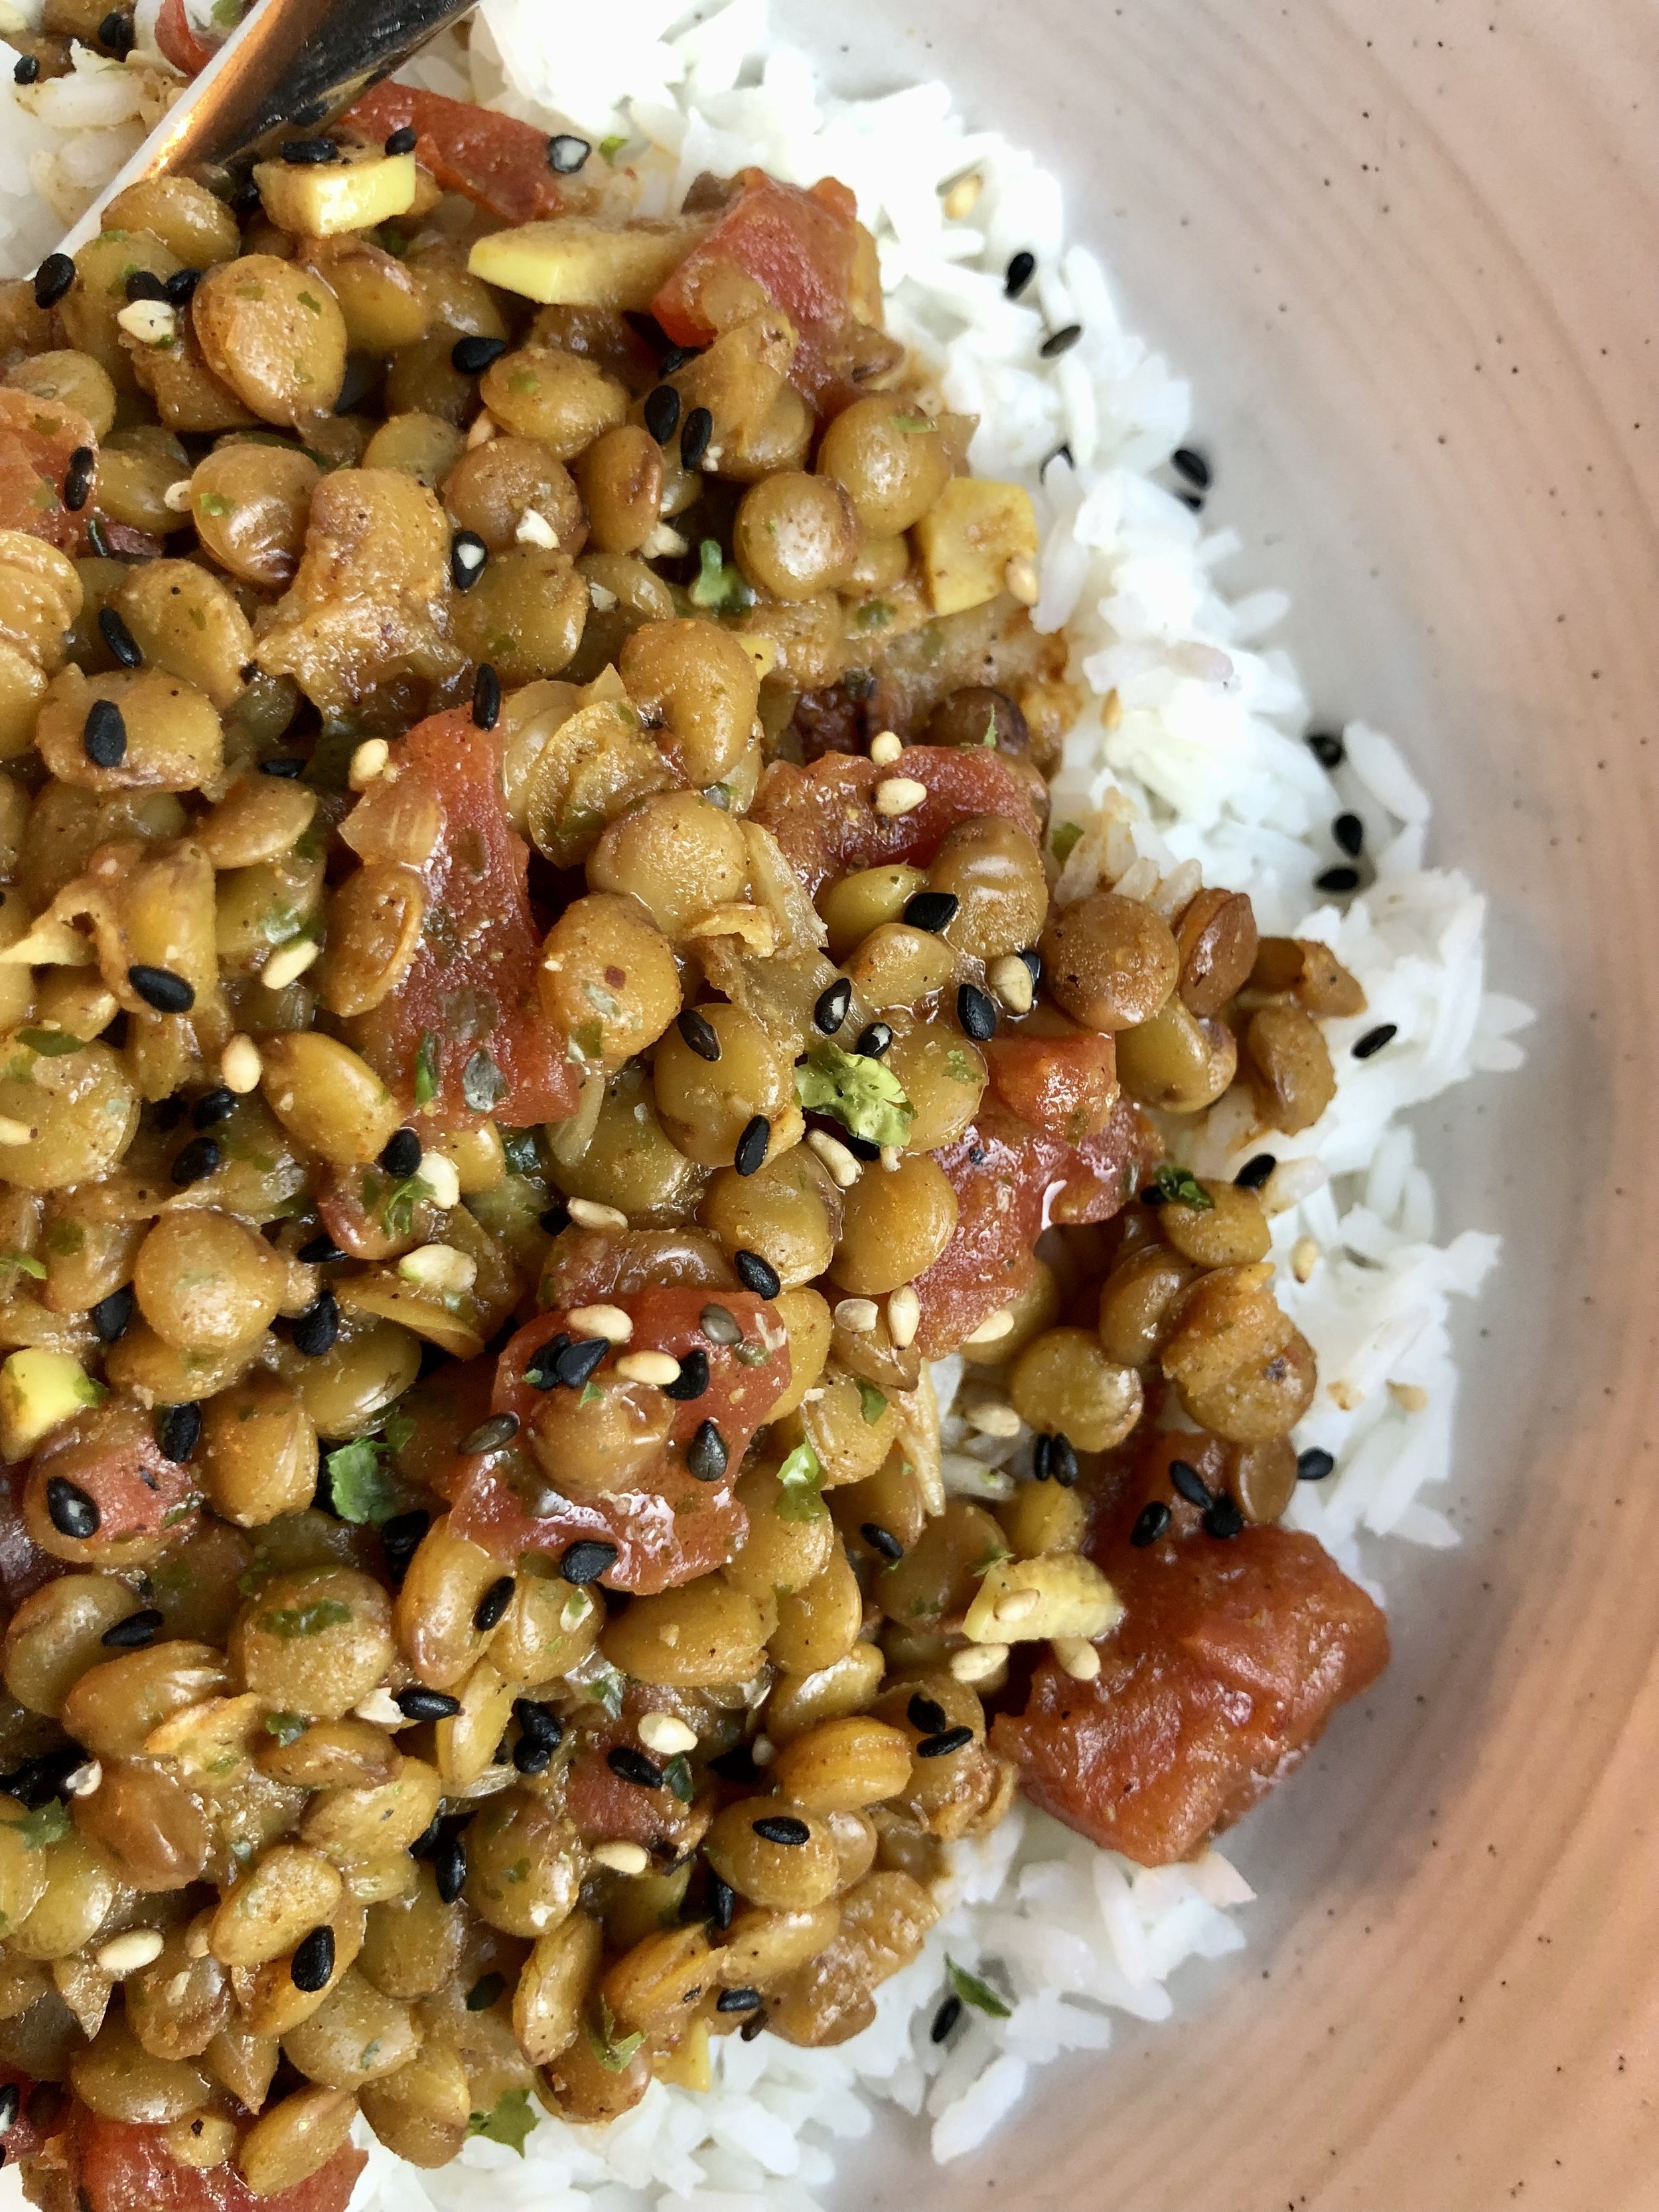
Cozy Lentil Curry

Cozy lentils cooked to perfection with flavors of ginger, garlic, and curry, served over rice. Easy, nutritious, and filling for when you want a comforting meal.

Something about August sits different. It’s still summer, yet somehow, inexplicably, you can feel that maybe before you’re ready, fall will be here. School starting, shorter evenings, cooler weather. Curries are one of my favorite cozy weather dishes. They’re easy to make and there are so many! While I love summer and all the summer no-cook or grilled dishes that go along with the season, I do start to miss cooking and hearty dishes. Those hot days where it’s too hot to turn on the oven are hard on me! Michigan summers are mild compared to Florentine summers, but I was still excited that this week held some cooler days that felt perfect for this lentil curry with rice.

I first started making this curry in Florence, I think it was during 2020 and have been making it regularly ever since. I love to add spinach to get in some vegetables, and I would often make it in a crockpot while also adding rice and more water straight to the crockpot; curried lentils and rice all cooked up together!

A note about ground coriander

While most of the ingredients in this recipe would be considered pantry staples, the biggest exception for me would be ground coriander. (Coconut milk might not be a staple for everyone, but if you make Asian dishes frequently it is!!) Now, a little pet peeve of mine is recipes that sound wonderful but call for one or more obscure ingredients that are “essential”, but also ones you’ll never use again. You know what I’m talking about, right? Well, normally I would be tempted to skip or find a substitute for ground coriander since that has never been a spice I’ve really used. The first time I made this recipe I somehow had coriander seeds in a spice grinder. It was a labor of love to hand grind 1 1/2 tsps, but I was surprised at how good it was! It’s not that you can taste the coriander itself, but the one time I didn’t have enough I could actually tell and missed the depth of flavor it lended. Bottom line, you can make this curry without it, but if you plan on making this again I would get yourself a bottle of ground coriander!

This post may contain affiliate links. If you make a purchase using these links, Jennyblogs may receive a small commission, at no extra cost to you. This helps to support Jennyblogs. Where possible, links are prioritized to small businesses and ethically and responsibly made items. For further information see the privacy policy. Grazie!

Recipe adapted from Janet’s Munch Meals


Cozy Lentil Curry

Serves 4-6

Ingredients:

  • 1 Tbsp oil

  • 1 onion or shallot, diced small

  • 4 garlic cloves, minced

  • 1 Tbsp grated fresh ginger

  • 1 Tbsp curry powder

  • 1 Tbsp cumin

  • 2 tsp chili powder or paprika

  • 1 1/2 tsp ground coriander

  • 1 cup / 210g dry lentils

  • 1 (15 oz) can diced or crushed tomatoes

  • 1 (14 oz) can coconut milk

  • 2 cups / 474g vegetable broth or water

  • salt and pepper to taste

  • Several handfuls of spinach, 100-200g spinach, finely chopped, optional

  • Rice, cilantro, red pepper flakes, sesame seeds, for serving, optional

Directions:

  1. Heat oil in a large pot over medium heat. Add onion and cook for several minutes, until translucent.

  2. Add garlic, ginger, curry, cumin, chili powder, and coriander and cook for about 3 minutes, until toasted and fragrant.

  3. Add lentils, tomatoes, coconut milk, broth, salt and pepper, and bring to a boil.

  4. Lower heat, cover, and allow to simmer for 25-30 minutes or until lentils are tender, stirring occasionally. Add more liquid at any point, if necessary.

  5. Stir in spinach and cook for another minute or two.

  6. Serve over rice with cilantro and red pepper flakes, as desired.

Jenny’s Notes:

  • This lentil curry can also be made in a crockpot: Place all ingredients in crockpot and stir. Cook on high for 4 hours or low for 8 hours, or until lentils are tender, stirring occasionally and adding any extra liquid as necessary.
Cozy Lentil Curry
Yield 4-6
Author
Prep time
5 Min
Cook time
45 Min
Total time
50 Min

Cozy Lentil Curry

Cozy lentils cooked to perfection with flavors of curry, ginger, and garlic, served over rice for a meal that is quick, nutritious, filling, and easy on the budget!
Cook modePrevent screen from turning off

Ingredients

Instructions

  1. Heat oil in a large pot over medium heat. Add onion and cook for several minutes, until translucent.
  2. Add garlic, ginger, curry, cumin, chili powder, and coriander and cook for about 3 minutes, until toasted and fragrant.
  3. Add lentils, tomatoes, coconut milk, broth, salt and pepper, and bring to a boil.
  4. Lower heat, cover, and allow to simmer for 25-30 minutes or until lentils are tender, stirring occasionally. Add more liquid at any point, if necessary.
  5. Stir in spinach and cook for another minute or two.
  6. Serve over rice with cilantro and red pepper flakes, as desired.

Notes

  • This lentil curry can also be made in a crockpot: Place all ingredients in crockpot and stir. Cook on high for 4 hours or low for 8 hours, or until lentils are tender, stirring occasionally and adding any extra liquid as necessary.

Nutrition Facts

Calories

497.79

Fat

29.02 g

Sat. Fat

21.57 g

Carbs

48.62 g

Fiber

20.69 g

Net carbs

27.95 g

Sugar

10.59 g

Protein

17.68 g

Sodium

705.08 mg

Cholesterol

0 mg

Nutritional information is approximate. Based on 4 servings, not including rice.

curried lentils, vegetarian, vegan, cheap meals, budget meals, curry
dinner
Asian
Did you make this recipe?
Tag @jennyblogsandbakes on instagram and hashtag it #jennyblogs

Healthier Chocolate Peanut Butter Bars

Last updated July 19, 2024

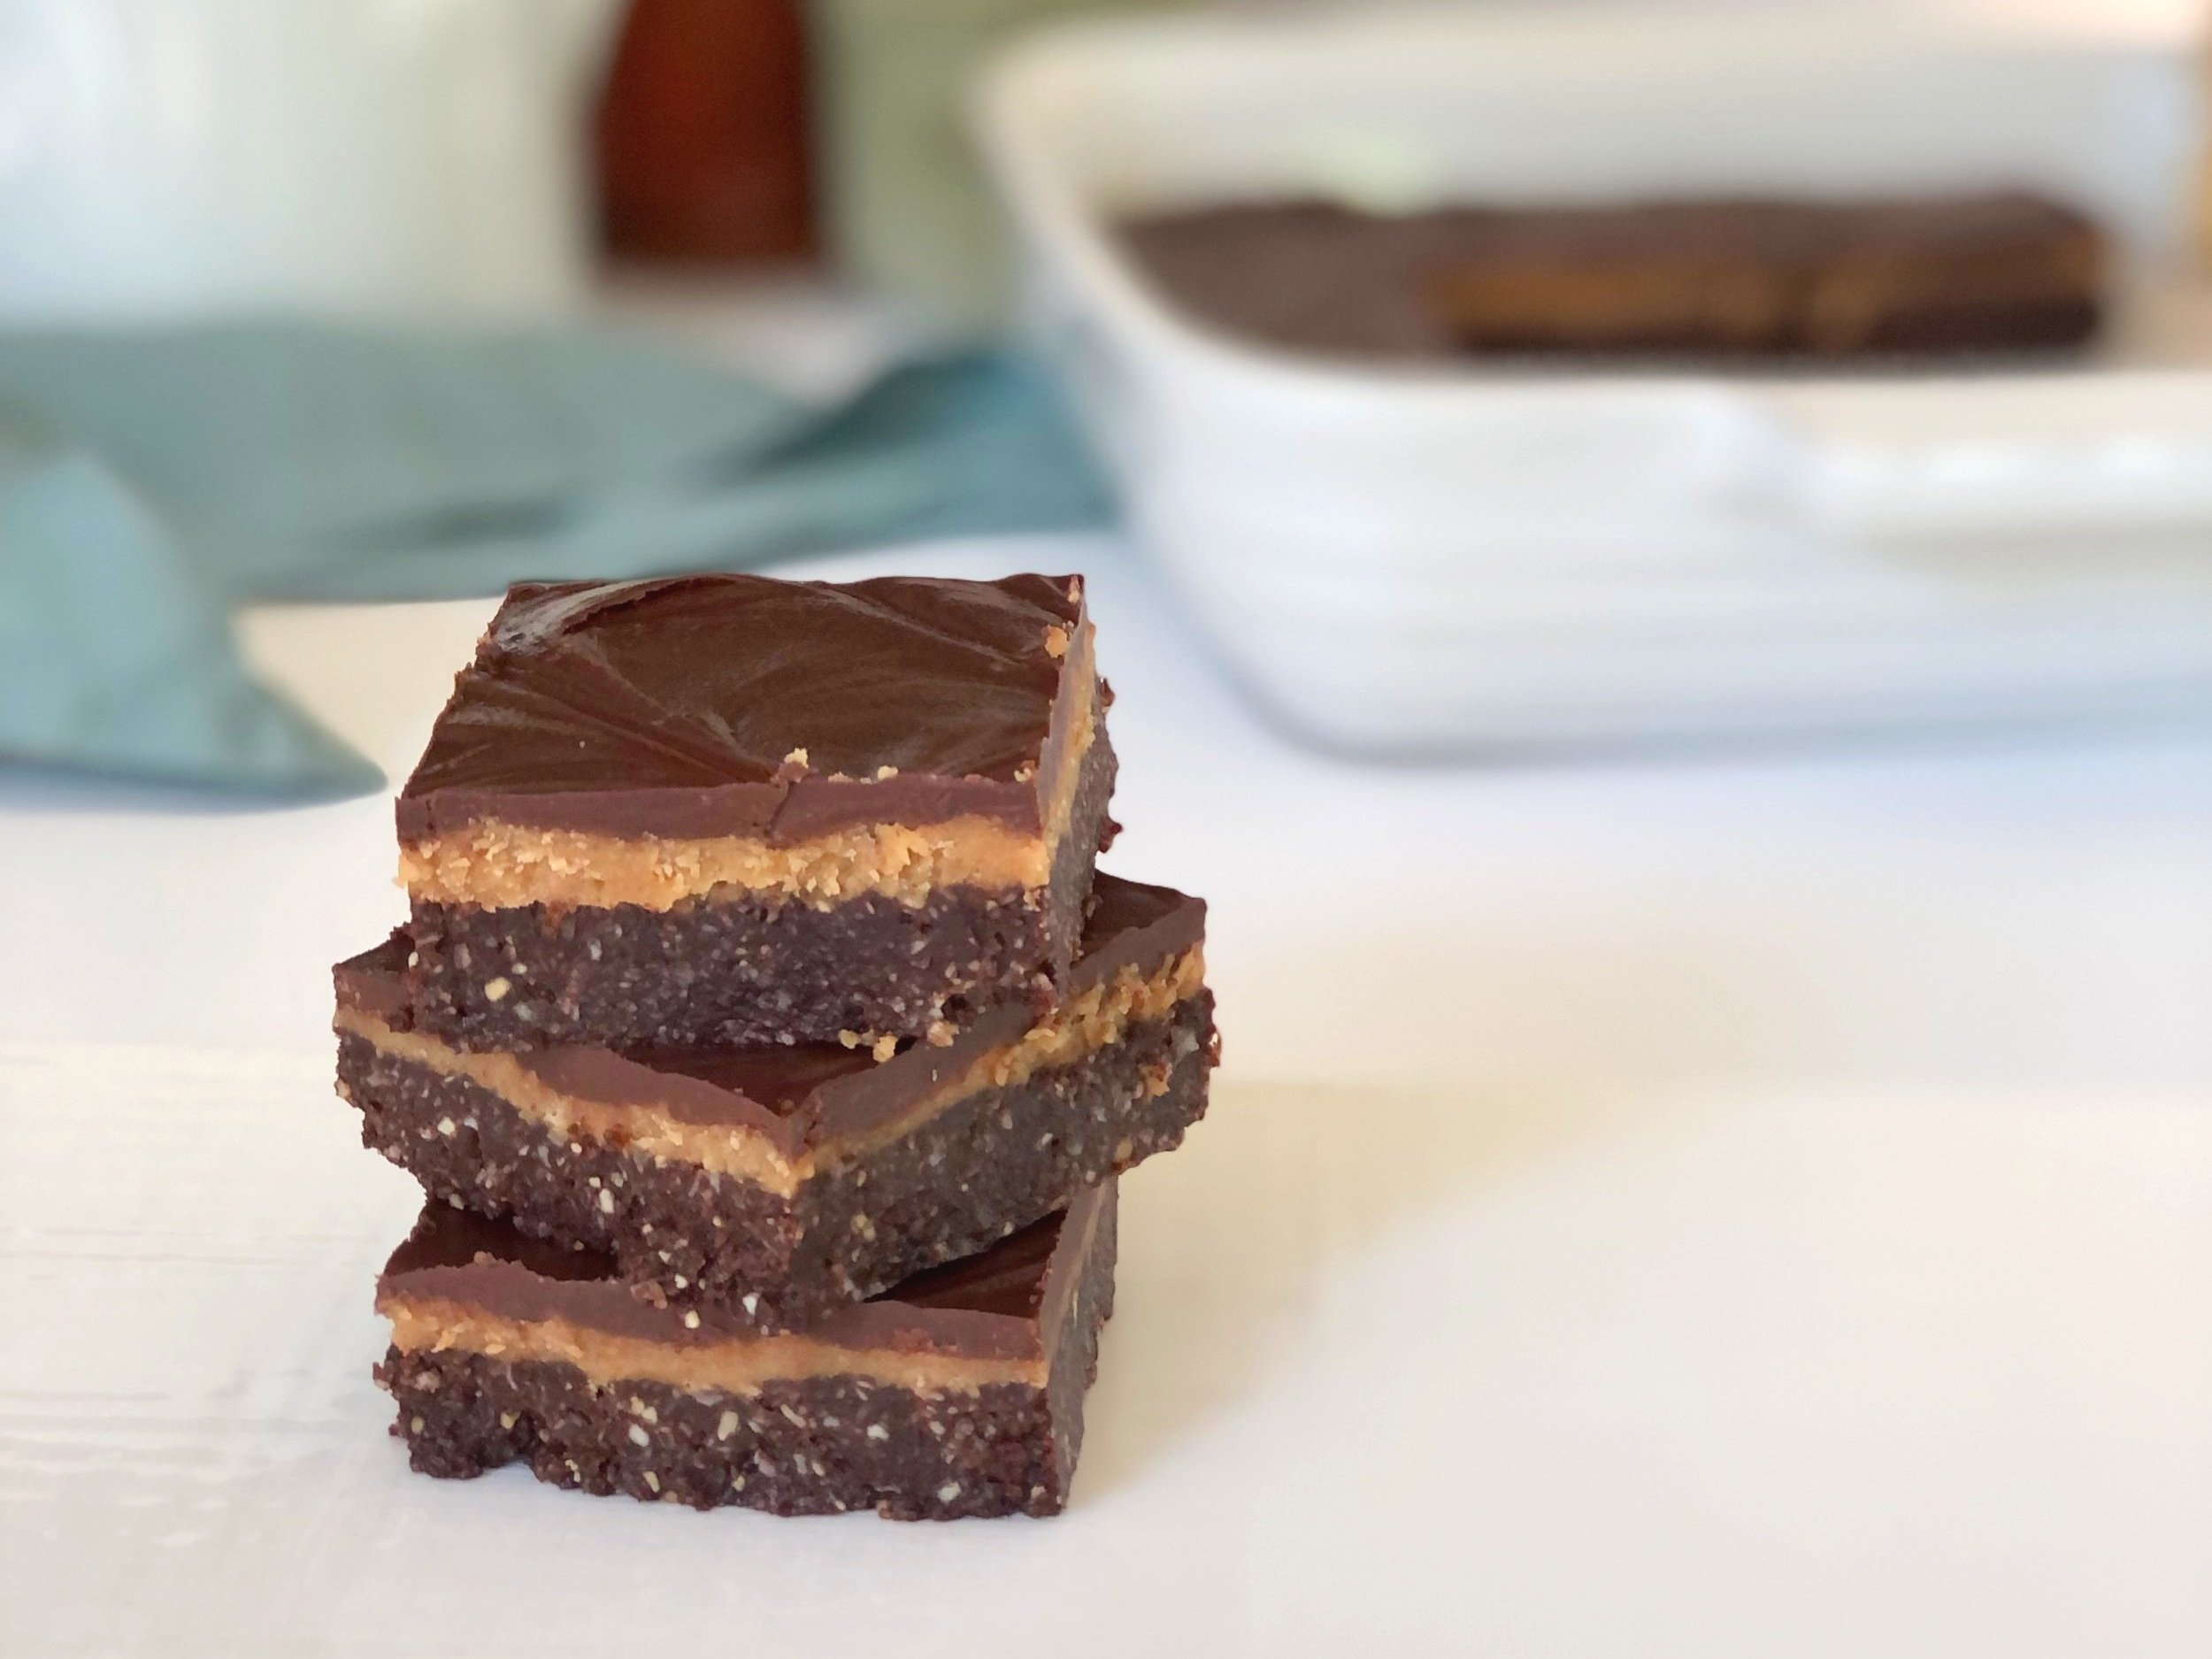
These Chocolate Peanut Butter Bars check a lot of boxes.

  • Delicious. These bars somehow bridge the gap between “coconut lovers” and “chocolate peanut butter lovers”, even for those who don’t normally love coconut, and those who don’t normally love peanut butter and chocolate together. I know, weird, but those people do exist and they’re some of my taste testers.

  • Healthier than most desserts. I would (and did) unabashedly eat these for breakfast. They’re full of nuts and coconut, and only use coconut oil, depending on which camp you fall in as far as viewing coconut oil as a good medium-chain fatty acid or simply another saturated fat.

  • No bake. Great for summer, if you don’t have an oven available to you, or simply don’t want to turn it on.

  • Easy. These can be ready in less than 30 minutes, quick and satisfying to whip up, with most of the work done in a food processor.

  • Satisfying. With the protein and fat content, these will keep you satisfied for longer. When you’re satisfied, you’re less likely to keep reaching for other unhealthy foods or overeating.

  • Gluten-free, vegan, dairy-free, egg-free, and almost refined sugar-free (there’s sugar in chocolate chips, which are in the chocolate topping.)

If those aren’t enough reasons to love these bars, I have one more. You don’t have to grease your baking dish! I know, that’s a little thing, but it’s a small kitchen task I don’t overly enjoy, and the fact that these bars slide ride out of an ungreased pan is a small yippee from me!

Another reason I like these, is because they don’t call for dates. Don’t get me wrong, I love dates, but it’s nice to have a healthy dessert recipe that doesn’t call for dates since so many do. I don’t always have dates on hand, and this way I can still whip up a healthier dessert/snack without waiting for my next grocery run. That makes this recipe’s ingredient list pretty close to being all pantry staples.

This post may contain affiliate links. If you make a purchase using these links, Jennyblogs may receive a small commission, at no extra cost to you. This helps to support Jennyblogs. Where possible, links are prioritized to small businesses, and American companies and products made in the USA for American readers. For further information see the privacy policy. Grazie!

Recipe inspired by Dani’s Healthy Eats


Healthier Chocolate Peanut Butter Bars

Serves about 16

Ingredients:

For the Chocolate Coconut Crust

  • 1 1/2 cups / 120g shredded unsweetened coconut

  • 6 Tbsp / 120g maple syrup

  • 6 Tbsp / 97g peanut butter

  • 6 Tbsp / 59g peanuts

  • 6 Tbsp / 38g cocoa powder

  • 5 Tbsp / 70g coconut oil

For the Peanut Butter Filling

  • 1/2 cup / 130g peanut butter

  • 1/4 cup / 81g maple syrup

  • 1/4 cup / 56g coconut oil

For the Chocolate Topping

  • 1 cup / 175g semi sweet or dark chocolate chips

  • 1 Tbsp / 14g coconut oil

Directions:

Ungreased 8x8 inch / 20x20 centimeter square baking dish

Make the Chocolate Coconut Crust

  1. Add all ingredients to a food processor; blend until smooth and mixture comes together in a soft dough-like ball.

  2. Press into pan and freeze while preparing filling.

Make the Peanut Butter Filling

  1. Add all filling ingredients to a medium bowl or food processor and mix until smooth. (It’s not necessary to clean food processor between mixing the crust and filling.)

  2. Remove crust from freezer and evenly spread filling over crust. Place back in freezer while preparing topping.

Make the Chocolate Topping

  1. In a small saucepan, combine chocolate and coconut oil. Melt over low heat, stirring frequently. Remove from heat when there are still a few tiny bits of chocolate; continue stirring until all is melted and smooth.

  2. Remove bars from freezer and spread topping evenly over filling. Cover and place in freezer or refrigerator to set, at least 30 minutes. Store covered in refrigerator.

Jenny’s Notes:

  • Different nut butters and nuts can be swapped out for the peanut butter and peanuts. Almond butter and almonds can be used, or cashews and cashew butter, or mix them up as you wish!

Healthier Chocolate Peanut Butter Bars
Yield 16
Author
Prep time
25 Min
Inactive time
30 Min
Total time
55 Min

Healthier Chocolate Peanut Butter Bars

Decadent, no-bake chocolate peanut butter bars with a chocolate coconut crust, peanut butter filling, and simple chocolate topping are deceivingly simple to make and satisfying to eat. Gluten-free, dairy-free, vegan, and almost refined sugar-free.
Cook modePrevent screen from turning off

Ingredients

For the Chocolate Coconut Crust
For the Peanut Butter Filling
For the Chocolate Topping

Instructions

Make the Chocolate Coconut Crust
  1. Ungreased 8x8 inch / 20x20 centimeter square baking dish
  2. Add all ingredients to a food processor; blend until smooth and mixture comes together in a soft dough-like ball.
  3. Press into pan and freeze while preparing filling.
Make the Peanut Butter Filling
  1. Add all filling ingredients to a medium bowl or food processor and mix until smooth. (It’s not necessary to clean food processor between mixing the crust and filling.)
  2. Remove crust from freezer and evenly spread filling over crust. Place back in freezer while preparing topping.
Make the Chocolate Topping
  1. In a small saucepan, combine chocolate and coconut oil. Melt over low heat, stirring frequently. Remove from heat when there are still a few tiny bits of chocolate; continue stirring until all is melted and smooth.
  2. Remove bars from freezer and spread topping evenly over filling. Cover and place in freezer or refrigerator to set, at least 30 minutes. Store covered in refrigerator.

Notes

  • Different nut butters and nuts can be swapped out for the peanut butter and peanuts. Almond butter and almonds can be used, or cashews and cashew butter, or mix them up as you wish!

Nutrition Facts

Calories

332.91

Fat

26.92 g

Sat. Fat

17.14 g

Carbs

21.81 g

Fiber

3.64 g

Net carbs

18.19 g

Sugar

13.5 g

Protein

6.06 g

Sodium

77.98 mg

Cholesterol

0.11 mg

Nutritional information is approximate. Based on 1 serving if cut into 16 pieces.

healthy coconut chocolate peanut butter bars, vegan, gluten free, dairy free, refined sugar free, no bake
dessert
American
Did you make this recipe?
Tag @jennyblogsandbakes on instagram and hashtag it #jennyblogs

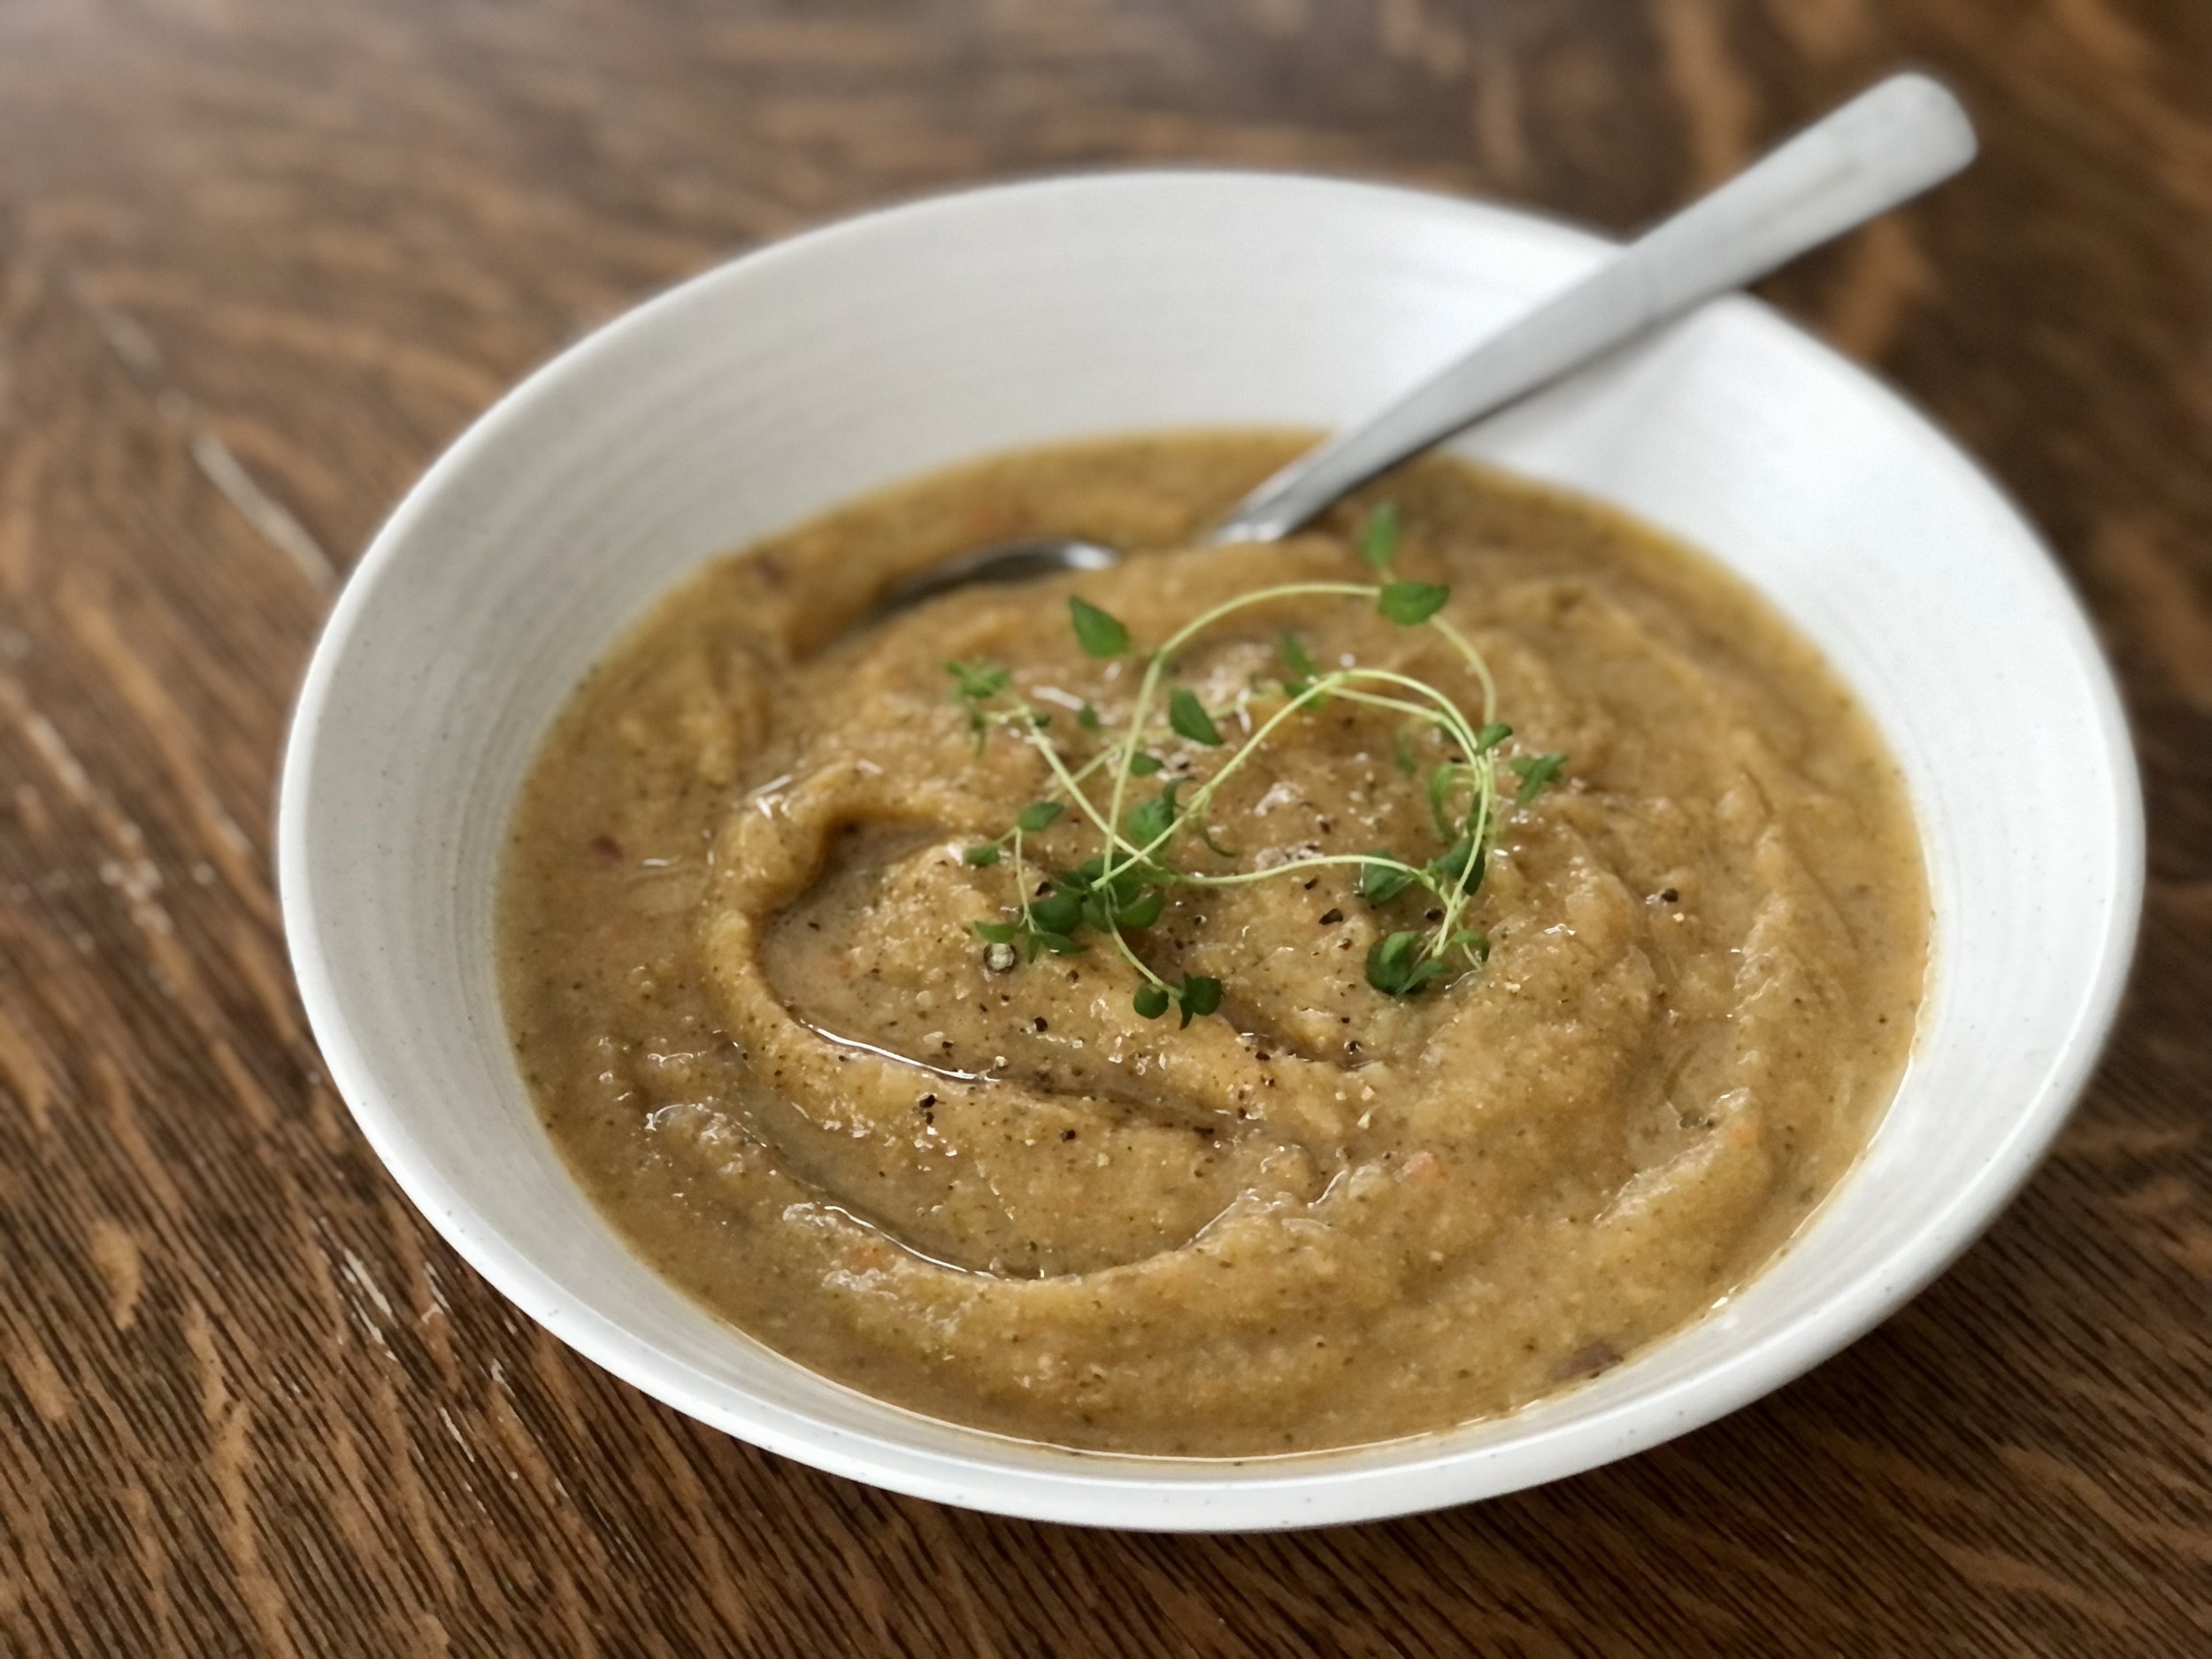
Smooth Potato and Vegetable Soup

This soup couldn’t be simpler to make, simply chop up vegetables, boil them, and purée them. Tada! Dinner. It’s high on my list for easy meals that require little hands on prep, think 10 minutes or less. Feasible even with a newborn and other little kids demanding all your time!

It’s all vegetables, which makes it hearty and very nutritious. Once it’s puréed you can’t tell what’s in it which makes it easy to sneak in maybe some of those vegetables that your family isn’t so fond of. If I’m going to be really honest, veggie soups aren’t overly exciting, but I really enjoy this one. It’s difficult to ruin, even if you swap out different kinds of veggies. Make as written at first if you feel more comfortable, rather than branching out on your own right away. After the first time or two making this, you’ll quickly learn what you want more of or less of in the veggie department to suit you and your family’s tastes.

And, being all vegetables, this soup is vegetarian and vegan, gluten and dairy free. Friendly for many diets and dietary needs!

This post may contain affiliate links. If you make a purchase using these links, Jennyblogs may receive a small commission, at no extra cost to you. This helps to support Jennyblogs. For further information see the privacy policy. Grazie!


Smooth Potato and Vegetable Soup

Serves about 4-6

Ingredients:

  • 1 quart / 1 liter chicken or vegetable broth

  • 2 cloves of garlic, peeled

  • 3 medium potatoes

  • 2 medium carrots

  • 2 stalks of celery

  • 1 small-medium broccoli crown

  • 1/2 medium onion

  • 2 fresh artichoke hearts, or 1 14 oz can, drained

  • salt and pepper, to taste

  • extra virgin olive oil, for drizzling, and crusty bread, optional

Directions:

  1. Rinse vegetables and chop all into chunks.

  2. Add all ingredients to a large pot over medium-high heat and brig to a boil.

  3. Allow to simmer for 30-45 minutes, or until all vegetables are tender when checked with a sharp knife. Check periodically to ensure it doesn’t boil dry, adding more water if necessary. Total time will depend on how large or small your vegetable chunks are.

  4. Once the vegetables are tender, transfer to a blender with enough broth to cover or almost cover them in the blender, or use an immersion blender to blend until smooth. If you desire a thinner soup, add more broth or water.

  5. Serve immediately with bread and a drizzle of olive oil, if desired. Store in the refrigerator or freeze.

Jenny’s Notes:

  1. You’ll notice the recipe is a bit vague, and I did that on purpose. If I wrote all the options or different ways I’ve made this soup, it would be quite confusing to read. So, you can find some variations down here.

  2. What kind of broth? Completely up to you. I prefer vegetable as this is a vegetable soup, but you could just as easily use chicken, beef, a combo, or your own homemade broth.

  3. Try using sweet potatoes for part or all of the potatoes.

  4. I don’t even bother to remove the skin from any of the potatoes or carrots. It all gets blended anyway, and it saves a lot of time while adding nutrition!

  5. The first time I made this with artichokes I hadn’t ever worked with a fresh artichoke before. I thought the center was bigger than it was, and thus ended up with some strands of fiber throughout the soup from the leaves. Not a deal breaker, but beware of those fibrous artichoke outer leaves. If you aren’t sure what exactly is the “center”, simply try biting the leaves. If it’s too fibrous and hard to chew, don’t blend it. The center will be small, as in, I-bought-that-whole-artichoke-just-for-that-tiny-thing? and yellow and almost melt in your mouth tender.

  6. Feel free to play with some spices to change things up! I like to add a Tbsp of turmeric, and sometimes some thyme or sage.

  7. Finally, add or subtract any vegetables you want! Basically as long as you have the same volume of vegetables to liquid, ish, you’ll end up with a vegetable soup. Ha. I love how simple it is. It’s just playing with flavors and textures!

Smooth Potato and Veggie Soup
Yield 4-6
Author
Prep time
15 Min
Cook time
30 Min
Total time
45 Min

Smooth Potato and Veggie Soup

Simple and nutritious purèed potato and vegetable soup

Ingredients

Instructions

  1. Rinse vegetables and chop all into chunks.
  2. Add all ingredients to a large pot over medium-high heat and brig to a boil.
  3. Allow to simmer for 30-45 minutes, or until all vegetables are tender when checked with a sharp knife. Check periodically to ensure it doesn’t boil dry, adding more water if necessary. Total time will depend on how large or small your vegetable chunks are.
  4. Once the vegetables are tender, transfer to a blender with enough broth to cover or almost cover them in the blender, or use an immersion blender to blend until smooth. If you desire a thinner soup, add more broth or water.
  5. Serve immediately with bread and a drizzle of olive oil, if desired. Store in the refrigerator or freeze.

Notes

  1. You’ll notice the recipe is a bit vague, and I did that on purpose. If I wrote all the options or different ways I’ve made this soup, it would be quite confusing to read. So, you can find some variations down here.
  2. What kind of broth? Completely up to you. I prefer vegetable as this is a vegetable soup, but you could just as easily use chicken, beef, a combo, or your own homemade broth.
  3. Try using sweet potatoes for part or all of the potatoes.
  4. I don’t even bother to remove the skin from any of the potatoes or carrots. It all gets blended anyway, and it saves a lot of time while adding nutrition!
  5. The first time I made this with artichokes I hadn’t ever worked with a fresh artichoke before. I thought the center was bigger than it was, and thus ended up with some strands of fiber throughout the soup from the leaves. Not a deal breaker, but beware of those fibrous artichoke outer leaves. If you aren’t sure what exactly is the “center”, simply try biting the leaves. If it’s too fibrous and hard to chew, don’t blend it. The center will be small, as in, I-bought-that-whole-artichoke-just-for-that-tiny-thing? and yellow and almost melt in your mouth tender.
  6. Feel free to play with some spices to change things up! I like to add a Tbsp of turmeric, and sometimes some thyme or sage.
  7. Finally, add or subtract any vegetables you want! Basically as long as you have the same volume of vegetables to liquid, ish, you’ll end up with a vegetable soup. Ha. I love how simple it is. It’s just playing with flavors and textures!


Nutrition Facts

Calories

240.61

Fat

4.33 g

Sat. Fat

0.72 g

Carbs

46.34 g

Fiber

8.9 g

Net carbs

37.42 g

Sugar

8.16 g

Protein

8.2 g

Sodium

1094.33 mg

Cholesterol

0 mg

Nutritional information is approximate, based on 1 serving if recipe serves 4, including olive oil drizzle.

potato soup, Armenian vegetable soup, vegan, vegetarian
dinner
American
Did you make this recipe?
Tag @jennyblogsandbakes on instagram and hashtag it #jennyblogs


Chocolate Sauce

Photo Public Domain https://creativecommons.org/licenses/by-sa/3.0/at/deed.en Permission: Sammlung J.P. Adlbrecht

Photo Public Domain https://creativecommons.org/licenses/by-sa/3.0/at/deed.en Permission: Sammlung J.P. Adlbrecht

Last Updated August 15, 2024

This post contains affiliate links. If you buy something using these links, Jennyblogs may receive a small commission, at no extra cost to you. This helps to support Jennyblogs. For further information see the privacy policy. Grazie!

Classic. Quintessential. Chocolatey. Good on everything, from your morning pancakes and coffee to ice cream and that cake you just made. Or ya know, by the spoonful. Just a spoonful of…I’ll let you sing the rest yourself. ;)

What is it? Chocolate Sauce! Or chocolate syrup, as you prefer. No more Hershey’s in a bottle, or going without if you live outside the USofA. It’s so easy you’ll wonder why you never made it before. No high fructose corn syrup involved!

Recipe from my Mama


Chocolate Sauce

Makes about 3/4 cup of sauce

Ingredients:

  • 3/4 cup / 150g sugar

  • 1/3 cup / 33g unsweetened cocoa powder

  • 1 Tbsp / 7.5g cornstarch

  • 1/2 cup / 118g water

  • 1 tsp vanilla

Directions:

  1. Combine sugar, cocoa, and cornstarch in a small saucepan.

  2. Add water and whisk until there are no cornstarch lumps.

  3. Cook over medium heat, stirring constantly, until mixture boils. Reduce heat to low and boil for 5 minutes, continuing to stir.

  4. Remove from heat and add vanilla. Cool.

  5. Store in an airtight container in the refrigerator.

Jenny’s Notes:

  • The better quality your cocoa powder the better your sauce will taste!

  • Keeps well in the fridge.

Chocolate Sauce
Yield 12
Author
Prep time
5 Min
Cook time
10 Min
Total time
15 Min

Chocolate Sauce

A basic chocolate sauce for ice cream topping, drizzling, mixing in coffee, and anything you need chocolate sauce for!
Cook modePrevent screen from turning off

Ingredients

Instructions

  1. Combine sugar, cocoa, and cornstarch in a small saucepan.
  2. Add water and whisk until there are no lumps.
  3. Cook over medium heat, stirring constantly, until mixture boils. Reduce heat to low and boil for 5 minutes, continuing to stir.
  4. Remove from heat and add vanilla. Cool.
  5. Store in an airtight container in the refrigerator.

Notes

The better quality your cocoa powder the better your sauce will taste! Keeps well in the fridge.

Nutrition Facts

Calories

63.04

Fat

0.27 g

Sat. Fat

0.00 g

Carbs

14.76 g

Fiber

0.56 g

Net carbs

14.21 g

Sugar

12.52 g

Protein

0.55 g

Sodium

0.61 mg

Cholesterol

0.00 mg

Nutritional information is approximate.

Hershey's chocolate sauce, ice cream topping, hot fudge sundae sauce, chocolate sauce
dessert, sauce, topping
American
Did you make this recipe?
Tag @jennyblogsandbakes on instagram and hashtag it #jennyblogs

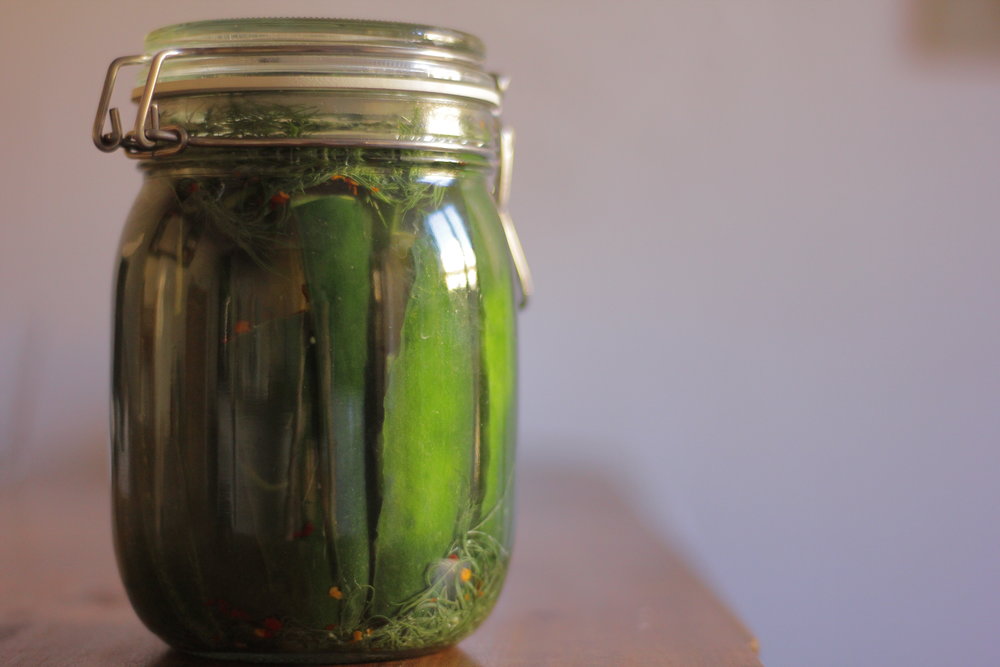
Refrigerator Dill Pickles

Last Updated August 11, 2024

Summertime calls for watermelon, lemonade, ice cream, swimming, and cook outs.  And every quintessential cookout will have something to cook outside, usually meat and vegetables in some form.  (I know we're all thinking hamburgers, bratwursts, and hotdogs, but hey, there are some other weird traditions out there, too.)  And if you're cooking out, you're going to need buns and condiments.  And the best condiment award goes to....pickles!!

Not only does it have the best taste (opinion), but it stands alone.  As in, if you eat a pickle, no one will think twice.  But if we see you munching on a romaine lettuce leaf or slurping on a spoonful of ketchup, well, you might get some stares.  Of course, this is coming from someone who doesn't like hamburgers and once ate a romaine sandwich.  As in, onion, ketchup, mustard, and pickles sandwiched between to Romaine lettuce leaves.  Mmmmm.  Yeah, it was weird.  But I was so hungry, and hamburgers were the only option, I rather enjoyed it.  That's now on the worldwide webs.  Maybe I should change my heading to be: "Jenny, the girl who eats condiments like a main dish." Don't worry I won't, only you, my seven followers, are now privy to this information.  Haha.  
Back to pickles.  Now that we have remembered how great pickles are, did you know they are super easy to make at home?  Yes they are, and now you know that too.  Boil some water, throw some ingredients in a jar, chop up some cucumbers, stick them in the fridge, and voila!  Pickles.  

This post may contain affiliate links. If you buy something using these links, Jennyblogs may receive a small commission, at no extra cost to you. This helps to support Jennyblogs. For further information see the privacy policy. Grazie!

Recipe adapted from my mama


Refrigerator Dill Pickles

Makes about 24 spears/servings

Ingredients:

  • 3 1/2 cups / 830g water

  • 1 1/4 cups / 296g white vinegar

  • 1 Tbsp / 12g sugar

  • 1 Tbsp / 17g salt

  • 1 tsp / 2g turmeric, optional

  • 4 cups or about 2-3 large cucumbers, cut into slices, spears, or shape of choice

  • 2 cloves garlic

  • 2 heads fresh dill

  • 1 tsp red chili flakes, mustard seeds, or celery seeds, optional

Directions:

  1. Stir together water, vinegar, sugar, and salt in a large saucepan.  Place over medium-high heat and bring to a boil.  Remove from heat and allow to cool completely. 

  2. In a large glass jar or container, 4-quart or larger, arrange garlic, dill, cucumbers, and any spices you choose to use.  Pour the cooled liquid over the cucumbers, discarding or saving any leftover for another use.  Top with lid, sealing well, and refrigerate.  

  3. They will start to taste pickle-y the next day, but for optimum flavor refrigerate at least 3 days before consuming.  

Jenny's Notes:

  • I recommend making this recipe once as is to get an idea of the flavor profile, then play around to make it your own!

    1) If you like more bread & butter or sweet style pickles, up the sugar

    2) If you love dill, use more dill

    3) Add sliced onions or bell peppers

    4) Add more red pepper flakes or other hot pepper for more spice

    5) Really, add whatever suits your fancy. The garden is your playground.

  • The turmeric is for color, not so much flavor, to get that idyllic yellow pickle.  However, if you could care less about having a yellow pickle or don’t enjoy turmeric, leave it out!  I for one don't think the turmeric is very obvious in this recipe, but it's detectable if you really think about it.  

Refrigerator Dill Pickles
Yield 24
Author
Prep time
15 Min
Cook time
10 Min
Inactive time
72 Hour
Total time
72 H & 25 M

Refrigerator Dill Pickles

Classic dill pickles made in your refrigerator in just 3 days.
Cook modePrevent screen from turning off

Ingredients

Instructions

  1. Stir together water, vinegar, sugar, and salt in a large saucepan. Place over medium-high heat and bring to a boil. Remove from heat and allow to cool completely.
  2. In a large glass jar or container, 4-quart or larger, arrange garlic, dill, cucumbers, and any spices you choose to use. Pour the cooled liquid over the cucumbers, discarding or saving any leftover for another use. Top with lid, sealing well, and refrigerate.
  3. They will start to taste pickley the next day, but for optimum flavor refrigerate at least 3 days before consuming.

Notes

I recommend making this recipe once as is to get an idea of the flavor profile, then play around to make it your own! 1) If you like more bread & butter or sweet style pickles, up the sugar2) If you love dill, use more dill3) Add sliced onions or bell peppers4) Add more red pepper flakes or other hot pepper for more spice5) Really, add whatever suits your fancy. The garden is your playground.The turmeric is for color, not so much flavor, to get that idyllic yellow pickle. However, if you could care less about having a yellow pickle or don’t enjoy turmeric, leave it out! I for one don't think the turmeric is very obvious in this recipe, but it's detectable if you really think about it.

Nutrition Facts

Calories

10.04

Fat

0.04 g

Sat. Fat

0.01 g

Carbs

1.91 g

Fiber

0.20 g

Net carbs

1.72 g

Sugar

1.09 g

Protein

0.25 g

Sodium

276.95 mg

Cholesterol

0.00 mg

Nutritional information is approximate. Based on one pickle spear.

dill pickles, refrigerator pickles, homemade pickles
condiment, snack
American
Did you make this recipe?
Tag @jennyblogsandbakes on instagram and hashtag it #jennyblogs