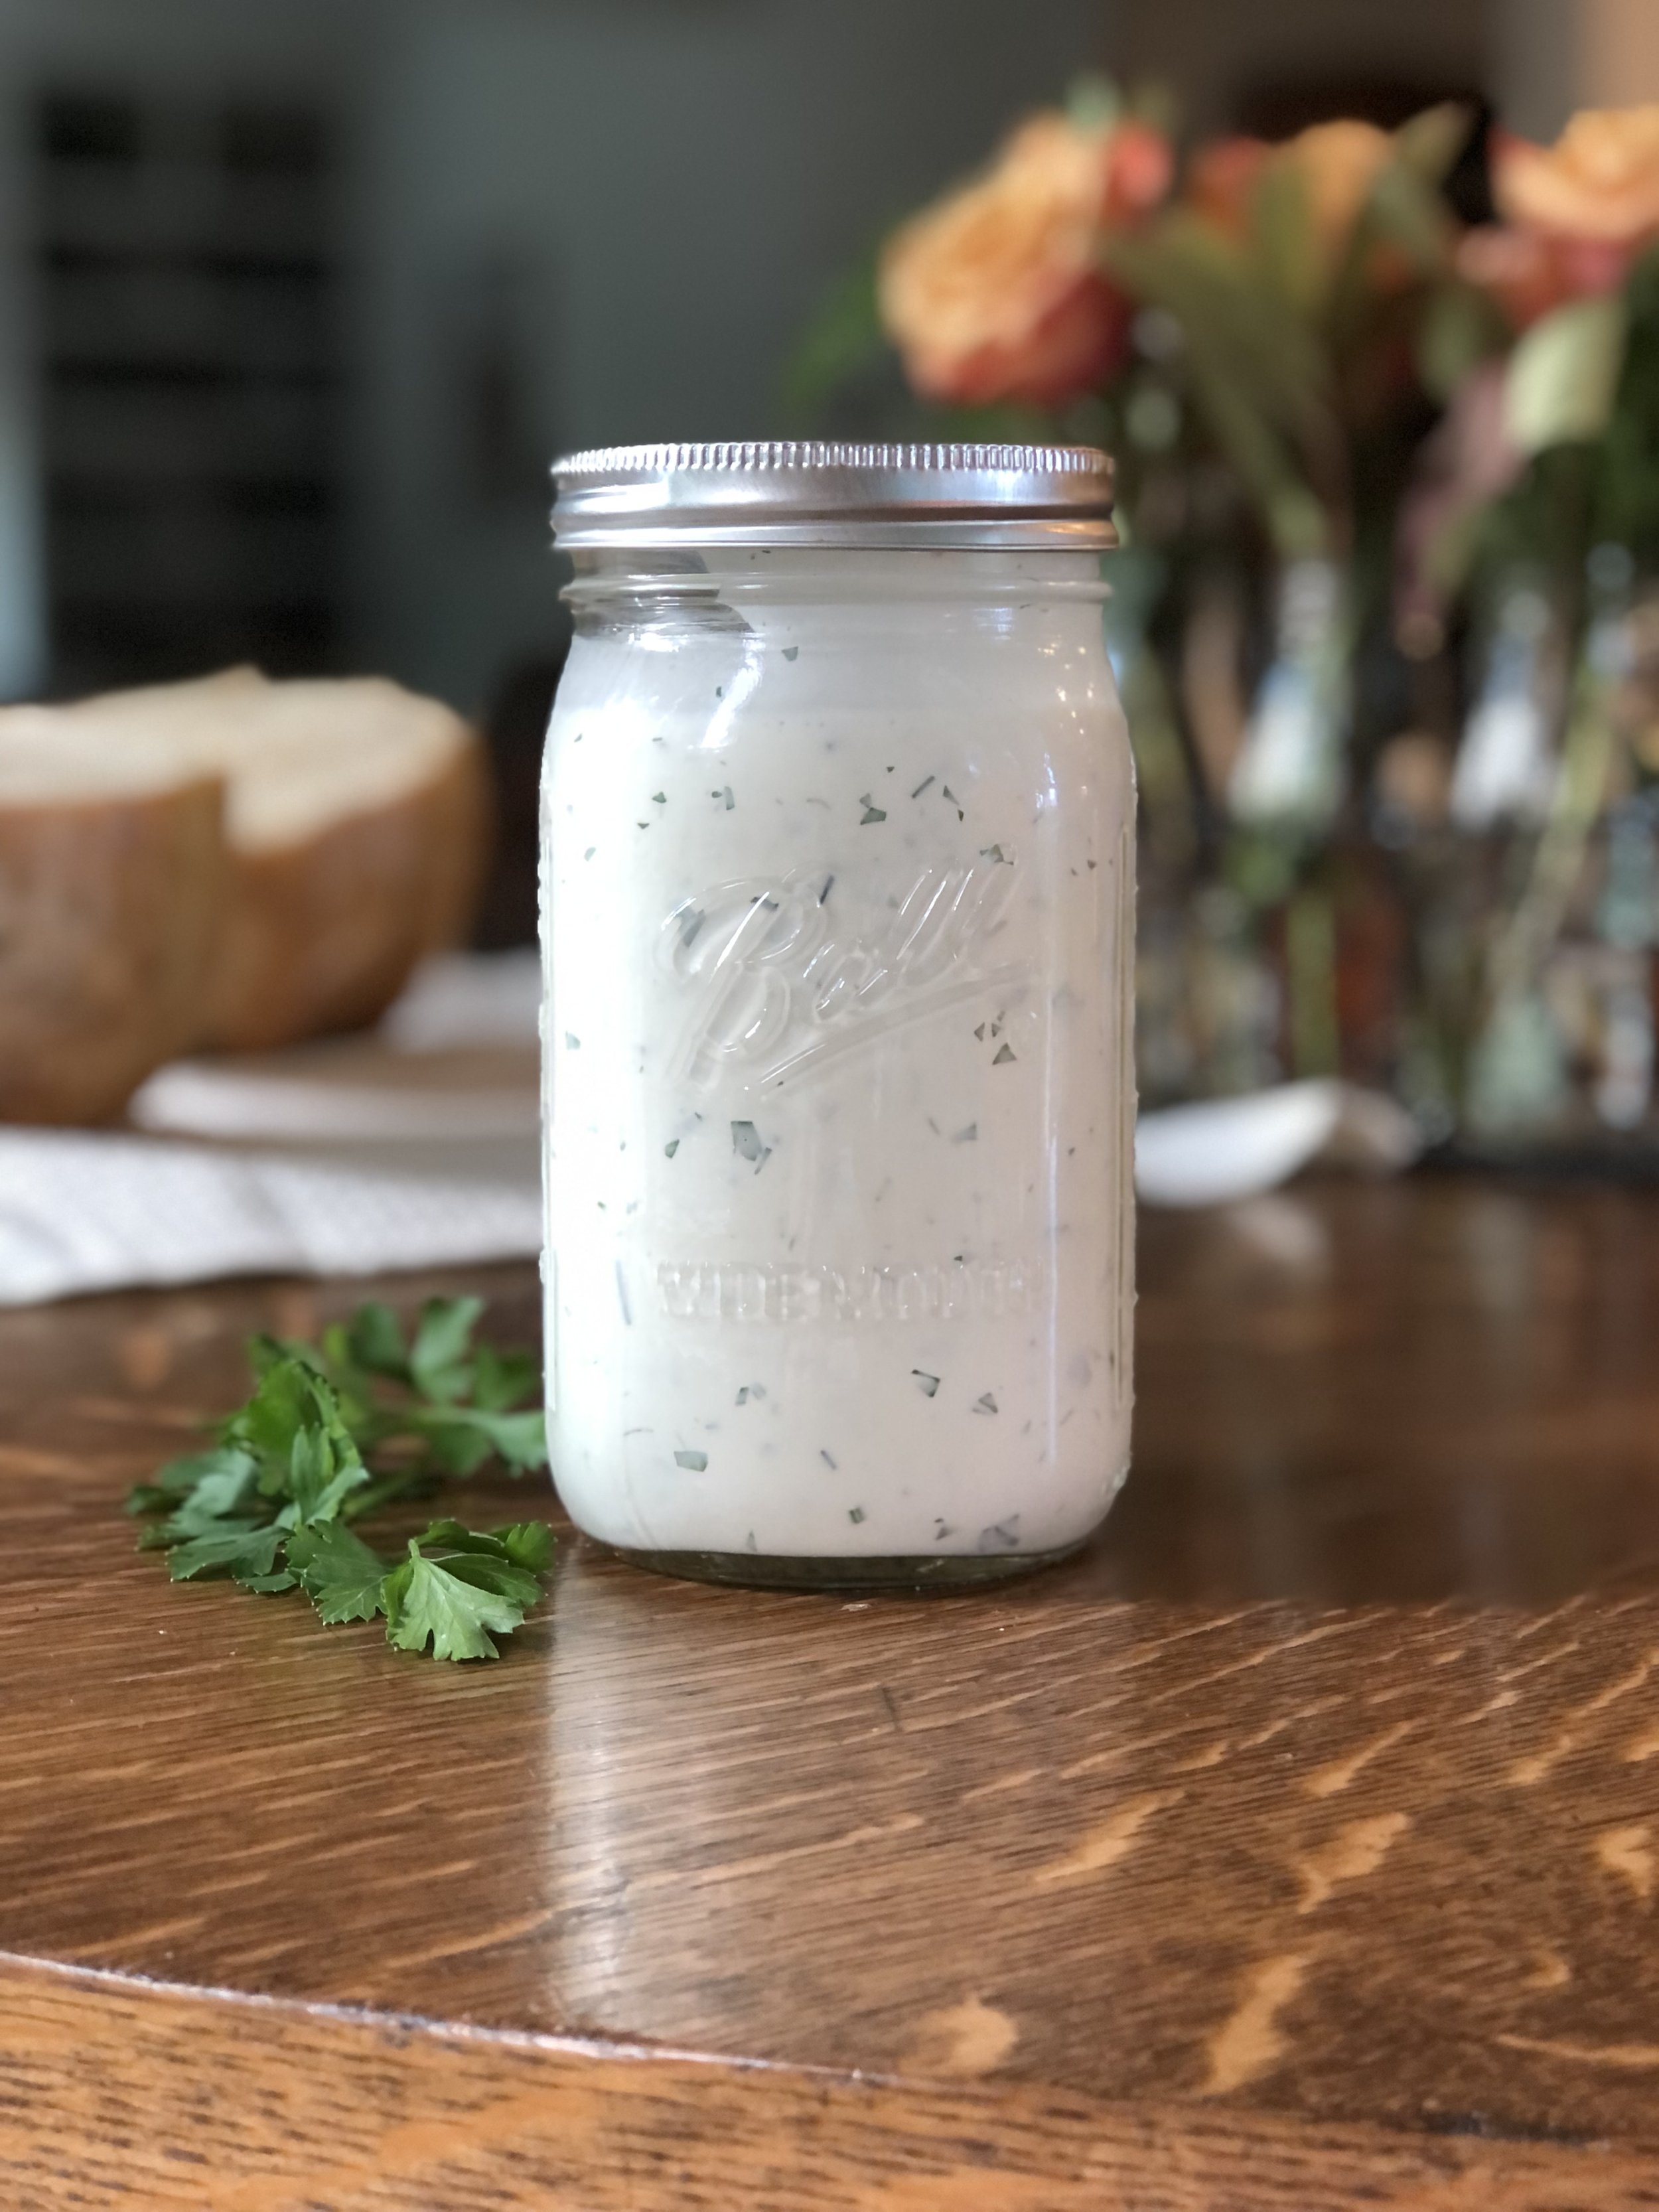
Homemade Buttermilk Ranch Dressing

Last Updated September 28, 2024

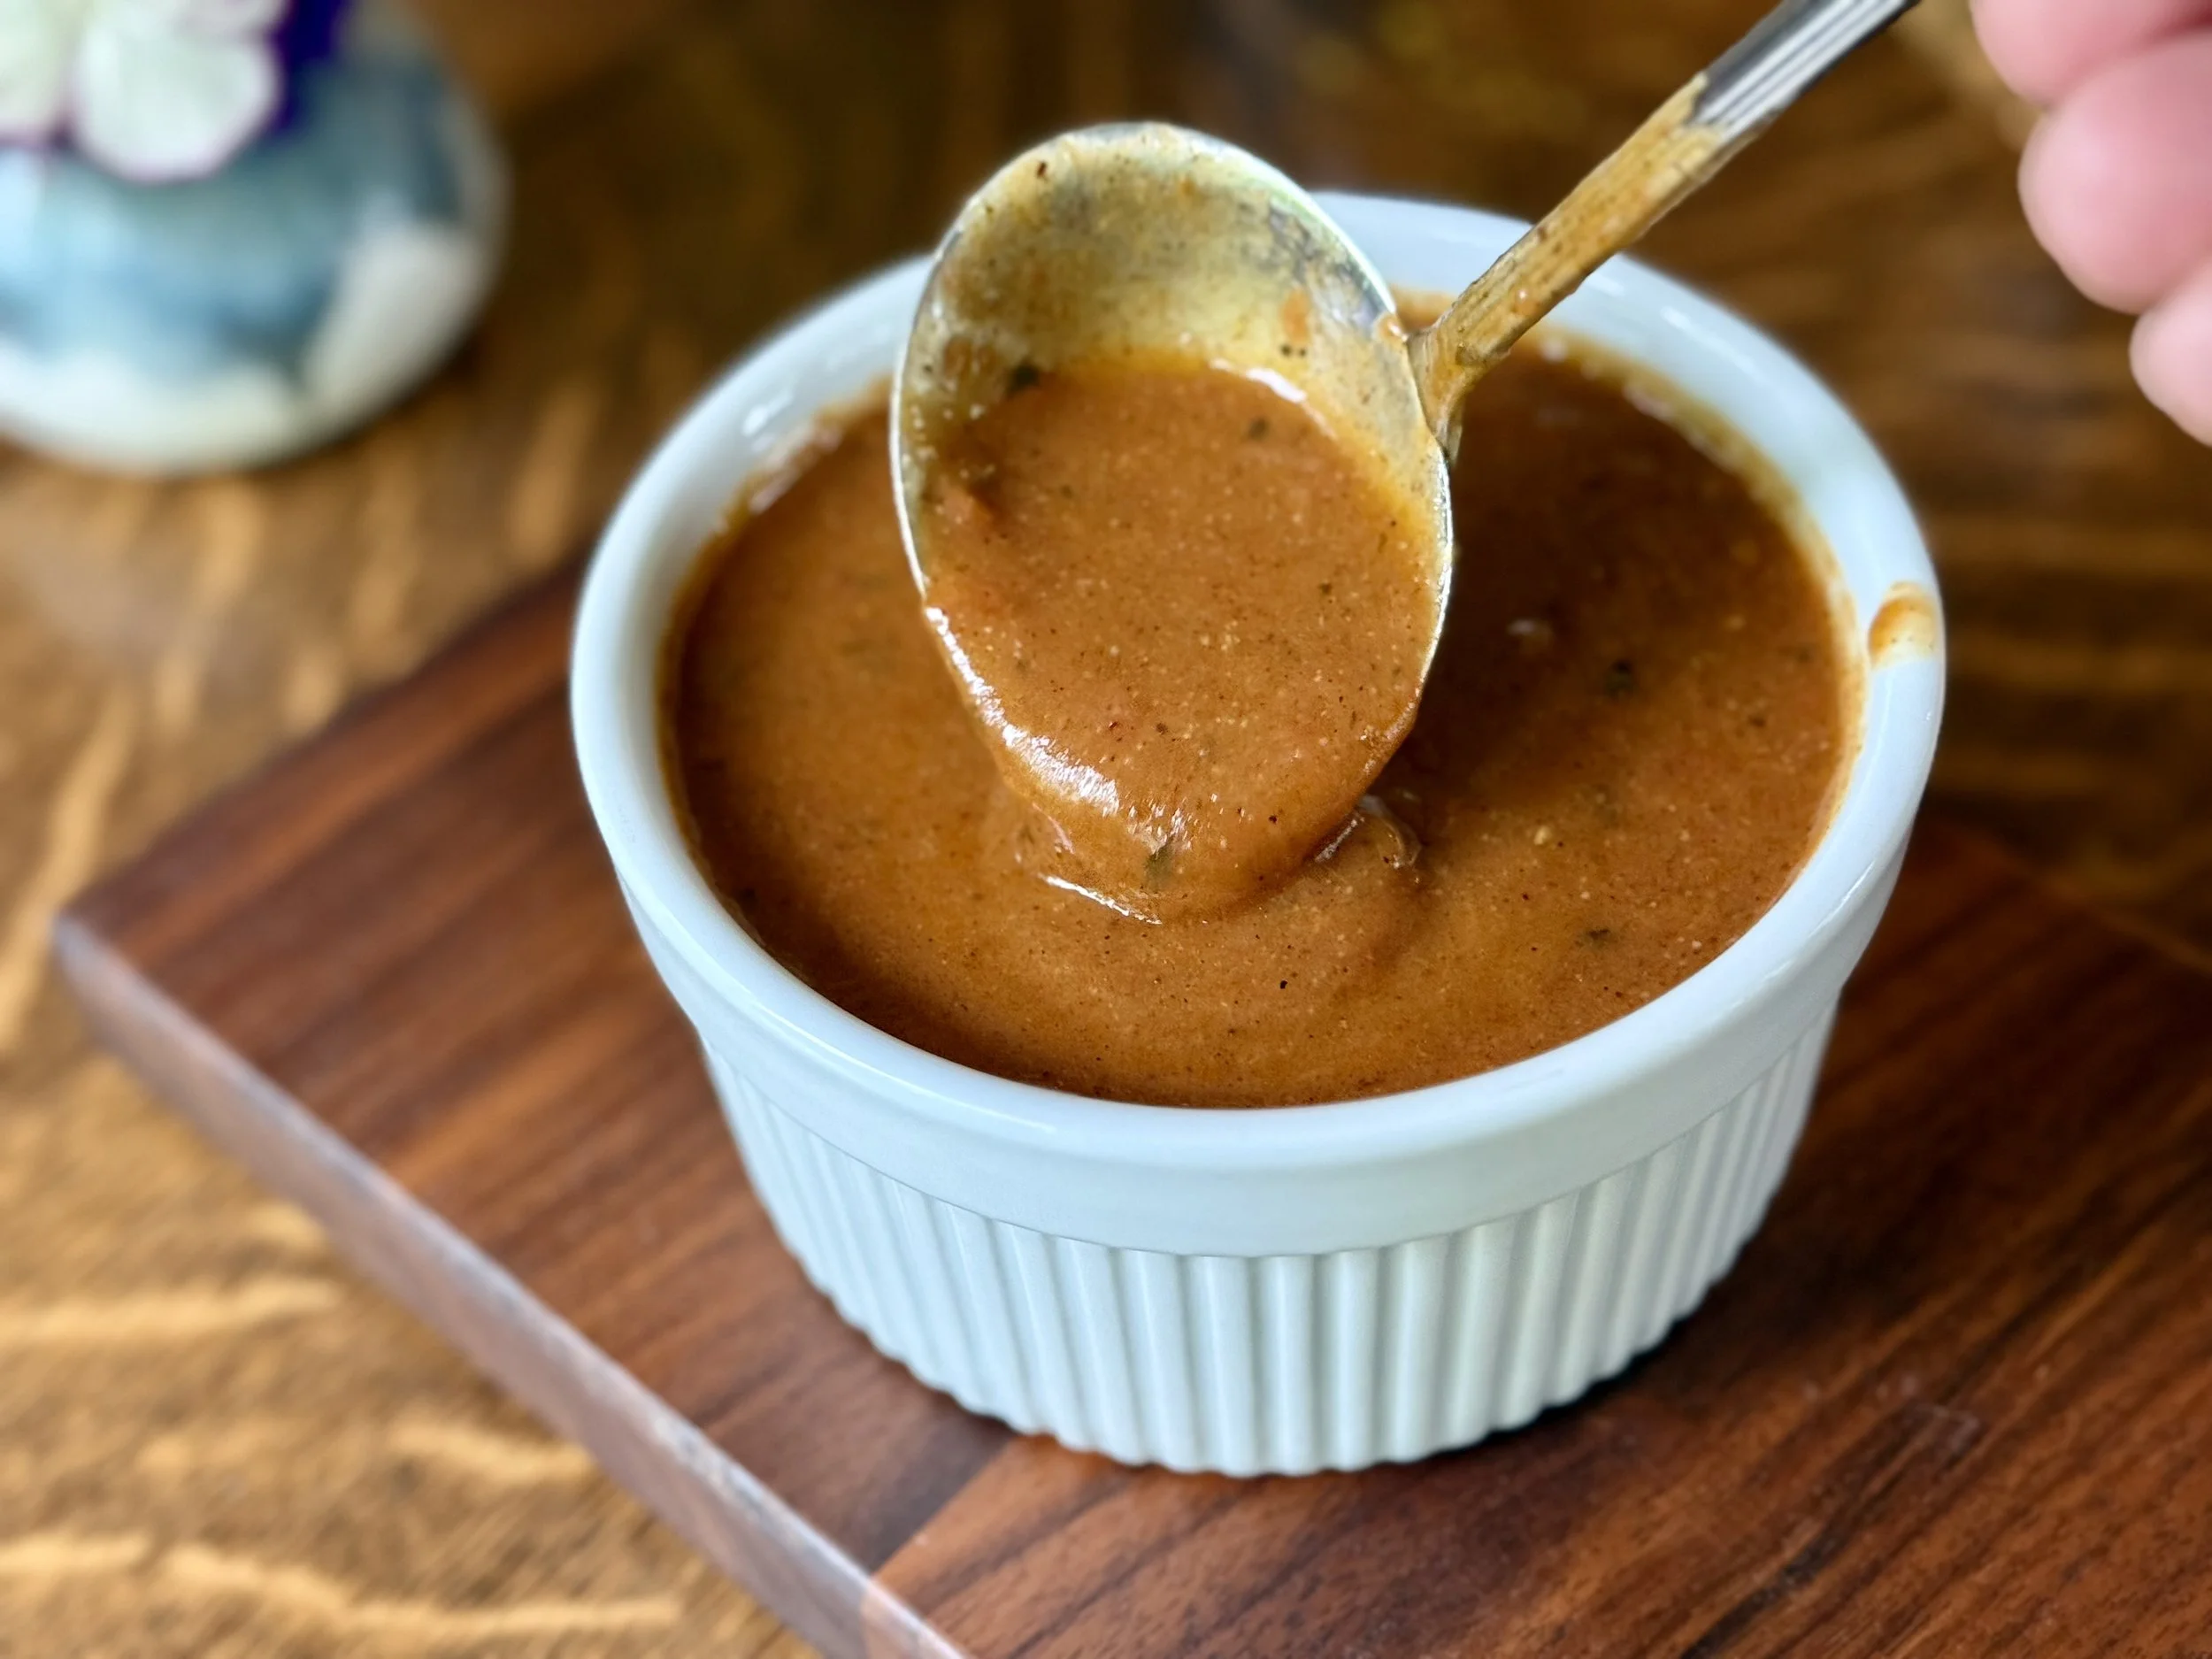
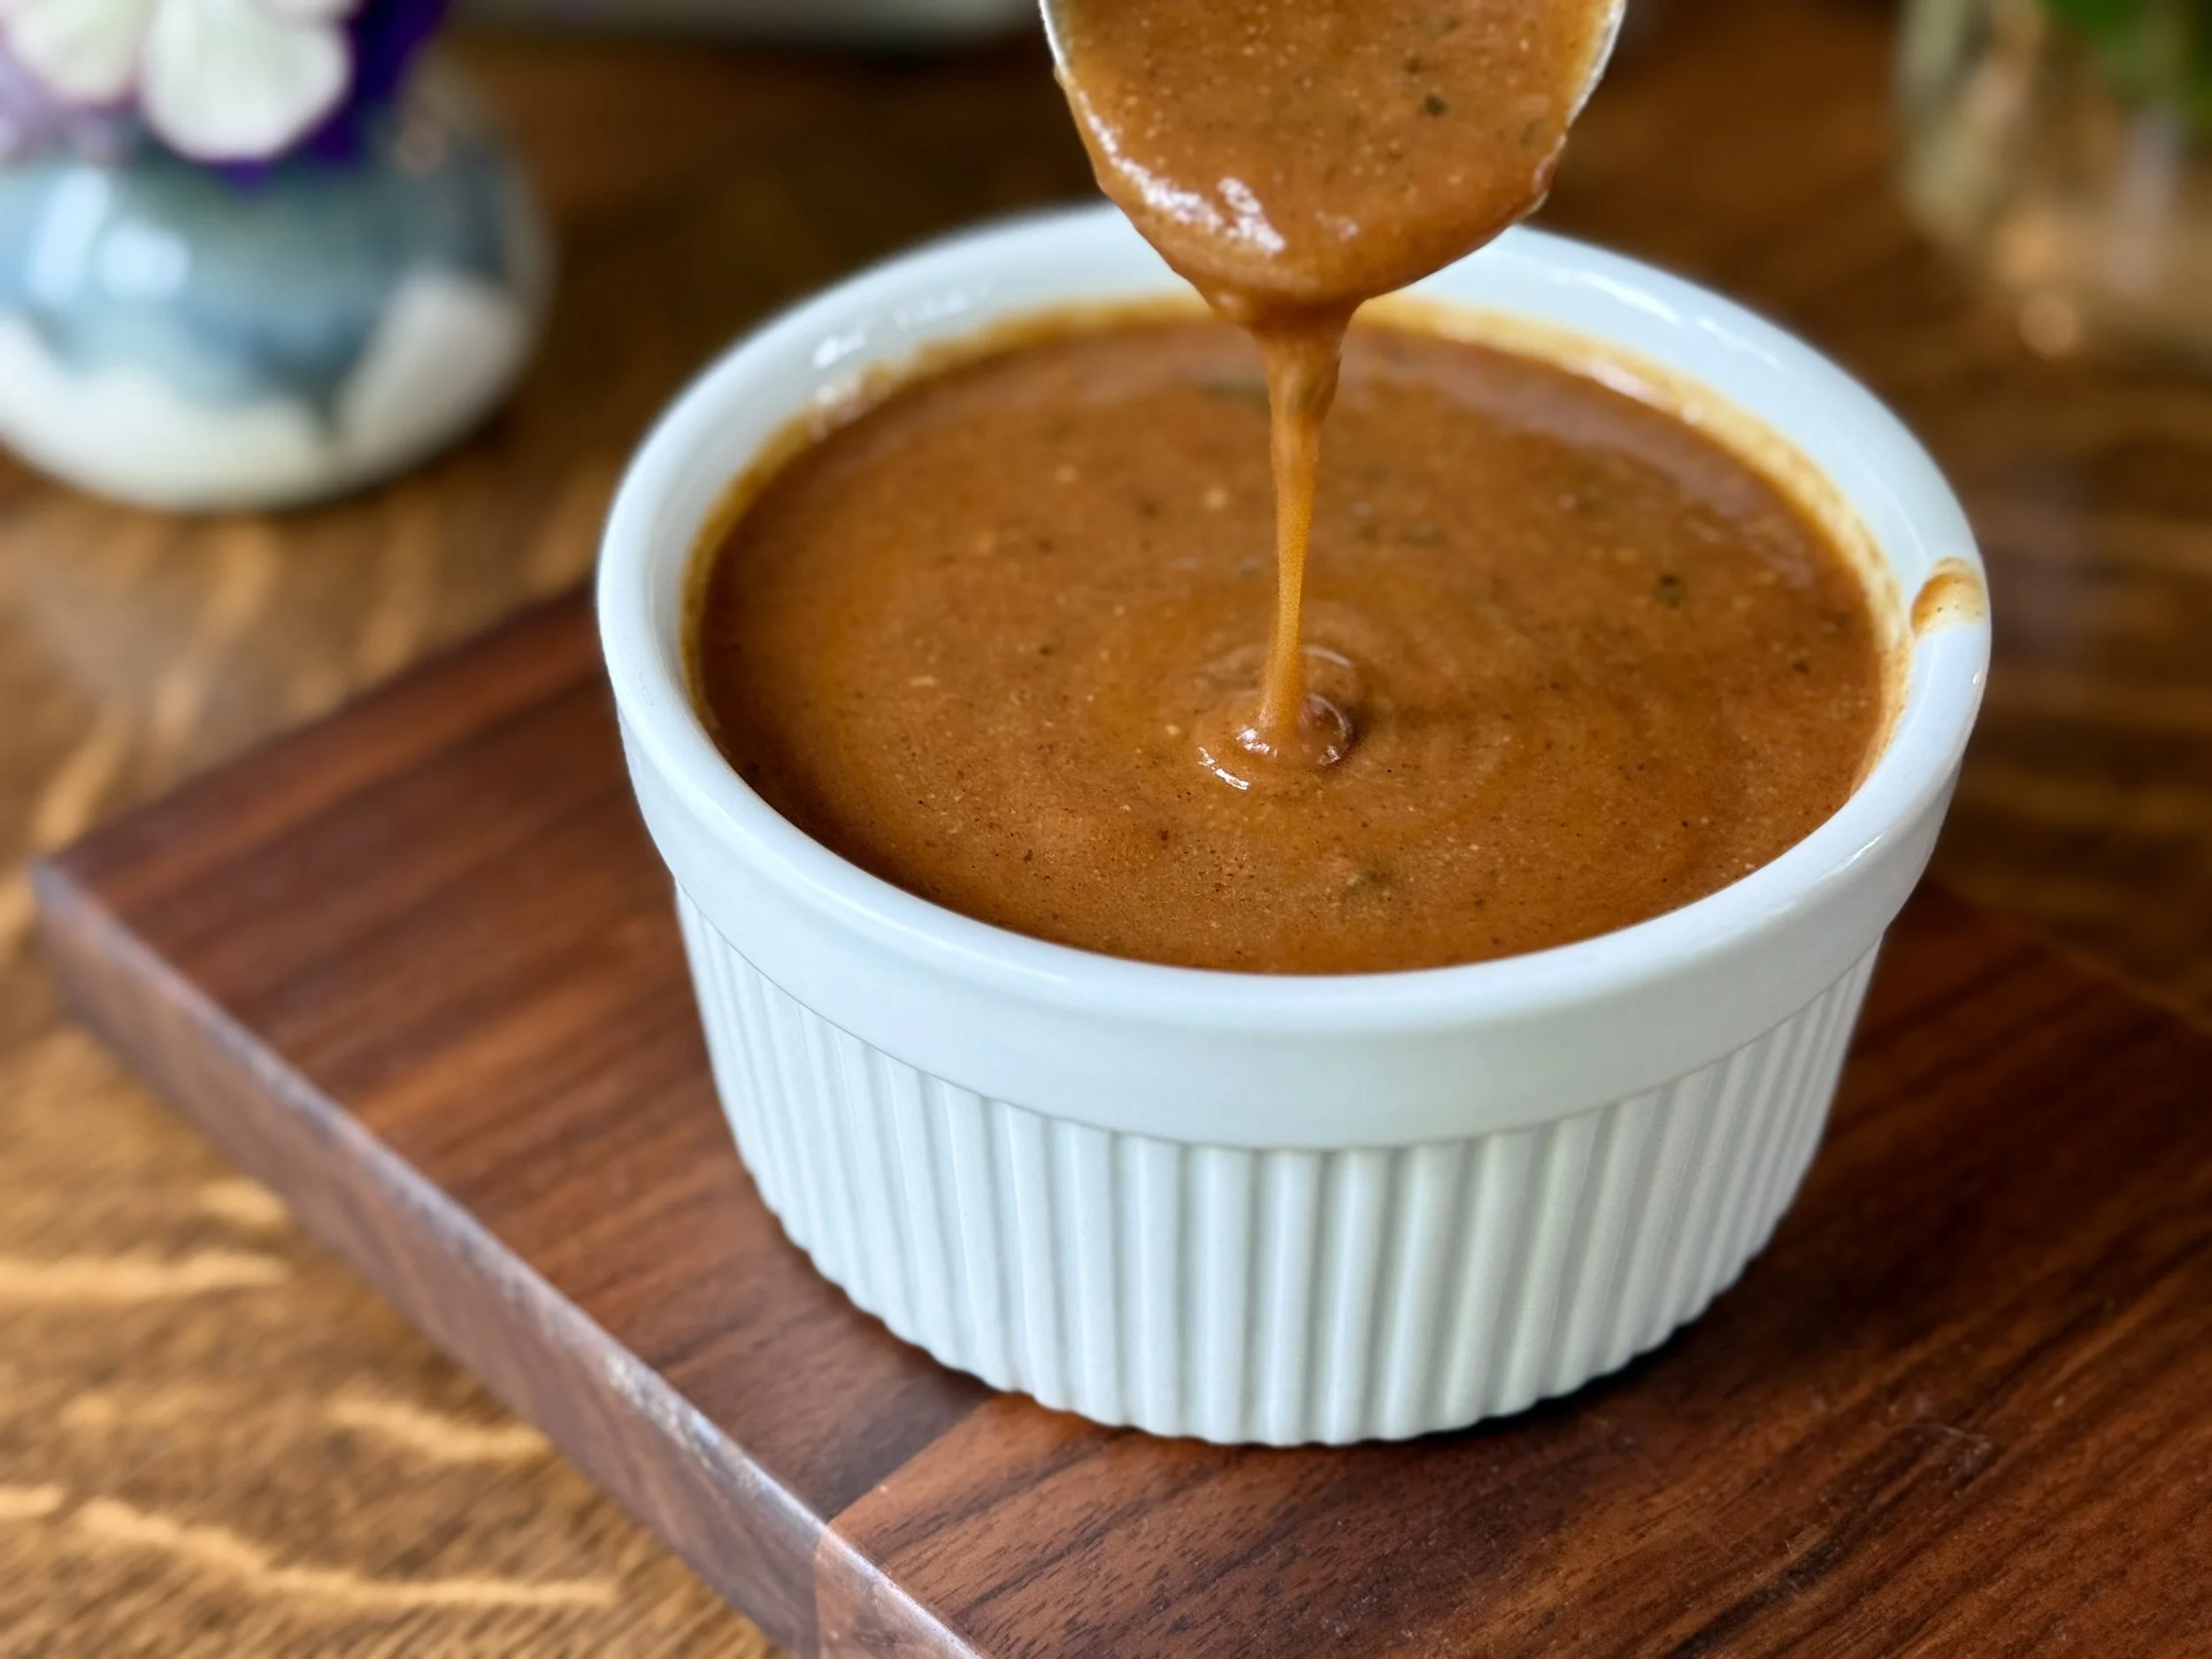
Ranch. The quintessential American dressing and dip. It’s white and creamy, tangy, and flavorful from the herbs and garlic.

Many Americans use Ranch on everything from their pizza and chicken tenders to their vegetables and salads. Some feel very strongly about it, they must have it to eat certain foods. In Italy, I had some American friends who would always request big jugs of Ranch if anyone was coming over to visit them.

Once when I was in Austria in a supermarket, I saw some bottles of salad dressing, one of which was named “American.” Why of course, if in America we have Italian dressing, French dressing, then other countries would have an American dressing. And yes, it was white and creamy so I can only surmise that it was some version of Ranch.

I like Ranch, but have never really understood the hype around it. I’d rather eat my pizza and taste pizza rather than eat pizza and taste Ranch, you know? Especially when you look at the ingredients in a bottle of Ranch or even Ranch packets that you make at home, the ingredients are not the best.

That’s where homemade Ranch comes into play. Not only is it super simple to make, but you know exactly what ingredients are going into your dressing, and it tastes fresher and better. After making this, you may never go back to store-bought again!

Use Ranch on salads, as a dip for vegetables, and yes, even on your pizza or however you like it best! I just made a quart of this the other day and mixed some with Frank’s Hot Sauce as a dressing for some buffalo pasta salad, yum!

This post may contain affiliate links. If you make a purchase using these links, Jennyblogs may receive a small commission, at no extra cost to you. This helps to support Jennyblogs. Where possible, links are prioritized to small businesses and ethically and responsibly made items. For further information see the privacy policy. Grazie!

Recipe from my mama


Homemade Buttermilk Ranch

Makes about 1 quart

  • 2 cups mayonnaise

  • 1 cup buttermilk

  • 1 Tbsp finely chopped fresh chives

  • 1 Tbsp finely chopped fresh parsley

  • 1 tsp salt, or to taste

  • 1/4 tsp garlic powder

  • 1/4 tsp finely chopped fresh dill

Directions:

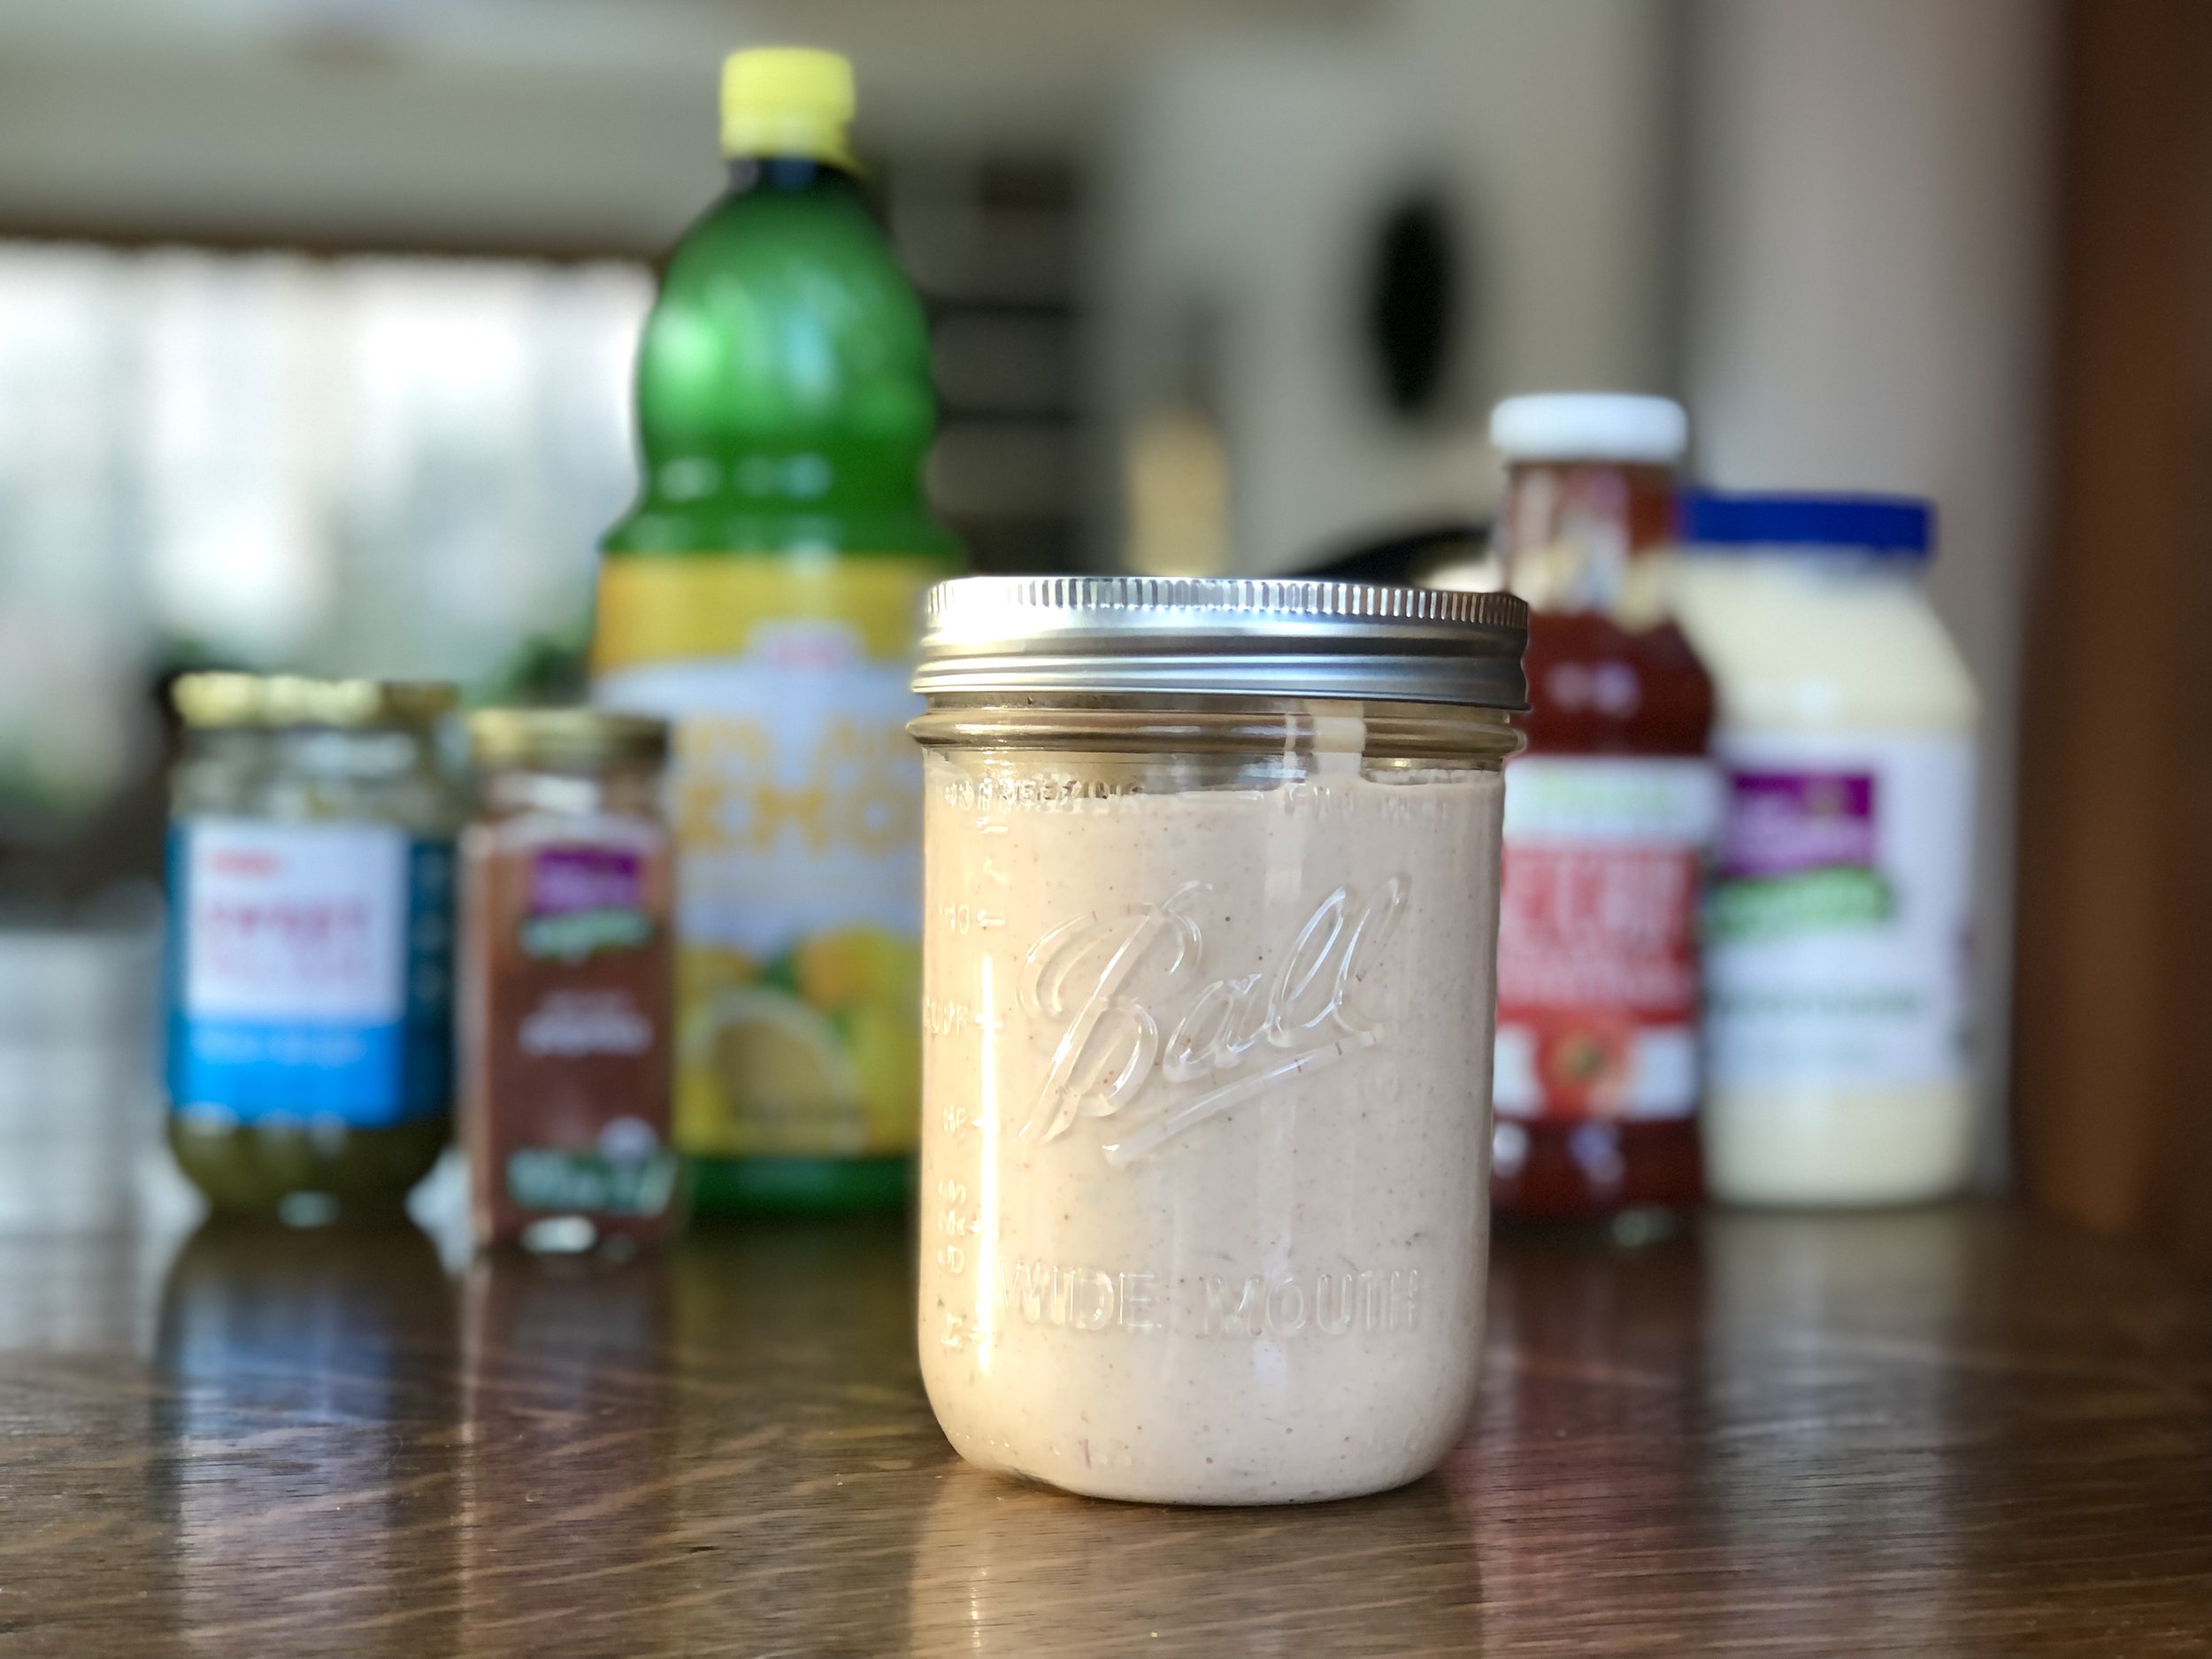
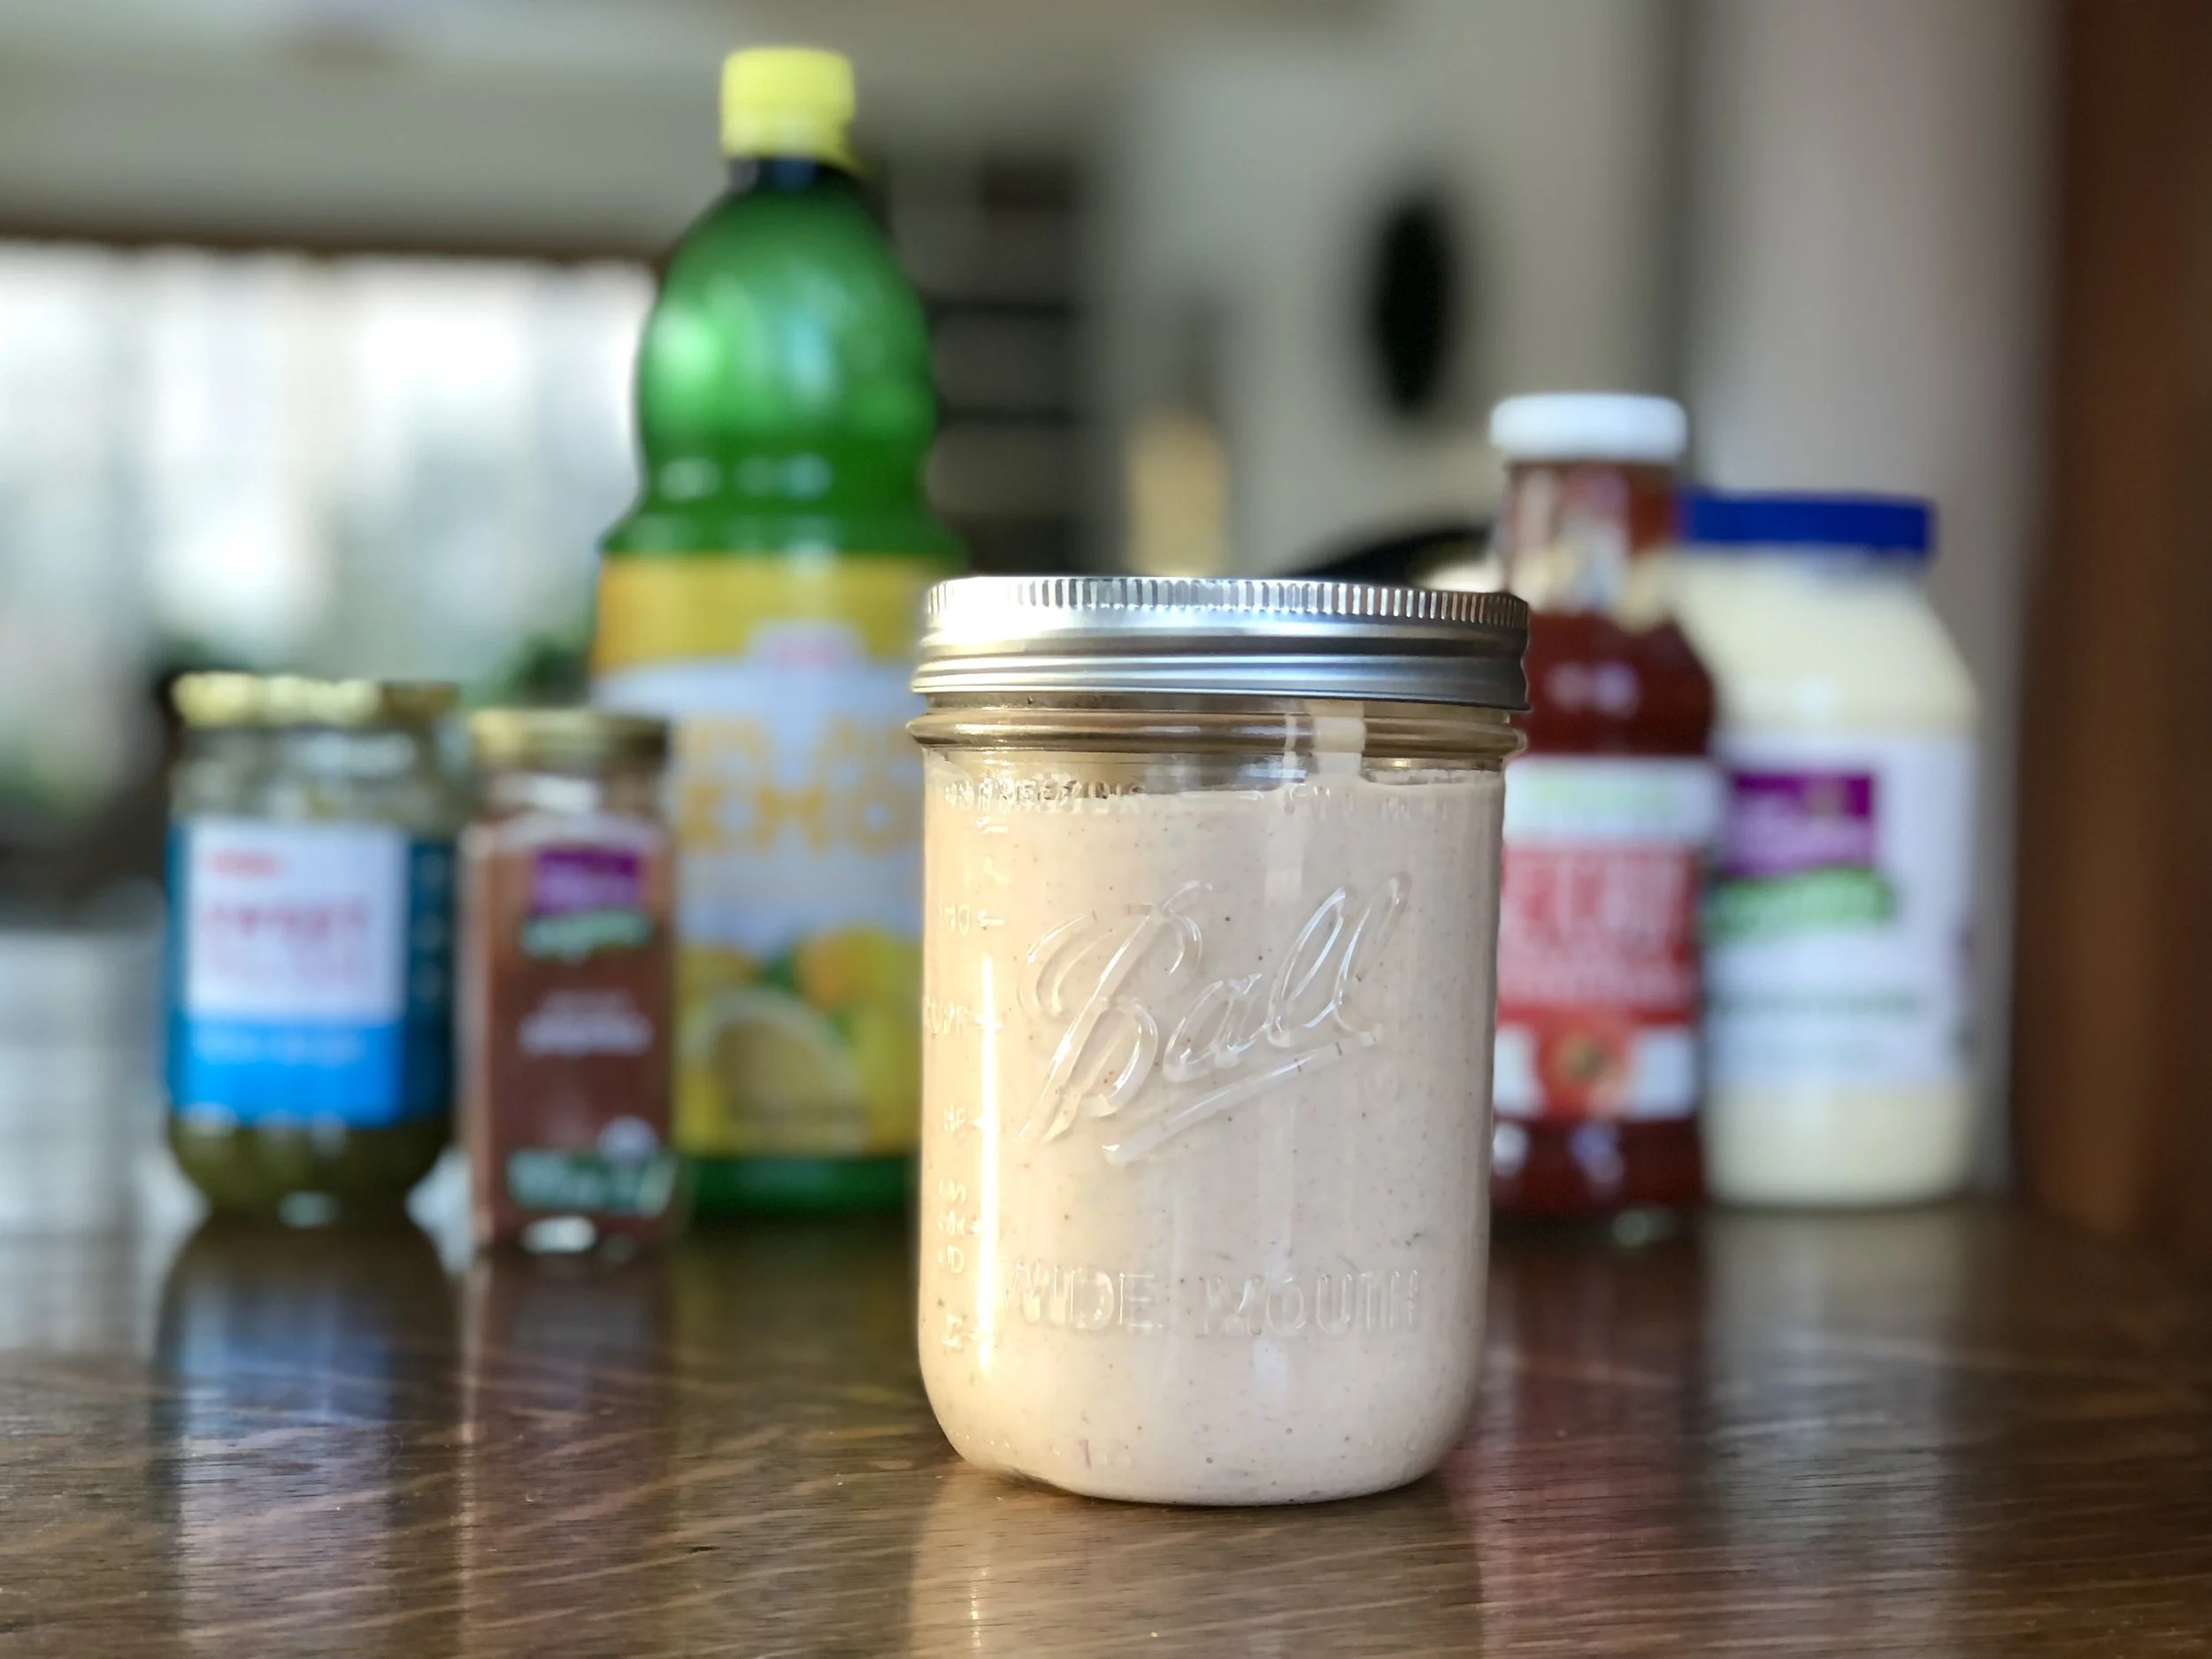
  1. Combine all ingredients in a quart jar or container with a lid and shake well to combine.

  2. Serve or refrigerate.

Homemade Buttermilk Ranch
Yield 24
Author
Prep time
10 Min
Total time
10 Min

Homemade Buttermilk Ranch

Creamy, tangy, homemade Ranch is healthier than its store-bought counterpart and as simple as mixing together 7 ingredients.
Cook modePrevent screen from turning off

Ingredients

Instructions

  1. Combine all ingredients in a quart jar or container with a lid and shake well to combine.
  2. Serve or refrigerate.

Nutrition Facts

Calories

133.34

Fat

14.29 g

Sat. Fat

2.37 g

Carbs

0.64 g

Fiber

0.01 g

Net carbs

0.62 g

Sugar

0.6 g

Protein

0.51 g

Sodium

226.03 mg

Cholesterol

8.94 mg

Nutritional information is approximate. Based on 24 servings of approximately 2 Tbsp each.

homemade buttermilk ranch dressing, ranch veggie dip, creamy American dressing, tangy vegetable dip
snack, condiment
American
Did you make this recipe?
Tag @jennyblogsandbakes on instagram and hashtag it #jennyblogs

How to Write Out a Recipe

Writing out a recipe is a subtle art that is becoming increasingly lost in the abundance of recipes on the internet.

I should probably mention here that this post will be mainly talking about writing out a recipe, not developing a recipe.

It has never been easier to create and share recipes, thanks to the ease of the internet. You no longer have to publish a cookbook, or write out a recipe card by hand. This is an immensely wonderful thing, but with it comes an evolution of cooking and recipes that is not always for the better.

Some recipe creators have probably learned by osmosis; when you’ve read and made thousands of recipes, you can just write a recipe without too much thought and it will probably be a decently well written recipe, if not perfect. Others write recipes blissfully unaware that there are certain rules to be followed. It doesn’t mean their recipes are bad, it more means they aren’t sharing their recipe in an easy to read, easy to follow way.

If you have a mom or grandma who is a boomer, chances are they grew up learning how to cook and bake. My mom had a home-ec class in high school where they learned to cook, sew, etc. and it was one of her favorite classes! As women transitioned from being primarily homemakers to more and more having careers outside the home, cooking and baking, and teaching your kids to cook and bake, took a backseat. Then came the internet, and online recipes: food blogs, TikTok, Instagram, Pinterest, and recipe sharing sites to make learning to cook easy, appealing, and accessible. Many people who did not grow up in the kitchen discovered just how rewarding cooking is. With so many novice cooks in the audience, recipe creators and sharers realized that each and every recipe has to be explained, with great detail in step by step directions. Something like that, anyway.

Along the way, we’ve lost some terminology, some techniques. Some are now outdated, some have disappeared more because they’re not well understood and it feels nicer to cut corners. With so many recipe creators out there now, sometimes it feels like anything goes. At the end of the day, if you are able to understand a recipe, it turns out, and it tastes good, that’s a win. I’m with Chef Gusteau when he says “Anyone can cook!” However, to preserve a tradition, an art form, you might find interesting the more correct formula to writing a recipe, as outlined below, and compare it to some of your favorite recipes.

It’s also important to note that while there are certain recipe rules, there are always exceptions, and some elements are optional, and yet others come down to style.

I believe if you’re going to do something, you should do it to the best that you can, and always willing to learn. I find things like writing recipe formulas intriguing. I’ve spent my whole life practically in the kitchen, and I’m still learning new things on the daily! I always want to know the why behind things. If you too are curious as to how a recipe should be written and why, keep reading! And no, all of my recipes I’ve written here on the blog are not perfect. In fact, I’m on here almost on the daily, fixing and improving all the recipes and content; stewarding my little corner of the internet, doing the best I can with what I have, and doing better when I know better.

To keep things neat and tidy, let’s just start with the title and work our way down, shall we? :)

This post may contain affiliate links. If you make a purchase using these links, Jennyblogs may receive a small commission, at no extra cost to you. This helps to support Jennyblogs. Where possible, links are prioritized to mall businesses and ethically and responsibly made items. For further information see the privacy policy. Grazie!


Title

Traditionally a title would be short and succinct, often named after the main ingredient or perhaps the inventor, sometimes with the method of preparation. Many recipes that are household recipes (you’ve probably heard of German Chocolate Cake) were originally created with a different name than we are familiar with now, and sometimes they slowly morph into the name they eventually become. With the age of keywords and trying to climb to the top of Google and Pinterest with SEO while also trying to make your recipe stand out, longer titles often rank, literally.

As a recipe creator, naming new recipes does not always come easily. It’s hard not to eye roll when you see the name of some recipes, and yet, it can be hard to come up with names that give an adequate representation of a recipe without getting too long. If you just baked up a quick bread with say, raspberries, almonds, and a Nutella swirl, what would you call it? Raspberry Almond Nutella Quick Bread? Too long, right? But if you call it just Nutella bread, that could be a number of other things. Just “raspberry bread” is also a bit vague. The title of a recipe should convey clearly what it is, but it doesn’t necessarily have to give away all of its secrets. I did have to laugh recently when I saw a classic recipe, but renamed with all of its ingredients in the title. Suddenly Shrimp Scampi was “Butter Lemon Garlic Shrimp Pasta”.

When naming a recipe, the ingredients should be listed in descending order by amount. If you make a quick bread with chocolate chips and orange zest, it should be named chocolate orange quick bread rather than orange chocolate quick bread, since there would be more chocolate chips in the recipe than orange zest.

Servings

After the title of the recipe should be how much it makes (i.e. 2 cups)/how many it makes (i.e. 24 cookies)/how many it serves (i.e. 6-8 servings).

Time

Also near the beginning should be how long it takes to execute the recipe from beginning to end. There should be a total time, and usually also a prep time and cook time, and optionally but very helpful, an inactive time. Prep would be how long it takes to prepare the dish. Cook is how long it takes to cook or bake. Inactive time is necessary time to complete a recipe that requires no hands on time. A good example of this would be the time it takes to let bread dough rise.

Something important to note is that the time given on a recipe is calculated based on how the ingredients are already listed. If a recipe calls for a carrot that is cleaned, peeled, and chopped, then that recipe does not include the time it takes to clean, peel, and chop the carrot. A recipe will only count the time it takes to do what the recipe directions explicitly tell you to do.

If you’ve ever wondered why it feels like it takes you longer to make recipes than the recipe states, this is probably why. I have never felt this is an accurate representation of recipe preparation time, so I do actually ignore this rule and include how long the whole recipe takes when I write recipes, no matter how I list my ingredients. All recipes on Jennyblogs are written to reflect a more accurate preparation time.

Author

The author of a recipe is usually listed towards the top also.

If the recipe has been adapted from someone else’s, due credit should be given.

Recipes are not able to be copyrighted, at least the ingredients. Anyone is free to share any recipe’s ingredients, however the directions should be rewritten in your own words. If someone copies and pastes word for word what another recipe author wrote out for the directions, that could be considered plagiarism. However, recipe sharing etiquette would have you give credit to the original author. I’ve read a general rule of thumb where if you change 3 ingredients or more in a recipe, that modified recipe could now be considered yours. I guess I subconsciously followed this rule before I knew it, but more conservatively so. The changes need to be pretty major for me to consider the recipe “my own”. If I know where the recipe came from, I always give credit, and not hidden away somewhere. It’s rare that I share an exact recipe, although there are a select few on Jennyblogs because they were just so good, and you can tell pretty easily by my credit if a recipe is simply “adapted” or if it’s significantly different but still “inspired by” so and so. Essentially, recipe sharing and can be a gray area, but I think that if you follow the golden rule “treat others as you wish to be treated” you will do well.

Equipment

Another more recent addition to recipes is stating what equipment you will need. This is more suited to blogs and websites where you have endless space to write (oh yes, don’t we know it with us bloggers’ rambling backstories!) and can list what equipment you will need. Old fashioned recipe cards never listed equipment, no room on the card and I’m guessing everyone had about the same equipment anyway!

Ingredients

  • Ingredients should be listed in the order that they are called for in the recipe directions.

  • Use subcategories where appropriate. For a cake recipe, you might write “For the Cake” followed by ingredients for the cake, then “For the Frosting” followed by ingredients for the frosting.

  • When an ingredient is used more than once in a recipe, it should be listed just once under each subcategory, followed by divided. For example, if you’re making a cake and the recipe calls for beating 1 cup sugar with butter, then whipping egg whites with 3/4 cup sugar, the ingredients would be listed as 1 3/4 cups sugar, divided. The directions would then specify how much of the sugar would be needed for the first use: “beat 1 cup sugar with butter”; then for the second use: “beat egg whites with remaining sugar.”

  • Ingredients with simple advance preparation should be listed as they will be used in the recipe. If a recipe calls for butter and it needs to be soft so that it can be beaten with sugar, it should be listed as “butter, softened. Otherwise, the instructions will need to include how to get said ingredient to desired state, such as, “leave butter out on countertop until softened” but that’s a bore. We don’t want that. Keep recipes as concise as possible.

  • The wording of the advance preparation of an ingredient matters. “1 cup strawberries, sliced” means you measure first, slice second. “1 cup sliced strawberries” means you slice first, measure second.

  • Measurements in the ingredients can and should be listed with appropriate abbreviations. Tablespoon doesn’t need to be written out, you can save time by simply writing Tbsp. Some common abbreviations are:

    Teaspoon - tsp

    Tablespoon - Tbsp (also tbsp, Tbs, TB, T are all also used)

    Ounce - oz

    Pound - lb

    Gram- g

    Kilogram - kg

    Milliliter - ml

    Liter - L

    Inch - in

    Centimeter - cm

    It’s funny because years ago when I was first writing out recipes and looking into recipe writing etiquette, I read that you should always abbreviate measurements, as just mentioned. Since this is also how my mom was taught and thus taught me, I had no reason to question it. However I’ve also more recently read the complete contradiction to this; measurements should be written out. Pound, ounce, teaspoon. etc. I politely disagree, but if I’m wrong I will come back and change this. :) My thinking is, if abbreviations for tsp and Tbsp and such exist and are well known, but aren’t meant to be used in recipes, when else would you use them, if not in a recipe?

  • Numbers are numbers and shouldn’t be written out (1, not one), and fractions are used rather than decimals.

  • If an ingredient starts with a letter and not a number, the first letter should be capitalized.

  • Use generic ingredient names rather than brand names, unless a brand name is specifically needed to achieve a certain result.

Directions

  1. The first step in any recipe is usually to preheat the oven.

    While there is nothing wrong with this standard way, I alter the wording on this slightly for all my recipes. I got tired of making recipe after recipe, turning on my oven right at step 1 as instructed, only to have it preheat within minutes long before I was ready to use it. When I write out recipes I tend to simply use “Oven 400F / 205C” right at the top of the directions. This way it is not technically a step, so that the recipe preparer can turn their oven on at their discretion, knowing best how quickly or slowly their oven preheats, and how long it may take them to prepare the recipe (more or less time than recipe indicates).

  2. Directions should be clear, but concise. Full sentences aren’t needed. Recipes over time have gotten wordier, with many a blog writing recipes like they’re talking to friends. I like the friendliness of it, but if you’re not careful, can take a clean and concise recipe into a lengthy, sprawling, and more difficult to read recipe.

  3. Each step should consist of the ingredients needed, what kind of container/utensil needed, cooking heat, etc., where applicable.

  4. Use multiple senses where possible to cue reader into the correct way to do things. How things should look, feel, taste, etc.

  5. Avoid using excess use of the word “the”. Instead of writing out “beat the butter and the sugar” you can write “beat butter and sugar”.

  6. 2 Numbers together should be offset with a dash or parentheses. If a recipe calls for a 14 oz can of coconut milk, you ‘d want to write “1 - 14oz” or “1 (14oz) can of coconut milk”.

  7. Recipes should be written for someone with basic kitchen knowledge. Recipes become too long if a recipe needs to include how to fold whipped cream into the batter, not to pack flour into a measuring cup, or how to dice an onion. This is basic terminology that should already be somewhat familiar before diving in and trying to bake or cook. Just as it’s helpful to learn some basic terminology for any skill before starting, the same applies to working in the kitchen. The beauty of recipes on the internet is that while the recipe can be clear and concise on the “recipe card”, bloggers have as much space as they wish, usually before getting to the recipe card, to explain the steps and ingredients in the recipe in detail. This is helpful for those that are new to cooking or even certain kinds of recipes, not as fun for those who already know the purpose and importance of baking soda in the recipe. This is where food blogs often get bad raps, because you have to scroll so far before ever finding the recipe hiding amidst the verbiage.

Storage

At the end of the recipe comes the storage of the dish, where applicable: if it can be stored at room temperature, fridge, freezer, etc. covered, uncovered, etc.

Nutritional Information

Many recipe cards can easily calculate the nutritional information by taking the amount of each ingredient listed and dividing it by the number of servings. This is new and a nice feature. The con is that it’s approximate.


After having read all this, you might be like me and be tempted to go rewrite some of your saved recipes to be more streamlined, and sometimes, more “correct”. My mom and I do this all the time, especially when we want to print recipes or refer to them often!

Why You Should Use a Baking Scale

Last Updated July 21, 2024

I am a full and happy convert to baking with a kitchen scale.

The Art of French Pastry: A Cookbook
By Pfeiffer, Jacquy, Shulman, Martha Rose

I grew up with measuring cups and spoons, and it wasn’t until I started going back and forth between Italy and Michigan that I started to get interested in weighing, rather than measuring by volume. Or perhaps it was when my mom, my brother and I started to get serious about our pour over coffee method, which requires a scale. Or maybe, when I started my first sourdough starter back in 2017. Or even, when I baked my way through Jacquey Pfieffer’s “The Art of French Pastry”. It’s been such a blissful blur of weighing ingredients, I can’t even remember which was the first reason I got a kitchen scale!

While there is absolutely nothing wrong with measuring cups and spoons, it is an inexact science. You cannot measure exactly with a measuring cup. If you measure 1 cup of flour, then measure another, and another, each cup measured in the measuring cup would have a different weight. One might weigh 138g. The next 118g. The next 127g. But you wouldn’t know that unless you were using a scale in the first place. You would only know that, say, your cookie dough turns out a bit differently each time.

The more comfortable you are in the kitchen and know how a recipe should look and feel, the easier it will be to use measuring cups and spoons and make adjustments accordingly. This lends better when you’ve spent time making the same recipes over and over again, or are luckily enough to have a mom or mentor in the kitchen with you, to guide you. It’s a bit harder when you’re learning on your own how to bake and cook. Knowing how recipes should turn out is an invaluable skill to have no matter how you measure, but using a scale will help you get those correct, consistent results that will be harder to achieve when using cups. In short, using a scale helps to take the guesswork out.

At least for an American, where measuring cups and spoons reign supreme in the land of baking, it may seem more approachable to use measuring cups and spoons rather than a scale. That’s probably what you grew up with, or what most bloggers use. The irony is that the scale is more precise, which will give you more consistent results and end in less frustration. It may feel like a leap of numbers and math, but investing in learning to use a kitchen scale is very rewarding and worth it. I have yet to meet someone who switched over and regretted it. On the contrary, they usually sing their scale’s praises and wonder how they ever baked without it.

Not convinced yet? Here are some of my top arguments to get you to try a scale. :)

This post may contain affiliate links. If you make a purchase using these links, Jennyblogs may receive a small commission, at no extra cost to you. This helps to support Jennyblogs. Where possible, links are prioritized to small businesses, and American companies and products made in the USA for American readers. For further information see the privacy policy. Grazie!


Less dishes

Yes, you heard me. Less dishes! Since everything is weighed right in the bowl or baking vessel, you don’t have to wash measuring cups and other utensils needed.

Faster

When you use less dishes and everything can go straight into the bowl or pan it needs to, it’s more efficient and thus quicker.

More Precise

This point has already been pretty well covered above, but it’s the top point chefs and bakers usually give for using a kitchen scale. More precision, more consistent results, happier bakers.

Opens up the world of baking beyond America

If you know how to use a kitchen scale and how to bake with cups and measuring spoons, much more of the baking world opens up to you. Not only will European (including French and Italian!) recipes come within reach, but also things like sourdough. French cuisine, especially if you want to get into the precise and technical world of french pastry, will be much easier if you use a kitchen scale. Sourdough is very impractical when you don’t use a scale. There are already so many variables in sourdough you wouldn’t want to throw yet another variable in by trying to measure by volume.

If you think of measuring by weight as a different language, then any recipe from Europe or beyond would have to be “translated” into measuring with cups and spoons. You would only have access to the recipes that someone took the time to “translate”. Instead, learn the language, and you can make any recipe you want, no having to wait for someone to translate it for you or simply not make it because you don’t have a scale or don’t know how to measure by weight.

Easier to scale recipes up and down and customize

While most recipes are easily scaled up or down by halving, doubling, quadrupling, etc., what happens when you want to customize the recipe more?

If a muffin recipe makes 8, and you want an even 12 muffins instead, you need to multiply the recipe by 150% or 1.5. That’s much trickier when working with cups, teaspoons, and their fractions. If this muffin recipe calls for 1/3 cup oil, do you want to multiply that by 1 1/2? It’s much nicer to multiply 75g oil x 1.5 = 113g. Multiplying numbers is easier than multiplying fractions. I heart kitchen scales!

Easier to Bake with Children

Honestly, I initially had this as a con, but even as I was writing it out I realized it largely depends on personal preference and age of children.

Using a scale allows a child to happily scoop away, while the scale is still telling you precisely how much has been put in. Older children can watch for the number they’re aiming for. A 2 year old might not comprehend the idea of scooping in 240g of flour, but an 8 year old could! In fact, some kids might find aiming for a number on a scale easier than trying to figure out cups and fractions. With younger children, you might decide that pre-measuring (in a separate bowl on the scale) is easier, before letting them add that ingredient to the main bowl, to avoid adding too much of an ingredient that then becomes difficult to remove the excess. This does negate the “no extra dishes” pro of using a scale, but hey, isn’t having kids just all about cleaning up extra messes anyway?? Haha.

Measuring with cups requires being careful not to pack the flour in and measuring to precise lines, among other things. With all the scooping, spilling, playing that is potentially going on with the budding cooks, it’s easy to lose track of what has been put in the bowl, or just how much flour was packed into that measuring cup. For younger children, I like to measure out ingredients for them, and just let them dump and help with mixing.

Either way, baking requires basic math skills and is good for practice! In the end, you’re spending quality time with the kids in your life, they’re learning important skills, and even if what you’re making doesn’t turn out perfectly, they’re generally proud as a peach of their lumpy, misshapen cookies. :)


Ok, but what are the cons?

We’ve covered some pretty big pros to using a kitchen scale, what about the cons? Honestly, I’ve come across very few, but it’s fair to talk about the potential drawbacks.

Having to convert recipes to grams

The single biggest drawback to switching to using a scale, is that you may have to convert all or most recipes you use from cups to grams.

The exception to this would be if you use a lot of online recipes on blogs, often the recipes are written on printable “recipe cards” which can be converted from cups to grams with the click of a button. Despite these wonderful internet things I’ve found too many errors for comfort so I still convert all my recipes manually. Often the errors come into play with unsual ingredients or measurements, or those subtleties in a recipe measurement that an auto translate just doesn’t pick up on. I have many ingredient weights memorized (is my geek showing?) so I often catch these errors by simply scanning converted recipes on these recipe cards.

Converting your own recipes can be a daunting task, but if you give yourself just an extra 5-10 minutes before making each recipe to convert the measurements, it’s really quite manageable. That way you’re doing just a recipe at a time, one a day or however often you bake or cook, and it’s not overwhelming at all.

In fact, I’ve done half of the work for you by creating this master list of ingredient weight conversions. All weight measurements on that list have been duly researched and checked for accuracy. All the recipes on Jennyblogs have been converted using this list. While some ingredients may inevitably vary (1 cup of raisins may differ in weight from another cup of raisins, for example), usually the ones that do vary are the ones least likely to mess up a recipe. (Having a few extra raisins in a raisin bread recipe will not ruin your bread).

Scale turns off mid-measure

If you have a kitchen scale that turns off automatically, beware. This is a big con, but also an avoidable one. Simply don’t let it stay on too long before adding something new.

Despite best intentions, it probably will happen to you at some point, if not frequently. (This has happened to me more times than I should admit. I should know to tap the scale first or turn it off and on again before continuing! Alas.)

What do you do if/when your scale turns off on you?

  • If you only have one thing in your bowl, it’s no big deal: simply take it out and start over.

  • If you have other ingredients in the bowl, that’s where it gets tricky and you’ll have to guess how much was in there, or do some math. To figure out exactly how much you have in there, place a new clean bowl on the scale, tare so it reads 0, then transfer your bowl of ingredients to the new bowl. Add up the weight of the ingredients you have in the bowl, then subtract that number from the number on the scale. What’s left is the mystery weight of the ingredient you half measured before your scale turned off. Clear as mud? Here’s an example:

    Let’s say you’re making muffins, and you measure into the bowl 150g of sugar, 150g brown sugar, and now you’re adding 56g of oil into the bowl. The scale turns off mid measure and you didn’t see how much oil you had measured. Take the bowl off the scale. Place a new bowl on the scale, and tare so the scale reads 0. Now pour the bowl of ingredients into the new bowl and note the number. Let’s say it says 338g. You know you have 150g + 150g = 300g of other ingredients in the bowl, so you must have 338g - 300g = 38g of oil in the bowl. You need to add 56g - 38g = 18g more oil to your bowl!

Now, all of this is easily avoided completely by simply investing in a scale that has the option to STAY ON until you turn it off. I’ve dealt with the auto-off for years and just recently upgraded to this larger capacity scale. The auto-off can be turned off and it is WONDERFUL. Of course, now I have to remember to turn it off when I’m done! It takes up a bit more space than a flat scale, but it feels like the professional scales that I would often use in the commercial pasta kitchen in Italy.

Baking with others

This is a very, very minor thing. At this point. I’m just trying to find some negatives.

One of the small cons I’ve found is that it’s trickier to bake with others. If you and a friend are baking together and you have a newfound love of using a kitchen scale but they prefer cups and measuring spoons, well, what do you do?

You’d either have to teach them how to use a kitchen scale or go back to using measuring cups and spoons. Neither is a big deal, but if you don’t want to take extra time, using cups and spoons would probably be the way to go.

On the flip side, knowing how to use a kitchen scale would make baking with a European friend much easier, since you already know their baking “language.”

I guess that’s all I can come up with for now for cons…do you have any?

Hopefully this has given you plenty of food for thought, and will lure you to try baking with a kitchen scale, mwahaha!

Alright, I want to use a kitchen scale! Now what?

If you decide you want to start using a kitchen scale and would like help converting some recipes from cups to grams, you can use this master list of Baking Measurement Conversions I’ve compiled over the last years as I’ve been converting and creating new recipes. All the recipes on Jennyblogs uses this list for absolute consistency!


Baking Measurement Conversions

Last Updated July 11, 2024

Here is a master list for converting recipes from volume (cups) to weight (grams) and vice versa.

Whether you’re looking to convert just one recipe or would like to convert multiple, this handy list is my go-to, tried and true list for common baking ingredients conversions.

Each ingredient has been cross-checked from multiple conversion sites for accuracy, and then tested in my own kitchen multiple times for accuracy. All recipes that have been developed or converted on Jenny Blogs use this master list. As recipes continue to be added, more ingredients will be added to this list.

This list goes beyond ingredients, it can be a quick reference for pan sizes from inches to centimeters, and temperature from Fahrenheit to Celsius, and vice versa.

This post may contain affiliate links. If you make a purchase using these links, Jennyblogs may receive a small commission, at no extra cost to you. This helps to support Jennyblogs. Where possible, links are prioritized to small businesses, and American companies and products made in the USA for American readers. For further information see the privacy policy. Grazie!


Pan Sizes

9x13 inch rectangle = 23x33 centimeter

8x8 inch square = 20x20 centimeter

9x5 inch bread pan = 23x13 centimeter

8 inch round = 20 centimeter

9 inch round = 23 centimeter

10 inch round = 25 centimeter


Temperature

110°F = 43°C

165°F = 74°C

185°F = 85°C

190°F = 88°C

205°F = 96°C

210°F = 99°C

250°F = 121°C

300°F = 149°C

325°F = 163°C

350°F = 177°C

375°F = 190°C

400°F = 205°C

425°F = 218°C

450°F = 232°C

500°F = 260°C


Ingredients

In alphabetical order

*some ingredients may have slight variability in their weight. An example of this would be nuts, where 1 cup of nuts can vary slightly when weighed. When there is variability, this list does its best to find the median weight.

Almonds, whole, 1 cup = 140g

Almonds, sliced, 1 cup = 84g

Applesauce, 1 cup = 250g

Banana, 1 cup mashed = 300g (about 3 bananas)

Baking powder, 1 tsp = 5g (4.6g)

Baking powder, 1 Tbsp = 14g

Baking soda, 1 tsp = 5g (4.6g)

Baking soda, 1 Tbsp = 14g

Blackberries, 1 cup = 145g

Breadcrumbs, 1 cup = 100g

Butter, 1 stick = 4oz = 113g

Butter, 1 Tbsp = 14g

Buttermilk, 1 cup = 240g

Caramel Sauce, 1 cup = 300g

Cashews, whole, 1 cup = 150g

Cheese, crumbly soft (feta, Gorgonzola, etc), 1 cup = 6 oz = 170g

Cheese, semi-soft (cheddar, colby jack, etc), shredded, 1 cup = 4oz = 113g

Cheese, hard (parmesan, asiago, romano etc) grated, 1 cup = 3-3.5oz = 85-100g

Cheese, ricotta, 1 cup = 250g

Cherries, dried, 1 cup = 120g

Chia seeds, 1 cup = 160g

Chia seeds, 1 Tbsp = 12g

Chocolate, 1 oz = 30g

Chocolate, 6 oz/1 cup = 175g

Chocolate Chips, regular and mini, 1 cup = 170g

Cinnamon, 1 tsp = 2.3g

Cocoa, 1 Tbsp = 6-7g

Cocoa, 1 cup = 100g

Coconut, flaked, 1 cup = 80g (varies, roughly the same for unsweetened and sweetened)

Cornmeal, 1 cup = 120g

Cornstarch, 1 tsp = 2.5g

Cornstarch, 1 Tbsp = 7.5g

Cornstarch, 1 cup = 120g

Corn syrup, 1 cup = 328g

Corn syrup, 1 Tbsp = 20g

Cranberries, dried, 1 cup = 140g

Cranberries, fresh, 1 cup = 110g

Cream Cheese, 1 cup = 8oz = 225g

Cream Cheese, 3oz = 85g

Cream, heavy whipping, 1 Tbsp = 15g

Cream, heavy whipping, 1 cup = 237g

Dates, pitted, 1 cup = 160g

Date, deglet, 1 = about 10g

Date, Medjool, 1 = 24g

Dried fruit, 1 cup = 190g

Evaporated Milk, 1 cup = 262g

Flaxmeal, 1 cup = 180g

Flour, all-purpose, 1 cup = 120g

Flour, all-purpose, 1 Tbsp = 8g

Flour, bread, 1 cup = 120g

Flour, oat, 1 cup = 100g

Flour, whole wheat, 1 cup = 128g

Flour, cake, 1 cup = 110g

Graham Crackers, crumbs, 1 cup = 85g

Graham Cracker, 1 sheet = 15g

Honey, 1 Tbsp = 21g

Honey, 1/4 cup = 85g

Hummus, 1 cup = 245g

Ketchup, 1 Tbsp = 15g

Lemon Juice, 1 Tbsp = 14g

Lemon Juice, 1 cup = 237g

Lemon/lime zest, 1 Tbsp = 6g

Lentils, dry, 1 cup = 210g

Maple Syrup, 1 Tbsp = 20g

Maple Syrup, 1 cup = 322g

Marshmallow Fluff, 1 cup = 85g

Marshmallows, mini, 1 cup = 2 oz, 57g

Mascarpone, 1 cup/8oz = 225g

Mayonnaise, 1 cup = 230g

Milk, 1 cup = 237g

Milk, Coconut, 1 cup = 237g

Molasses, 1 Tbsp = 21g

Nutella, 1 Tbsp = 19g

Nutella, 1 cup = 296g

Nutter Butter, 1 cookie = 14g

Oat Bran, 1 cup = 80g

Oats, quick, 1 cup = 90g

Oats, rolled, 1 cup = 80g

Oil, 1 Tbsp = 14g

Oil, 1 cup = 224g

Oil, coconut, 1 cup = 220g

Olives, kalamata, 1 cup = 180g

Peanut Butter, 1 Tbsp = 16g

Peanut Butter, 1 cup = approx 260g

Peanuts, 1 cup = 155g

Pecans, chopped, 1 cup = 125g

Pickle Relish, Sweet, 1 Tbsp = 15g

Pistachios, shelled, 1 cup = 125g

Pumpkin Puree, canned, 1 cup = 240g

Pumpkin Puree, 1 15oz can = 425g

Quinoa, 1 cup cooked = 185g

Raisins, 1 cup = 150g

Red Pepper Flakes, 1 Tbsp = 5-6g

Rice, uncooked, 1 cup = 185g

Rice Krispies, Cereal, 1 cup = 28g

Salt, 1 tsp = 5g

Sour cream, 1 cup = 245g

Sourdough discard, 1 cup = 250g

Sourdough starter, active, 1 cup = 227g

Soy Sauce, 1 Tbsp = 17g

Soy Sauce, 1 cup = 265g

Spinach, 1 cup raw = 30g

Spinach, 1 cup raw, chopped, = 45g

Sugar, brown, 1 cup = 200g

Sugar, powdered/confectioner’s, 1 cup = 125g

Sugar, white, 1 cup = 200g

Sugar, white, 1 Tbsp = 12.5g

Toffee Bits (Heath), 1 cup = 170g

Tomatoes, cherry, 1 cup = 150g

Tomato Paste, 1 Tbsp = 16g

Vanilla, 1 tsp = 5g

Vinegar, 1 cup = 238g

Walnuts, chopped, 1 cup = 125g

Water, 1 cup = 237g

Wheat Germ, 1 cup = 100g

Xylitol, 1 Tbsp = 15g

Yeast, 1 tsp = 3g

Yeast, 2 1/4 tsp = 7g

Yogurt, 1 cup = 245g

Zucchini, 1 cup grated = 100g 


Ingredient Substitutions

In light of the recent Ingredient Substitutions in Italy post, I realized I could easily write another master list for common and easy ingredient substitutions, more geared for cooking and baking in the USA.

I know that I am often making one or a couple modifications or substitutions in a recipe each time I’m in the kitchen. It’s part of the beauty of baking and cooking. Sometimes it comes out of necessity, other times it’s simply a desire to. Maybe I don’t have buttermilk, but I know I can use sour milk. A cookie recipe might call for butter, but maybe I’ll use oil instead if I forgot to soften butter or don’t feel like creaming it. A lot of these I do without thinking, others I’m always having to look up to remember the quantity or ratio.

Here is an ingredient substitution list I’ve been working on, although far from comprehensive, these are some of the ones I find myself needing to do most often, or a few that saved me just once or twice in a pinch that I have never forgotten and am forever grateful for!

New York Times has an interesting list of ingredients substitutes, cuts of meat, herbs and their classes by taste and how to properly substitute them. Different kinds of substitutions, equally interesting!

I will continue to add to this list as I think of and learn new ones!

Use discretion when making substitutions. The kitchen is a wonderful place for experiments, but not all recipes can handle substitutions.

This post may contain affiliate links. If you make a purchase using these links, Jennyblogs may receive a small commission, at no extra cost to you. This helps to support Jennyblogs. Where possible, links are prioritized to small businesses, American companies, and products made in the USA. For further information see the privacy policy. Grazie!


  1. Baking Soda - you can use baking powder.

    Baking powder isn’t as powerful as baking soda, so it’s recommended to use 3x the amount. For example, for 1 tsp of baking soda, add instead 3 tsp of baking powder. In higher amounts this can lead to an unusual, bitter taste from the baking powder, just so you know.

  2. Broth - use bouillon cubes, powdered broth, or even just water, if the recipe calls for small amounts like 1/4 or 1/2 cup of broth. Reference the package or container for appropriate amount of bouillon or powdered broth to use.

    Using powdered broth comes in handy so you don’t have to open a container of liquid broth and have the rest go to waste. Bouillon cubes you generally need to make at least 1 cup of broth per cube. I love powdered broth as a sub for small amounts of broth, as it is customizable. Just be wary, many powdered broths and bouillon cubes contain sketchy ingredients, including monosodium glutamate. Similar to real broth, both of these substitutes can be very high in sodium, so I usually suggest not adding in any extra salt to the recipe until you’ve tasted it with all broth or broth substitutes added in.

    A new one I’ve found, is this Better Than Bouillon. They have many different flavors, some are organic. You can find better prices at Costco but here is an idea on Amazon:

  3. Brown sugar - for every 1 cup of brown sugar, take 1 cup white granulated sugar and blend with 1 Tbsp of molasses. A food processor works well, if not mix well by hand.

  4. Butter - use oil, coconut oil, margarine, shortening, or lard.

    Oil: for every 1 cup of butter, add 3/4 cup of oil. Some say to use 7/8 cup of oil, but I will tell you that I grew up replacing 1 cup of butter with 3/4 cup of oil. It’s an easier amount to work with and works well!

    Coconut oil: use an equal amount (1:1 ratio)

    Margarine: use an equal amount (1:1 ratio)

    Shortening: use an equal amount (1:1 ratio)

    Lard: use 7/8 cup lard for every 1 cup of butter

    You can sub applesauce for butter in baked goods, see “oil” below.

  5. Buttermilk - for every 1 cup of buttermilk, add 1 Tbsp of lemon juice or any kind of baking vinegar (apple cider vinegar, white vinegar, etc.) to a measuring cup and fill to the 1 cup measure line with regular milk.

  6. Cake flour - Take 1 cup of flour, remove 2 Tbsp of flour and add 2 Tbsp of cornstarch.

  7. Canned Green Chilies - use a fresh pepper instead.

    I like to sub 1-2 jalapeño or other spicy peppers for 1 can. Fresh tastes better, too! Canned chilies aren’t usually too spicy, so you‘ll want to remove the seeds from fresh hot peppers to reduce the spiciness.

  8. Cream cheese - mascarpone can be a good sub for cream cheese in equal amounts.

  9. Corn syrup - depending on the recipe, you can use honey or water and sugar.

    Use an equal amount of honey for corn syrup. For sugar/water substitute, use 4 parts sugar and 1 part sugar. Meaning, if a recipe calls for 1 cup of corn syrup, use 1 cup of sugar and 1/4 cup of water.

  10. Eggs - you can use a flax egg or chia egg.

    Mix together 1 Tbsp flaxmeal or chia seeds with 3 Tbsp water. Mix well, and let sit in fridge until thickened and gloopy, about 15 minutes. This will replace 1 large egg.

  11. Flour, self-rising - for every 1 cup of self-rising flour use 1 cup all-purpose flour with 1 tsp baking powder, 1/2 tsp salt, and 1/4 tsp baking soda.

  12. Garlic - garlic granules or powder can be substituted for fresh garlic, or vice versa. 1/8 tsp of garlic POWDER or 1/4 tsp of garlic GRANULES is supposed to be equivalent to 1 clove of garlic.

  13. Ginger - Fresh ginger and ground ginger can be swapped out for one another.

    There is no hard and fast rule for the amount, unfortunately. You can use as little as 1/4 tsp ground ginger for every 1 Tbsp of fresh grated ginger, or as much as 1 1/2 tsp ground ginger for every 1 Tbsp grated fresh ginger called for.

  14. Herbs - You can swap out fresh herbs for dried herbs, or vice versa. The general rule of thumb is to use 3x the amount of fresh as dried, as dried is usually stronger. i.e. if a recipe calls for 1/2 tsp dried thyme, you could use 1 1/2 tsp fresh thyme. Or if a recipe calls for 1 Tbsp (3 tsp) fresh oregano, you could swap out for 1 tsp dried oregano. I personally don’t think all herbs are equal when fresh or dried, one of the biggest being basil. I don’t think that dried basil should be substituted for fresh. If a recipe calls for dried basil, that’s fine, but I think the taste between fresh and dried are very distinct.

  15. Honey - use equal amounts of maple syrup, agave nectar, or even sugar, brown sugar, etc.

  16. Maple Syrup - use equal amounts of honey, agave nectar, sugar, brown sugar, etc.

  17. Mayonnaise - use equal amounts of plain yogurt or sour cream.

  18. Oil - use butter or any of the fats above under butter, or applesauce.

    • Butter: When subbing oil for butter it’s a bit more straightforward, oil is oil and doesn’t need to be whipped. When subbing butter for oil, if you’re making cookies, cake, quick breads, in most cases you’ll want to cream the butter until light and fluffy (about 3-5 minutes). Not to say you can’t make a delicious chocolate chip cookie with melted butter, you absolutely can, but it will be different than a cookie made with creamed butter.

      or

    • Applesauce: This can be a cheaper and healthier alternative to oil. Since even unsweetened applesauce is naturally sweet, you can also reduce sugar in recipes when using this substitution. This substitution does take a bit of experimenting, especially if swapping out for larger quantities of oil, and doesn’t suit all recipes.

  19. Onion - shallots, green onions, and leeks can all be interchanged for one another.

    You can also use about 1 Tbsp onion powder for every 1 cup diced onion, this can be adjusted according to taste.

  20. Peanut Butter - yes, you CAN use natural peanut butter!

    Many desserts that call for peanut butter specify to use creamy, not natural, peanut butter, since natural peanut butter has a tendency to separate. But you know what? I have yet to find a pie, cookie, or other peanut butter dessert where I couldn’t use natural peanut butter. Do be mindful of over-stirring/beating, as this is what can often get you into trouble with the peanut butter separating.

  21. Salt - No, there’s no substitute for salt really, but have you ever wondered why some recipes specify what kind of salt? For example, if a recipe calls for kosher salt? Why? Can’t you just use table salt?

    Yes, of course you can. But it’s also handy to know that 1 tsp of different kinds of salt will lend different levels of salt to your dish. 1 tsp of Kosher salt is not quite as salty as 1 tsp of table salt, but it’s saltier than 1 tsp coarse sea salt. Why? Different kinds of salt pack into measuring spoons differently. More tiny grains of table salt fit into a teaspoon than coarser kosher or sea salt. So if you’re using table salt instead of kosher salt, you will want to use less, especially in larger quantities.

    If all of that sounded like mumbo jumbo to you, that’s ok. Here’s a cheat sheet for swapping out salts, but you’ll probably only notice in larger quantities. Salt is personal, anyway. When in doubt, start with less. You can always taste and add more as needed, but you can’t un-salt a dish.

    1 tsp of table salt = 1 tsp fine sea salt = 1 1/4 tsp coarse kosher salt = 2 tsp of fine kosher salt

  22. Sour cream - use an equal amount of plain yogurt!

    It’s also a healthier alternative.

  23. Tomatoes - Fresh tomatoes and canned tomatoes can often be interchanged in cooking. For example, if a soup calls for a 14.5oz can of diced tomatoes, you could use instead 3 ripe medium tomatoes. You will probably need to adjust the cooking time to allow more time for the fresh tomatoes to break down. Similarly, you can use a can of tomatoes instead of fresh tomatoes, where appropriate.

  24. Tomatoes (canned varieties) - Have you ever felt confused by the seemingly myriad varieties of canned tomatoes, and wondered what the difference is? I certainly have. There is diced, crushed, whole, plum, San Marzano, tomato paste, passata, fire roasted, tomato sauce, prepared sauces, etc. etc. But can you use them interchangeably? Easy answer is yes, but it helps to be familiar with their forms and what your actual preferences are for eating tomatoes in a recipe.

    For example, if you’re making a tomato sauce for pasta, and the recipe calls for crushed tomatoes, you can absolutely sub in diced tomatoes instead. If, however, you don’t want chunks of tomatoes in your sauce, and you know that diced tomatoes are bigger chunks than crushed, then you can choose to blend your sauce in a blender or use an immersion blender to get your smooth, not chunky, pasta sauce.

    That said, here is a quick cheat sheet for canned tomatoes and their consistencies, from smoothest to chunkiest:

    • Passata di pomodoro - a tomato purée, the smoothest of canned tomatoes. I have a harder time finding this in the States, but it is one of the more plentiful tomato products you can find in an Italian grocery store, as it is so often used in their cooking. I also enjoy paying .70cents for it in Italy vs $4 in the States. :)

    • Tomato sauce - another smooth purée, but often with a few added ingredients, such as basil, salt, garlic. Depending on your recipe, these may already be ingredients called for (since they so often go with tomatoes) and may not matter. Just pay attention to the salt, since tomato sauce often does have some salt and the recipe could end up saltier than anticipated.

    • Tomato paste - smooth, thick, tomato concentrate. Water can be added to reconstitute it, other times recipes call for tomato paste as is to be added. This adds richness to the tomato flavor of the recipe, even if fresh or canned tomatoes are already called for.

    • Crushed tomatoes - a little chunkier, maybe “lumpier” than passata, but still quite smooth. Once in a recipe I don’t usually notice any tomato “chunks.”

    • Diced tomatoes - Still saucy, but now with chunks of tomatoes. Maybe one of the most common types of canned tomatoes I see called for in US recipes.

    • Whole tomatoes - well, they’re whole! Usually peeled. You can slice or dice them for sauces, soups, etc., or add them to a blender or blend with an immersion blender for a smooth sauce.

    • Whole plum tomatoes - this is a kind of tomato. They’re medium, oblong, with a rich, juicy flavor great for making sauces. Some well-known varieties include Roma and San Marzano.

    • San Marzano tomatoes - these are a prized, production protected, type of Italian plum tomato. They can be found in the various forms, passata, crushed, whole, etc. You can often find them imported in cans straight from the Campania region of Italy, from where they originally hail. This makes them pricey, but you can also find them in American plant nurseries or in seed form to grow yourself.

    • Fire roasted tomatoes - tomatoes with a distinct smoky flavor, usually in diced form. Really delicious in soups, especially Mexican inspired ones such as enchilada or tortilla soup.

    • Tomatoes with green chilies - diced tomatoes with diced green chilies, for when you want both in a recipe. I rarely buy this since I like to have cans of green chilies on hand, or I just use a fresh pepper, such as jalapeño, instead.


Homemade Thousand Island Dressing

Last Updated August 14, 2024

Thousand Island Dressing - you know it as the pinkish, sweet and salty dressing for salads, hamburgers, and various other creative uses.

What you might not know is what this salad dressing is made of, and that it is super simple to whip up at home with only 7 ingredients you very possibly already have on hand!

Essentially, Thousand Island Dressing is a mayonnaise and ketchup based dressing. Beyond that, there are many variations, although my favorite below features sweet relish and onions.

Where did Thousand Island Dressing come from?

Its origin is disputed, but two main tales originate in the Thousand Islands region, between northern New York and Canada.

One tale starts at Boldt Castle when George Boldt (Waldorf-Astoria billionaire) and his wife Louise were out on their yacht. Their chef forgot to bring a dressing for some greens and had to scrounge something up, which turned into Thousand Island Dressing.

Another tale stems from a recipe found in a restaurant in the same Thousand Islands area. The recipe appears to be what we know now as Thousand Island Dressing, but is simply called “Sophia’s Sauce”. Sophia and George Lelonde used to own the restaurant.

Wherever it came from, it blossomed in popularity, although honestly I never understood why.

Why Make Thousand Island Dressing? One Reason: Taco Salad

Thousand Island has always been a bit mysterious to me, I never much cared for it and I never gave much thought to what it was actually made of. I usually saw it in a bottle, and per usual with store-bought salad dressings, many of the ingredients weren’t ones I cared overly to be eating.

my tiny photo stager :)

However, despite having no strong feelings for Thousand Island dressing, there is one dish that I and my family love that Thousand Island is crucial to: Taco Salad. Yep, that’s right. I don’t even know how Thousand Island came to be “the” dressing for Taco Salad, as I’ve never heard of anyone putting it on their tacos. I’m not sure where the Taco Salad recipe in my family came from originally, but whoever made it up decided, oh let’s make a salad with all the components of tacos in it…what kind of dressing should we use? I know, Thousand Island Dressing! Naturally.

Taco Salad

Due to our love for Taco Salad and also our desire to eat whole foods and make things homemade, we decided to look in to making our own Thousand Island Dressing, especially since we don’t use it for anything else. I came across this recipe and we haven’t bought a bottle of Thousand Island since.

Find the recipe for Taco Salad here!

This post may contain affiliate links. If you make a purchase using these links, Jennyblogs may receive a small commission, at no extra cost to you. This helps to support Jennyblogs. Where possible, links are prioritized to small businesses and ethically and responsibly made items. For further information see the privacy policy. Grazie!

Recipe Adapted from Simply Recipes


Homemade Thousand Island Dressing

Makes about 1 1/2 cups of dressing

Ingredients:

  • 1 cup / 230g mayonnaise

  • 1/4 of an onion or 1 small shallot, minced

  • 2 Tbsp / 30g ketchup

  • 2-3 Tbsp / 30g sweet pickle relish

  • 1 tsp / 5g lemon juice

  • 1/2 tsp sweet paprika

  • 1/4 tsp salt

Directions:

  1. Combine all ingredients together in a bowl, mix well.

  2. Place in a jar or sealed container and store in the fridge.

Jenny’s Notes:

  • Letting the dressing sit for a few hours or ideally a day or two really lets the flavors meld. It also can help to tame the onion or shallot a bit.

  • Use more sweet relish if you like a sweeter and tangier Thousand Island, use less if you don’t want it as sweet.

  • Mason jars make great storage containers!

Homemade Thousand Island Dressing
Yield 12 servings. about 1 1/2 cups
Author
Prep time
10 Min
Total time
10 Min

Homemade Thousand Island Dressing

Sweet and tangy homemade Thousand Island Dressing comes together in minutes with just 7 ingredients. It's tastier, healthier, and cheaper than its store-bought counterpart!
Cook modePrevent screen from turning off

Ingredients

Instructions

  1. Combine all ingredients together in a bowl, mix well.
  2. Place in a jar or sealed container and store in the fridge.

Notes

  • Letting the dressing sit for a few hours or ideally a day or two really lets the flavors meld. It also can help to tame the onion or shallot a bit.
  • Use more sweet relish if you like a sweeter and tangier Thousand Island, use less if you don’t want it as sweet.

Nutrition Facts

Calories

134.56

Fat

13.99 g

Sat. Fat

2.18 g

Carbs

2.15 g

Fiber

0.09 g

Net carbs

2.06 g

Sugar

1.68 g

Protein

0.24 g

Sodium

218.14 mg

Cholesterol

7.84 mg

Nutritional information is approximate. Based on a serving of 2Tbsp.

Thousand Island Dressing, homemade, Sofia's Sauce, Salad Dressing
Condiment,
American
Did you make this recipe?
Tag @jennyblogsandbakes on instagram and hashtag it #jennyblogs

Homemade Evaporated Milk

Last Updated October 27, 2024

Making evaporated milk at home is very simple to do. You only need one ingredient: milk!

The evaporated milk you buy from the store is simply milk that has had 60% of its water evaporated.You can make your own by simmering it on the stove until reduced by 60%, or a bit more than half. It takes a bit of time and diligence, half hour or so of simmering, and remembering it’s there so it doesn’t boil dry. And no. of course I’ve never done either of those things, nope. But really, it’s so simple to make you can hardly call this a “recipe”!

Now, knowing how to make evaporated milk is wonderful for various occasions, but it does have its cons. The most obvious being it takes time and is easy to forget simmering on the stove. Second, even when made correctly the milk can cook onto the bottom of the pan over the simmering period and is not the most fun to clean. Because of these drawbacks, I still do buy cans of evaporated milk at times!
On the flip side, the beauty of making your own evaporated milk is that you can personalize to your tastes or dietary needs. To make the closest to store-bought evaporated milk, use whole milk. Otherwise, you can use lower fat varieties or even any plant or nut milks you prefer!

The recipe as written below will give you the equivalent of 1 can of evaporated milk, or 1 1/2 cups. Adjust the recipe depending on how much you need!

Do you want to learn how to make homemade sweetened condensed milk, also? Click here for the recipe!

This post may contain affiliate links. If you make a purchase using these links, Jennyblogs may receive a small commission, at no extra cost to you. This helps to support Jennyblogs. Where possible, links are prioritized to small businesses and ethically and responsibly made items. For further information see the privacy policy. Grazie!Recipe by Jenny


Homemade Evaporated Milk

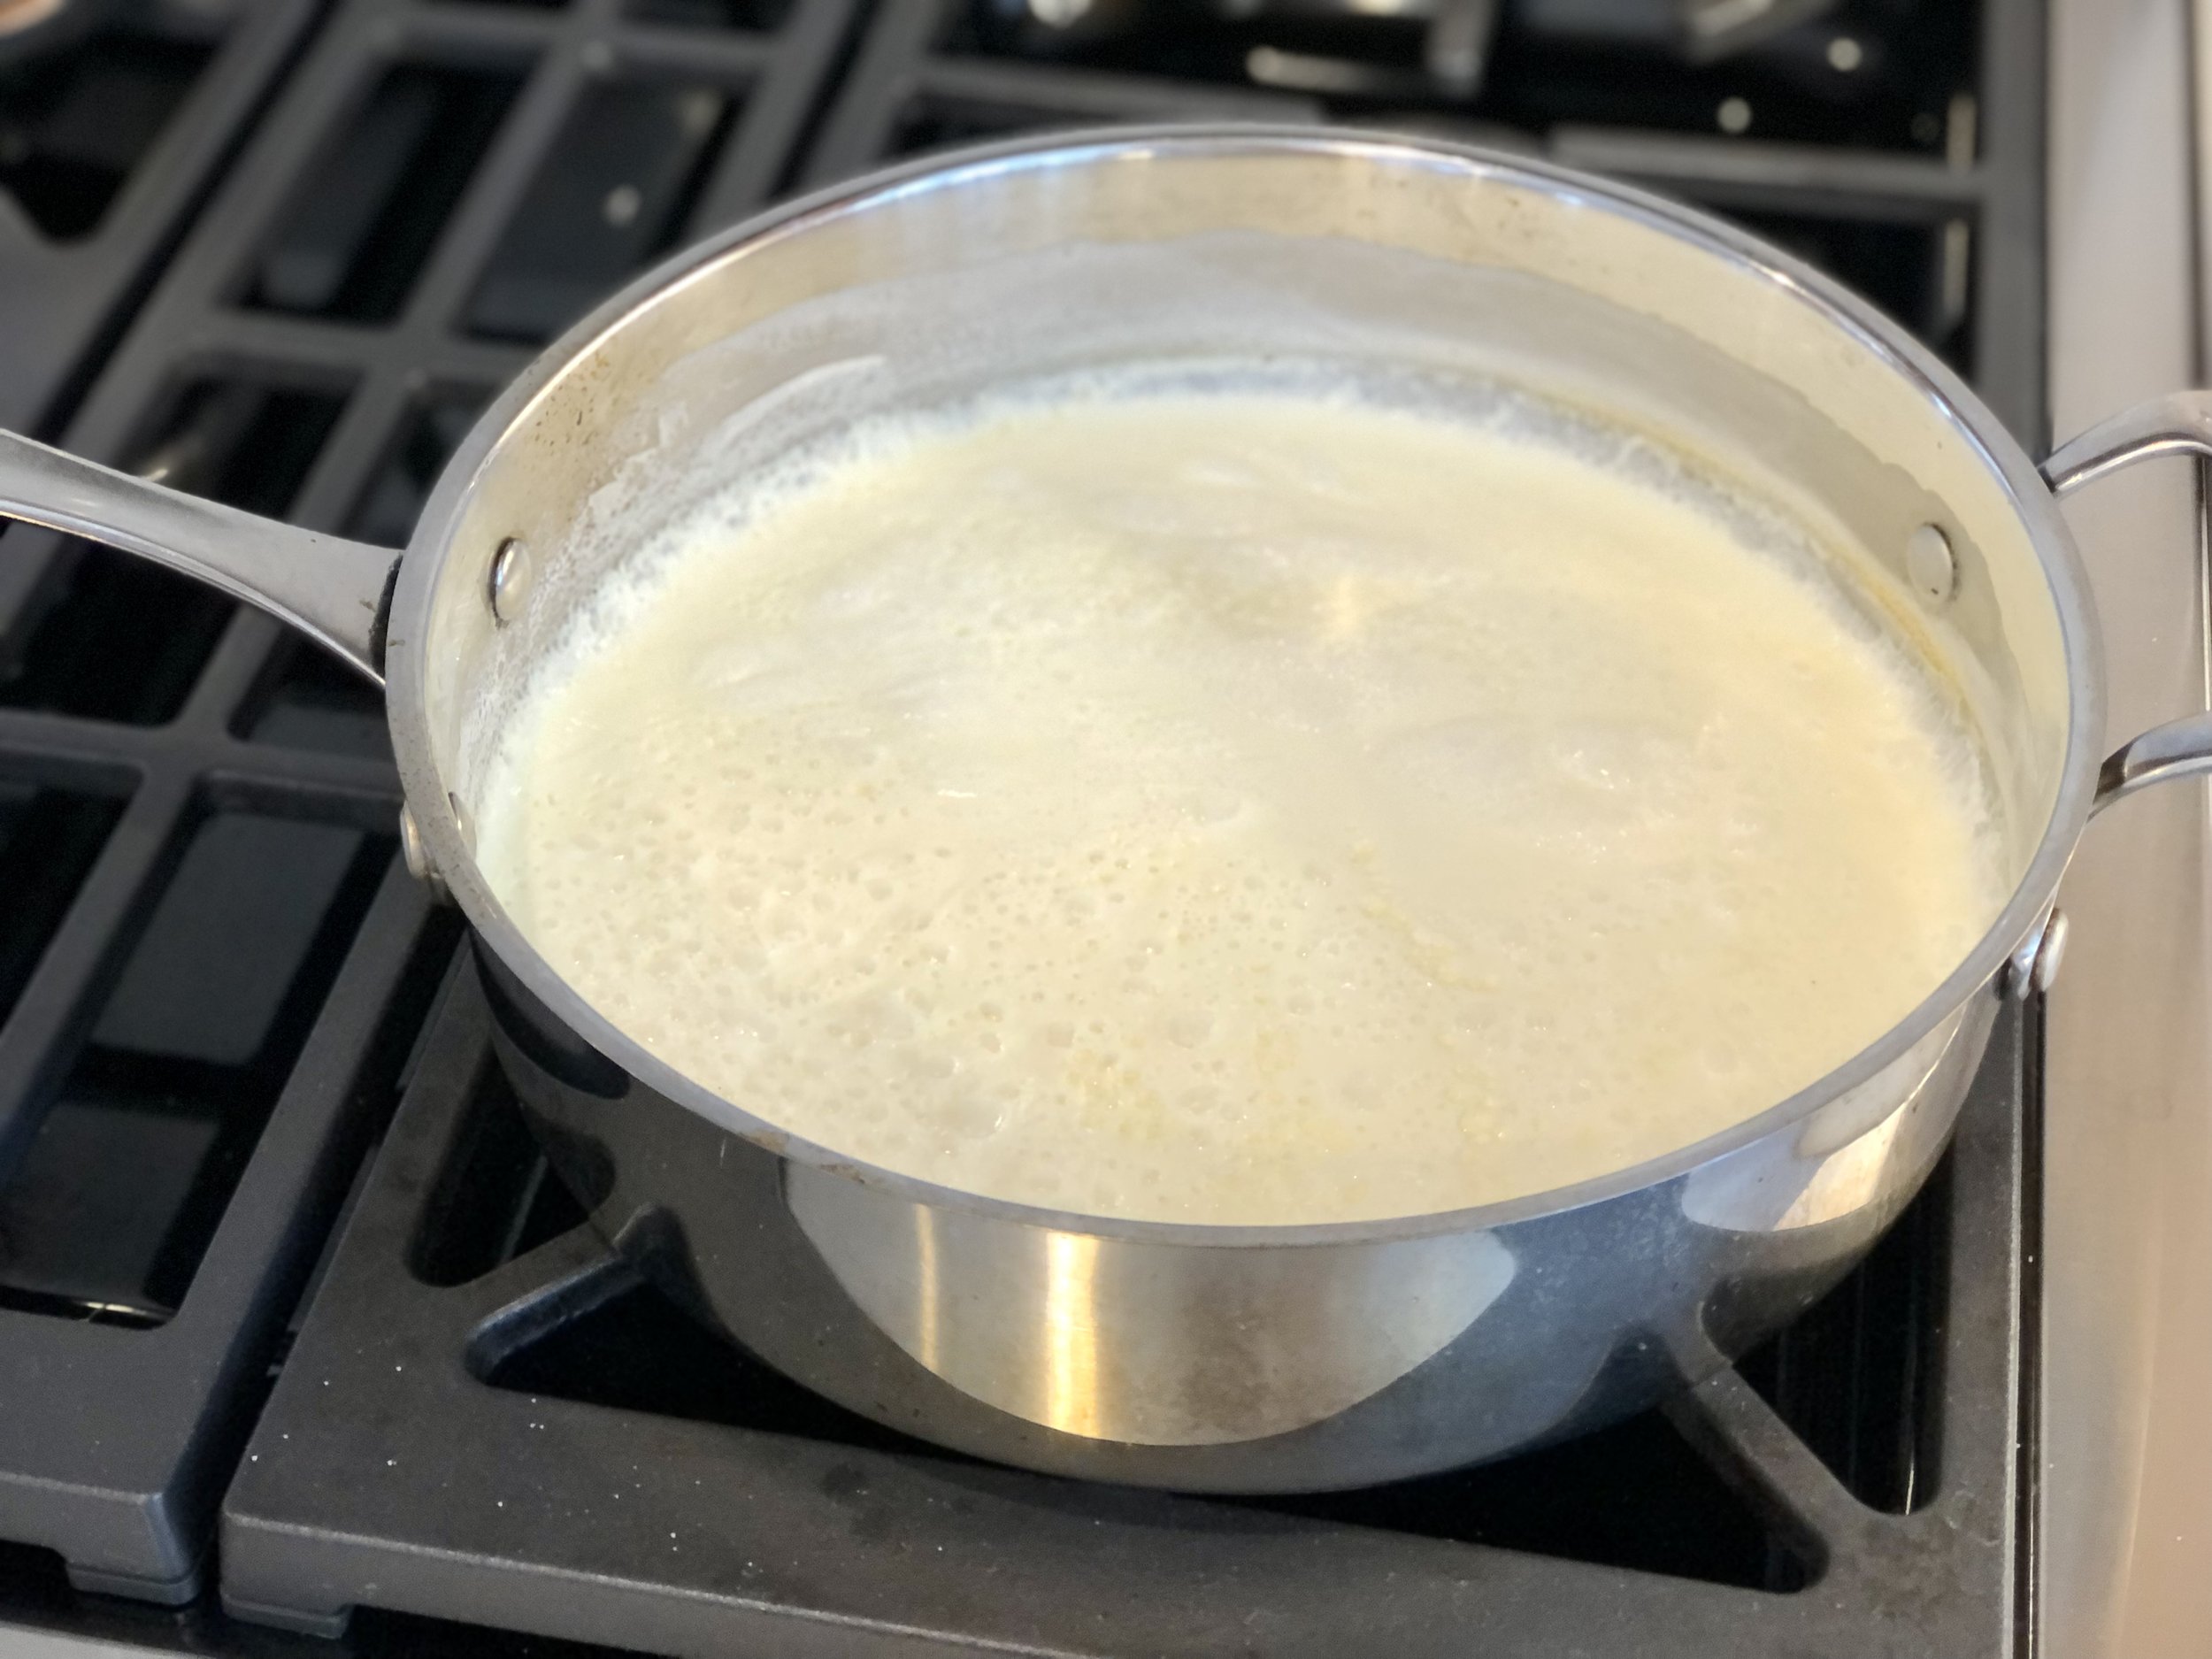
simmering milk

Makes 1 1/2 cups / 12 oz (355ml) of evaporated milk

Ingredients:

  • 3 1/4 cups / 770g milk

Directions:

  1. Place milk in wide pan over medium heat. When it starts to simmer, reduce heat to low.

  2. Simmer until reduced by just more than half, this can take anywhere from half an hour to an hour, all depending on the stove. Remove from heat and cool.

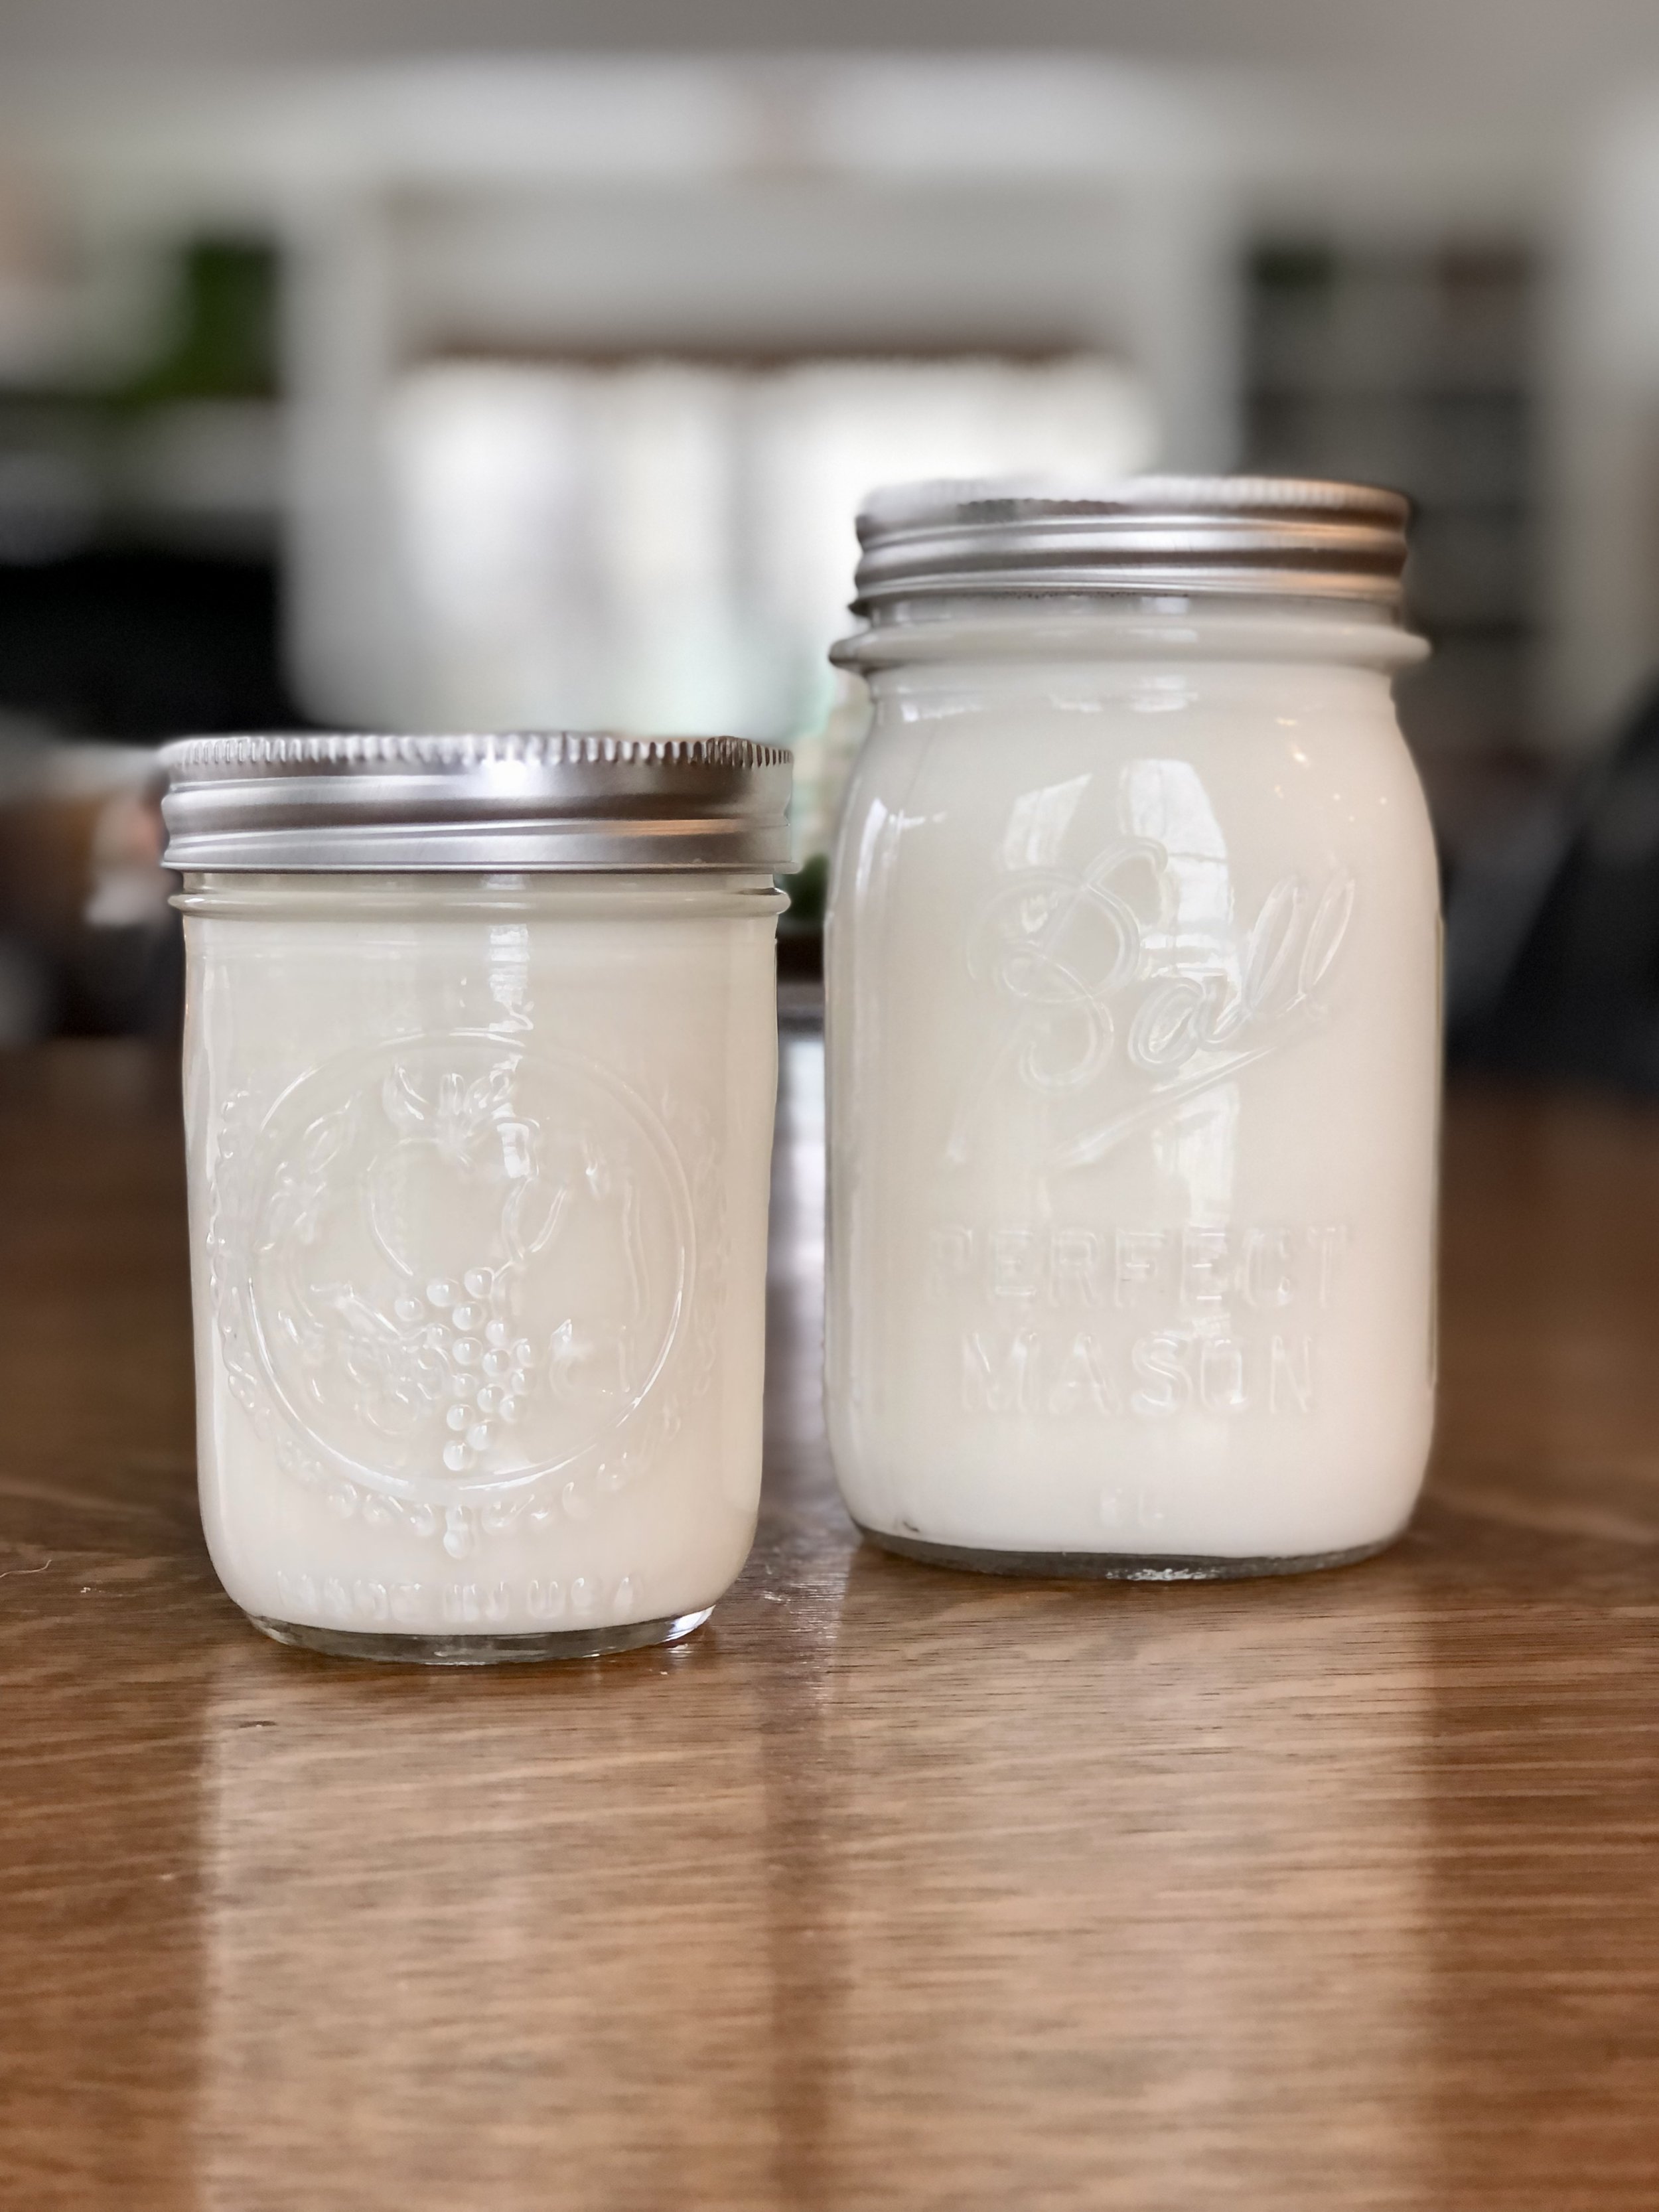
  3. Strain and store in an airtight container in the refrigerator. Best if used within 5 days.

Jenny’s Notes:

Lightly golden, evaporated milk

  • Whole milk will get you the closest to store-bought evaporated milk, but the beauty of making your own is that you can use whatever kind of milk you please, whether a lower fat milk or a plant-based milk.

  • While eyeballing may be the easiest way to judge if it the milk has reduced by half, it’s not the most exact. Instead, try dipping a toothpick in the milk before simmering and making a mark on the toothpick where the milk comes up to. That way, as the milk simmers down, you can periodically dip the toothpick back in to see how close to half it is.

  • When milk is almost ready, it will take on a very light golden color as it reduces and caramelizes.

  • Mason jars make great storage containers!

Homemade Evaporated Milk
Yield 12 oz
Author
Prep time
2 Min
Cook time
45 Min
Total time
47 Min

Homemade Evaporated Milk

Making evaporated milk at home is as easy as simmering milk on the stove!
Cook modePrevent screen from turning off

Ingredients

Instructions

  1. Place milk in wide pan over medium heat. When it starts to simmer, reduce heat to low.
  2. Simmer until reduced by just more than half, this can take anywhere from half an hour to an hour, all depending on the stove. Remove from heat and cool.
  3. Strain and store in refrigerator.

Notes

  • Whole milk will get you the closest to store-bought evaporated milk, but the beauty of making your own is that you can use whatever kind of milk you please, whether a lower fat milk or a plant-based milk.
  • While eyeballing may be the easiest way to judge if it the milk has reduced by half, it’s not the most exact. Instead, try dipping a toothpick in the milk before simmering and making a mark on the toothpick where the milk comes up to. That way, as the milk simmers down, you can periodically dip the toothpick back in to see how close to half it is.
  • When milk is almost ready, it will take on a very light golden color as it reduces and caramelizes.


Nutrition Facts

Calories

39.65

Fat

2.11 g

Sat. Fat

1.23 g

Carbs

3.09 g

Fiber

0 g

Net carbs

3.09 g

Sugar

3.18 g

Protein

2.17 g

Sodium

25.11 mg

Cholesterol

7.93 mg

Nutritional info is approximate, based on 1 serving size of 2 Tbsp.

evaporated milk, dairy free evaporated milk, unsweetened condensed milk
beverage, baking
American
Did you make this recipe?
Tag @jennyblogsandbakes on instagram and hashtag it #jennyblogs

Homemade Chocolate Pudding

Everybody needs a good, quick, chocolate pudding recipe!

This recipe is almost as fast as the instant box kind, but much healthier! Well, as healthy as chocolate pudding can be. :) All it requires is a few ingredients whisked together, heated on the stove, then left to set up in the fridge. Easy peasy!

Because it’s so quick and easy, the original name of this recipe is “Hasty Chocolate Pudding”. I use this recipe in place of instant chocolate pudding when called for in recipes, in popsicles, as a filling for cupcakes, and when anyone just wants a bowl of chocolate pudding!

This post may contain affiliate links. If you make a purchase using these links, Jennyblogs may receive a small commission, at no extra cost to you. This helps to support Jennyblogs. For further information see the privacy policy. Grazie!

Recipe adapted from All Recipes


Homemade Chocolate Pudding

Makes about 2 cups of pudding

Ingredients:

  • 1/2 cup / 100g granulated sugar

  • 1/3 cup / 33g unsweetened cocoa powder

  • 3 Tbsp / 27g corn starch

  • 2 cups / 474g milk

  • 2 tsp / 10g vanilla extract

Directions:

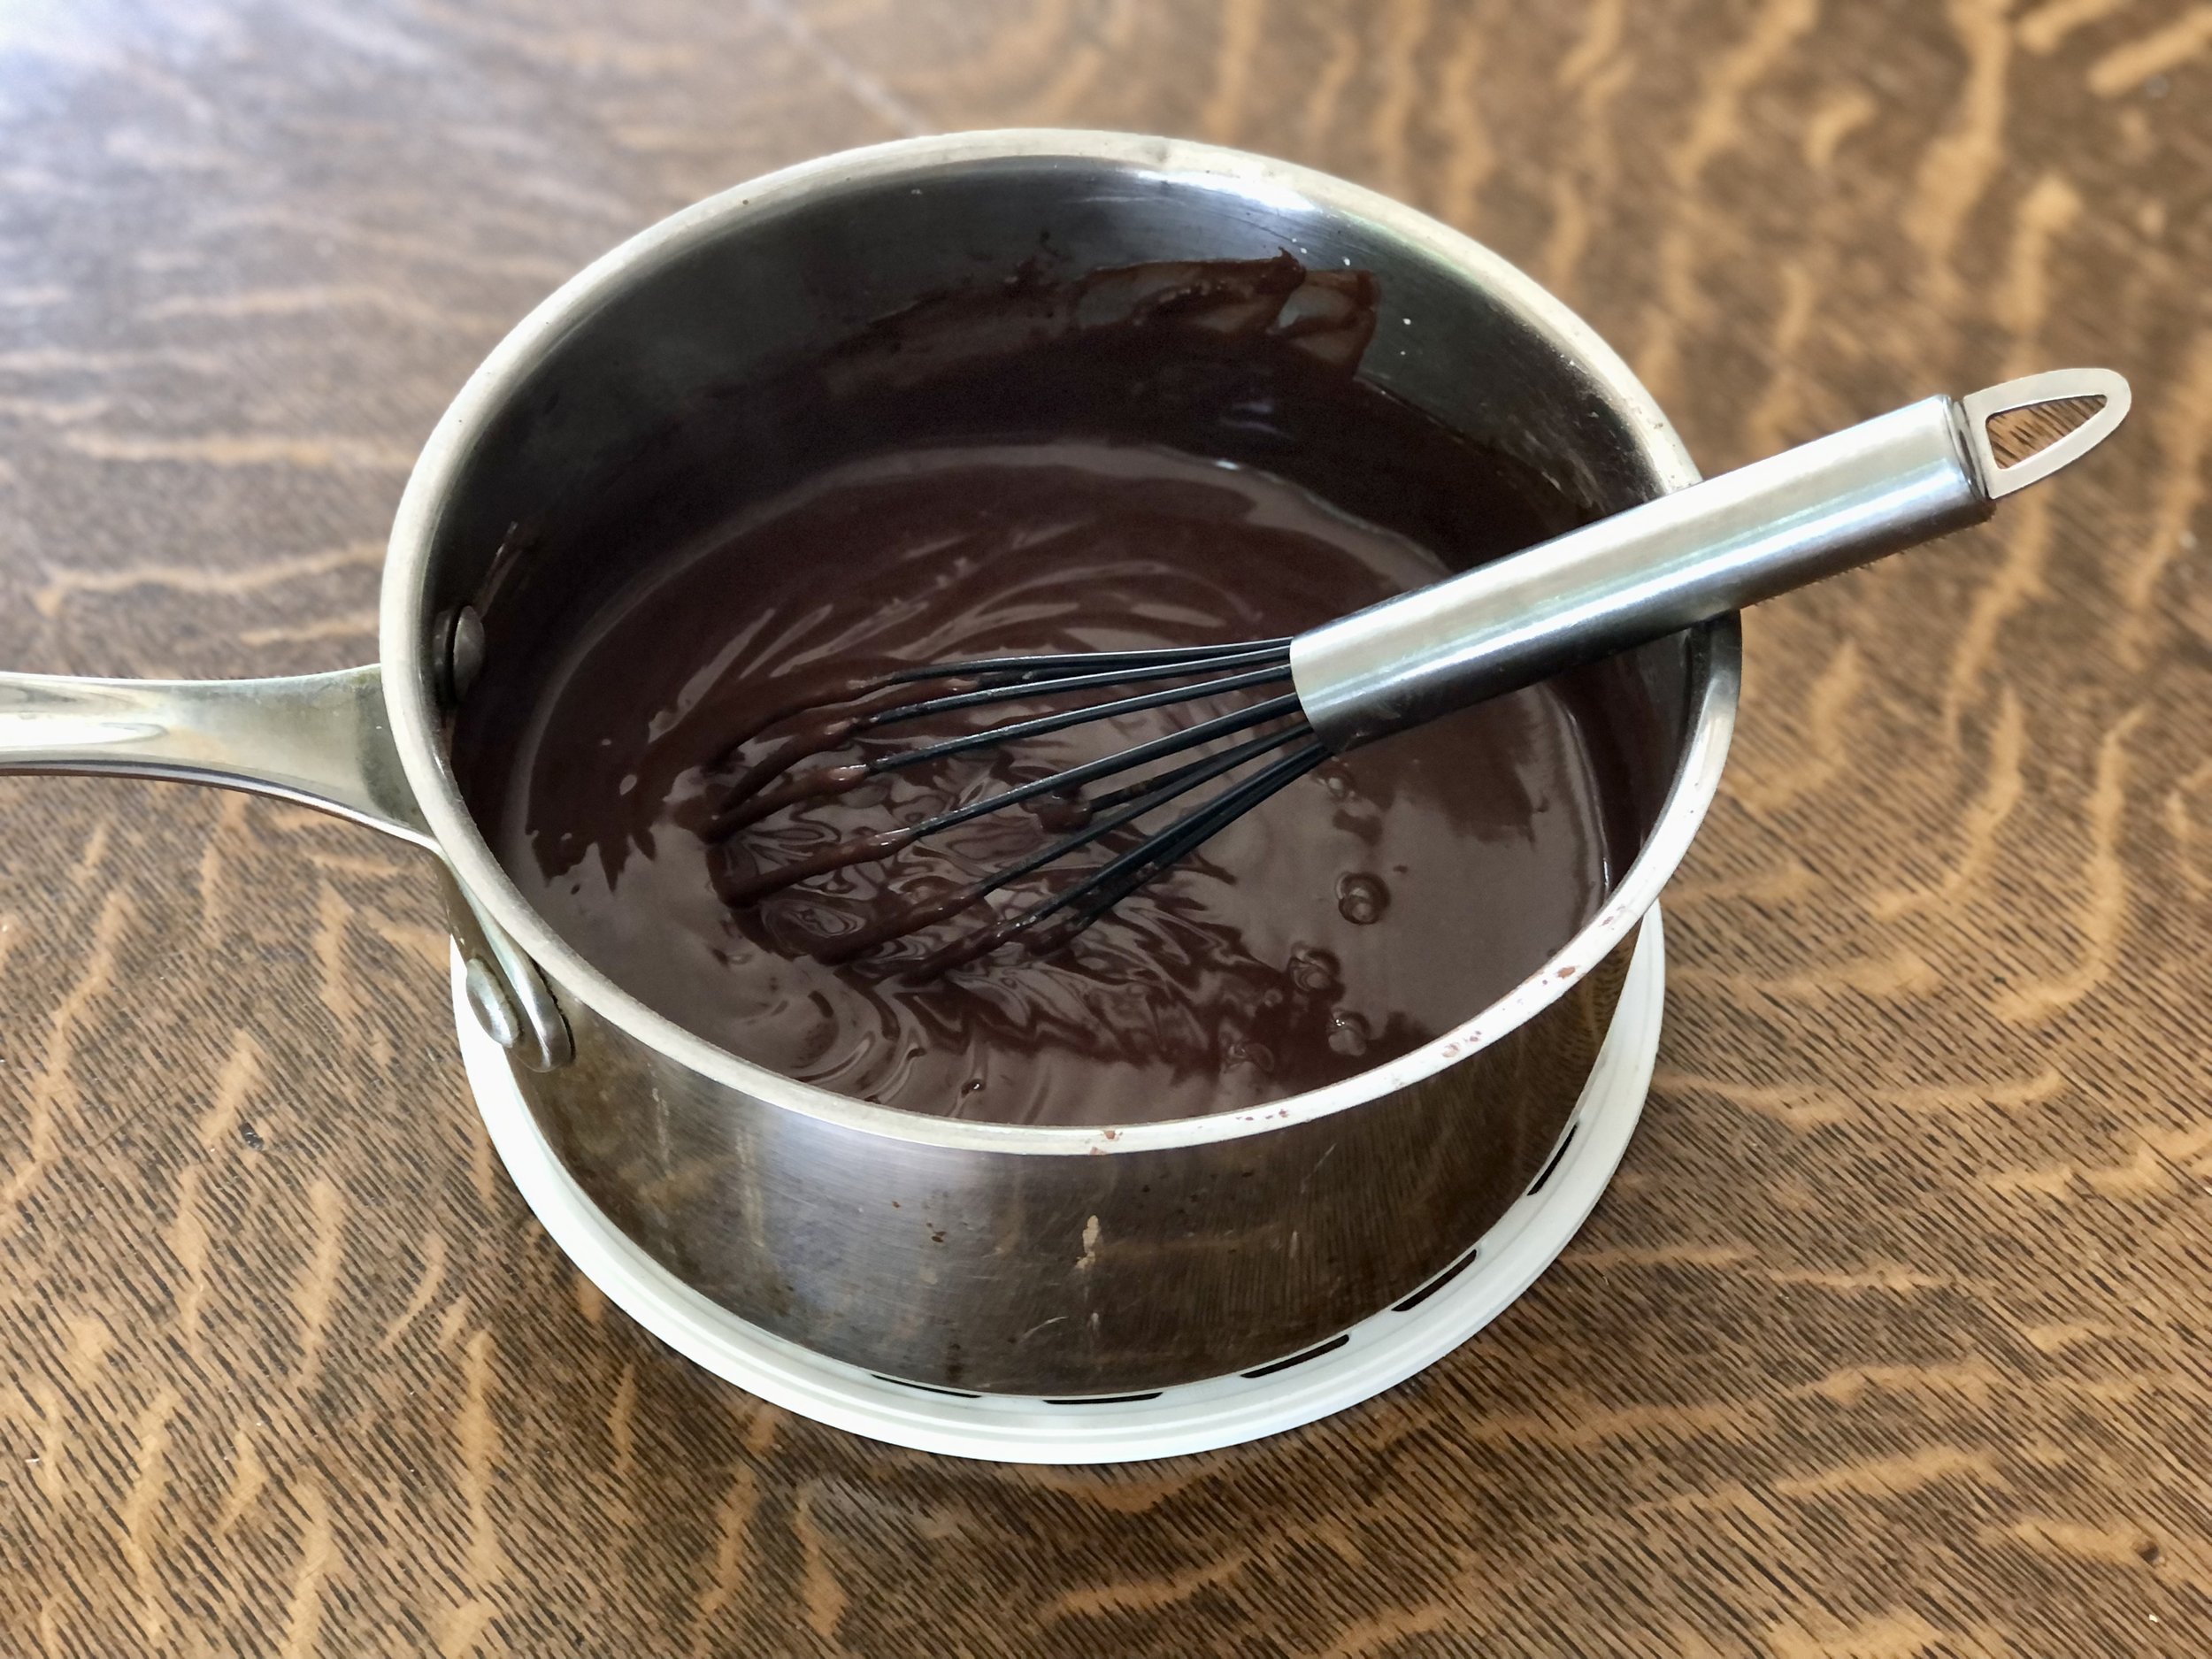
  1. In a medium pot, whisk together sugar, cocoa powder, and corn starch until no lumps remain.
  2. Slowly add in milk, whisking well to get a smooth mixture.
  3. Place mixture over medium heat and whisk constantly, until mixture thickens and begins to simmer.

  4. Remove from heat and stir in vanilla extract

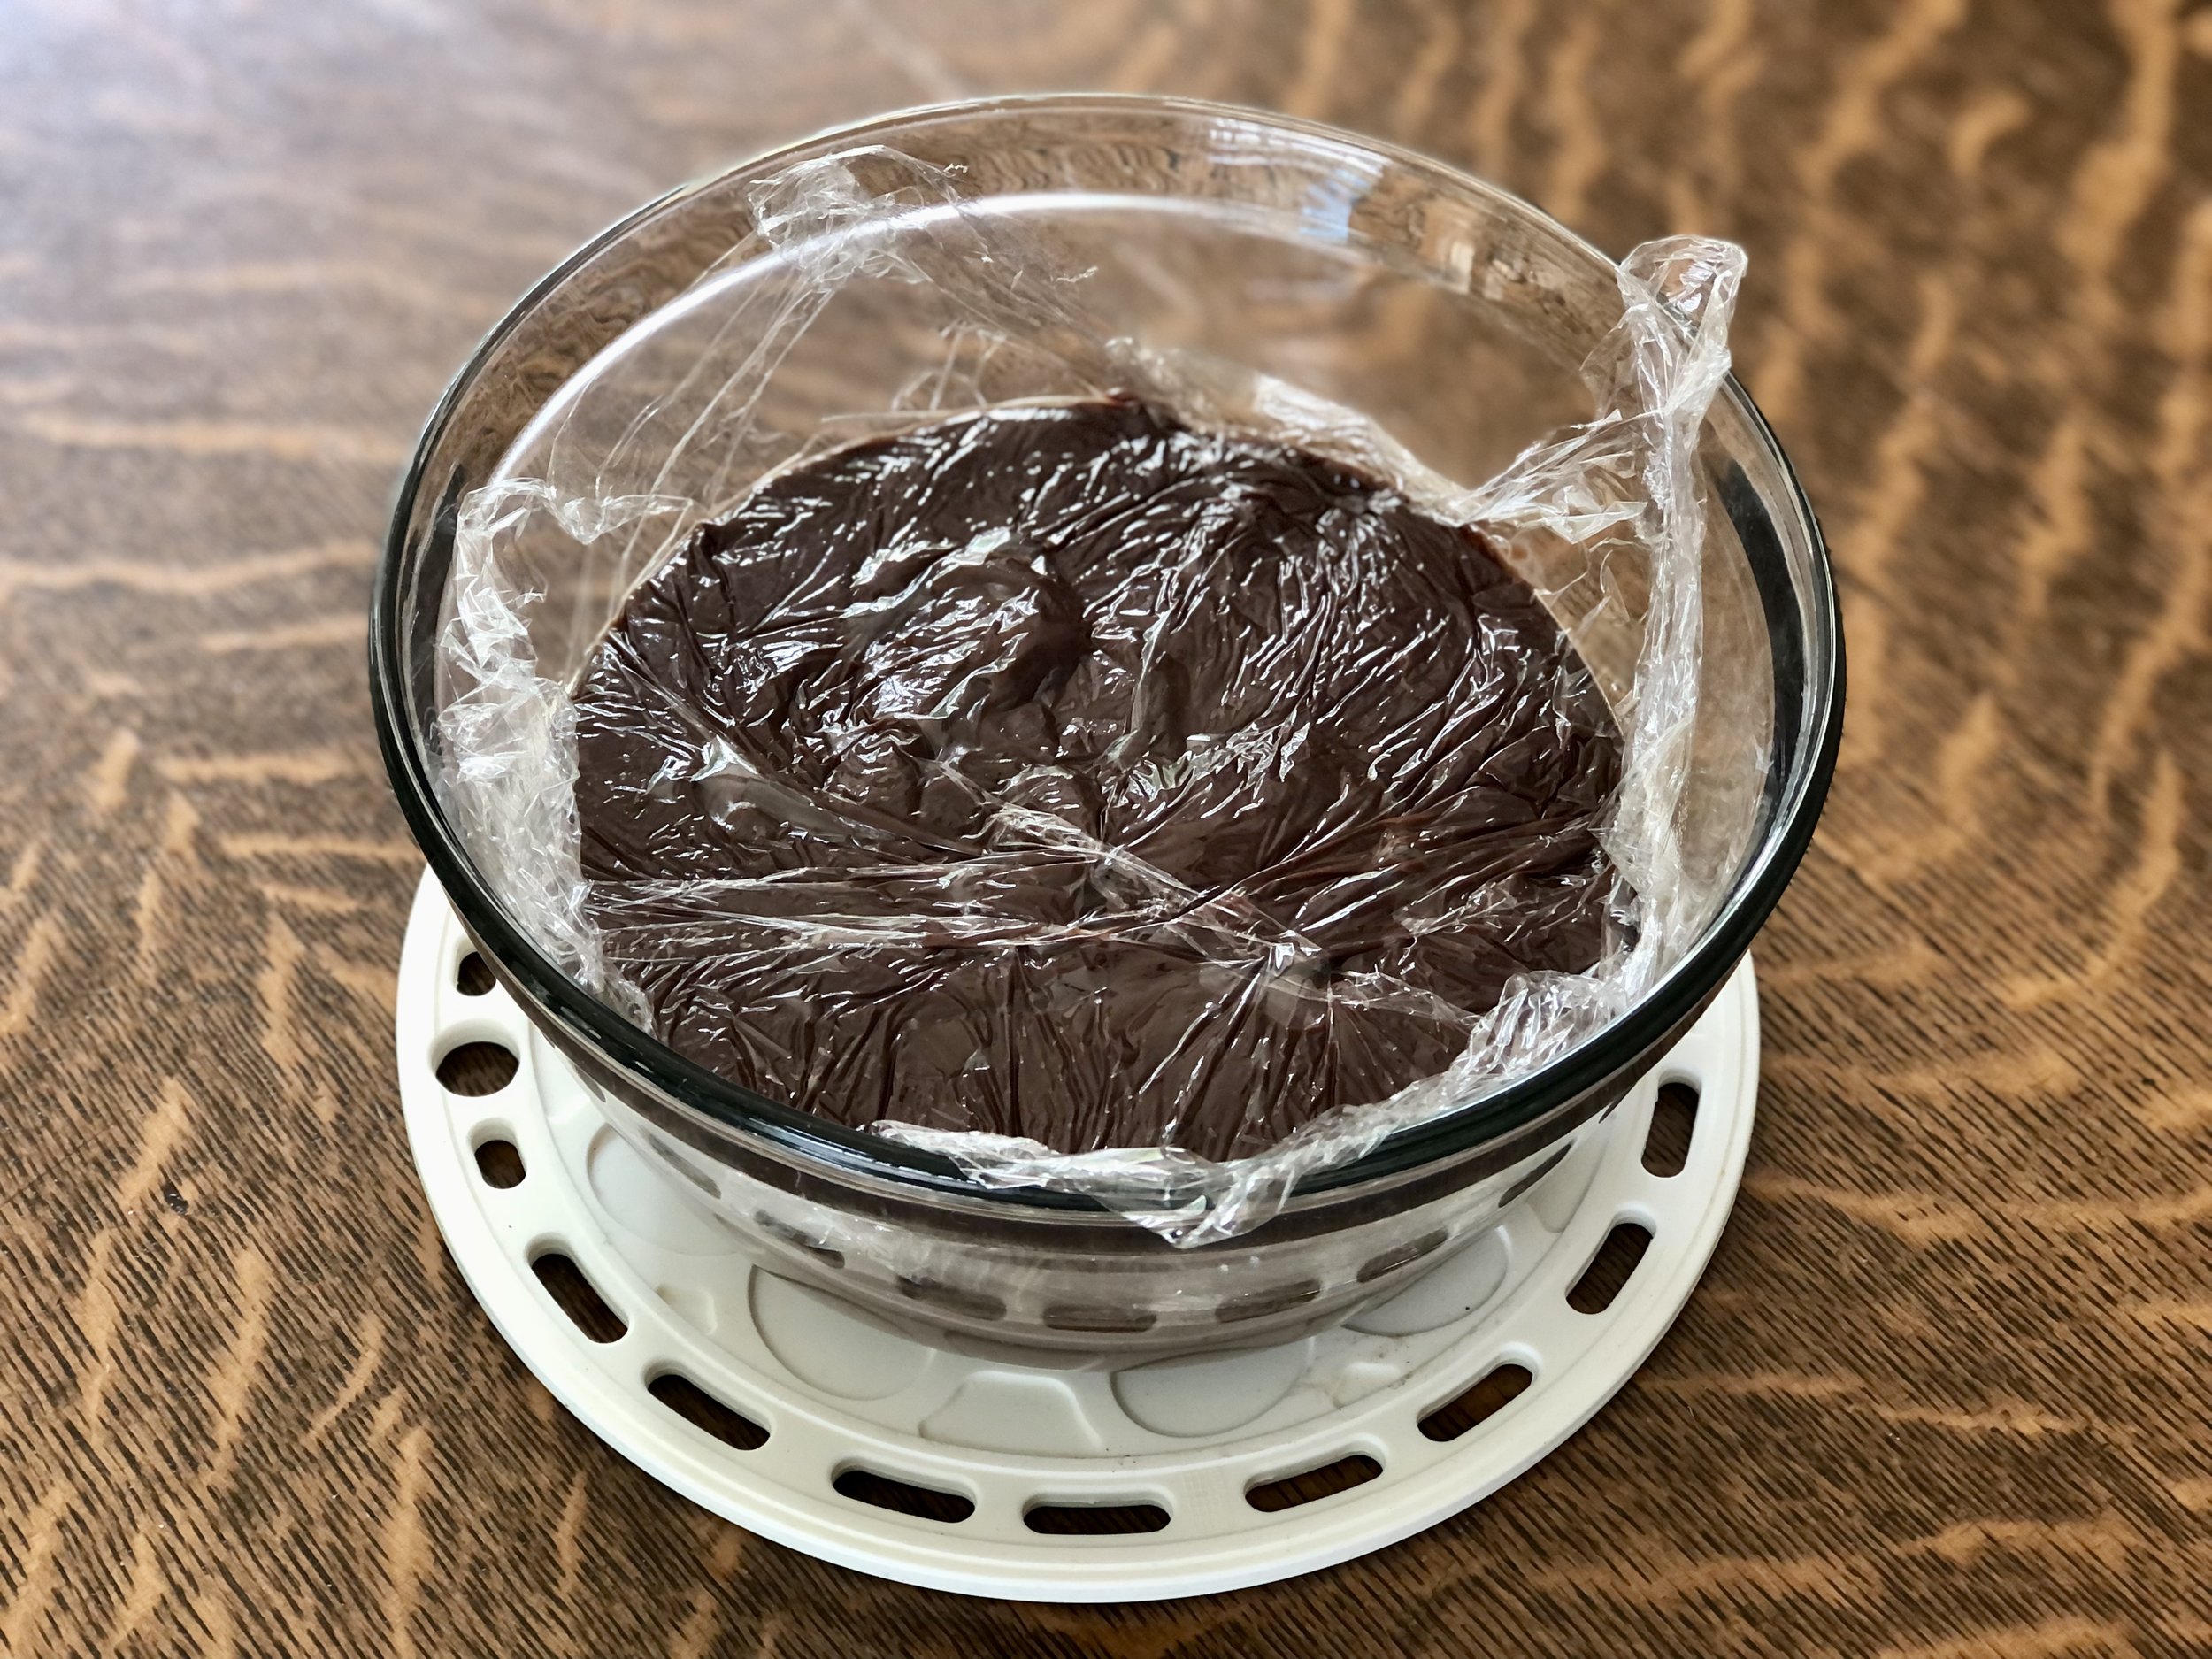
  5. Transfer pudding to a heat-proof bowl, and allow to cool slightly, whisking now and then to avoid the “skin” forming. When pudding is cooler, place a piece of plastic wrap directly onto pudding.

  6. Refrigerate until set.

Jenny’s Notes:

  • “heat-proof” just means a bowl that is safe to handle hot food; one that won’t break (certain glass bowls), or won’t leak dangerous chemicals into your food (plastic), or in any other way form a peril if you pour hot liquid into it. :)

  • Placing the plastic wrap directly onto the pudding prevents that “skin” from forming as the pudding cools. Because I don’t enjoy using plastic in general and especially when coming into contact with hot food, I try to wait for the pudding to cool before placing it on. This also ensures the plastic wrap won’t melt, as it could if you put it on immediately after taking it off the heat.

The plastic wrap placed directly on the pudding to prevent a skin from forming

chocolate pudding, chocolate cream, no bake
dessert
American
Yield: 4
Author:
Homemade Chocolate Pudding

Homemade Chocolate Pudding

Chocolate pudding can be made at home with just 5 ingredients and a stovetop. It couldn't be easier and it's all natural!
Prep time: 5 MinCook time: 10 MinInactive time: 1 HourTotal time: 1 H & 15 M

Ingredients

Instructions

  1. In a medium pot, whisk together sugar, cocoa powder, and corn starch until no lumps remain.
  2. Slowly add in milk, whisking well to get a smooth mixture.
  3. Place mixture over medium heat and whisk constantly, until mixture thickens and begins to simmer.
  4. Remove from heat and stir in vanilla extract
  5. Transfer pudding to a heat-proof bowl, and allow to cool slightly, whisking now and then to avoid the “skin” forming. When pudding is cooler, place a piece of plastic wrap directly onto pudding.
  6. Refrigerate until set.

Notes

  • “heat-proof” just means a bowl that is safe to handle hot food; one that won’t break (certain glass bowls), or won’t leak dangerous chemicals into your food (plastic), or in any other way form a peril if you pour hot liquid into it. :)
  • Placing the plastic wrap directly onto the pudding prevents that “skin” from forming as the pudding cools. Because I don’t enjoy using plastic in general and especially when coming into contact with hot food, I try to wait for the pudding to cool before placing it on. This also ensures the plastic wrap won’t melt, as it could if you put it on immediately after taking it off the heat.


Nutrition Facts

Calories

214.7

Fat

4.96 g

Sat. Fat

2.85 g

Carbs

40.48 g

Fiber

2.71 g

Net carbs

37.79 g

Sugar

31.21 g

Protein

5.42 g

Sodium

48.84 mg

Cholesterol

14.64 mg

Nutritional information is approximate; based on four 1/2 cup servings.

Did you make this recipe?
Tag @jennyblogsandbakes on instagram and hashtag it #jennyblogs

Homemade Italian Dressing

Last Updated September 6, 2024

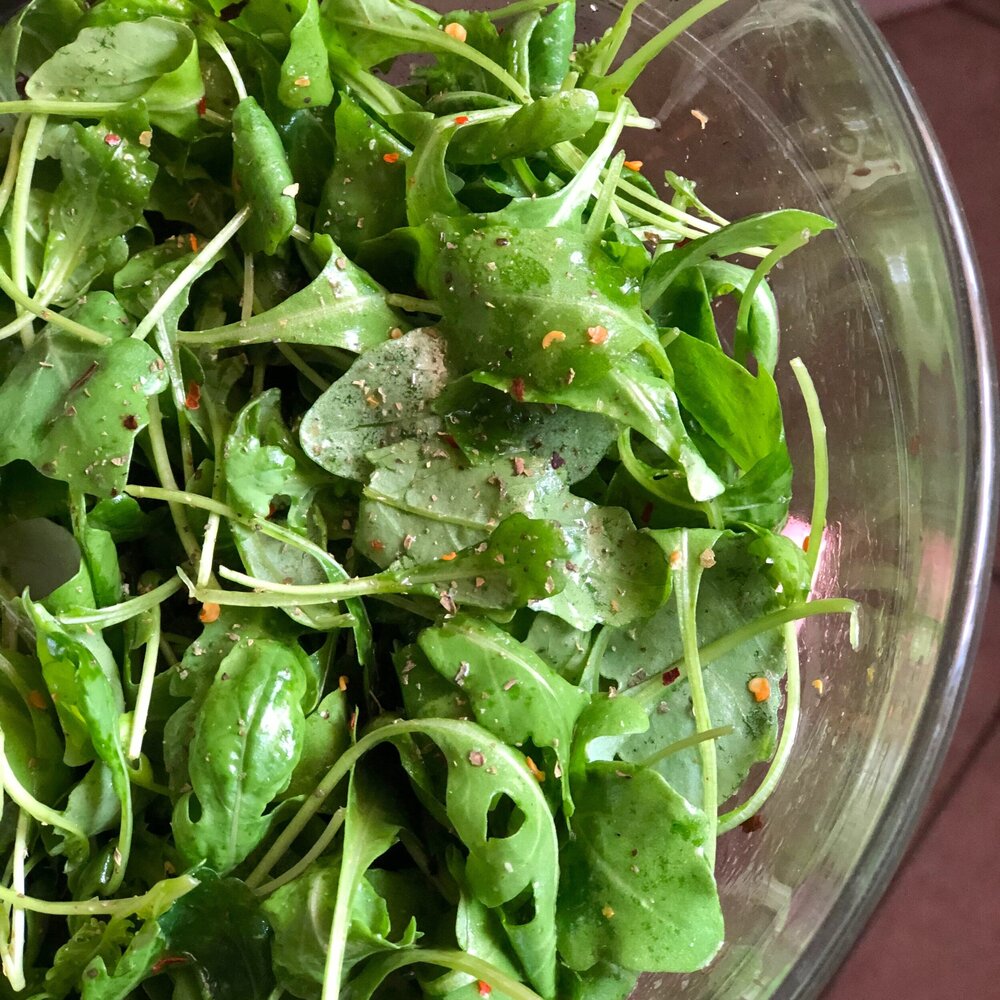
Simple goodness: Arugula tossed with Homemade Italian Dressing

Simple goodness: Arugula tossed with Homemade Italian Dressing

Have you ever thought to make homemade Italian dressing? I certainly hadn’t, until this summer, as it’s usually something I buy. Why bother making it homemade when it’s cheap and I really don’t use it that often? Except for pasta salad, and I’ve been allll about the pasta salads this summer.

First I wanted the classic creamy pasta salad (dressing made with mayo and mustard), then the Italian dressing pasta salad, then I started going off and making up my own, like this Greek Pasta Salad I posted a couple weeks ago. But you know what’s ironic? You can’t find Italian dressing in Italy. Italian dressing is very American. Italians dress their salads with a quality olive oil, salt and pepper, generally speaking. One time I was in Switzerland grocery shopping and saw American dressing. I’m American and had no idea what it was. It was creamy, maybe like Ranch? Haha. I was amused. I wonder if that’s how Italians feel about Italian dressing.

Being in Italy with no Italian dressing ready made at the store, I figured I would see if I could find a homemade recipe. Surreeee there are plenty on the interwebs! And easy enough ingredients, you probably have them all on hand, as I did. Olive oil, vinegar, some spices…I looked at several different recipes, looked up the ingredients for “classic” Kraft Italian dressing, and combined a few of them to create a bit of my own version. It’s tangy and got the job done! Success. Made a delicious pasta salad and had a bit leftover even to dress some regular ol’ salads.

It probably won’t taste exactly like the store bought version, but maybe better if you’re not a die-hard Kraft fan? Some of the ingredients listed on the Kraft Zesty Italian dressing are a bit vague, like “spice,” which can be hard to replicate, but the bright side is that you can control the quality and freshness of ingredients going into your dressing. Better yet, no preservatives at all!

Great for salads, pasta salad, marinades for all types of proteins!

This post may contain affiliate links. If you make a purchase using these links, Jennyblogs may receive a small commission, at no extra cost to you. This helps to support Jennyblogs. For further information see the privacy policy. Grazie!

Recipe adapted from Kraft, Five Heart Home, and the Whole Cook


Homemade Italian Dressing

Makes about 1 cup dressing

I clearly need to figure out how to attractively photograph liquids…and find my whisk. (Recently moved apartments.) But hey, forks work, too!

I clearly need to figure out how to attractively photograph liquids…and find my whisk. (Recently moved apartments.) But hey, forks work, too!

Ingredients:

  • 3/4 cup / 168g extra virgin olive oil

  • 1/4 cup / 60g red or white wine vinegar

  • 1 tsp / 5g lemon juice

  • 1 tsp / 7g honey

  • 3/4 tsp dried basil

  • 1/2 tsp dried oregano

  • 1/2 tsp garlic powder

  • 1/2 tsp salt

  • 1/4 tsp onion powder

  • 1/4 tsp crushed red pepper

  • 1/4 tsp black pepper

  • 1/4 cup / 25g grated parmesan cheese, optional

Directions:

  1. Whisk or shake all ingredients together; taste and adjust seasonings as desired.

  2. Store in fridge, shake well before using.

Jenny’s Notes:

  • This is one of those very versatile and very easily adjustable recipes, no one says you have to follow this one to a T! If you don’t have red or white wine vinegar, use what you have on hand. Even the olive oil can be switched out for what you have. While olive oil will give you the heartiest flavor, technically Kraft uses a bunch of rather junkier oils that don’t add much to the flavor profile (soybean, canola), but oils do tone the vinegar in dressings/vinaigrettes. The spices can be upped if you want a very zesty dressing, or you can add another teaspoon of honey to help tone it down a bit.

  • You could also finely dice red bell pepper to add to this instead of the crushed red pepper, but that seemed like more work than I wanted to put in for this “whip up” type recipe. Plus, I like the touch of added spice, even if not original.

Homemade Italian Dressing
Yield 8
Author
Prep time
10 Min
Total time
10 Min

Homemade Italian Dressing

Homemade zesty Italian dressing is simple, uses pantry ingredients, and doesn't have any preservatives like store-bought versions.
Cook modePrevent screen from turning off

Ingredients

Instructions

  1. Whisk or shake all ingredients together; taste and adjust seasonings as desired.
  2. Store in fridge, shake well before using.

Notes

  • This is one of those very versatile and very easily adjustable recipes, no one says you have to follow this one to a T! If you don’t have red or white wine vinegar, use what you have on hand. Even the olive oil can be switched out for what you have. While olive oil will give you the heartiest flavor, technically Kraft uses a bunch of rather junkier oils that don’t add much to the flavor profile (soybean, canola), but oils do tone the vinegar in dressings/vinaigrettes. The spices can be upped if you want a very zesty dressing, or you can add another teaspoon of honey to help tone it down a bit.
  • You could also finely dice red bell pepper to add to this instead of the crushed red pepper, but that seemed like more work than I wanted to put in for this “whip up” type recipe. Plus, I like the touch of added spice, even if not original.

Nutrition Facts

Calories

204.62

Fat

21.89 g

Sat. Fat

3.39 g

Carbs

1.58 g

Fiber

0.14 g

Net carbs

1.44 g

Sugar

0.75 g

Protein

0.98 g

Sodium

202.78 mg

Cholesterol

2.69 mg

Nutritional information is approximate. Based on 8 servings of 2 Tbsp each and includes parmesan cheese.

Homemade Italian dressing recipe, copycat Zesty Kraft Dressing, Greek dressing
Condiment
American
Did you make this recipe?
Tag @jennyblogsandbakes on instagram and hashtag it #jennyblogs

Strawberry Nutella Coconut Milkshake

Last Updated August 24, 2024

This post may contain affiliate links. If you make a purchase using these links, Jennyblogs may receive a small commission, at no extra cost to you. This helps to support Jennyblogs. Where possible, links are prioritized to small businesses and ethically and responsibly made items. For further information see the privacy policy. Grazie!

IMG_0952.jpg

Buon Ferragosto!

Also known as the day where everything is closed and I feel slightly trapped. Hmmm the gelato place is closed so I’ll just run to the store and pick up some…oh wait, all the grocery stores are closed. Ok, well maybe I’ll go browse some shops, oh wait, all closed. I’ll go walk around in the center for a bit…nope, hardly any buses running today to get to the center. Even if I could find a bus, all the places I could buy a ticket are closed. Ok, so I’ll walk to the gym to work out and enjoy some air conditioning. Ah, closed. So, I hunker down and eat whatever food is in the house, try to stay cool. Actually we’ve come to a bit of a cool spell, today only has a high of 90°F. I’ll take it!

I actually planned ahead this year and went grocery shopping last night. I got fruit and veggies for lunch and dinner today, but why didn’t I get better snackies? But then I remembered that I have a good stash of gelato in the freezer, and made me think of this delectable milkshake I made a few weeks ago.

So with all this time on my hands, I shall be milkshaking and sharing this milkshake with you! What’s so great about this milkshake?

It’s a Strawberry Nutella Coconut Milkshake. That’s such a long name, and kinda going against my own rule of not listing every ingredient in the title, but otherwise I didn’t quite know how to get the dream across, ya know?

How about this: Strawnutelloco Milkshake. Stranucoco Milkshake. Conuterry. Strawconutella. Regardless, this milkshake tastes like a chocolate covered strawberry rolled in coconut with a hint of hazelnut.

I have a confession to make. I originally made this milkshake to try and hide this not-awesome gelato I bought. There was a sale on a brand I had never tried before at the grocery store, and they had coconut and I love coconut but it just did not end well. Icy and so much coconut it was chewy. I didn’t want to waste it, but I also didn’t necessarily want to force myself to eat gelato?

Enter the milkshake idea. I had strawberries, Nutella, and milk, and this beautiful combo was born. The copious amounts of coconut from the gelato still rendered my milkshake a bit chewy, but if you have a GOOD brand of coconut ice cream, or even vanilla ice cream with a bit of flaked coconut and maybe a drop of coconut extract or two thrown in, you’ve got yourself the perfect summer day’s treat.

So thank you, gelato brand that shall remain unnamed, for the not delicious gelato that prompted me to create a delicious milkshake.


Strawberry Nutella Coconut Milkshake

Serves 2

IMG_0947.jpg

Ingredients:

  • 2 cups coconut ice cream, slightly softened

  • 1/2 cup milk, any variety

  • 1/2 cup hulled strawberries, fresh or frozen

  • 2 heaping Tbsp Nutella

  • Dash of vanilla extract, optional

  • Whipped cream, optional

Directions:

  1. Add all ingredients except whipped cream to a blender and blend until smooth. Check consistency and add more milk if desired.

  2. Spoon into 2 glasses and top with whipped cream. Serve immediately.

Jenny’s Notes:

  • Don’t have coconut ice cream but still want that coconut taste? Substitute chocolate or vanilla ice cream and add a bit of flaked coconut and a drop or two of coconut extract.

  • For creamier shakes, use whole milk.

  • For thinner shakes you can sip, add more milk. For thicker, spoonable shakes, add less milk. Some blenders don’t blend thicker shakes well, so if yours is having problems, either wait a minute or two for the ice cream to soften a bit more before continuing to blend, or add a touch more milk.

  • To make fresh whipped cream, whip about 1/4 cup / 60g heavy whipping cream with 1 Tbsp / 14g sugar in the bowl of a stand mixer fitted with whisk attachment, or with a handheld mixer. This makes about 1/2 cup fresh whipped cream. Store in fridge, best if used within a few days.

Strawberry Nutella Coconut Milkshake
Yield 2 Servings
Author
Prep time
5 Min
Total time
5 Min

Strawberry Nutella Coconut Milkshake

Thick and creamy milkshake with coconut ice cream, Nutella, strawberries and whipped cream on top.
Cook modePrevent screen from turning off

Ingredients

Instructions

  1. Add all ingredients except whipped cream to a blender and blend until smooth. Check consistency and add more milk if desired.
  2. Spoon into 2 glasses and top with whipped cream. Serve immediately.

Notes

  • Don’t have coconut ice cream but still want that coconut taste? Substitute chocolate or vanilla ice cream and add a bit of flaked coconut and a drop or two of coconut extract.
  • For creamier shakes, use whole milk.
  • For thinner shakes you can sip, add more milk. For thicker, spoonable shakes, add less milk. Some blenders don’t blend thicker shakes well, so if yours is having problems, either wait a minute or two for the ice cream to soften a bit more before continuing to blend, or add a touch more milk.
  • To make fresh whipped cream, whip about 1/4 cup / 60g heavy whipping cream with 1 Tbsp / 14g sugar in the bowl of a stand mixer fitted with whisk attachment, or with a handheld mixer. This makes about 1/2 cup fresh whipped cream. Store in fridge, best if used within a few days.

Nutrition Facts

Calories

440.85

Fat

23.21 g

Sat. Fat

19.31 g

Carbs

54.51 g

Fiber

3.87 g

Net carbs

50.64 g

Sugar

40.58 g

Protein

6.95 g

Sodium

49.23 mg

Cholesterol

9.42 mg

Nutritional information is approximate and based on 2 servings and includes whipped cream.

milkshake, milk, strawberry, Nutella, coconut, ice cream, vanilla, fresh whipped cream, dessert, summer
Dessert, Beverage
American
Did you make this recipe?
Tag @jennyblogsandbakes on instagram and hashtag it #jennyblogs
IMG_0943.jpg

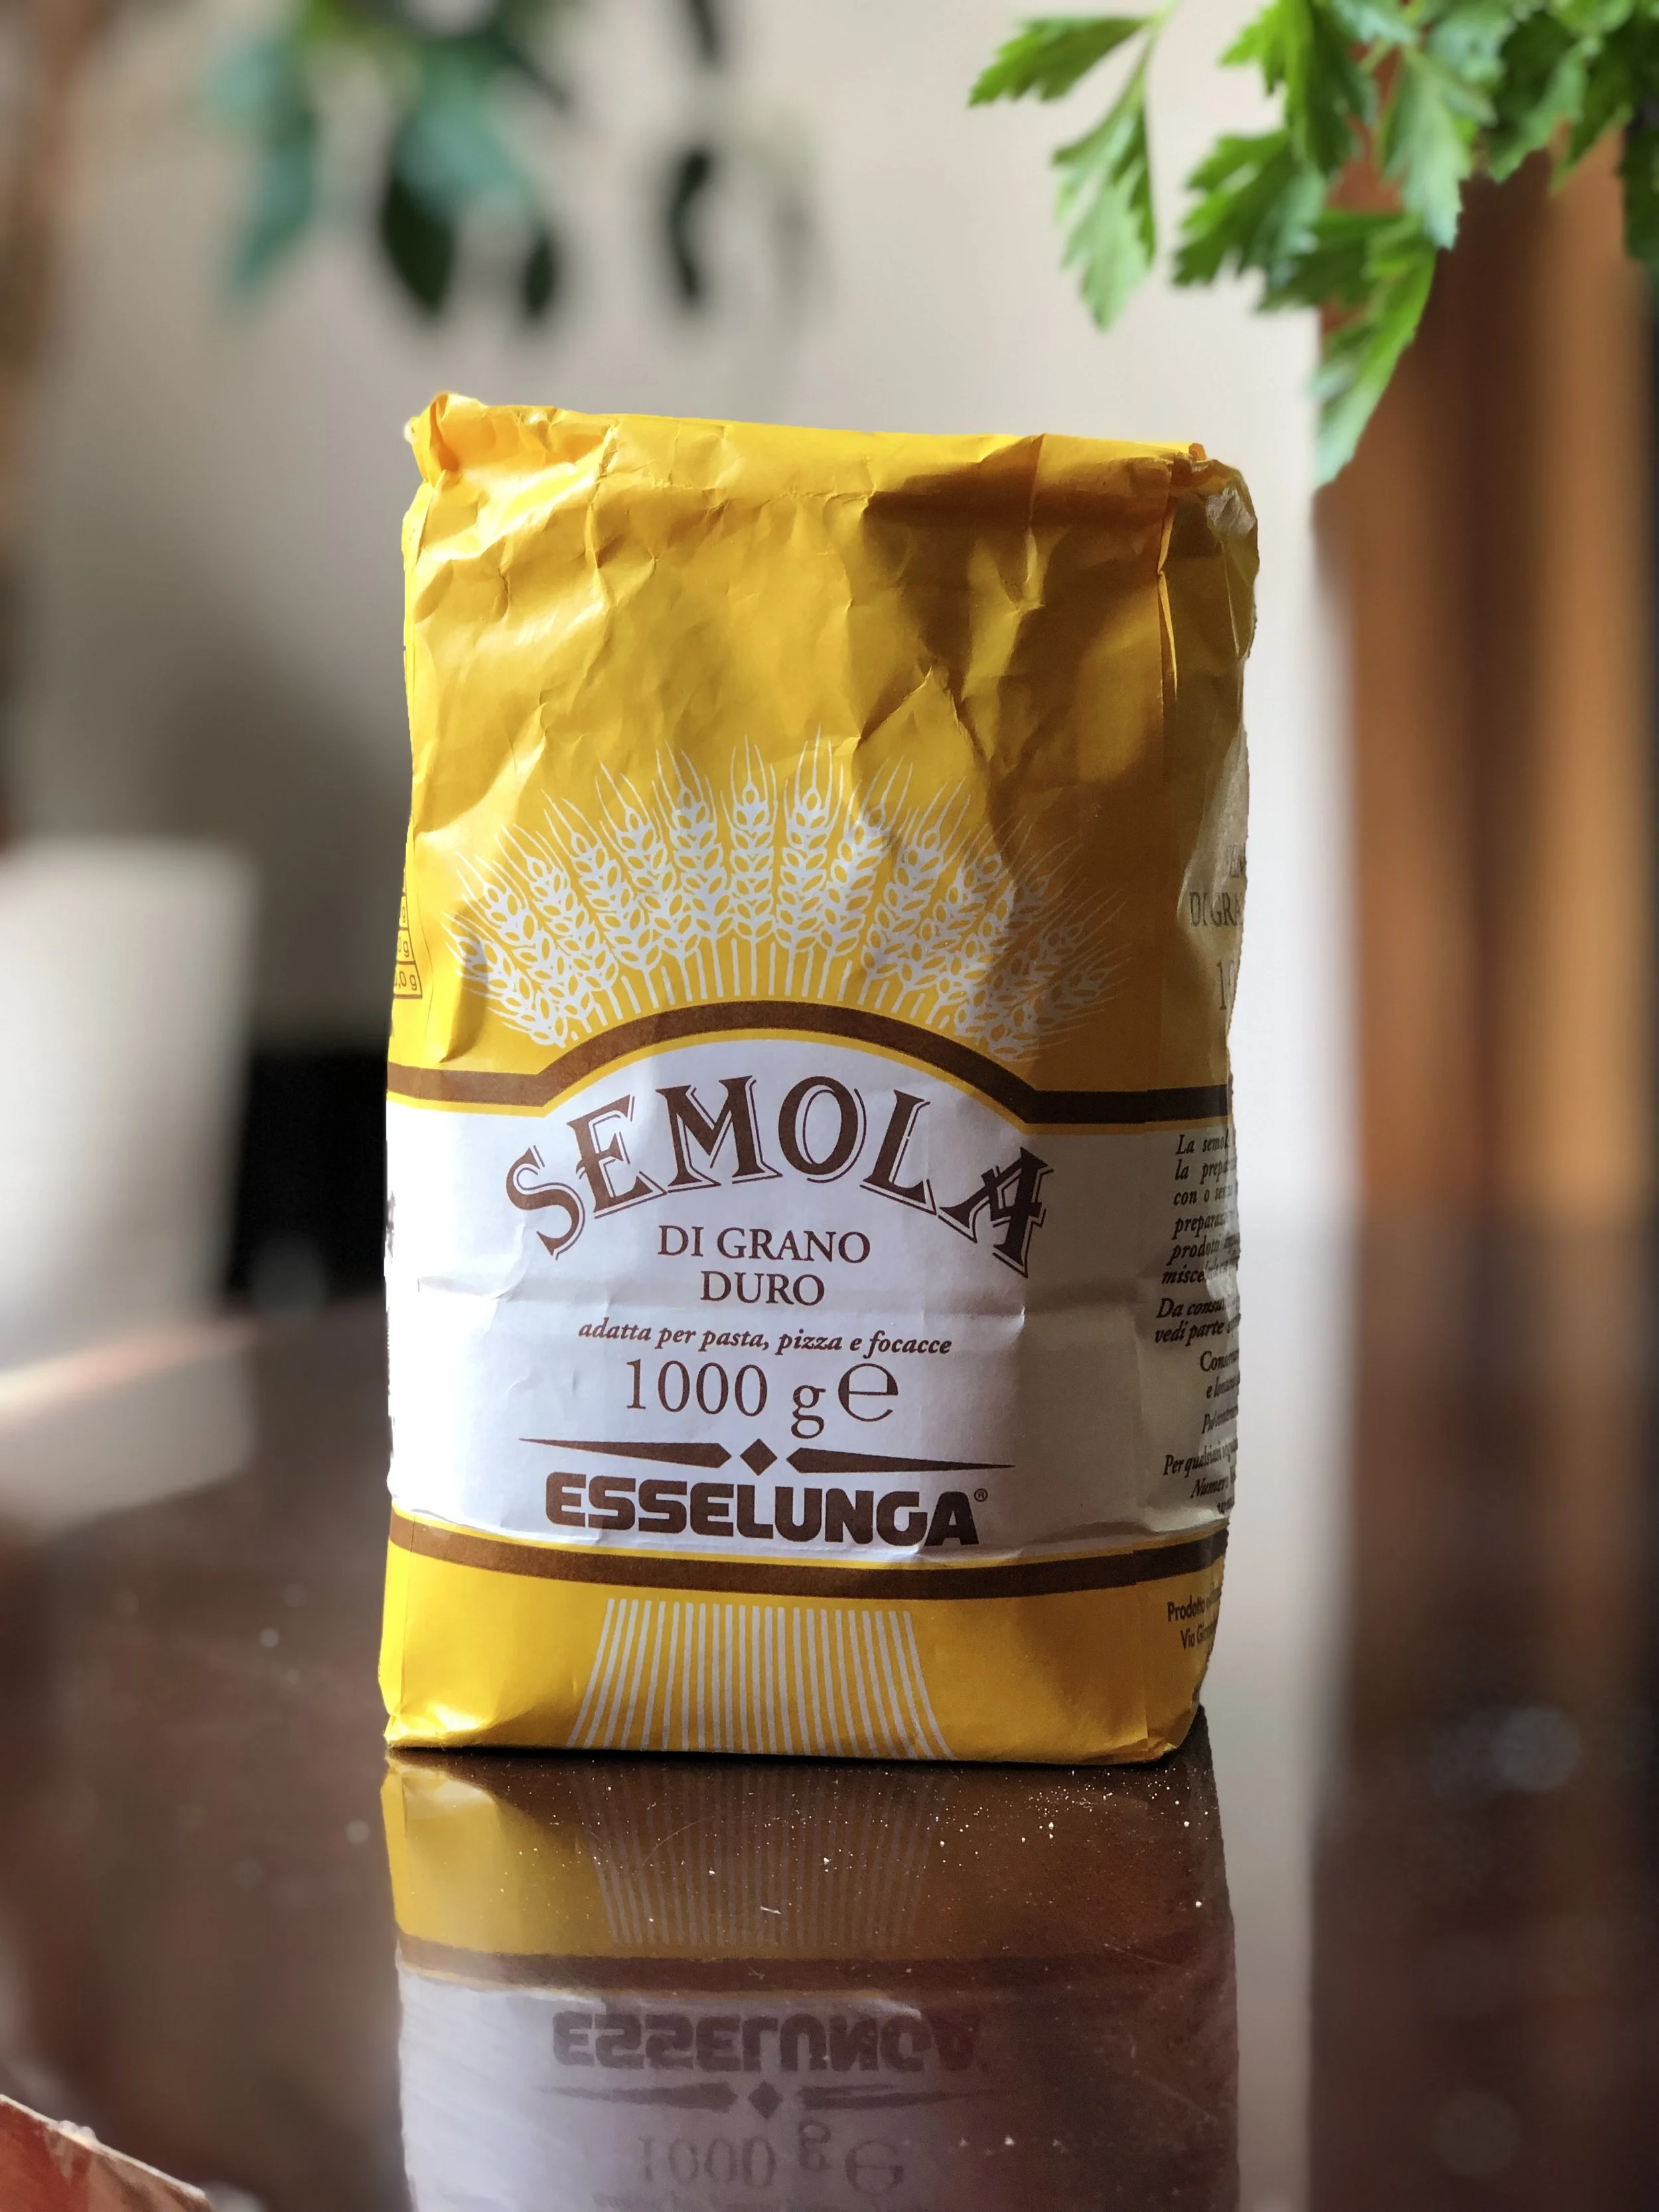
All About that Wheat Flour - FARINA part 2

2019-05-17+18.29.09-2.jpg

This post contains affiliate links. If you buy something using these links, Jennyblogs may receive a small commission, at no extra cost to you. This helps to support Jennyblogs. For further information see the privacy policy. Grazie!

If you’re reading this, you have probably have some form of wheat flour in your home. Even the person nearest to you, who is most likely not reading this, probably has some kind of wheat flour in their home. It almost sounds funny to say wheat flour because it is universally known as just flour. Flour refers to wheat flour, and only the other types of flour need to differentiate themselves. Rice flour is no less a flour, but we need to say “rice” in front of “flour” otherwise it will be assumed we are talking about flour; that is, wheat flour.

All-purpose, bread, cake, pastry, self-raising, strong, durum, semolina, whole wheat, whole wheat pastry, and graham are just some of the names for wheat flour types…what do you always have on hand? Besides maybe the price and brand of your flour, what else do you know about the substance that goes into so many hundreds of recipes? Should you care? It may not make a life or death difference, but if you enjoy cooking and baking, or generally like learning, then learning to understand wheat flour varieties and how best to use them can take the food you make to a whole new level!

If you’d like to read Part 1 and learn how flour is used in Italy, click here.


The Six Categories of Wheat

In your American pantry you probably have an all-purpose flour, a bread flour, maybe a cake flour, maybe a self-raising, possibly a few others. If you know when and how to use these flours (or just follow a recipe), you might not need to know where or what kind of wheat is actually grown and ground to make these. But once you become familiar with the types of wheat, their properties and best uses, you can make more educated choices about your baking and end up with a superior result. Even the most nominal baker will eventually come across recipes that call for cake flour or bread flour, and knowing more about the wheat characteristics and which kinds are used to make these flours will help you understand if you can substitute say, all-purpose flour, and the results if you do so.

The first thing to know is that wheat can be defined by these six characteristics:

L to R: durum wheat (semola), soft wheat for sweets, soft wheat (manitoba) for bread

L to R: durum wheat (semola), soft wheat for sweets, soft wheat (manitoba) for bread

  • Soft wheat has a higher moisture content and less gluten, suitable for making cake and cookies and more delicate baked goods

  • Hard wheat has a lower moisture content and higher protein/gluten* content, usually between 12-14%, suitable for bread making

  • Red wheat has a slightly higher protein than white and a bolder taste

  • White wheat is milder in taste even if the color is not so different from red once milled into flour

  • Winter wheat is usually planted in the fall and harvested in the summer, with the exception of countries that have too harsh of winters, such as Canada where it is planted in the spring

  • Spring wheat is usually planted in the spring and harvested in the fall, with the exception of countries that have too hot and dry of summers, such as California in which case it is planted in the fall. You can read more about winter and spring wheat here.

*Many use the terms protein and gluten in wheat flour interchangeably. This is because gluten is a type of protein found in wheat, the kind that is “developed” when you knead bread and gives it the elastic/chewy quality. In most cases, the higher the protein content, the higher the gluten. It is important to note that all gluten is protein, but not all protein is gluten, as your celiac friends should be able to tell you. Also, all wheat contains gluten, but not all gluten comes from wheat. Make sense? You can read more here or here for better understanding gluten in the light of gluten allergies, or here for a good explanation of gluten. For my purposes today, and baking in general, if someone says a flour is high in protein, and someone else says a flour has a high gluten content, they mean the same thing. And they both mean the flour is good for bread making.

There are thousands of varieties of wheat grown around the world, but chaos can be brought to order with the following six principle categories, using the characteristics we reviewed above:

  1. Hard Red Winter Wheat (HRW)

  2. Hard Red Spring Wheat (HRS)

  3. Soft Red Winter Wheat (SRW)

  4. Hard White Wheat (HW)

  5. Soft White Wheat (SW)

  6. Durum Wheat (DW) is the hardest of all wheat, used for pasta making

The flour you buy from the store will most likely fall into one of these six categories. The bread flour in your pantry is most likely a hard red or white spring wheat; your cake flour is probably milled from a soft white wheat; all-purpose is usually a mixture of hard and soft wheat. You’d know now, for example, that baking a loaf of bread with all-purpose or cake flour will not yield a wonderfully chewy loaf like using bread flour would; they don’t have the gluten required to achieve the chewiness.

If you’d like to start experimenting with flour varieties, check your area for a local mill. If you live in the States and are not fortunate enough to have a mill near you, check out Bob’s Red Mill, in store or online. They have some clearly labeled high-quality flours. You could buy some of their whole-wheat hard red flour and whole-wheat hard white flour and make some simple bread loaves, trying the two wheat varieties side by side.

Happy baking!

Mixing flours

Mixing flours

Mocha Punch

2018-12-29+15.42.50.jpg

Last Updated August 16, 2024

This post may contain affiliate links. If you buy something using these links, Jennyblogs may receive a small commission, at no extra cost to you. This helps to support Jennyblogs. For further information see the privacy policy. Grazie!

Mocha punch is exactly what it sounds like. Cold, creamy, sweet, chocolatey coffee served in a punch bowl with dollops of vanilla ice cream slowly melting into a dreamy, creamy puddle.

Punch might seem a thing do the past, but I really love punch. Classic punch to me is a bottle of cranberry raspberry juice combined with Sprite and some fruit-flavored sherbet dolloped in the lunch bowl. And I love it. It reminds me of Christmas time as a kid because that’s really the only time we’d make it. Then I was introduced to this Mocha Punch as a teenager, and the fruity punch got left behind. Everyone loves this coffee punch. It’s hard to put the ladle down.

It’s simple to make but it can steal the show, which makes it ideal for parties. Think holidays, birthday parties, baby showers, bridal showers, and on and on! Keep some empty milk jugs to store it in, and you have one easy and delicious thing done for your next gathering!

No mocha in Italy?

On entering any coffee shop in America, you’ll easily find mocha on the menu.

This is not the case in Italy. Italy may be the birthplace of coffee as we know it today, but that doesn’t mean that they own ALL the copyrights to the best coffee drinks. Cappuccino, espresso, macchiato….but Vanilla Latte and Mocha are not on the menu here, unless you go to one of the few “American” coffee shops, such as Arnold. First of all, if you order a latte you will get….milk. And if you order a mocha you will get…a withering stare. Not the end of the world, especially with all of the other types of coffee you can order, but sometimes I just want a mocha, ya know? I usually order my cappuccino with cocoa powder on top, but that’s not quite the same.

If I’ve learned anything living away from my home country, it’s that I will suddenly miss all the creature comforts of home, whether or not I appreciated or even liked them before. I do really like a good mocha. And somehow missing mochas has me thinking about this mocha punch, so here you go. The recipe for the best punch, that really keeps the party going!

Recipe adapted from a friend’s mama. :)


Mocha Punch

Serves about 20

Ingredients:

  • 3 quarts / 3 L freshly brewed strong coffee

  • 1 1/2 cups / 300g sugar

  • 2 quarts / 2 L milk

  • 3/4 cup / 240g chocolate syrup, try this homemade recipe!

  • 3 tsp vanilla extract

  • 1/2 gallon (8 cups) / 1 kg vanilla ice cream

Directions:

  1. Pour brewed coffee into a large pot, bowl, or other large container. Stir sugar into hot coffee until dissolved. Cool in fridge.

  2. Remove coffee from fridge and add milk, chocolate syrup, and vanilla and stir until well combined.

  3. Chill until cold or overnight.

  4. Just before serving, pour into serving container, mix briefly, and scoop ice cream into the punch, allowing the ice cream to melt for a few minutes before serving. (Skip this step if not serving as a punch.)

  5. Store in fridge.

Jenny’s Notes:

  • For an everyday mocha I reduce the sugar and milk, sometimes by up to half, as I usually drink my coffee black, and it makes it less indulgent.

  • You can substitute store-bought chocolate syrup for the homemade and use instant coffee instead of brewing, if you wish! I think the flavor will always be superior when you make things from scratch, or in this instance, use good, fresh coffee instead of instant!

  • Of course, you don’t have to use vanilla ice cream, you could use chocolate or moose tracks or hey, coffee ice cream!

  • When serving, you can choose to pour the whole recipe’s worth of punch into a punch bowl with ice cream, or, for smaller or longer parties, start with just a portion of the punch and ice cream, keeping the remainder in the fridge and freezer, respectively, so by the end the punch isn’t warm and the ice cream long melted.

  • This punch is easily stored in pitchers or empty milk jugs!

Mocha Punch
Yield 20
Author
Prep time
25 Min
Total time
25 Min

Mocha Punch

Sweet and creamy cold coffee punch with dollops of ice cream is great for gatherings and parties!
Cook modePrevent screen from turning off

Ingredients

Instructions

  1. Pour brewed coffee into a large pot, bowl, or other large container. Stir sugar into hot coffee until dissolved. Cool in fridge.
  2. Remove coffee from fridge and add milk, chocolate syrup, and vanilla and stir until well combined.
  3. Chill until cold or overnight.
  4. Just before serving, pour into serving container, mix briefly, and scoop ice cream into punch, allowing ice cream to melt for a few minutes before serving.
  5. Store in fridge.

Notes


  • You don’t have to use vanilla ice cream, you could use chocolate or moose tracks or heck, coffee ice cream! Whatever you like.
  • When serving, you can choose to pour the whole recipe’s worth of punch into a punch bowl with ice cream, or, for smaller or longer parties, start with just a portion of the punch and ice cream, keeping the remainder in the fridge and freezer, respectively, so by the end the punch isn’t warm and the ice cream long melted.
  • This punch is easily stored in pitchers or empty milk jugs!


Nutrition Facts

Calories

202.41

Fat

4.98 g

Sat. Fat

3.02 g

Carbs

33.94 g

Fiber

0.49 g

Net carbs

33.45 g

Sugar

26.31 g

Protein

5.27 g

Sodium

91.66 mg

Cholesterol

19.30 mg

Nutritional information is approximate. Calculated including vanilla ice cream

mocha, mocha punch, party coffee chocolate punch, iced coffee drink
drink
American
Did you make this recipe?
Tag @jennyblogsandbakes on instagram and hashtag it #jennyblogs
2018-12-29+15.44.21-2.jpg

Chocolate Sauce

Photo Public Domain https://creativecommons.org/licenses/by-sa/3.0/at/deed.en Permission: Sammlung J.P. Adlbrecht

Photo Public Domain https://creativecommons.org/licenses/by-sa/3.0/at/deed.en Permission: Sammlung J.P. Adlbrecht

Last Updated August 15, 2024

This post contains affiliate links. If you buy something using these links, Jennyblogs may receive a small commission, at no extra cost to you. This helps to support Jennyblogs. For further information see the privacy policy. Grazie!

Classic. Quintessential. Chocolatey. Good on everything, from your morning pancakes and coffee to ice cream and that cake you just made. Or ya know, by the spoonful. Just a spoonful of…I’ll let you sing the rest yourself. ;)

What is it? Chocolate Sauce! Or chocolate syrup, as you prefer. No more Hershey’s in a bottle, or going without if you live outside the USofA. It’s so easy you’ll wonder why you never made it before. No high fructose corn syrup involved!

Recipe from my Mama


Chocolate Sauce

Makes about 3/4 cup of sauce

Ingredients:

  • 3/4 cup / 150g sugar

  • 1/3 cup / 33g unsweetened cocoa powder

  • 1 Tbsp / 7.5g cornstarch

  • 1/2 cup / 118g water

  • 1 tsp vanilla

Directions:

  1. Combine sugar, cocoa, and cornstarch in a small saucepan.

  2. Add water and whisk until there are no cornstarch lumps.

  3. Cook over medium heat, stirring constantly, until mixture boils. Reduce heat to low and boil for 5 minutes, continuing to stir.

  4. Remove from heat and add vanilla. Cool.

  5. Store in an airtight container in the refrigerator.

Jenny’s Notes:

  • The better quality your cocoa powder the better your sauce will taste!

  • Keeps well in the fridge.

Chocolate Sauce
Yield 12
Author
Prep time
5 Min
Cook time
10 Min
Total time
15 Min

Chocolate Sauce

A basic chocolate sauce for ice cream topping, drizzling, mixing in coffee, and anything you need chocolate sauce for!
Cook modePrevent screen from turning off

Ingredients

Instructions

  1. Combine sugar, cocoa, and cornstarch in a small saucepan.
  2. Add water and whisk until there are no lumps.
  3. Cook over medium heat, stirring constantly, until mixture boils. Reduce heat to low and boil for 5 minutes, continuing to stir.
  4. Remove from heat and add vanilla. Cool.
  5. Store in an airtight container in the refrigerator.

Notes

The better quality your cocoa powder the better your sauce will taste! Keeps well in the fridge.

Nutrition Facts

Calories

63.04

Fat

0.27 g

Sat. Fat

0.00 g

Carbs

14.76 g

Fiber

0.56 g

Net carbs

14.21 g

Sugar

12.52 g

Protein

0.55 g

Sodium

0.61 mg

Cholesterol

0.00 mg

Nutritional information is approximate.

Hershey's chocolate sauce, ice cream topping, hot fudge sundae sauce, chocolate sauce
dessert, sauce, topping
American
Did you make this recipe?
Tag @jennyblogsandbakes on instagram and hashtag it #jennyblogs

Pumpkin Pudding

IMG_5018.JPG

Last updated August 14, 2024

Pumpkin Pudding is a classic, easy fall recipe in my family. It’s like pumpkin pie, but without all the fuss of the crust. This is great to make in the time leading up to Thanksgiving, because you’re not ruining your appetite for pumpkin pie (you can’t call it pie if it doesn’t have a crust, therefore, totally different) while not wasting time NOT eating pumpkin. Bonus that it’s incredibly easy to whip up.

Fall is coming fall is coming! I love the changing of seasons and the different nostalgias and expectations that come with each season. Living in Italy, the nostalgia is a little bit stronger. Autumn is still autumn, but the changes are a little less distinct, and the comfort of knowing where to pick out the best pumpkins and buy the best apple cider is not something that really exists here. Pumpkins will be few and far between, unless you’re lucky enough to stumble upon some markets that have the mini gourds; apple cider is practically nonexistent; trick-or-treating happens, but most Italians wear scary costumes instead of characters; the leaf change is not the brilliant red, orange, and yellows like in Michigan, but more of a subtle green-to-yellow with the occasional leaves fluttering down. Despite the differences with what I grew up with, there are still oodles of things I love to do to make my home fall-y and to welcome the chilly evenings. Lighting candles, brewing tea, pulling out the fuzzy socks and sweaters (even if I’d be sweating if I actually tried to wear them yet) and baking and eating lots of fall goodies that include pumpkin, cinnamon, spices, breads, soups, and all the hearty autumn recipes.

This post may contain affiliate links. If you buy something using these links, Jennyblogs may receive a small commission, at no extra cost to you. This helps to support Jennyblogs. For further information see the privacy policy. Grazie!

Recipe from my mama


Pumpkin Pudding

IMG_5023.JPG

Serves: 4-6

Ingredients:

  • 15 oz / 425g pumpkin purée

  • 2/3 cup / 132g sugar

  • 1/2 tsp / 2.5g salt

  • 1 tsp / 5g cinnamon

  • 1/2 tsp / 2.5g ginger

  • 1/4 tsp / 1g cloves

  • 1 cup / 237g milk of choice

Directions:

Oven 375°F / 190°C. Lightly grease an 8x8in / 20x20cm baking pan.

  1. Mix all ingredients in a bowl until smooth.

  2. Pour into prepared pan; bake for 20-25 minutes in preheated oven until edges are bubbling.

Jenny’s Notes:

  • To dress this lovely and simple dessert up you can top it with confectioner’s sugar or crumbled cookies such as shortbread or Nilla Wafers, or serve with ice cream and/or whipped cream.

  • This recipe is gluten free, vegan (if you use a milk substitute like coconut or almond), and probably many of the other diet fads that I can’t quite keep track of. Eat up!

Pumpkin Pudding
Yield 4-6
Author
Prep time
10 Min
Cook time
25 Min
Total time
35 Min

Pumpkin Pudding

Like pumpkin pie but without the hassle of the crust. Gluten-free and can easily be made vegan.
Cook modePrevent screen from turning off

Ingredients

Instructions

  1. Oven 375F / 190C. Lightly greased 8x8in / 20x20cm baking pan.
  2. Mix all ingredients in a bowl until smooth.
  3. Pour into prepared pan; bake for 20-25 minutes in preheated oven until edges are bubbling.

Notes

To dress this lovely and simple dessert up you can top it with confectioner’s sugar or crumbled cookies such as shortbread or Nilla Wafers, or serve with ice cream and/or whipped cream.This recipe is gluten free, vegan (if you use a milk substitute like coconut or almond), and probably many of the other diet fads that I can’t quite keep track of. Eat up!

Nutrition Facts

Calories

198.32

Fat

1.49 g

Sat. Fat

0.88 g

Carbs

45.81 g

Fiber

3.85 g

Net carbs

41.97 g

Sugar

36.49 g

Protein

3.31 g

Sodium

279.59 mg

Cholesterol

4.74 mg

Nutritional information is approximate. Based on 4 servings.

crustless pumpkin pie, no crust pumpkin pie, pumpkin pudding, pumpkin pie, Thanksgiving dessert, fall dessert, easy pumpkin dessert, vegan, gluten free
dessert
American
Did you make this recipe?
Tag @jennyblogsandbakes on instagram and hashtag it #jennyblogs
The slowly melting confectioner’s sugar…

The slowly melting confectioner’s sugar…


Pinwheels 3 Ways: Avocado Veggie - Buffalo Chicken - Thanksgiving

From top to bottom: Thanksgiving, Veggie, Buffalo Chicken

Last Updated August 11, 2024

Pinwheels. Also known as veggie rolls, veggie wraps, or veggie roll-ups, (but that just makes me think of fruit roll-ups, yuck. No offense to my fruit roll-up loving friends. Actually, every once in a blue moon I see a fruit roll up and think, hey, that sounds good right about now. Then I walk on. That's the end of the story.)  Or you could just call these tortilla/veggie/cream cheese concoctions for what they are; delicious. That would be fine. And the truth.  

Pinwheels make for a great snack or appetizer, or lunch because it can be hard to stop eating these! They're also very portable, quick, and simple to make, which make them ideal for parties, potlucks, lunch at the office, etc.  

The formula is very easy to get the hang of, think tortillas, cream cheese, and your flavors. Deli meat is easy to roll and adds some protein. Chopped, sliced, or grated veggies, raw or cooked, add some nutrients. Other kinds of cheese are tasty. Spices and herbs add flavor. Tuna and sliced hardboiled eggs could be a very European take on these. The options are endless, feel free to create your own!

Following are some of my favorite pinwheel flavors: Fresh Veggie and Avocado, Buffalo Chicken, and Turkey Cranberry a.k.a. Thanksgiving.  

This post may contain affiliate links. If you buy something using these links, Jennyblogs may receive a small commission, at no extra cost to you. This helps to support Jennyblogs. For further information see the privacy policy. Grazie!

Recipes by Jenny


Avocado Veggie Pinwheels

Makes about 24 pinwheels

Ingredients: 

Hmm, these photos could use improving upon…

Hmm, these photos could use improving upon…

  • 4 8-inch or 6 6-inch flour tortillas

  • 8 oz / 225g cream cheese, softened

  • 1/3 cup shredded carrots, or about 1-2 small carrots

  • 1/3 chopped spinach or broccoli

  • 1 bunch green onions, chopped

  • 1/4 tsp garlic powder

  • 1/4 tsp dill weed

  • salt and pepper, to taste

  • 1/2 cup guacamole

Directions:

  1. In a medium bowl, mix together cream cheese, carrots, spinach, green onions, garlic powder, dill weed, and salt and pepper.  

  2. Distribute evenly over tortillas, spreading almost to the edges.  Spread a thick layer of guacamole over cream cheese mixture.  Roll up tightly.  

  3. Trim edges and slice into approximately 1 inch slices.  Serve or chill until it's par-tay time.  

Avocado Veggie Pinwheels
Yield 24
Author
Prep time
25 Min
Total time
25 Min

Avocado Veggie Pinwheels

Tortillas slathered with seasoned cream cheese, avocado, and veggies, rolled up and sliced.
Cook modePrevent screen from turning off

Ingredients

Instructions

  1. In a medium bowl, mix together cream cheese, carrots, spinach, green onions, garlic powder, dill weed, and salt and pepper.
  2. Distribute evenly over tortillas, spreading almost to edges. Spread a thick layer of guacamole over cream cheese mixture. Roll up tightly.
  3. Trim edges and slice into approximately 1 inch slices. Chill until ready to serve.

Notes

All quantities are very approximate. You could double basically any ingredient you want to have more filling, less filling, more flavor, less flavor. The tortilla is your playground.

Nutrition Facts

Calories

68.72

Fat

4.49 g

Sat. Fat

2.11 g

Carbs

5.73 g

Fiber

0.61 g

Net carbs

5.05 g

Sugar

0.50 g

Protein

1.52 g

Sodium

104.65 mg

Cholesterol

9.47 mg

Nutritional information is approximate, based on 1 pinwheel.

pinwheels, roll ups, veggie rolls, veggie wraps, avocado, buffalo chicken pinwheels, Thanksgiving pinwheels, vegetable wraps, cranberry sauce, appetizer, finger food, snack
American
Did you make this recipe?
Tag @jennyblogsandbakes on instagram and hashtag it #jennyblogs

Buffalo Chicken Pinwheels

Makes about 24 pinwheels

Ingredients:

  • 4 8-inch or 6 6-inch flour tortillas

  • 8 oz / 225g cream cheese, softened

  • 1/3 cup / 80g Frank's hot sauce

  • 1/2 cup cooked chopped or shredded chicken

  • 1 bunch green onions, chopped

  • 1/4 cup blue cheese, crumbled, optional

Directions:

  1. In a medium bowl, mix together cream cheese, hot sauce, chicken, green onion, and blue cheese.

  2. Distribute evenly over tortillas, spreading almost to the edges.  Roll up tightly.  

  3. Trim edges and slice into approximately 1 inch slices.  Serve or chill until it's par-tay time.   

Buffalo Chicken Pinwheels
Yield 24
Author
Prep time
15 Min
Total time
15 Min

Buffalo Chicken Pinwheels

Tortillas slathered in Frank's hot sauce and cream cheese with chicken and green onions, rolled, and sliced for bite size hot wing pinwheels.
Cook modePrevent screen from turning off

Ingredients

Instructions

  1. In a medium bowl, mix together cream cheese, hot sauce, chicken, green onion, and blue cheese.
  2. Distribute evenly over tortillas, spreading almost to the edges. Roll up tightly.
  3. Trim edges and slice into approximately 1 inch slices. Chill until ready to serve.

Notes

All quantities are approximate. You could double basically any ingredient you want to have more filling, less filling, more flavor, less flavor. I often use canned chicken for the buffalo chicken. Pinwheels aren't exactly a showcase of your cooking/baking skills, anyway, so I like to keep things chop, chop. (Literally)

Nutrition Facts

Calories

74.28

Fat

4.60 g

Sat. Fat

2.40 g

Carbs

5.20 g

Fiber

0.30 g

Net carbs

4.90 g

Sugar

0.42 g

Protein

3.02 g

Sodium

177.01 mg

Cholesterol

14.74 mg

Nutritional information is approximate. Based on one pinwheel; includes blue cheese.

pinwheel, veggie roll up, veggie wrap, buffalo chicken, blue cheese, buffalo chicken wrap, buffalo chicken pinwheel, canned chicken
snack, appetizer
American
Did you make this recipe?
Tag @jennyblogsandbakes on instagram and hashtag it #jennyblogs

Thanksgiving Pinwheels

Makes about 24 Pinwheels

Ingredients:

  • 4 8-inch or 6 6-inch flour tortillas

  • 8 oz / 225g cream cheese, softened

  • 1/2 cup cranberry sauce

  • 8 oz sliced deli turkey (or leftover Turkey!)

  • 1/3 cup chopped spinach, optional

Directions:

  1. In a medium bowl mix together cream cheese, cranberry sauce, and spinach.  Distribute evenly over tortillas, spreading almost to the edges.  

  2. Layer turkey slices over cream cheese mixture.  Roll up tightly.  

  3. Trim edges and slice into approximately 1 inch slices.  Serve or chill until it's par-tay time.  

Thanksgiving Pinwheels
Yield 24
Author
Prep time
15 Min
Total time
15 Min

Thanksgiving Pinwheels

Tortilla spread with cream cheese, cranberry sauce, and turkey, rolled and sliced for a nostalgic bite-sized taste of Thanksgiving.
Cook modePrevent screen from turning off

Ingredients

Instructions

  1. In a medium bowl mix together cream cheese, cranberry sauce, and spinach. Distribute evenly over tortillas, spreading almost to the edges.
  2. Layer turkey slices over cream cheese mixture. Roll up tightly.
  3. Trim edges and slice into approximately 1 inch slices. Chill until ready to serve.

Notes

All quantities are approximate. You could double basically any ingredient you want to have more filling, less filling, more flavor, less flavor. Like I said, the tortilla is your playground. I like the spinach, it gives it a nice punch of color. It also makes the roll versatile for Christmas, beautiful red and green!

Nutrition Facts

Calories

79.26

Fat

4.10 g

Sat. Fat

2.05 g

Carbs

8.14 g

Fiber

0.39 g

Net carbs

7.75 g

Sugar

2.56 g

Protein

2.63 g

Sodium

182.60 mg

Cholesterol

14.67 mg

Nutritional information is approximate. Based on one pinwheel; Includes spinach.

pinwheels, veggie roll ups, Thanksgiving, cream cheese, Thanksgiving pinwheel, Thanksgiving wrap, turkey, cranberry sauce, spinach
snack, appetizer
American
Did you make this recipe?
Tag @jennyblogsandbakes on instagram and hashtag it #jennyblogs

Jenny's Notes:

  • All quantities are approximate.  You could double basically any ingredient you want to have more filling, less filling, more flavor, less flavor.  Like I said, the tortilla is your playground.  

  • I like the spinach in the Thanksgiving roll, it gives it a nice punch of color.  It also makes the roll versatile for Christmas, beautiful red and green! 

  • I usually use canned chicken for the buffalo chicken. Pinwheels aren't exactly a showcase of your cooking/baking skills, anyway, so I like to keep things easy.  


Refrigerator Dill Pickles

Last Updated August 11, 2024

Summertime calls for watermelon, lemonade, ice cream, swimming, and cook outs.  And every quintessential cookout will have something to cook outside, usually meat and vegetables in some form.  (I know we're all thinking hamburgers, bratwursts, and hotdogs, but hey, there are some other weird traditions out there, too.)  And if you're cooking out, you're going to need buns and condiments.  And the best condiment award goes to....pickles!!

Not only does it have the best taste (opinion), but it stands alone.  As in, if you eat a pickle, no one will think twice.  But if we see you munching on a romaine lettuce leaf or slurping on a spoonful of ketchup, well, you might get some stares.  Of course, this is coming from someone who doesn't like hamburgers and once ate a romaine sandwich.  As in, onion, ketchup, mustard, and pickles sandwiched between to Romaine lettuce leaves.  Mmmmm.  Yeah, it was weird.  But I was so hungry, and hamburgers were the only option, I rather enjoyed it.  That's now on the worldwide webs.  Maybe I should change my heading to be: "Jenny, the girl who eats condiments like a main dish." Don't worry I won't, only you, my seven followers, are now privy to this information.  Haha.  

Back to pickles.  Now that we have remembered how great pickles are, did you know they are super easy to make at home?  Yes they are, and now you know that too.  Boil some water, throw some ingredients in a jar, chop up some cucumbers, stick them in the fridge, and voila!  Pickles.  

This post may contain affiliate links. If you buy something using these links, Jennyblogs may receive a small commission, at no extra cost to you. This helps to support Jennyblogs. For further information see the privacy policy. Grazie!

Recipe adapted from my mama


Refrigerator Dill Pickles

Makes about 24 spears/servings

Ingredients:

  • 3 1/2 cups / 830g water

  • 1 1/4 cups / 296g white vinegar

  • 1 Tbsp / 12g sugar

  • 1 Tbsp / 17g salt

  • 1 tsp / 2g turmeric, optional

  • 4 cups or about 2-3 large cucumbers, cut into slices, spears, or shape of choice

  • 2 cloves garlic

  • 2 heads fresh dill

  • 1 tsp red chili flakes, mustard seeds, or celery seeds, optional

Directions:

  1. Stir together water, vinegar, sugar, and salt in a large saucepan.  Place over medium-high heat and bring to a boil.  Remove from heat and allow to cool completely. 

  2. In a large glass jar or container, 4-quart or larger, arrange garlic, dill, cucumbers, and any spices you choose to use.  Pour the cooled liquid over the cucumbers, discarding or saving any leftover for another use.  Top with lid, sealing well, and refrigerate.  

  3. They will start to taste pickle-y the next day, but for optimum flavor refrigerate at least 3 days before consuming.  

Jenny's Notes:

  • I recommend making this recipe once as is to get an idea of the flavor profile, then play around to make it your own!

    1) If you like more bread & butter or sweet style pickles, up the sugar

    2) If you love dill, use more dill

    3) Add sliced onions or bell peppers

    4) Add more red pepper flakes or other hot pepper for more spice

    5) Really, add whatever suits your fancy. The garden is your playground.

  • The turmeric is for color, not so much flavor, to get that idyllic yellow pickle.  However, if you could care less about having a yellow pickle or don’t enjoy turmeric, leave it out!  I for one don't think the turmeric is very obvious in this recipe, but it's detectable if you really think about it.  

Refrigerator Dill Pickles
Yield 24
Author
Prep time
15 Min
Cook time
10 Min
Inactive time
72 Hour
Total time
72 H & 25 M

Refrigerator Dill Pickles

Classic dill pickles made in your refrigerator in just 3 days.
Cook modePrevent screen from turning off

Ingredients

Instructions

  1. Stir together water, vinegar, sugar, and salt in a large saucepan. Place over medium-high heat and bring to a boil. Remove from heat and allow to cool completely.
  2. In a large glass jar or container, 4-quart or larger, arrange garlic, dill, cucumbers, and any spices you choose to use. Pour the cooled liquid over the cucumbers, discarding or saving any leftover for another use. Top with lid, sealing well, and refrigerate.
  3. They will start to taste pickley the next day, but for optimum flavor refrigerate at least 3 days before consuming.

Notes

I recommend making this recipe once as is to get an idea of the flavor profile, then play around to make it your own! 1) If you like more bread & butter or sweet style pickles, up the sugar2) If you love dill, use more dill3) Add sliced onions or bell peppers4) Add more red pepper flakes or other hot pepper for more spice5) Really, add whatever suits your fancy. The garden is your playground.The turmeric is for color, not so much flavor, to get that idyllic yellow pickle. However, if you could care less about having a yellow pickle or don’t enjoy turmeric, leave it out! I for one don't think the turmeric is very obvious in this recipe, but it's detectable if you really think about it.

Nutrition Facts

Calories

10.04

Fat

0.04 g

Sat. Fat

0.01 g

Carbs

1.91 g

Fiber

0.20 g

Net carbs

1.72 g

Sugar

1.09 g

Protein

0.25 g

Sodium

276.95 mg

Cholesterol

0.00 mg

Nutritional information is approximate. Based on one pickle spear.

dill pickles, refrigerator pickles, homemade pickles
condiment, snack
American
Did you make this recipe?
Tag @jennyblogsandbakes on instagram and hashtag it #jennyblogs

Homemade Marzipan

Last Updated: August 10, 2024

Marzipan!  That weird almond dessert that no one seems to really talk about in America, but people rave about in Europe. It really should catch on in the US, because:

  1. It tastes like almonds and is delicious

  2. It's easy to make

  3. It's fun to work with and versatile

 It can be used as filling or toppings of baked goods, and it can also be colored and molded into shapes or rolled out and used to cover cakes in a fondant fashion. Fondant has it's place, but I would rather eat a marzipan covered cake any day over a fondant cake.  

marzipan.jpg

You may have seen almond paste sold in stores, and although almond paste and marzipan are made from the same ingredients, they are not usually equal. This depends on what part of the world you call home.  In many European countries the terms marzipan and almond paste are interchangeable, in other parts, such as the US, they are different products. If they are different, as in the US, marzipan is smoother, sweeter, made with egg whites and sometimes rose water, whereas almond pasted is less sweet and has a coarser texture.  When I first started dabbling in marzipan, I used almond paste as a base to make marzipan, but now I prefer to make it from scratch.

It's so simple, as you can see for yourself!

This post may contains affiliate links. If you buy something using these links, Jennyblogs may receive a small commission, at no extra cost to you. This helps to support Jennyblogs. For further information see the privacy policy. Grazie!

Recipe adapted from La Cuochina Sopraffina


Marzipan

Makes about 280g of marzipan, or about 10 oz. 

Ingredients:

  • 125g / 1 1/3 cup almond flour or almonds

  • 125g / 1 cup powdered sugar

  • 1 egg white (about 30g)

  • 6 drops almond extract

  • 3 drops rose water, optional

Directions:

  1. If using whole almonds, place in a food processor and process until finely ground.   

  2. Process almond flour, powdered sugar, egg white, almond extract, and rose water until a thick dough forms.  If the consistency is too thin, add more powdered sugar.  

  3. Turn marzipan out onto a surface lightly dusted with powdered sugar, knead for a few seconds.  Wrap tightly in plastic wrap and refrigerate until needed, or freeze.  

Jenny's Notes:

  • This recipe is very simple to adjust to the amount you need, especially if you scale/weigh your ingredients.  As you may have noticed, the almond flour to powdered sugar is a 1:1 ratio.  

  • If you are worried about eating or serving raw egg whites, be sure to buy pasteurized egg whites from the store.   

Homemade Marzipan
Yield 10
Author
Prep time
10 Min
Total time
10 Min

Homemade Marzipan

Marzipan is a versatile and tasty European almond sweet, often paired with chocolate, molded into fruit shapes, or used to cover cakes in place of fondant. Gluten and dairy free.
Cook modePrevent screen from turning off

Ingredients

Instructions

  1. If using whole almonds, place in a food processor and process until finely ground.
  2. Process almond flour, powdered sugar, egg white, almond extract, and rose water until a thick dough forms. If the consistency is too thin, add more powdered sugar.
  3. Turn marzipan out onto a surface lightly dusted with powdered sugar, knead for a few seconds. Wrap tightly in plastic wrap and refrigerate until needed, or freeze.

Notes

This recipe is very simple to adjust to the amount you need, especially if you scale/weigh your ingredients. As you may have noticed, the almond flour to powdered sugar is a 1:1 ratio. If you are worried about eating or serving raw egg whites, be sure to buy pasteurized egg whites from the store.

Nutrition Facts

Calories

131.15

Fat

7.44 g

Sat. Fat

0.57 g

Carbs

14.21 g

Fiber

1.86 g

Net carbs

12.35 g

Sugar

11.43 g

Protein

3.51 g

Sodium

6.80 mg

Cholesterol

0.00 mg

Nutritional information is approximate. Based on 10 servings.

marzipan, almond paste, European sweets, marzipan fruit, fondant, gluten-free, dairy-free, raw
dessert
European
Did you make this recipe?
Tag @jennyblogsandbakes on instagram and hashtag it #jennyblogs

How to Blog - By Someone Who Doesn't Know How

Photo Credit: Hannah Kelsey

Photo Credit: Hannah Kelsey

Last updated October 13, 2024

This post may contain affiliate links. If you make a purchase using these links, Jennyblogs may receive a small commission, at no extra cost to you. This helps to support Jennyblogs. Where possible, links are prioritized to small businesses, and American companies and products made in the USA for American readers. For further information see the privacy policy. Grazie!

Oh hey there. It's nice to see you here. Looks like someone is curious about how to become a STAR blogger. Beyond viral. Basically means you're in the hall of fame for bloggers. I can assure you, you have come to the right place. In this humble post I will show you how to:

  1. Create interesting content

  2. Improve your writing

  3. Up the game on humor

  4. Get Your Point Across, Be Understood Really Well, Be Clear

  5. Take super-awesome-stunning-great photos

  6. Edit photos and choose filters

  7. Increase your intelligence

Don't have a blog? No worries, number 7 still applies. If you are thinking about starting a blog, I can help you.  

First, you'll need a blog. We could make really extensive pro and con lists about all of the pros and cons about where to get a website, but hey, time is precious, right? I'll save you the trouble: Get Squarespace. There, no time wasted, no stress in having to make a decision, no taking into consideration what some of your specific needs might be. Next, you'll want to pick out a name for your blog and get a domain to match. Just like you wouldn't go out the door with your cell phone cover not matching your pillowcase, you need a good name and domain to match.  What's a domain? Idunnaknow. Probably means you have dominion over your blog, and no one else.  Mwahahaha. Because if they don't match, your name might lose syncretism with your domain, and the domain might decide it wants dominion and take over.  Thankfully it hasn't happened to me yet, but I thought I should warn you.  

So now you have a website and your domain. Now what? I'll be using a new baking post, a recipe and photos for Malted Chocolate Chip Cookies, to help demonstrate some of the techniques and strategies listed below. 

Create Interesting Content

To have a star blog, you need to have interesting stuff to write about. For example, if you collect baseball cards, like animals, try the samples at Sam's Club on a regular basis, watch a ton of movies...There's also an appalling lack of political opinions out there. Especially long rants, judgy articles, and arguments. So you might want to consider putting yours out there, fill the gap, ya know. Oh, and I almost forgot, baking blogs. There aren't very many of those, either, that's why I decided to blog n' bake. That and the baking/cooking section on Pinterest is a little lackluster.

Once you've found your niche, it's time to let the pen fly! Or fingers, as you'd say in this day and age. Always, always, ALWAYS start your blog out with a personal story or anecdote. Make it at least 7 paragraphs long (the number of completion), and if you can start to weave in your actual content or recipe towards the end, that's toooootally cool. Bonus if you can include an anecdote within the anecdote, or tie in 3 other stories during your main content.  The more the merrier!  This would also be a great spot to include your dog/cat's cute behavior for the last two weeks.  Keep your main content to a minimum, people's attention spans are rather short these days, and this is your blog, so you need to make sure you get your moment.  Include your opinion, your take, and advice on everything.  And be super transparent about everything, no walls.  Why else would people be reading your blog?  

Improve You're writing

Whilst blogging, you got to be ready to let your ideas fly.  Don't let grammer, spelling; and punk-you-a-shun get in you"re way.  There more like guidelines anyways.  If your bad at spelling or grammar doesn't come naturalmenty to you, don't use spell check and be like all those spelling bee medalists out there; no! You be you.  You do you.  If you spelled environment enviermant, leave it.  Empowerment to bad spellers everywhere.  Chances are people won't notice.  And time is money, people!  

Up the Game on Humor

Tell jokes.  Even if no one laughs in real life, or you forget the punch line.  Quote Parks and Rec and SNL constantly.  Give it the Girl Scout try.  No one was ever born funny, after all.  

Get Your Point Across, Be Understood Really Well, Be Clear

Don't be afraid to repeat yourself, be redundant, quote multiple sources to make just one point, or say the same thing twice. USE ALL CAPS FOR EMPHASIS as OFTEN as you WANT, and/or use BOLD or italic font.  Then you can step back and enjoy your blog for what it is, a piece of art, rather than just blah, blah, blah.  

Don't be afraid of clichés, catch-phrases, and idioms.  They always help to make your writing really clear and concise.  Otherwise your point might be like looking for a needle in a haystack.  Stay away from euphemisms.  

Avoid big words.  Lots of little words make so much more sense.  The extraneity of lengthy words then becomes superfluous.

Take Super-awesome-stunning-great Photos

Now.  I know all your blogging friends have fancy-smchancy cameras that you're not allowed to touch, but I'm here to tell you that you can do better.  Why spend thousands of dollars when your iPhone 4 takes photos?  No reason, that's why.  No need to lug around a camera bag, buy and change out lens', or learn what all those little black buttons mean when you have everything you need in an iPhone.  Not to mention Beyonce's latest album and Snapchat.  

When your friends get to talking, you can just bring out your IDK to their ISO, your amateur to their aperture, your Boca Burger to their Bokeh.  

Multiple shots were taken in this exhibit to be examples, and show the transition from "follow camera techniques boring" to "create your own inspired masterpieces."

Multiple shots were taken in this exhibit to be examples, and show the transition from "follow camera techniques boring" to "create your own inspired masterpieces."

For lighting, direct sunlight or a bare bulb lit directly overhead your subject is fine.  A dark, rainy day works well, or better yet, night.  When working with humans or animals, you can best light their face by shining a light straight on, directly in front of their face.  Gently remind them to keep their eyes open.  A spray bottle can be used to gently mist their face and keep their eyes from drying out.  If no light source is available, flash is always a viable option.

Trying to find a "studio." Up against a wall, tight, uninspired...

Trying to find a "studio." Up against a wall, tight, uninspired...

When choosing a location, the messier the better.  Some may choose to have a special window, area, or even studio where they take their photos and do "sessions," but I believe this natural lighting and set-up area produces, stiff, unnatural, and  sterile photos.  You and your subject need inspiration, room to breathe.  In a corner, on the floor, or the front seat of your car is fine.  When the inspiration hits, you need to be ready with your phone held high, face close to the screen, and finger poised to snap the moment, soon to be forever encapsulated on your blog.  I recommend keeping your phone out at all times, taking photos at will.  Even if you don't remember the moment because you were so busy "capturing" it, you'll always have the photo.  And we all know that's more important than the actual experience in the long run.   

Blurry hand, bodies...this photo speaks of movement and life.

Blurry hand, bodies...this photo speaks of movement and life.

Having a background and props is essential.  What that background is and what those props are, less so.  No need for a plain wall behind.  To have chaos in your photo is to have life.  To create an au naturel photo that doesn't look "staged" or "set up" I like to grab the 12-56 objects in closest range to me and set them up haphazardly around the subject.  I then choose my angle, and snap.  Yes, one snap.  No multiple shots, re-angling, re-staging.  It is what it is, and that's how it's meant to be.  Animals, babies, blurry hands, and half-eaten pizza all help to liven up the photo.  

In the culmination of this art spread, please notice the parallelism, rhythm, and flow within. The echoes of the greens, connections between the browns, the cylinders. The keys seem to say, "choose your path" while though the pile of succulent cooki…

In the culmination of this art spread, please notice the parallelism, rhythm, and flow within. The echoes of the greens, connections between the browns, the cylinders. The keys seem to say, "choose your path" while though the pile of succulent cookies seems to beckon and say, "we offer life, sweet life, and money" you see the healthy apple is also saying, "eat of me!" Meanwhile, the beano reminds us that the remedy lies within, that life is time, take of yourself, and keep a dream journal.

Everyone will be jealous.

Edit Photos and Choose Filters  

Here's how to take your photos to the next level.  You'll first need a photo editing program.  Higher end programs like PaintShop Pro, Final Cut, and Photo are ideal.  Then, modify away.  As a general rule, I think photos always look pro when you really crank the structure, saturation, and ombre.  If you have a ton of photos to share with the world and are short on time, filters are your friends.  X-Pro II, Lo-Fi, and Nashville are go to's.  

Increase Your Intelligence.

If you have made it this far, you have already acquired much intelligence along the way, all that stated above.  I have so much more I wish to impart to you, my young padowan, but I must first see how you bear up under this already great load.  So be free, conquer the world, and let your dreams take flight.  Remember as you soar high, to take others with you under your wing.  

Two more things before we part ways: One, this blog is completely facetious.  Happy April Fool's Day!  Don't take a word of it seriously.  Don't believe me?  Ask any of my seven followers.  Second, the cookies in the photos exhibited above are, despite the photos, really yummy. Find the recipe here!


Salted Chocolate Caramel Pretzel Bark

Last Updated August 6, 2024

Pretzels. Homemade caramel. Chocolate. And salted. This bark has only 5 ingredients, it’s super easy to make, and you keep going back for more.

Oh yes.  For the sugar lovers, sweets devotees, and when you want to whip up something delicious with precious little effort, this bark is it.  Some people even refer to it as crack bark. Maybe because you break, or crack it, at the end?  (Just kidding everyone, I know what they mean when they call it that.)  Plus all 5 ingredients are pretty easy to have on hand. 

Now, if this were Pinterest, you could call it "5 Ingredient Crack Bark."  Remember my thing with Pinterest names?  Yep.  Still there.  Keep it classy, people, keep it classy.  It already bothers me that this recipe has as many words in its title as it does ingredients.  If you have any better and more concise ideas for the title, please, let me know!

Slightly adapted from Where the Cookies Are

This post may contain affiliate links. If you buy something using these links, Jennyblogs may receive a small commission, at no extra cost to you. This helps to support Jennyblogs. For further information see the privacy policy. Grazie!


Salted Chocolate Caramel Pretzel Bark

Makes approximately one 11x17in / 28x43cm sheet of bark

Ingredients:

  • Enough mini pretzels to cover an approximately 11x17in / 28x43cm jelly roll pan, about half of a 15oz bag / 200g.

  • 1 cup / 226g butter

  • 1 cup / 200g brown sugar

  • 2 cups / 340g semi-sweet chocolate chips

  • coarse salt

Directions:

Oven 375°F / 190°C.  Line an approximately 11x17in / 28x43cm jelly roll pan with tinfoil. 

  1. Cover pan with an even layer of pretzels.

  2. In a medium saucepan over medium-low heat, combine butter and brown sugar.  Stir until mixture starts to simmer, then allow to cook, without stirring, until mixture turns a nice golden-brown.  This should take 3-5 minutes after the mixture has started to simmer. 

  3. Remove mixture from heat and immediately pour evenly over pretzels. 

  4. Place in the oven and bake for 6 minutes. 

  5. Remove from oven and immediately sprinkle chocolate chips over pretzels and caramel. 

  6. Wait a few minutes, then use a spatula to spread now melted chocolate chips over pretzels.  Sprinkle with salt. 

  7. Allow to cool completely before breaking into pieces.  You can place your pan in the fridge or freezer to speed up the process. 

Jenny's Notes:

  • Don't have tinfoil?  You can always use wax or parchment paper, but I would recommend greasing them beforehand as I have had the bark stick to both of those products. 

  • Want to go crazy?  Use any kind of chips in place of the semisweet chips, such as milk, peanut butter, bittersweet...or a combination! 

  • Once you have spread the melted chocolate, feel free to add some extra toppings if you wish.  Coconut, chopped peanuts, finely chopped coffee beans...

Salted Chocolate Caramel Pretzel Bark
Yield 12-15 servings
Author
Prep time
25 Min
Cook time
6 Min
Total time
31 Min

Salted Chocolate Caramel Pretzel Bark

Salty, crunchy, chocolatey, caramelly, and only 5 ingredients to whip up this addicting bark!
Cook modePrevent screen from turning off

Ingredients

Instructions

  1. Oven 375°F / 190°C. Line an approximately 11x17in / 28x43cm jelly roll pan with tinfoil.
  2. Cover pan with an even layer of pretzels.
  3. In a medium saucepan over medium-low heat, combine butter and brown sugar. Stir until mixture starts to simmer, then allow to cook, without stirring, until mixture turns a nice golden-brown. This should take 3-5 minutes after the mixture has started to simmer.
  4. Remove mixture from heat and immediately pour evenly over pretzels.
  5. Place in the oven and bake for 6 minutes.
  6. Remove from oven and immediately sprinkle chocolate chips over pretzels and caramel.
  7. Wait a few minutes, then use a spatula to spread now melted chocolate chips over pretzels. Sprinkle with salt.
  8. Allow to cool completely before breaking into pieces. You can place your pan in the fridge or freezer to speed up the process.

Notes

If you’re wondering what a jelly-roll pan is, it’s merely a baking sheet with about a 1in side around it, which in this case keeps the bark contained. Don't have tinfoil? You can always use wax or parchment paper, but I would recommend greasing them beforehand as I have had the bark stick to both of those products. Want to go crazy? Use any kind of chips in place of the semisweet chips, such as milk, peanut butter, bittersweet...or a combination! Once you have spread the melted chocolate, feel free to add some extra toppings if you wish. Coconut, chopped peanuts, finely chopped coffee beans...

Nutrition Facts

Calories

398.37

Fat

24.26 g

Sat. Fat

14.77 g

Carbs

47.86 g

Fiber

2.24 g

Net carbs

45.63 g

Sugar

31.99 g

Protein

3.04 g

Sodium

384.00 mg

Cholesterol

40.49 mg

Nutritional information is approximate and based on 12 servings.

salted caramel, salted chocolate, bark, butter, toffee, caramel, chocolate chips, crack bark
dessert, snack
American
Did you make this recipe?
Tag @jennyblogsandbakes on instagram and hashtag it #jennyblogs

Homemade Eggnog

Last Updated July 16, 2024

Do you know what 2 weeks from today is?  Yes, Thanksgiving!  A big feast requires lots of food, lots of planning, and of course lots of shopping, preparing, and cooking.  There are of course all the traditional dishes to make, but sometimes you want to throw in something new and delicious.  Since many of you, my smart friends, break out the eggnog for the first time on Thanksgiving, why not try making it homemade this year?  No high fructose corn syrup, artificial flavor, or "Holly"-ness about it. It's very simple to make, and can easily be doubled, tripled, or quadrupled (Hello, Morris family) to fit your needs. 'Tis the season to be jolly, not drink Hollynog.  

This post may contain affiliate links. If you make a purchase using these links, Jennyblogs may receive a small commission, at no extra cost to you. This helps to support Jennyblogs. Where possible, links are prioritized to small businesses, and American companies and products made in the USA for American readers. For further information see the privacy policy. Grazie!


Homemade Eggnog

Makes 8 Servings

Ingredients:

  • 4 eggs

  • 1/2 cup / 100g sugar

  • 2 tsp / 10g vanilla extract

  • 4 cups / 948g milk

  • 1/2 tsp nutmeg, plus more for sprinkling

  • 1/4 cup / 56g brandy, bourbon, or rum, optional

Directions: 

  1. In a large bowl, whisk together eggs and sugar until light in color and the sugar has dissolved. 

  2. Whisk in vanilla, nutmeg, milk, and alcohol.  Strain into a pitcher or serving dish of choice and chill until ready to serve. Sprinkle with additional nutmeg. 

Jenny's Notes:

  • Halve, double, or triple this recipe as needed.

  • So easy and delicious!  If you are worried about the raw eggs in this, simply use pasteurized eggs. 

  • If you are serving this to children and/or people who don't drink, obviously don't add any alcohol. What I like to do is add the alcohol to only half so everyone is happy, or let people add their own. But not the children.

  • Serve in a punch bowl with dollops of vanilla ice cream for an extra decadent treat!