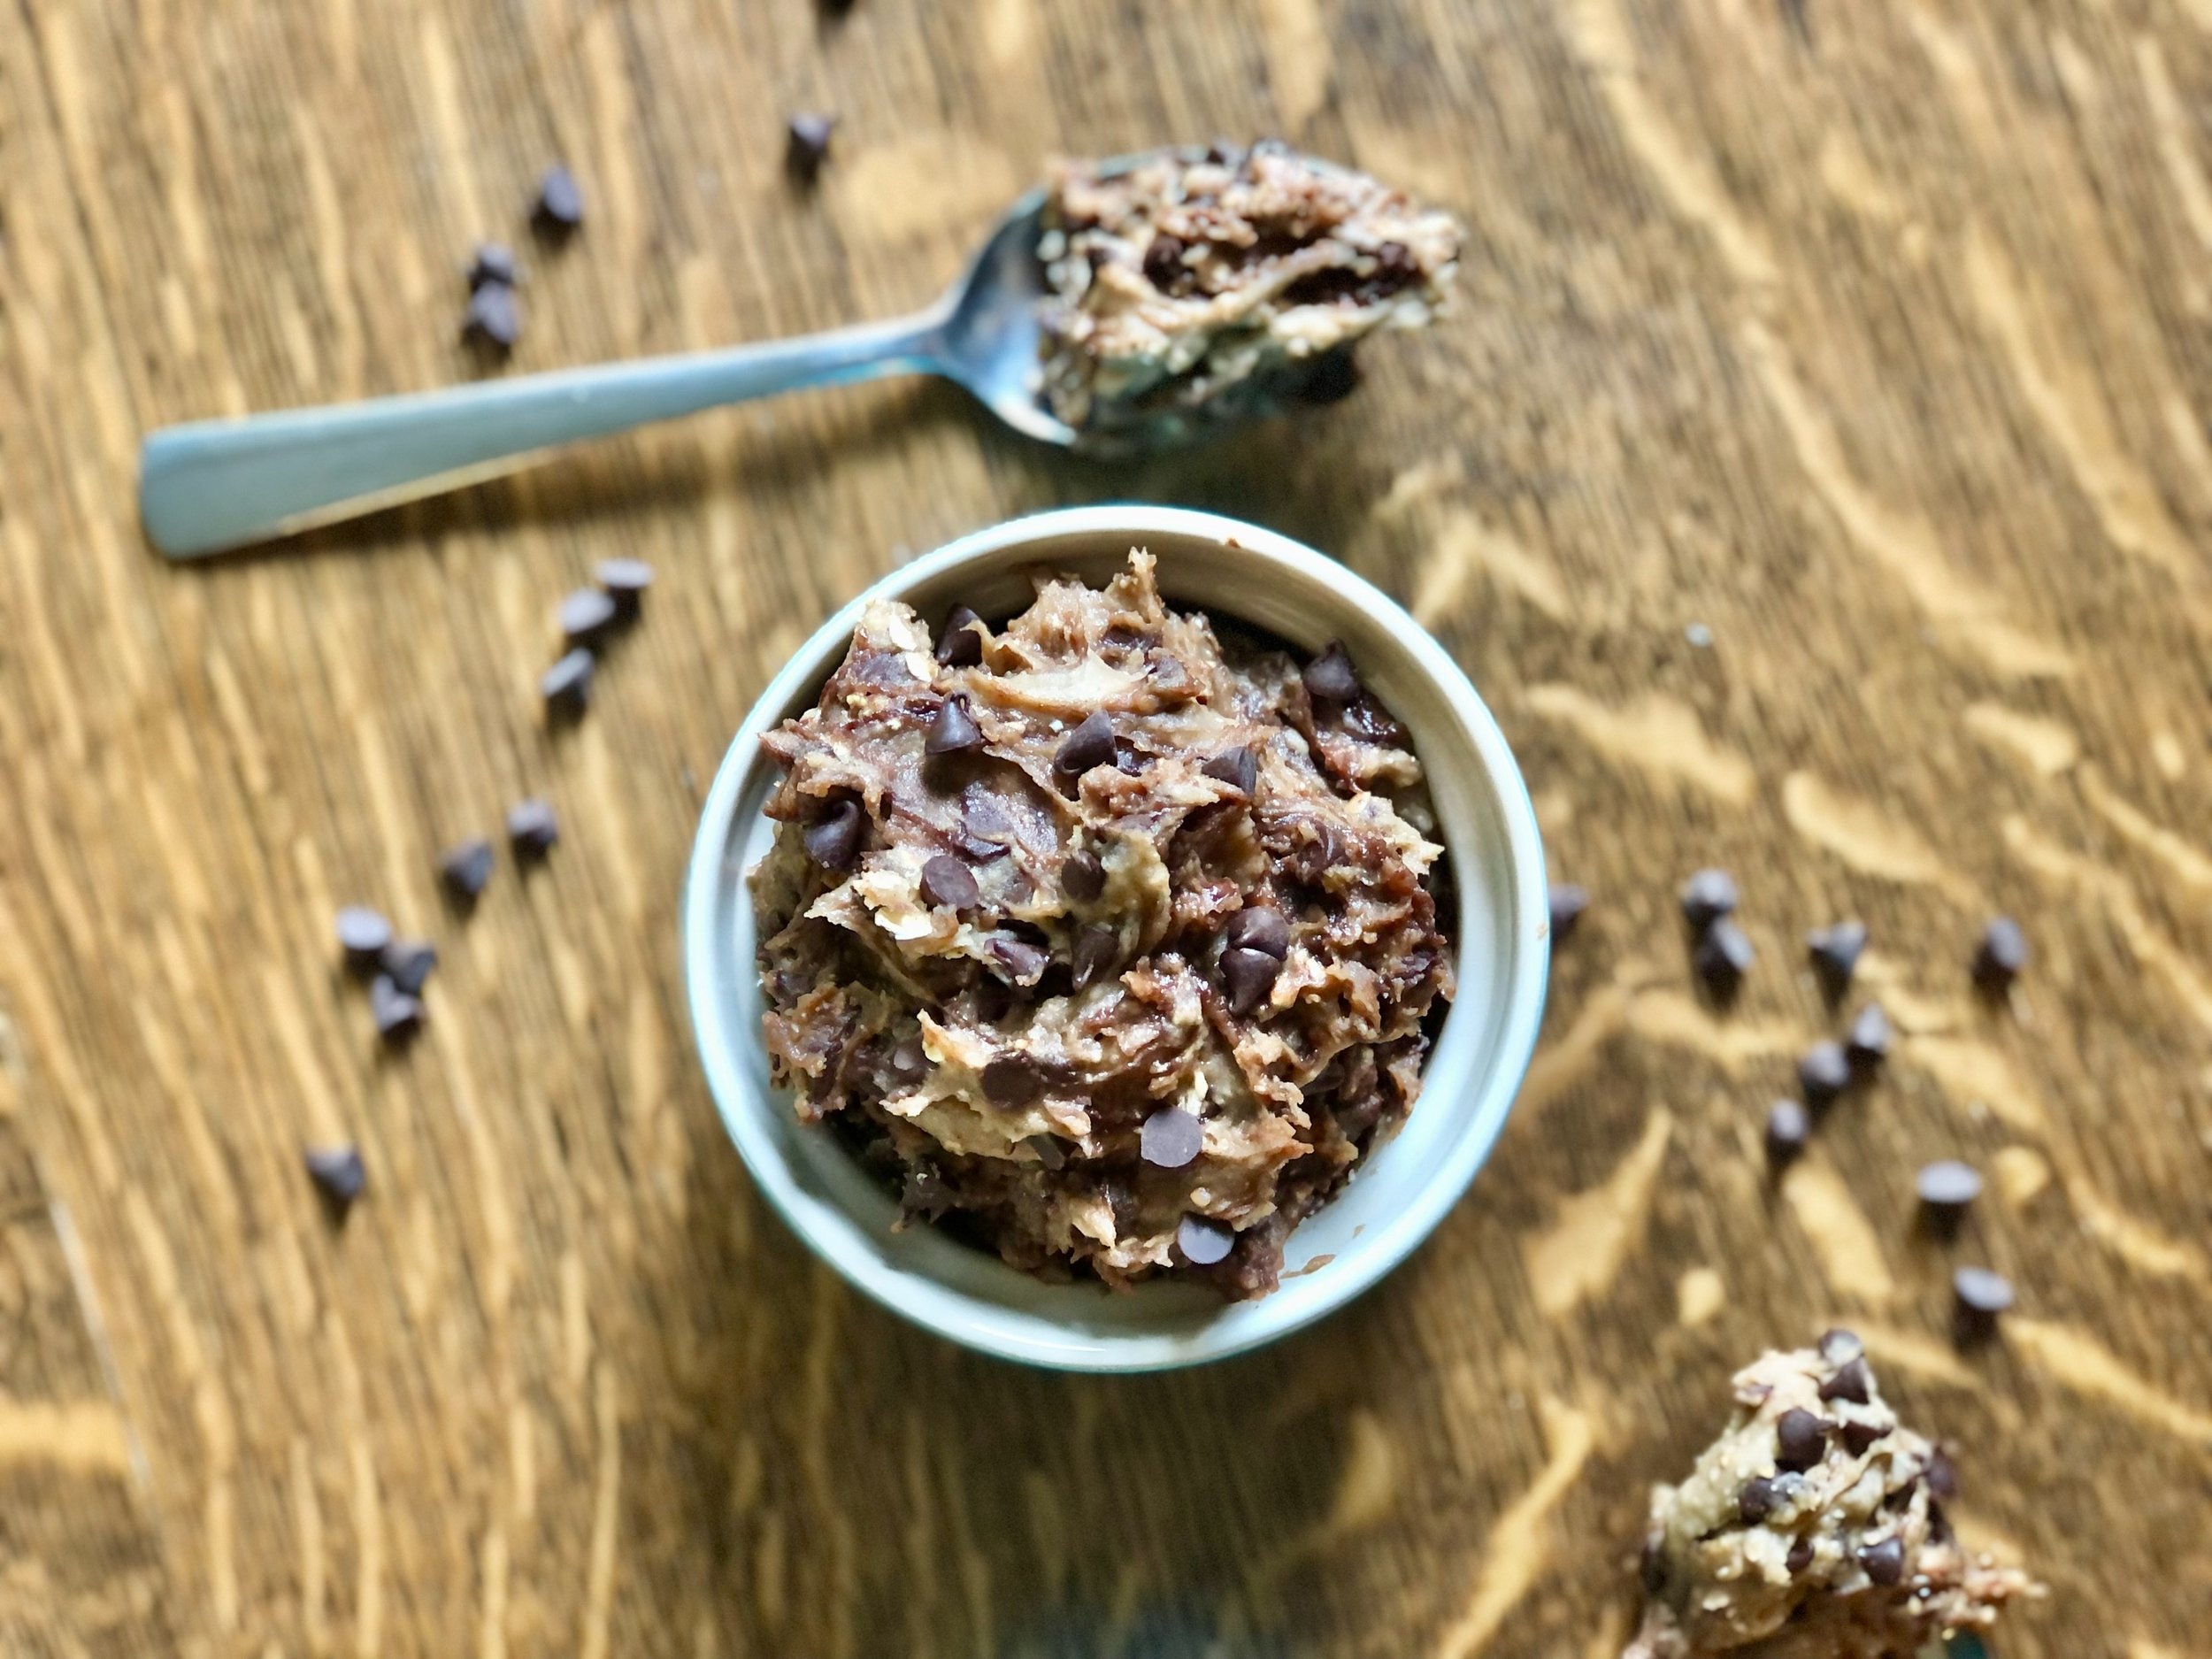
Healthy Chocolate Chip Cookie Dough Dip

Last updated August 3, 2024

Looks pretty delicious, right? Chocolate Chip Cookie Dough Dip, but actually pretty good for you! I’m not going to say that you could do a blind taste test with real cookie dough and not know the difference, but also, for having beans as a base, this is weirdly close. It’s delicious in its own right. The only time this recipe gets flack is if someone knows it is made with beans before trying it. Even then they admit it’s pretty tasty. If they don’t know and aren’t prejudiced, they love it.

This cookie dough dip is one I’ve been making for over a decade now. A blogger by the name of Chocolate Covered Katie was having a big moment and I made and loved a lot of her recipes. She was, I believe, the person who got me into the ‘healthy” baking scene. Back when I was dancing full time, I loved all of the healthier desserts, food that actually provided some fuel for my body while still tasting like dessert (my favorite thing). Well, most of the time. I ate and made some pretty weird things that I no longer eat and make and will most definitely not ever share as a recipe on this blog. This one, though, is one I’ve kept and made over and over again. Now, it’s a snack for my kids that they have no idea is not actual decadent cookie dough. One day, they will realize the deception. Ah, it’s fun being a parent, isn’t it? (My kids also get to experience real cookie dough, don’t worry!!) 

While this recipe is based on Chocolate Covered Katie’s, almost every element is highly customizable depending on your tastes, dietary needs (vegan, gluten-free, dairy-free, etc.), or simply which ingredients you have on hand. If you make and like this recipe, you too will probably find your groove in how you like to make it and it will become your own. 

In fact, let’s walk through the ingredient list so you can see all the different options that are possible with this recipe. I don’t normally do this, but this one has a lot, too many to simply add to the “Jenny’s Notes” that I usually have at the bottom of each recipe. 

Beans

The base of this recipe is beans. You can use any kind of white bean you’d like, as long as it doesn’t have too strong of a flavor. Rinse beans to keep the flavor as neutral as possible. Use a can or cook up your own. I prefer to use chickpeas, but also use great northern beans and cannellini beans if that’s what I have on hand.

Nut Butter

Any nut butter can be used in this recipe, as long as it’s something you like, of course! Think peanut butter, almond butter, cashew butter, sunflower butter, etc…the stronger the flavor of the butter (like sunflower), the more it will come through in the dip. Completely up to you what you prefer. I like using peanut butter, mostly because I always have peanut butter. I also like to use almond butter. 

Sweetener

Brown sugar will get you the closest flavor to cookie dough. You can also use higher amounts than in the recipe below to get that super sweet cookie dough taste. Conversely, you can also use less. I think 1/4 cup is that sweet spot for keeping it on the healthier side, while still tasting plenty sweet, especially when paired with plenty of chocolate chips! 

Other sweeteners can also be used. I probably use maple syrup the most. You can also use any kind of sugar (granulated, superfine, demarara, rapadura, sucanat, powdered, etc.), honey, stevia, agave, or any other sweetener you prefer. Keep in mind that the consistency of the sweetener used will affect the overall consistency of the dip, and will need to be adjusted accordingly. 

Oats

Oats help to give the dip a little bit of texture while also thickening it. The amount you need will vary depending on how well the beans are drained, how thick or thin your nut butter is, and if using a liquid sweetener. Remember that oats and some of the other options below will continue to absorb moisture as they sit, so it’s okay to leave the dip a bit thinner than desired to allow it to thicken up without getting too thick. 

You can use quick or rolled oats, wheat germ, oat bran, flaxmeal, almond flour, or even baby cereal. Just keep in mind that wheat germ and oats have gluten or possible gluten contamination, for those with wheat or gluten sensitivities. If you don’t have any problems with wheat, you could also just use flour. Since flour is supposed to be cooked before eating due to possibly harboring harmful bacteria that can cause food poisoning, this is the part where I’m supposed to recommend that you toast it first before adding to this dip. 

Vanilla Extract

A little extra vanilla for great flavor! Not much to say here other than use real vanilla extract for best flavor! Unless, of course, you have some real vanilla bean lying around you’d like to add.

Salt

Regular cookie dough usually has about a teaspoon of salt per batch. This recipe does not make as much as a batch of cookie dough, but you do have the option of increasing the salt, to taste. Keep in mind that some nut butters may have salt in them, so take that into consideration when adding salt.

Baking Soda

Baking soda might seem like an unusual addition when this dip is raw and not baked, but it lends a slight, but authentic flavor to the dip. It’s not a huge deal if you omit it, but if you do, consider increasing the salt slightly since baking soda is also salty. 

Milk

If your dough is too thick for your liking, add a bit of milk of choice, 1 tablespoon at a time, until desired consistency is reached. To keep this dairy-free, use a plant or nut based milk instead of dairy milk.

I don’t usually need to add any milk when I make this, since my sweetener is liquid (maple syrup) and the almond butter I use is quite runny. 

Chocolate Chips

You can use any size, shape or flavor of chips that you’d like. Regular semi-sweet chocolate chips would be the classic choice, but my favorite is probably using mini chocolate chips in this dip. I also really like dark chocolate. Chocolate chips sometimes sneakily have dairy in them, so check your ingredients if wanting to keep this dairy-free.

Use as little as 1/4 cup of chocolate chips to really keep things on the lighter/healthier side, but I recommend starting with 1/2 cup / 85g or up to 1 cup / 170g to really get the party going. 

Equipment

The last thing you need to know, is that you need a food processor to make this. Some quality blenders may be able to handle the thickness of this, but most blenders and mine most definitely cannot.

Such a simple dip to make and eat, but oh so many options! Have fun, friends! 

This post may contain affiliate links. If you make a purchase using these links, Jennyblogs may receive a small commission, at no extra cost to you. This helps to support Jennyblogs. Where possible, links are prioritized to small businesses and ethically and responsibly made items. For further information see the privacy policy. Grazie!

Recipe adapted from Chocolate Covered Katie


Healthy Chocolate Chip Cookie Dough Dip

Makes about 2 cups

Ingredients:

  • 266g (1 14oz can drained) chickpeas or white beans

  • 1/4 cup / 65g peanut butter or nut butter of choice

  • 1/4 cup / 50g brown sugar or 1/4 cup / 80g maple syrup or other sweetener of choice

  • 1/4 cup / 22g quick oats

  • 2 tsp / 10g vanilla extract

  • 1/8 tsp salt

  • 1/8 tsp baking soda

  • a few tablespoons of milk, as needed

  • 1/2 - 1 cup / 85g - 170g regular or mini semi-sweet chocolate chips

Directions:

  1. Combine chickpeas, peanut butter, sugar, oats, vanilla, salt, and baking soda in a food processor. Blend until smooth.

  2. Add milk, 1 tablespoon at a time, if a thinner consistency is desired. (Dip will continue to thicken slightly.)

  3. Stir in chocolate chips with spoon or spatula.

  4. Serve with fruit, graham crackers, pretzels, etc. or simply eat by the spoonful!

Jenny’s Notes:

  • Oats will continue to absorb liquid as they sit, so it’s okay to let the dip sit for 30 minutes or so (if it lasts that long!) before deciding to add more oats to thicken.

  • If blended in the food processor for more than a couple minutes, the motor may heat up the dip. If this happens, simply allow to cool or stick in the fridge before stirring in chocolate chips. Alternatively, stir in chips gently while warm for a melty, swirly, fresh baked cookie taste.
Healthy Chocolate Chip Cookie Dough Dip
Yield 8
Author
Prep time
15 Min
Total time
15 Min

Healthy Chocolate Chip Cookie Dough Dip

What could be better than a cookie dough dip? One that's so healthy you can eat it for breakfast or anytime! Made with a base of beans and highly customizable, this dip is delicious and can also be gluten-free, dairy-free, vegan, and it's no-bake.
Cook modePrevent screen from turning off

Ingredients

Instructions

  1. Combine chickpeas, peanut butter, sugar, oats, vanilla, salt, and baking soda in a food processor. Blend until smooth.
  2. Add milk, 1 tablespoon at a time, if a thinner consistency is desired. (Dip will continue to thicken slightly.)
  3. Stir in chocolate chips with spoon or spatula.
  4. Serve with fruit, graham crackers, pretzels, etc. or simply eat by the spoonful!

Notes

  • Oats will continue to absorb liquid as they sit, so it’s okay to let the dip sit for 30 minutes or so (if it lasts that long!) before deciding to add more oats to thicken.
  • If blended in the food processor for more than a couple minutes, the motor may heat up the dip. If this happens, simply allow to cool or stick in the fridge before stirring in chocolate chips. Alternatively, stir in chips gently while warm for a melty, swirly, fresh baked cookie taste.

Nutrition Facts

Calories

200.64

Fat

8.78 g

Sat. Fat

3.38 g

Carbs

24.77 g

Fiber

3.6 g

Net carbs

21.18 g

Sugar

11.45 g

Protein

6.24 g

Sodium

96.89 mg

Cholesterol

1.34 mg

Nutritional information is approximate. Based on 8 servings of about 1/4 cup each.

healthy chickpea chocolate chip cookie dough dip, bean dessert dip, vegan, gluten free, dairy free, no bake
dessert
American
Did you make this recipe?
Tag @jennyblogsandbakes on instagram and hashtag it #jennyblogs

Healthier Chocolate Peanut Butter Bars

Last updated July 19, 2024

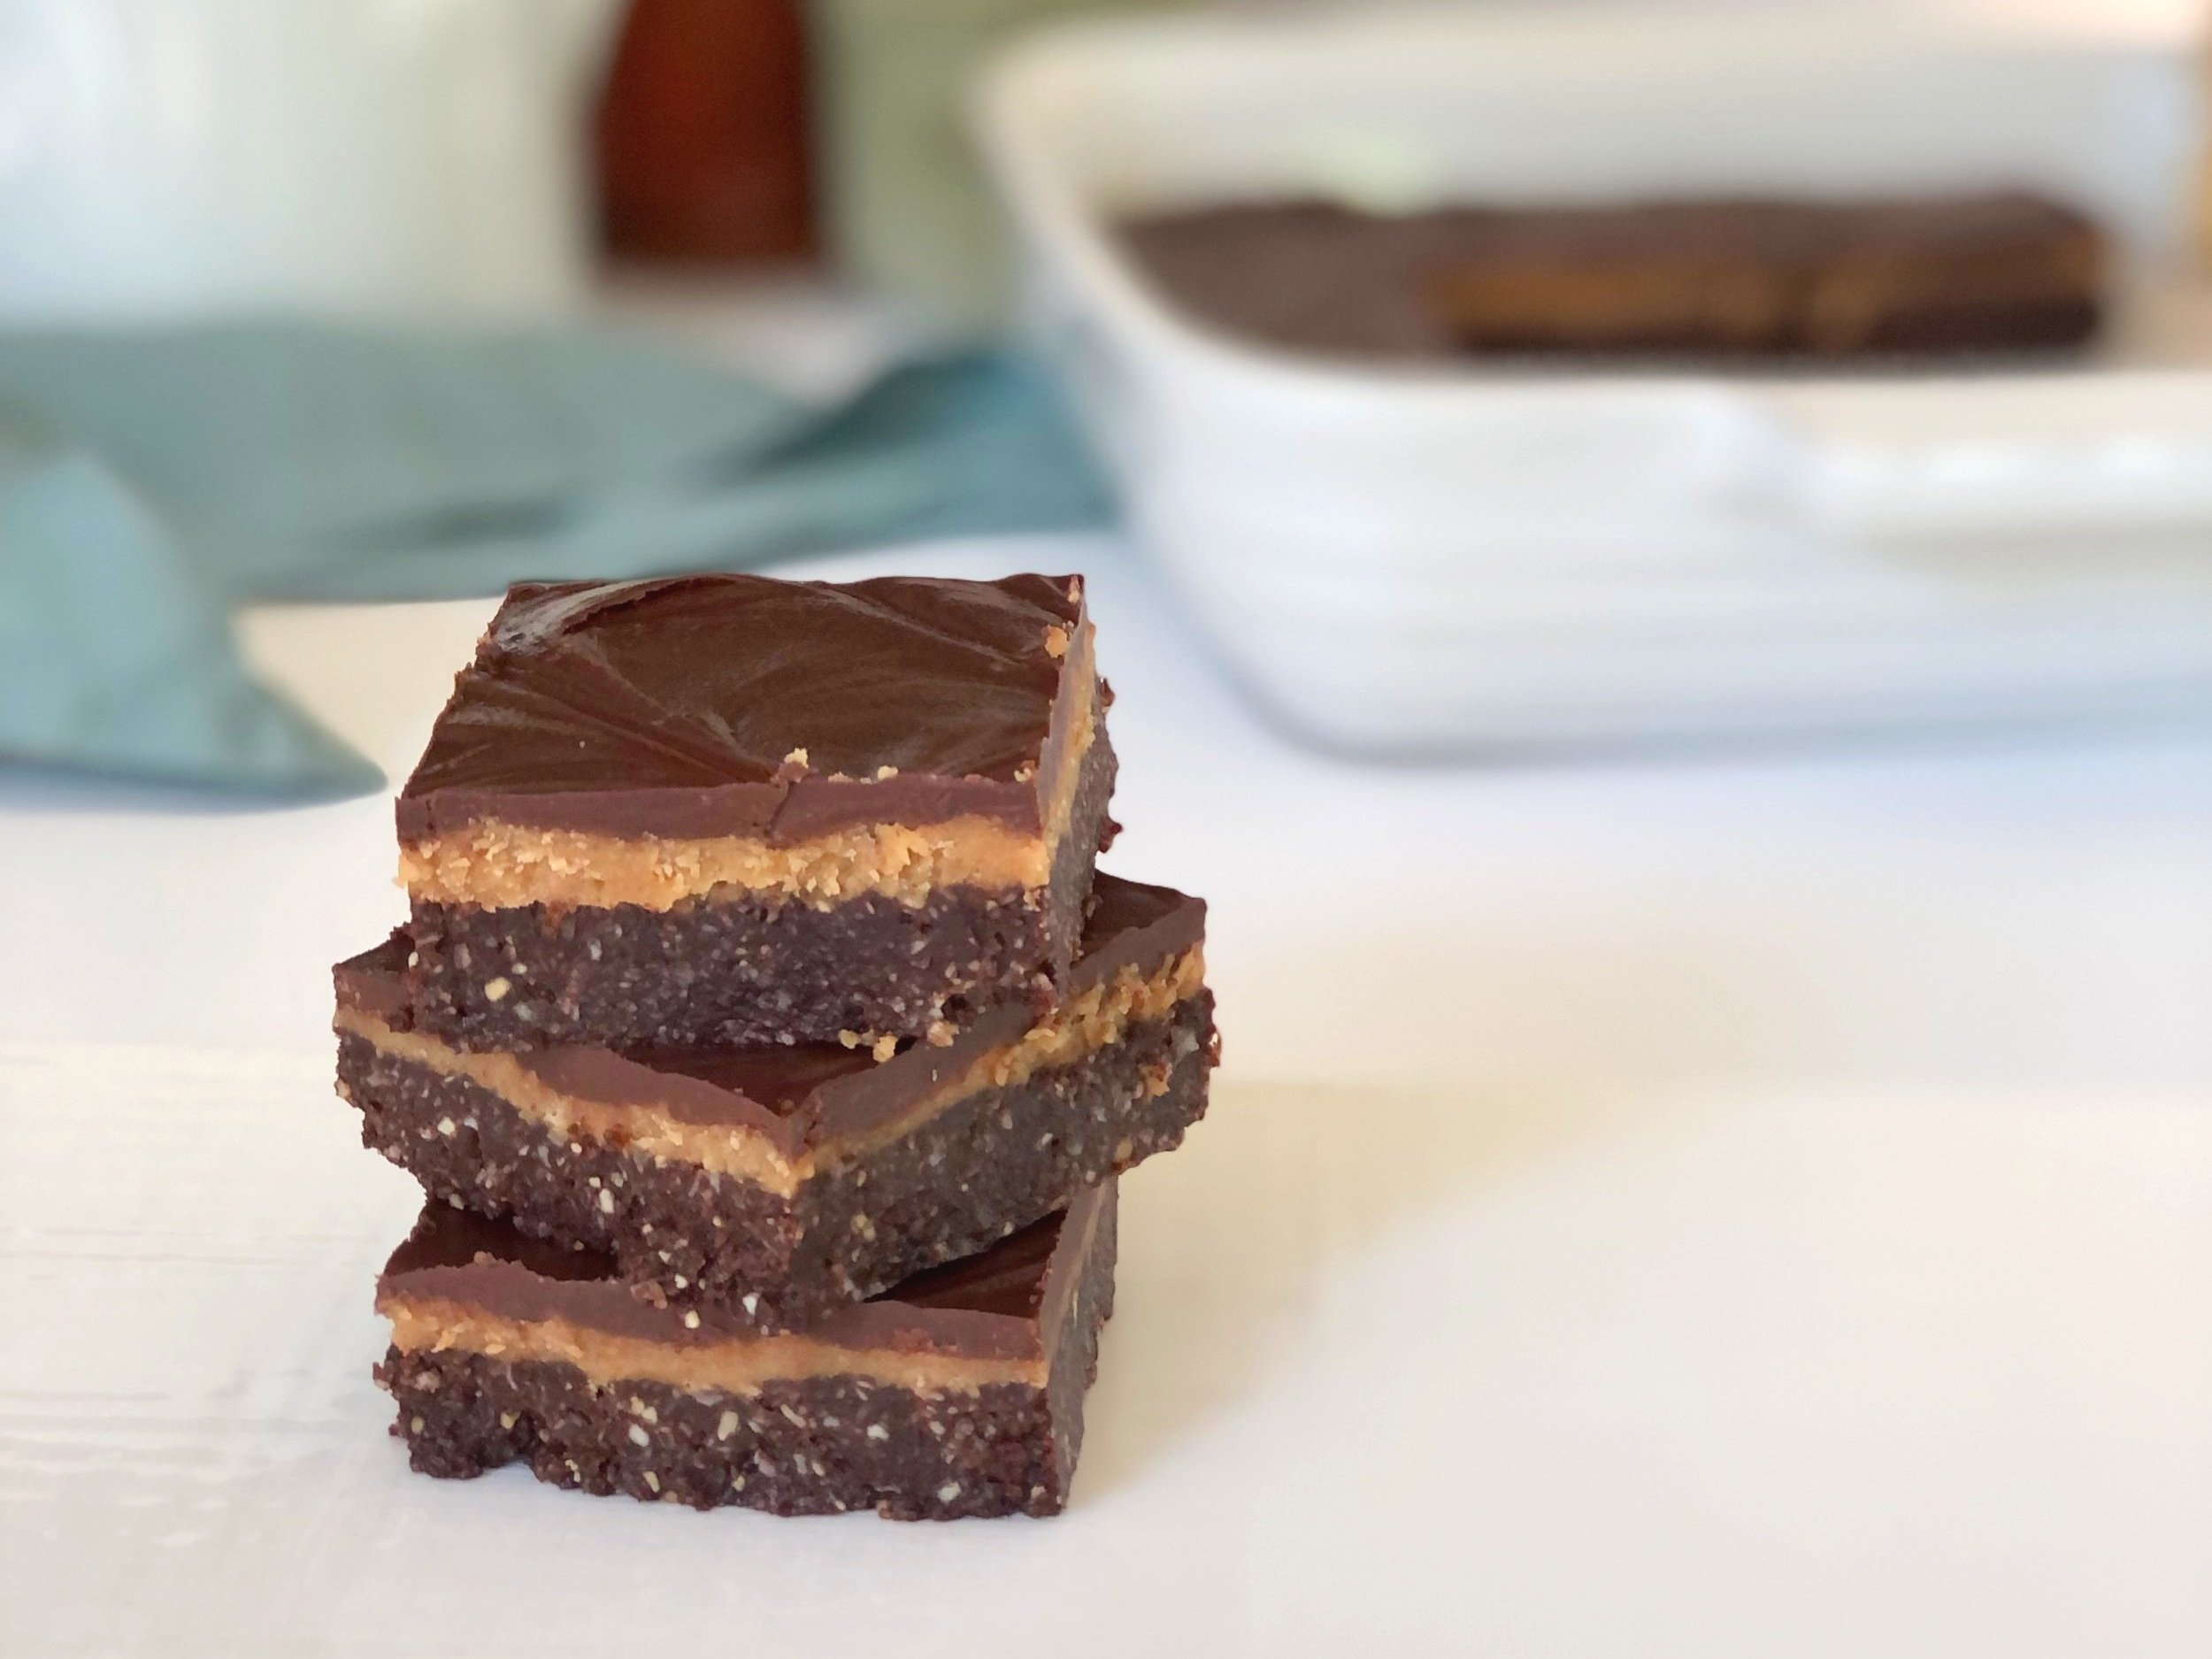
These Chocolate Peanut Butter Bars check a lot of boxes.

  • Delicious. These bars somehow bridge the gap between “coconut lovers” and “chocolate peanut butter lovers”, even for those who don’t normally love coconut, and those who don’t normally love peanut butter and chocolate together. I know, weird, but those people do exist and they’re some of my taste testers.

  • Healthier than most desserts. I would (and did) unabashedly eat these for breakfast. They’re full of nuts and coconut, and only use coconut oil, depending on which camp you fall in as far as viewing coconut oil as a good medium-chain fatty acid or simply another saturated fat.

  • No bake. Great for summer, if you don’t have an oven available to you, or simply don’t want to turn it on.

  • Easy. These can be ready in less than 30 minutes, quick and satisfying to whip up, with most of the work done in a food processor.

  • Satisfying. With the protein and fat content, these will keep you satisfied for longer. When you’re satisfied, you’re less likely to keep reaching for other unhealthy foods or overeating.

  • Gluten-free, vegan, dairy-free, egg-free, and almost refined sugar-free (there’s sugar in chocolate chips, which are in the chocolate topping.)

If those aren’t enough reasons to love these bars, I have one more. You don’t have to grease your baking dish! I know, that’s a little thing, but it’s a small kitchen task I don’t overly enjoy, and the fact that these bars slide ride out of an ungreased pan is a small yippee from me!

Another reason I like these, is because they don’t call for dates. Don’t get me wrong, I love dates, but it’s nice to have a healthy dessert recipe that doesn’t call for dates since so many do. I don’t always have dates on hand, and this way I can still whip up a healthier dessert/snack without waiting for my next grocery run. That makes this recipe’s ingredient list pretty close to being all pantry staples.

This post may contain affiliate links. If you make a purchase using these links, Jennyblogs may receive a small commission, at no extra cost to you. This helps to support Jennyblogs. Where possible, links are prioritized to small businesses, and American companies and products made in the USA for American readers. For further information see the privacy policy. Grazie!

Recipe inspired by Dani’s Healthy Eats


Healthier Chocolate Peanut Butter Bars

Serves about 16

Ingredients:

For the Chocolate Coconut Crust

  • 1 1/2 cups / 120g shredded unsweetened coconut

  • 6 Tbsp / 120g maple syrup

  • 6 Tbsp / 97g peanut butter

  • 6 Tbsp / 59g peanuts

  • 6 Tbsp / 38g cocoa powder

  • 5 Tbsp / 70g coconut oil

For the Peanut Butter Filling

  • 1/2 cup / 130g peanut butter

  • 1/4 cup / 81g maple syrup

  • 1/4 cup / 56g coconut oil

For the Chocolate Topping

  • 1 cup / 175g semi sweet or dark chocolate chips

  • 1 Tbsp / 14g coconut oil

Directions:

Ungreased 8x8 inch / 20x20 centimeter square baking dish

Make the Chocolate Coconut Crust

  1. Add all ingredients to a food processor; blend until smooth and mixture comes together in a soft dough-like ball.

  2. Press into pan and freeze while preparing filling.

Make the Peanut Butter Filling

  1. Add all filling ingredients to a medium bowl or food processor and mix until smooth. (It’s not necessary to clean food processor between mixing the crust and filling.)

  2. Remove crust from freezer and evenly spread filling over crust. Place back in freezer while preparing topping.

Make the Chocolate Topping

  1. In a small saucepan, combine chocolate and coconut oil. Melt over low heat, stirring frequently. Remove from heat when there are still a few tiny bits of chocolate; continue stirring until all is melted and smooth.

  2. Remove bars from freezer and spread topping evenly over filling. Cover and place in freezer or refrigerator to set, at least 30 minutes. Store covered in refrigerator.

Jenny’s Notes:

  • Different nut butters and nuts can be swapped out for the peanut butter and peanuts. Almond butter and almonds can be used, or cashews and cashew butter, or mix them up as you wish!

Healthier Chocolate Peanut Butter Bars
Yield 16
Author
Prep time
25 Min
Inactive time
30 Min
Total time
55 Min

Healthier Chocolate Peanut Butter Bars

Decadent, no-bake chocolate peanut butter bars with a chocolate coconut crust, peanut butter filling, and simple chocolate topping are deceivingly simple to make and satisfying to eat. Gluten-free, dairy-free, vegan, and almost refined sugar-free.
Cook modePrevent screen from turning off

Ingredients

For the Chocolate Coconut Crust
For the Peanut Butter Filling
For the Chocolate Topping

Instructions

Make the Chocolate Coconut Crust
  1. Ungreased 8x8 inch / 20x20 centimeter square baking dish
  2. Add all ingredients to a food processor; blend until smooth and mixture comes together in a soft dough-like ball.
  3. Press into pan and freeze while preparing filling.
Make the Peanut Butter Filling
  1. Add all filling ingredients to a medium bowl or food processor and mix until smooth. (It’s not necessary to clean food processor between mixing the crust and filling.)
  2. Remove crust from freezer and evenly spread filling over crust. Place back in freezer while preparing topping.
Make the Chocolate Topping
  1. In a small saucepan, combine chocolate and coconut oil. Melt over low heat, stirring frequently. Remove from heat when there are still a few tiny bits of chocolate; continue stirring until all is melted and smooth.
  2. Remove bars from freezer and spread topping evenly over filling. Cover and place in freezer or refrigerator to set, at least 30 minutes. Store covered in refrigerator.

Notes

  • Different nut butters and nuts can be swapped out for the peanut butter and peanuts. Almond butter and almonds can be used, or cashews and cashew butter, or mix them up as you wish!

Nutrition Facts

Calories

332.91

Fat

26.92 g

Sat. Fat

17.14 g

Carbs

21.81 g

Fiber

3.64 g

Net carbs

18.19 g

Sugar

13.5 g

Protein

6.06 g

Sodium

77.98 mg

Cholesterol

0.11 mg

Nutritional information is approximate. Based on 1 serving if cut into 16 pieces.

healthy coconut chocolate peanut butter bars, vegan, gluten free, dairy free, refined sugar free, no bake
dessert
American
Did you make this recipe?
Tag @jennyblogsandbakes on instagram and hashtag it #jennyblogs

Smooth Potato and Vegetable Soup

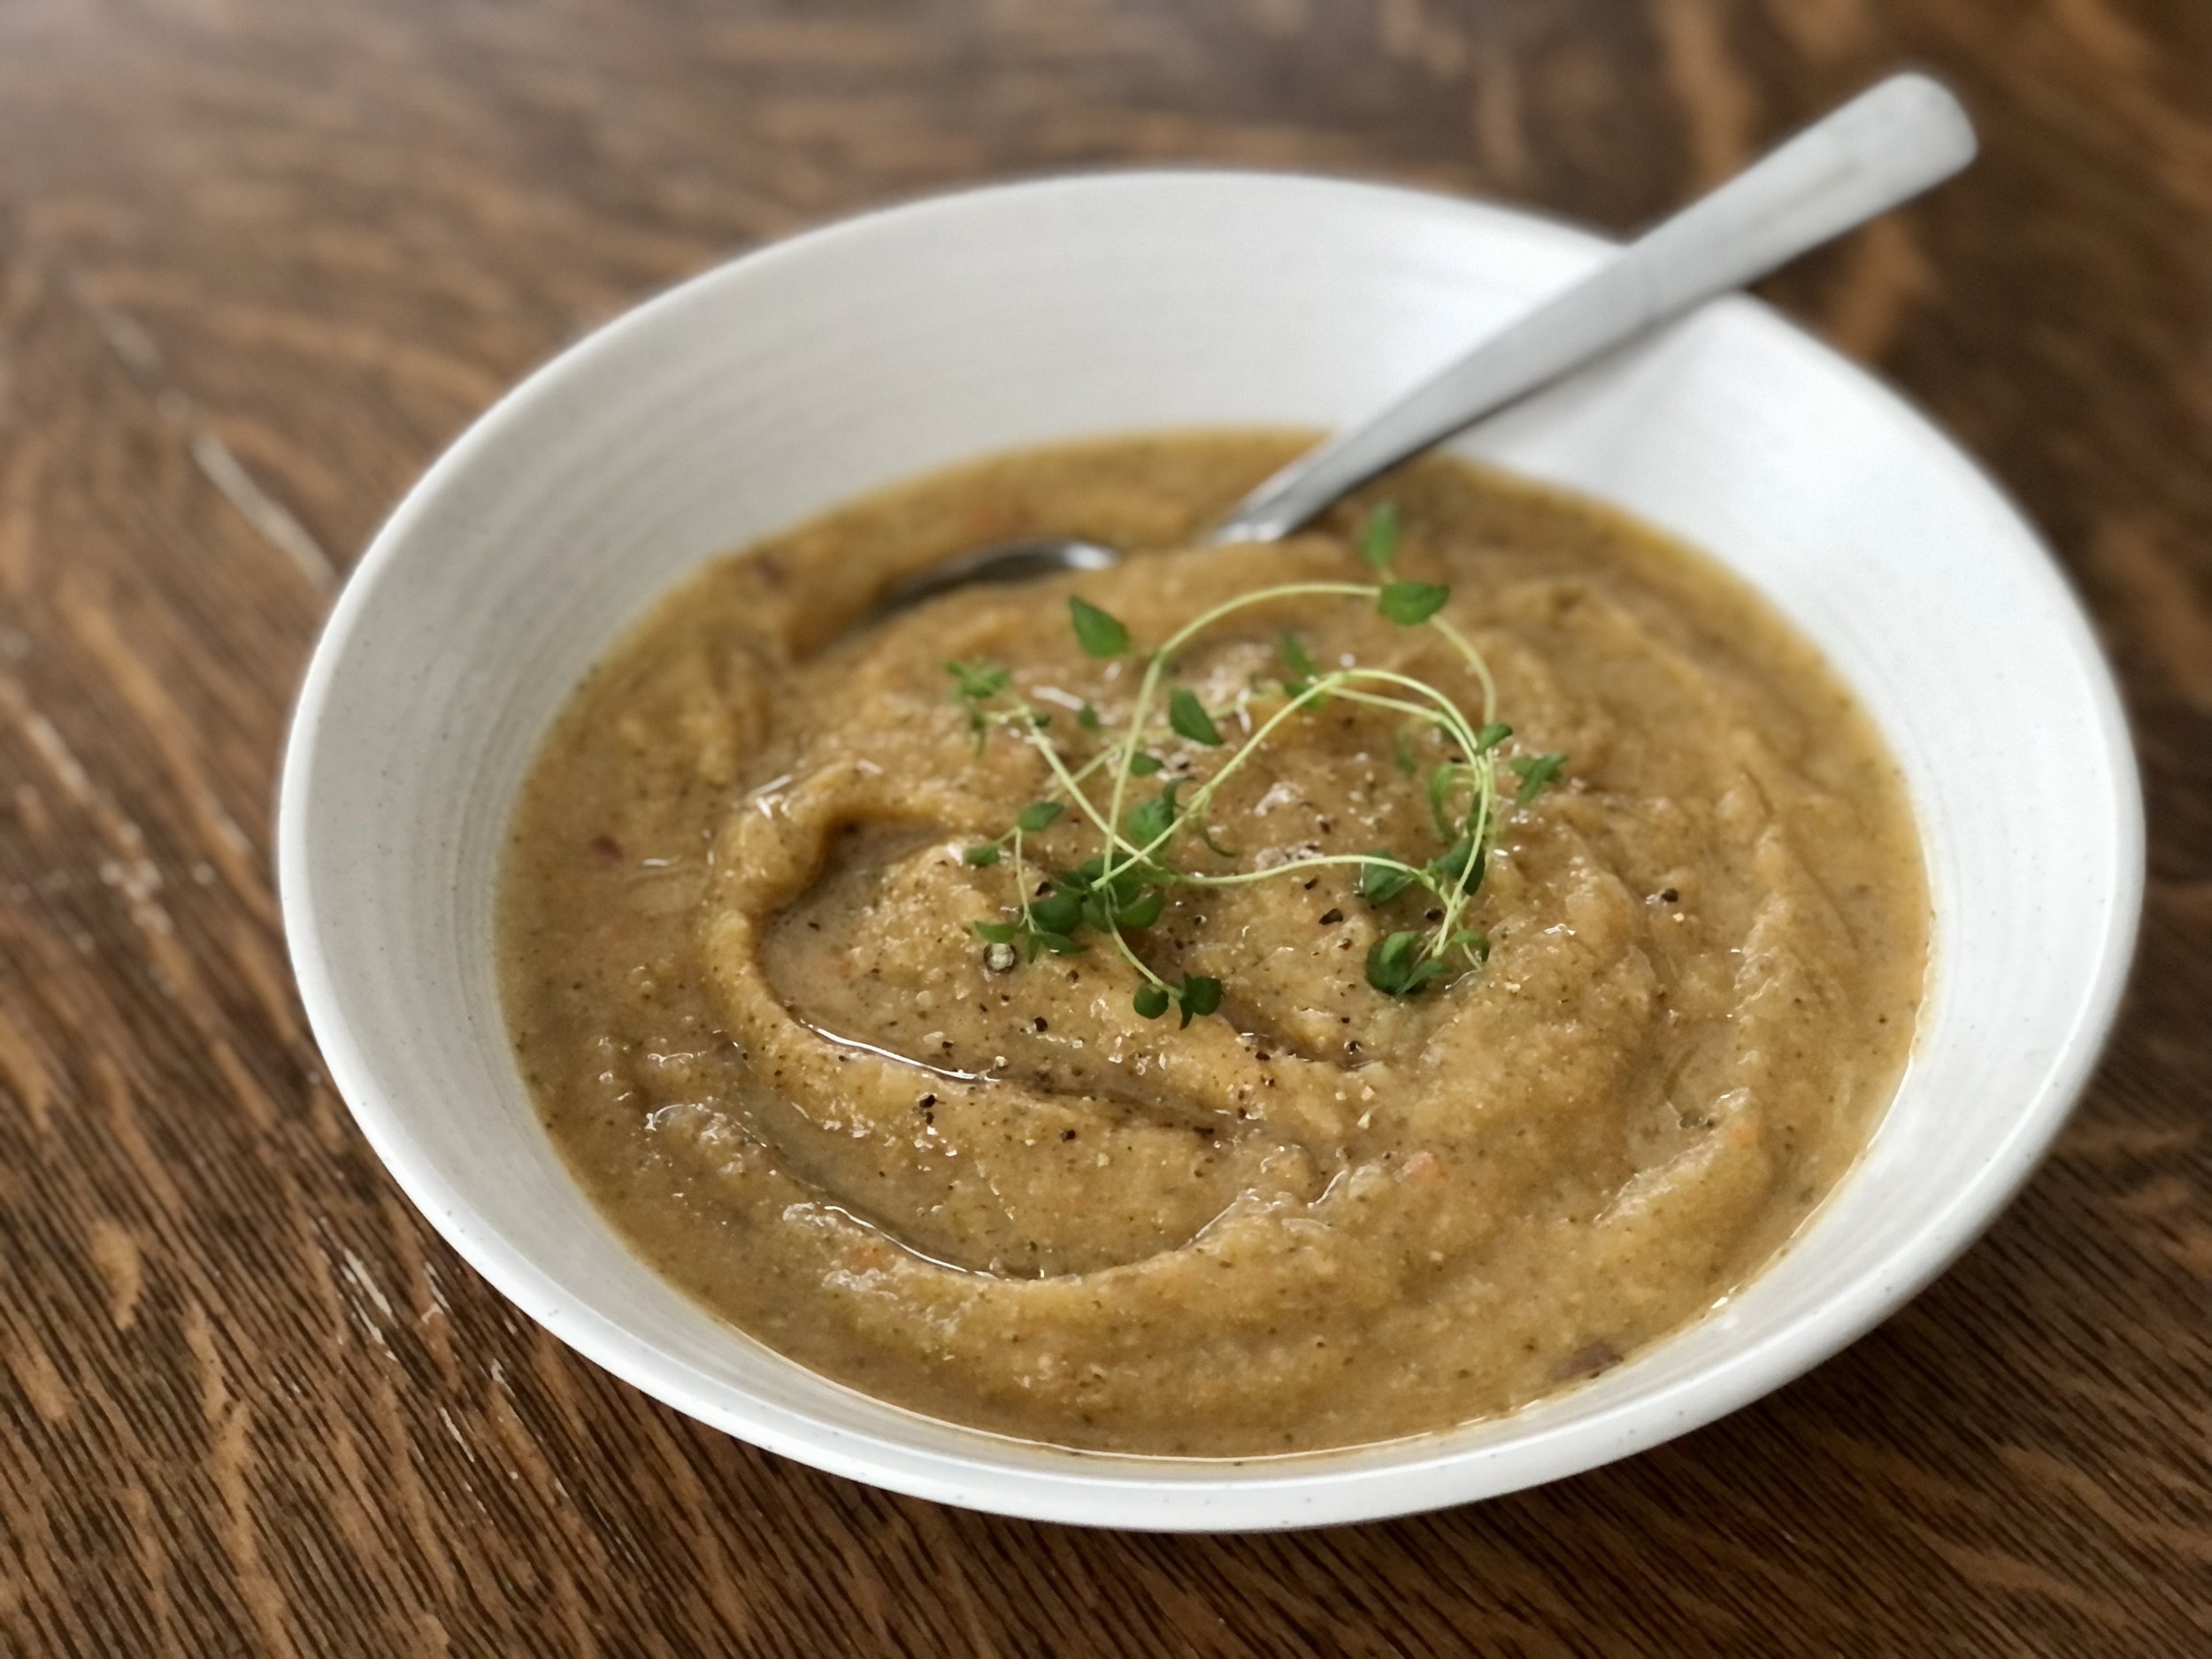
This soup couldn’t be simpler to make, simply chop up vegetables, boil them, and purée them. Tada! Dinner. It’s high on my list for easy meals that require little hands on prep, think 10 minutes or less. Feasible even with a newborn and other little kids demanding all your time!

It’s all vegetables, which makes it hearty and very nutritious. Once it’s puréed you can’t tell what’s in it which makes it easy to sneak in maybe some of those vegetables that your family isn’t so fond of. If I’m going to be really honest, veggie soups aren’t overly exciting, but I really enjoy this one. It’s difficult to ruin, even if you swap out different kinds of veggies. Make as written at first if you feel more comfortable, rather than branching out on your own right away. After the first time or two making this, you’ll quickly learn what you want more of or less of in the veggie department to suit you and your family’s tastes.

And, being all vegetables, this soup is vegetarian and vegan, gluten and dairy free. Friendly for many diets and dietary needs!

This post may contain affiliate links. If you make a purchase using these links, Jennyblogs may receive a small commission, at no extra cost to you. This helps to support Jennyblogs. For further information see the privacy policy. Grazie!


Smooth Potato and Vegetable Soup

Serves about 4-6

Ingredients:

  • 1 quart / 1 liter chicken or vegetable broth

  • 2 cloves of garlic, peeled

  • 3 medium potatoes

  • 2 medium carrots

  • 2 stalks of celery

  • 1 small-medium broccoli crown

  • 1/2 medium onion

  • 2 fresh artichoke hearts, or 1 14 oz can, drained

  • salt and pepper, to taste

  • extra virgin olive oil, for drizzling, and crusty bread, optional

Directions:

  1. Rinse vegetables and chop all into chunks.

  2. Add all ingredients to a large pot over medium-high heat and brig to a boil.

  3. Allow to simmer for 30-45 minutes, or until all vegetables are tender when checked with a sharp knife. Check periodically to ensure it doesn’t boil dry, adding more water if necessary. Total time will depend on how large or small your vegetable chunks are.

  4. Once the vegetables are tender, transfer to a blender with enough broth to cover or almost cover them in the blender, or use an immersion blender to blend until smooth. If you desire a thinner soup, add more broth or water.

  5. Serve immediately with bread and a drizzle of olive oil, if desired. Store in the refrigerator or freeze.

Jenny’s Notes:

  1. You’ll notice the recipe is a bit vague, and I did that on purpose. If I wrote all the options or different ways I’ve made this soup, it would be quite confusing to read. So, you can find some variations down here.

  2. What kind of broth? Completely up to you. I prefer vegetable as this is a vegetable soup, but you could just as easily use chicken, beef, a combo, or your own homemade broth.

  3. Try using sweet potatoes for part or all of the potatoes.

  4. I don’t even bother to remove the skin from any of the potatoes or carrots. It all gets blended anyway, and it saves a lot of time while adding nutrition!

  5. The first time I made this with artichokes I hadn’t ever worked with a fresh artichoke before. I thought the center was bigger than it was, and thus ended up with some strands of fiber throughout the soup from the leaves. Not a deal breaker, but beware of those fibrous artichoke outer leaves. If you aren’t sure what exactly is the “center”, simply try biting the leaves. If it’s too fibrous and hard to chew, don’t blend it. The center will be small, as in, I-bought-that-whole-artichoke-just-for-that-tiny-thing? and yellow and almost melt in your mouth tender.

  6. Feel free to play with some spices to change things up! I like to add a Tbsp of turmeric, and sometimes some thyme or sage.

  7. Finally, add or subtract any vegetables you want! Basically as long as you have the same volume of vegetables to liquid, ish, you’ll end up with a vegetable soup. Ha. I love how simple it is. It’s just playing with flavors and textures!

Smooth Potato and Veggie Soup
Yield 4-6
Author
Prep time
15 Min
Cook time
30 Min
Total time
45 Min

Smooth Potato and Veggie Soup

Simple and nutritious purèed potato and vegetable soup

Ingredients

Instructions

  1. Rinse vegetables and chop all into chunks.
  2. Add all ingredients to a large pot over medium-high heat and brig to a boil.
  3. Allow to simmer for 30-45 minutes, or until all vegetables are tender when checked with a sharp knife. Check periodically to ensure it doesn’t boil dry, adding more water if necessary. Total time will depend on how large or small your vegetable chunks are.
  4. Once the vegetables are tender, transfer to a blender with enough broth to cover or almost cover them in the blender, or use an immersion blender to blend until smooth. If you desire a thinner soup, add more broth or water.
  5. Serve immediately with bread and a drizzle of olive oil, if desired. Store in the refrigerator or freeze.

Notes

  1. You’ll notice the recipe is a bit vague, and I did that on purpose. If I wrote all the options or different ways I’ve made this soup, it would be quite confusing to read. So, you can find some variations down here.
  2. What kind of broth? Completely up to you. I prefer vegetable as this is a vegetable soup, but you could just as easily use chicken, beef, a combo, or your own homemade broth.
  3. Try using sweet potatoes for part or all of the potatoes.
  4. I don’t even bother to remove the skin from any of the potatoes or carrots. It all gets blended anyway, and it saves a lot of time while adding nutrition!
  5. The first time I made this with artichokes I hadn’t ever worked with a fresh artichoke before. I thought the center was bigger than it was, and thus ended up with some strands of fiber throughout the soup from the leaves. Not a deal breaker, but beware of those fibrous artichoke outer leaves. If you aren’t sure what exactly is the “center”, simply try biting the leaves. If it’s too fibrous and hard to chew, don’t blend it. The center will be small, as in, I-bought-that-whole-artichoke-just-for-that-tiny-thing? and yellow and almost melt in your mouth tender.
  6. Feel free to play with some spices to change things up! I like to add a Tbsp of turmeric, and sometimes some thyme or sage.
  7. Finally, add or subtract any vegetables you want! Basically as long as you have the same volume of vegetables to liquid, ish, you’ll end up with a vegetable soup. Ha. I love how simple it is. It’s just playing with flavors and textures!


Nutrition Facts

Calories

240.61

Fat

4.33 g

Sat. Fat

0.72 g

Carbs

46.34 g

Fiber

8.9 g

Net carbs

37.42 g

Sugar

8.16 g

Protein

8.2 g

Sodium

1094.33 mg

Cholesterol

0 mg

Nutritional information is approximate, based on 1 serving if recipe serves 4, including olive oil drizzle.

potato soup, Armenian vegetable soup, vegan, vegetarian
dinner
American
Did you make this recipe?
Tag @jennyblogsandbakes on instagram and hashtag it #jennyblogs


Chocolate Chip Meringue Cookies

Last Updated September 7, 2024

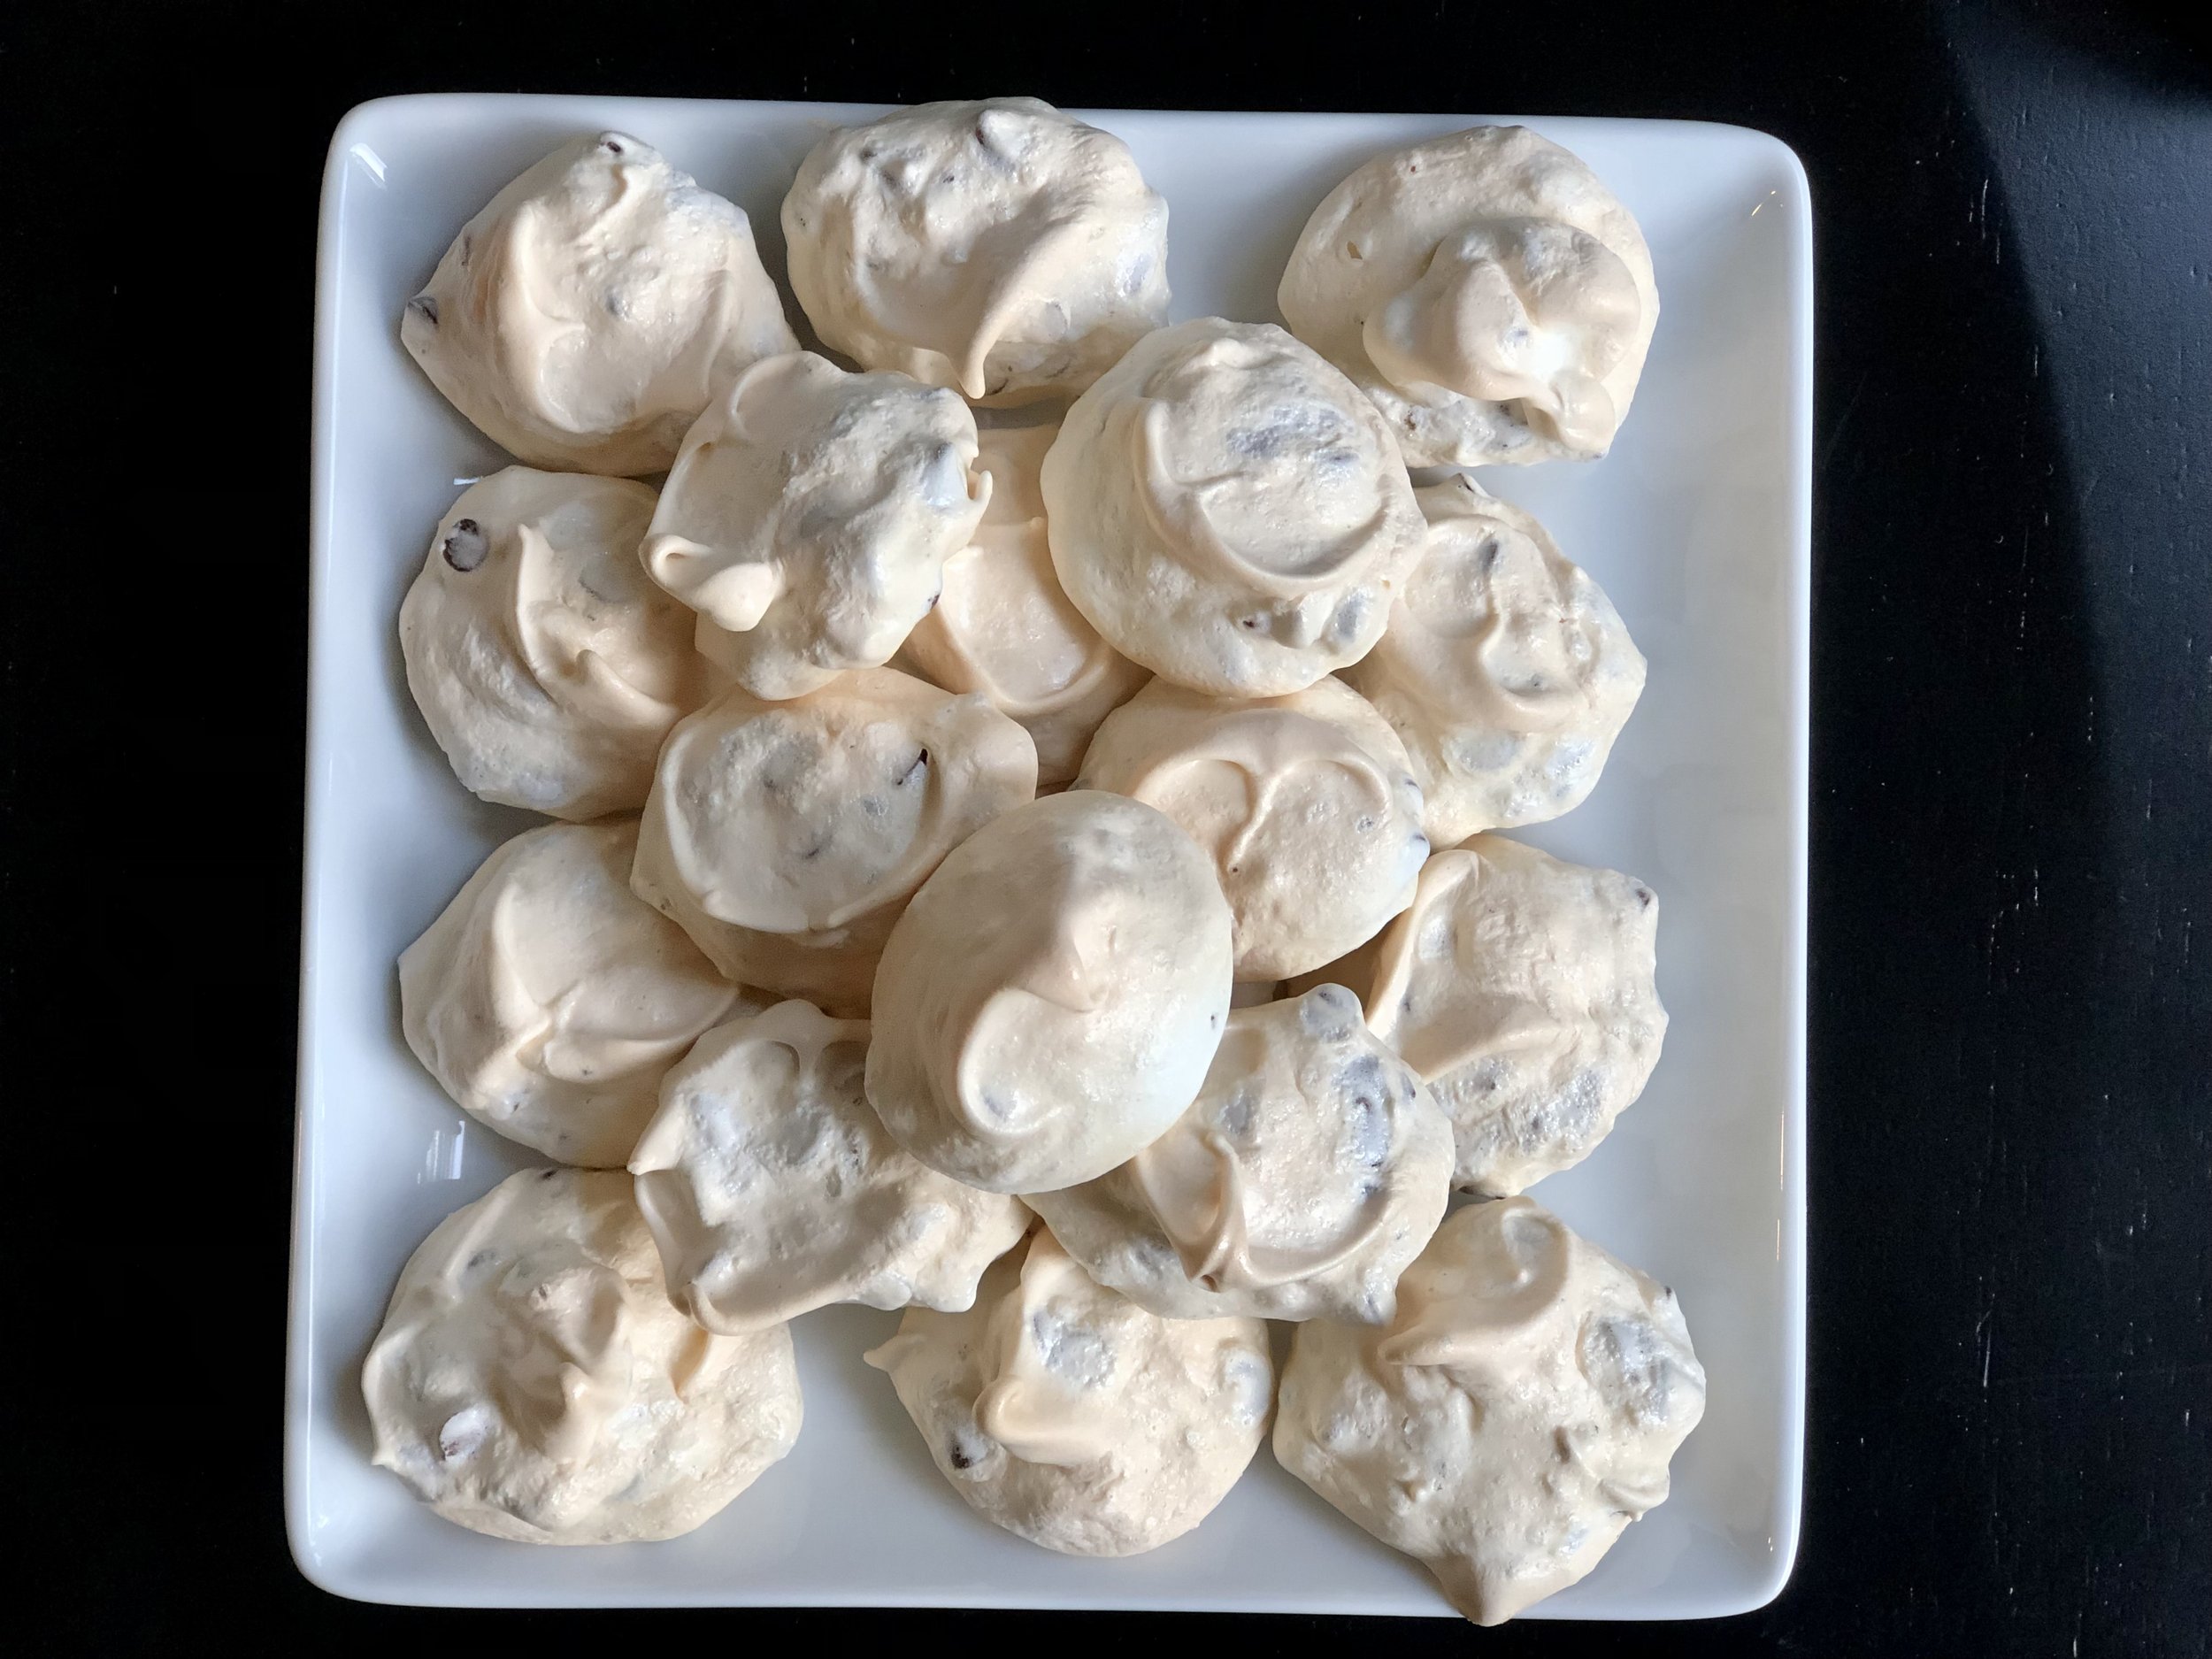
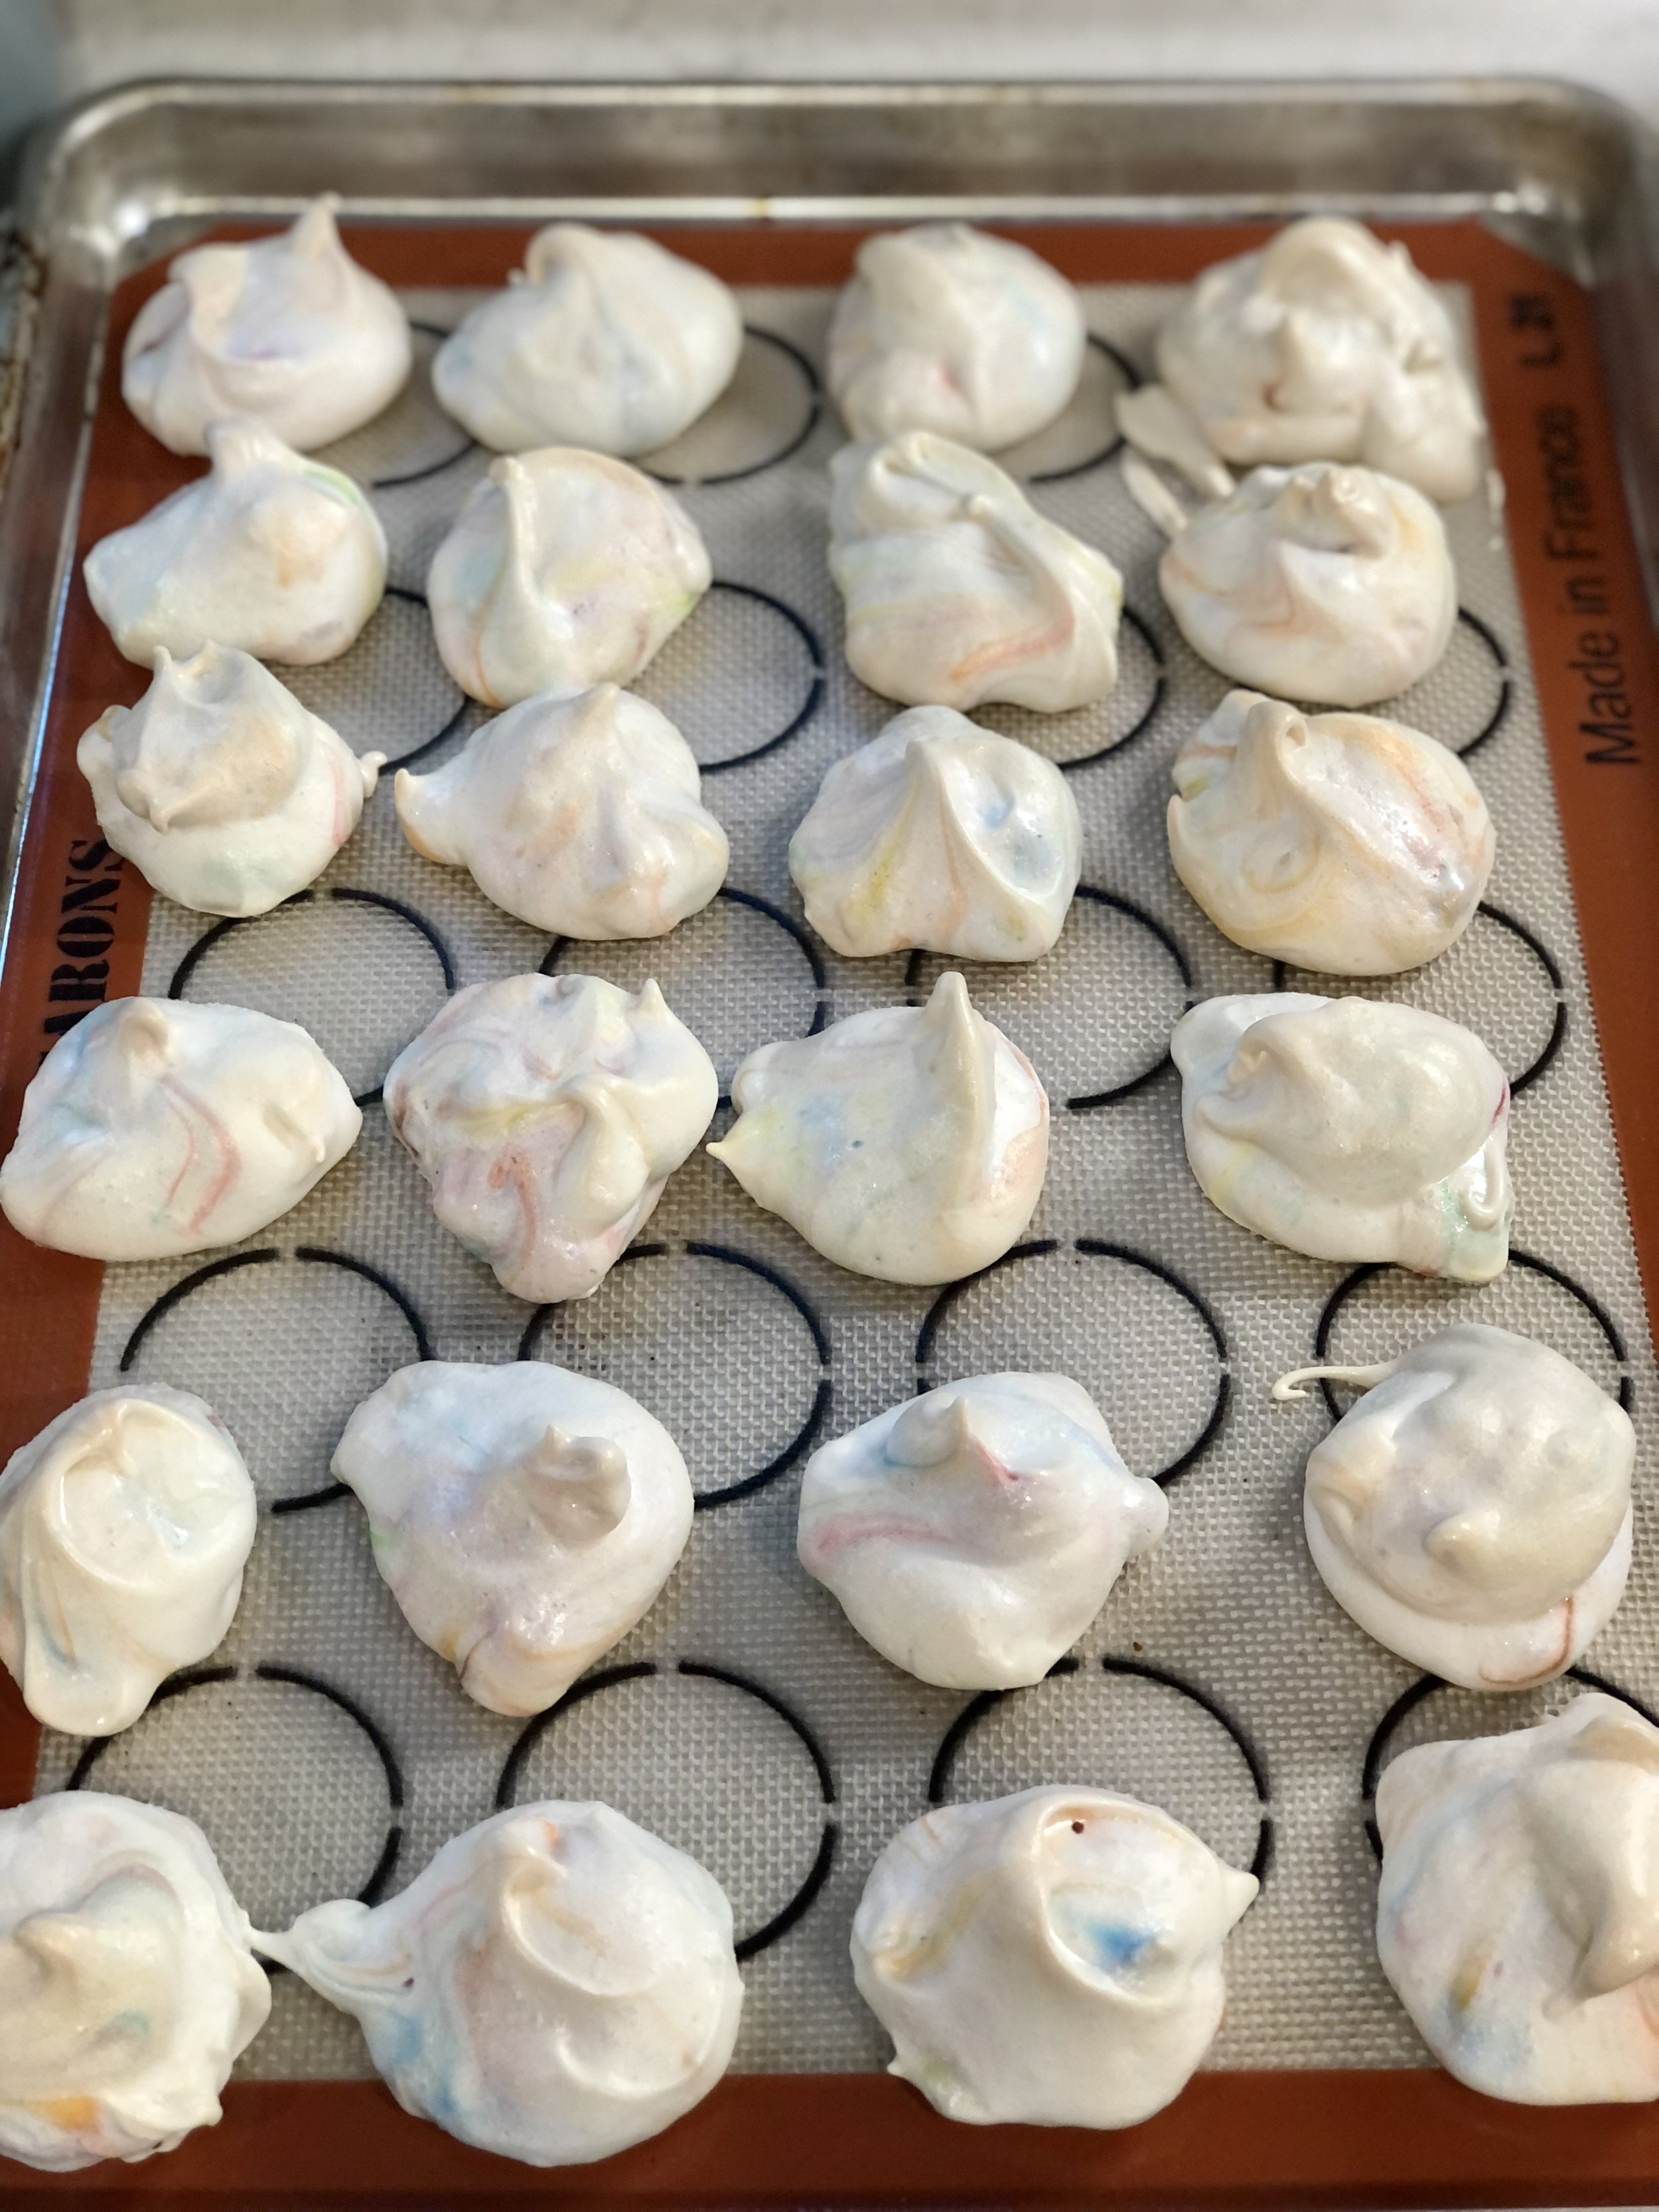
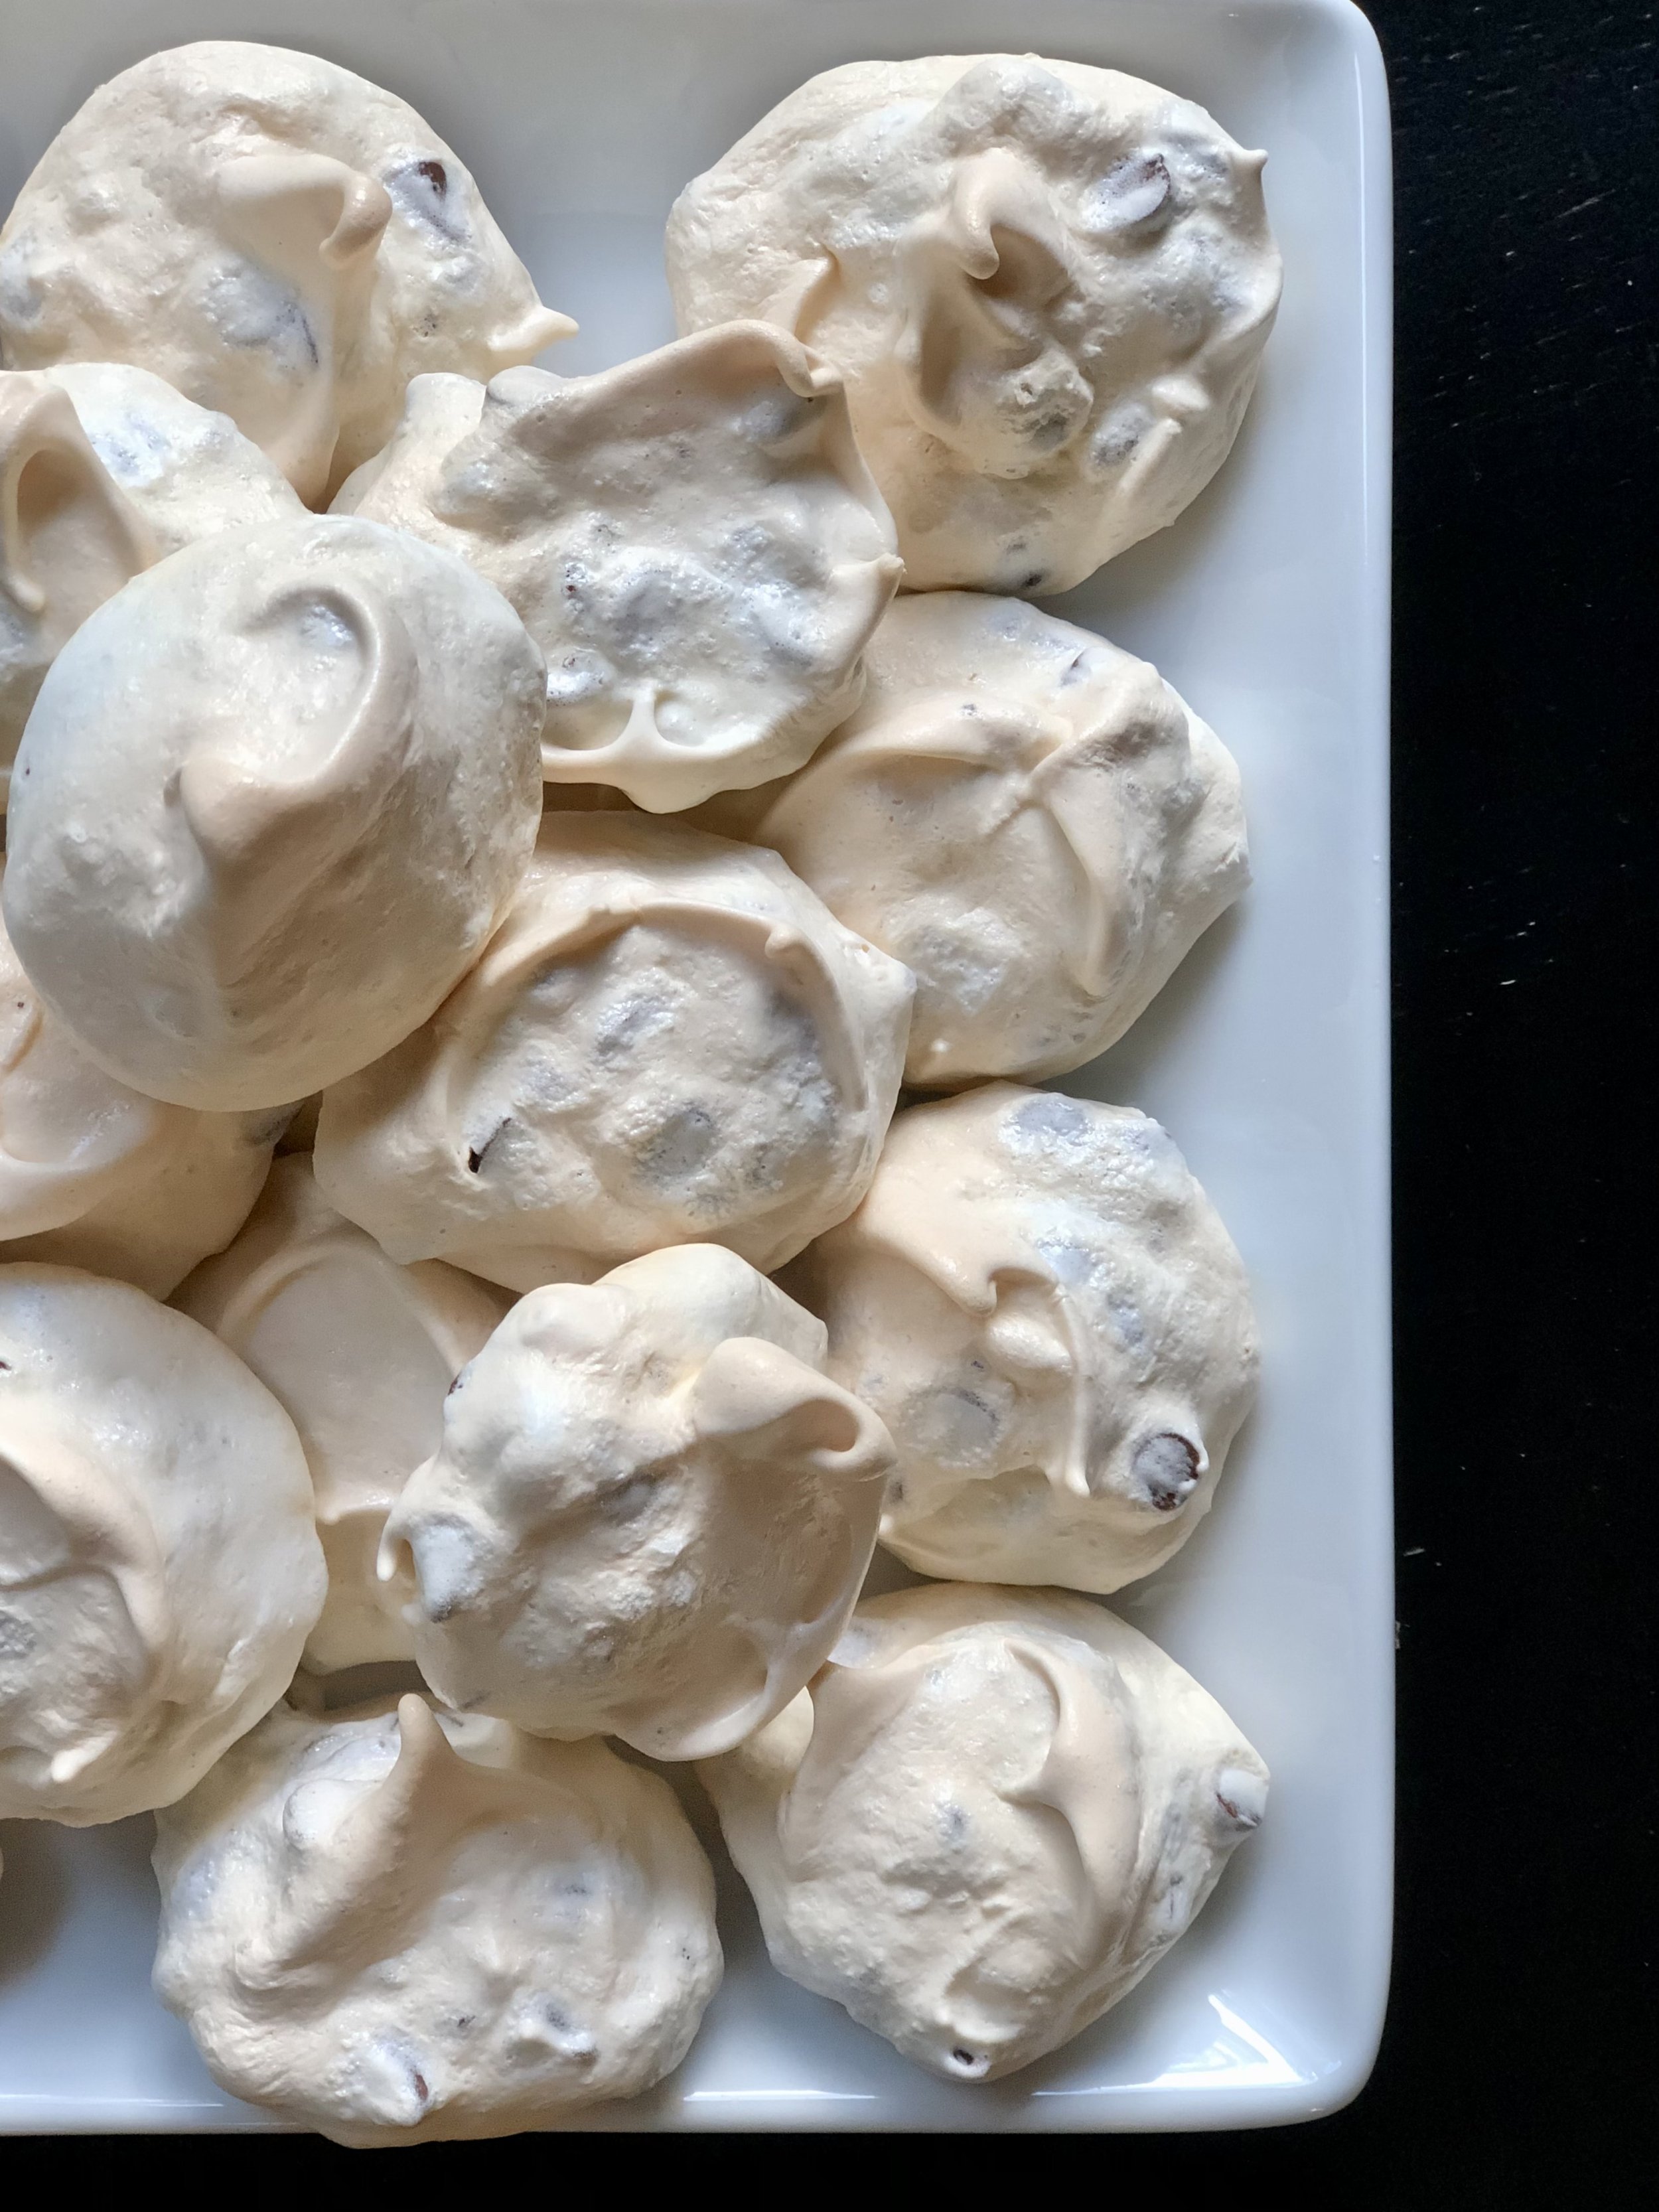
As far as simple and delicious cookie recipes go, this is a good one to have on hand.

These cookies have only 4 ingredients, and are gluten-free, dairy-free (as long as your chocolate chips don’t contain dairy), and many other allergen and dietary needs friendly.

This is a recipe I’ve had around for ages, since I was a kid! I believe I originally got it from my cousin. I recently re-discovered these, they’re almost too easy to make, and a great way to use up extra egg whites. They’re easy enough kids can help or even make them by themselves, and with the chocolate chips, M&M’s, or other add ins, also very appealing to kids!

Are you ready for some of the easiest cookies you’ve made yet? Yeah, let’s go!

This post may contain affiliate links. If you make a purchase using these links, Jennyblogs may receive a small commission, at no extra cost to you. This helps to support Jennyblogs. For further information see the privacy policy. Grazie!

Recipe from my cousin


Chocolate Chip Meringue Cookies

M&M Meringue Cookies

Makes about 24 (about 1 1/2inch / 3cm) cookies

Ingredients:

  • 2 egg whites

  • 1 pinch of cream of tartar

  • 1/2 cup / 100g granulated sugar

  • 3/4 cup / 128g mini chocolate chips or other add-in of choice

Directions:

Oven preheated to 250°F / 121°C. Line a cookie sheet with a silpat or lightly grease.

  1. In the bowl of a stand mixer or with a hand-held electric mixer, beat egg whites and cream of tartar with whisk attachment until foamy.

  2. Add sugar and beat until stiff peaks form.

  3. Fold in chocolate chips with a spatula.

  4. Drop onto prepared cookie sheet and bake for about 30 minutes, or until set and just starting to turn a light golden color. Allow to cool slightly before removing from cookie sheet.

Jenny’s Notes:

  • Mini M&M’s are also a hit in these cookies! You can get creative, any kind of crushed candy or cookie like Oreo’s, or nuts, sprinkles, etc.

  • These cookies are best enjoyed within a day or two. They can be stored loosely covered at room temperature, but if you cover too tightly they turn soft and sticky even quicker.

Chocolate Chip Meringue Cookies
Yield 24
Author
Prep time
20 Min
Cook time
30 Min
Total time
50 Min

Chocolate Chip Meringue Cookies

4 ingredient meringue cookies with a slightly crunchy exterior and a soft, chewy inside, speckled with chocolate chips.
Cook modePrevent screen from turning off

Ingredients

Instructions

  1. Oven preheated to 250°F / 121°C. Line a cookie sheet with a silpat or lightly grease.
  2. In the bowl of a stand mixer or with a hand-held electric mixer, beat egg whites and cream of tartar with whisk attachment until foamy.
  3. Add sugar and beat until stiff peaks form.
  4. Fold in chocolate chips with a spatula.
  5. Drop onto prepared cookie sheet and bake for about 30 minutes, or until set and just starting to turn a light golden color. Allow to cool slightly before removing from cookie sheet.

Notes

  • Mini M&M’s are also a hit in these cookies! You can get creative, any kind of crushed candy or cookie like Oreo’s, or nuts, sprinkles, etc.
  • These cookies are best enjoyed within a day or two. They can be stored loosely covered at room temperature, but if you cover too tightly they turn soft and sticky even quicker.

Nutrition Facts

Calories

45.69

Fat

1.32 g

Sat. Fat

0.81 g

Carbs

8.05 g

Fiber

0.15 g

Net carbs

7.9 g

Sugar

7.7 g

Protein

0.54 g

Cholesterol

0.84 mg

Sodium

8.04 mg

Nutritional information is approximate. Based on 1 cookie from a 24-cookie batch.

meringue, egg whites, cookies, gluten-free, dairy-free
dessert, cookies
American
Did you make this recipe?
Tag @jennyblogsandbakes on instagram and hashtag it #jennyblogs

Flax Bread

Updated May 27, 2024

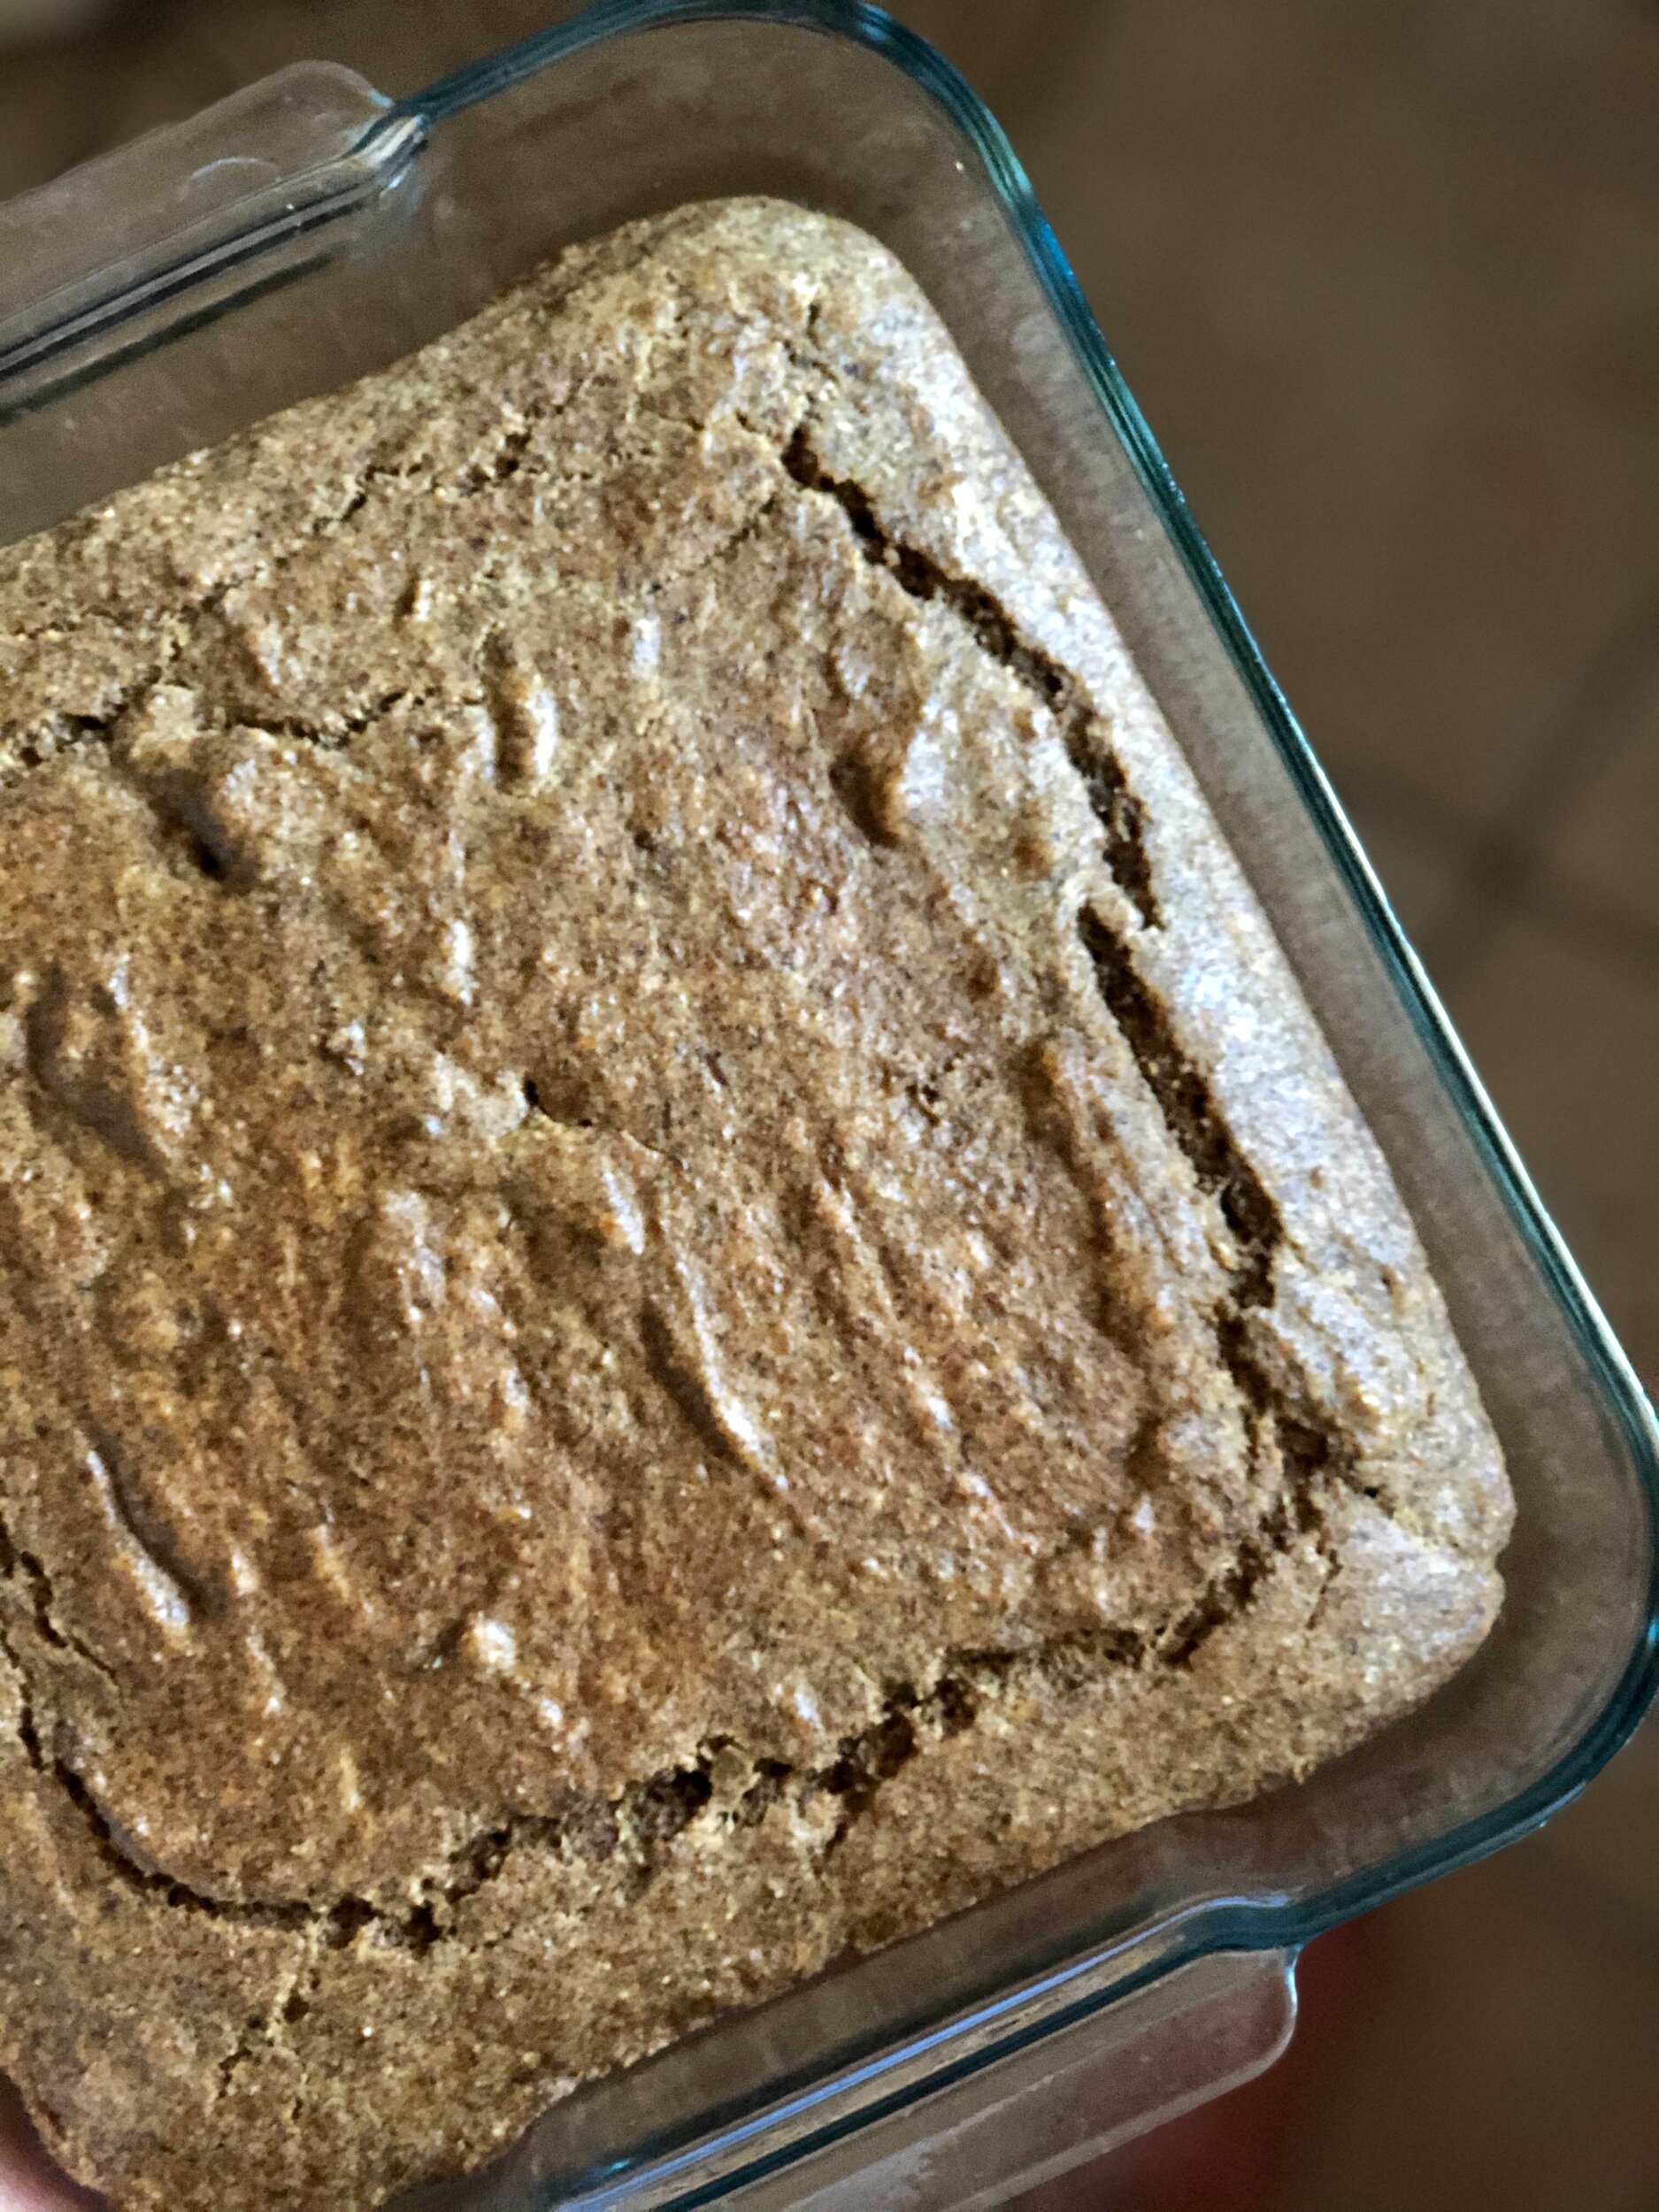
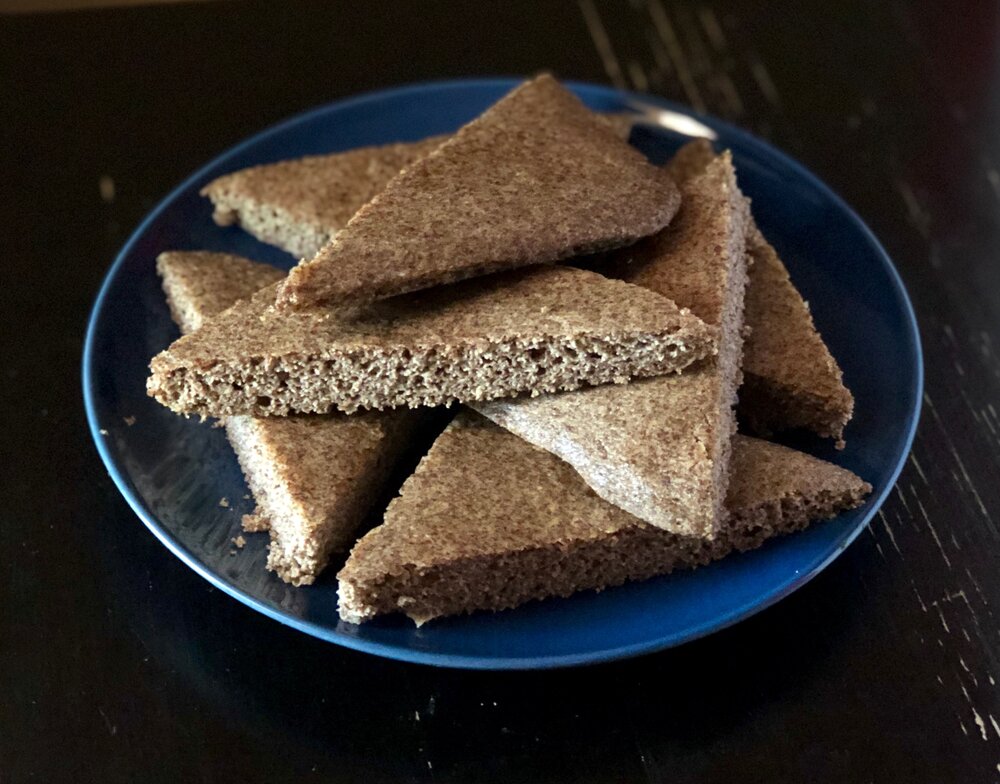
This easy, no-knead flax bread is a unicorn of a recipe. It’s friendly to so many different special diets, including gluten-free, dairy-free, sugar-free, paleo, candida, and keto, and yet somehow is not only edible, but quite tasty.

I came across this recipe because I was determined to find a palatable bread for my husband who was eating a very restricted diet for a few months. The bread couldn’t contain gluten, yeast, sugar of any kind, or dairy. It’s already challenging to make a good gluten-free bread. But a bread without yeast? That’s tricky. Then throw in the dairy and sugar part and whew. Slim pickings. I tried a few recipes that I immediately discarded, but in the end I found this flax bread winner which contains none of the above.

Keep in mind with the above restrictions, you’re not going to get a bread that’s crusty and artisanal and really anything like what you might imagine when you think of typical bread. But when your diet is restricted, and you come across a recipe like this, it’s absolutely heavenly.

The original recipe was called Focaccia Flax Bread but I couldn’t quite bring myself to call it focaccia, since it’s so far from the real thing. It’s low, so similar in height to focaccia, but it’s also not really a flat bread. Maybe we can just call it a low bread?? Needless to say, I went with simple “flax bread”.

It also happens to be fabulously easy, which is a bonus. In less than 30 minutes you can have this bread hot out of the oven!

The flour in this bread is flax meal, although you can mix it up and use other GF flours, as well; the leavening is baking powder (use baking powder without cornstarch to be paleo-friendly), the fat is coconut oil or really any non-dairy fat you choose. There’s also optional xylitol as a sweetener, which before this recipe I had never used. Sometimes I add it, sometimes I don’t, but I’ve found I rather enjoy using xylitol. It wasn’t as expensive as I had anticipated, it looks very similar to granulated sugar, it doesn’t have a weird taste to it like some sugar substitutes can, and it doesn’t feel as evil as say, aspartame.

If you’re a normal carb-ivore, I won’t try and sell this bread to you as “OMG you’ll never eat real bread again!” because that’s just silly. If you can eat real bread, eat real bread! I’m a normal carb-ivore and I find this bread tasty, but it certainly won’t replace my love of baguettes. But if you’re not able to eat normal bread, whether for a short time or indefinitely, I really hope this recipe brings some tastiness into your life!

This post may contain affiliate links. If you make a purchase using these links, Jennyblogs may receive a small commission, at no extra cost to you. This helps to support Jennyblogs. For further information see the privacy policy. Grazie!

Recipe adapted from whole new mom


Flax Bread

Serves 8

Ingredients:

  • 1 cup / 180g flax meal

  • 1 1/2 tsp baking powder

  • 1 tsp - 1 Tbsp / 5-15g xylitol, optional

  • 2 eggs

  • 1/2 cup / 119g water

  • 1/3 cup / 74g coconut oil, melted

Directions:

Preheat oven to 350°F / 177°C. Grease an 8x8in / 20x20cm square pan or 8in / 20cm round cake pan.

  1. In a medium bowl, combine flax meal, baking powder, and xylitol, if using.

  2. In a small bowl, lightly beat eggs. Add eggs to dry mixture along with water and coconut oil; mix until well combined.

  3. Let sit for a few minutes to thicken up slightly, then pour and spread into prepared pan.

  4. Bake for about 20 minutes or until turning golden-brown and bread is springy to the touch.

Jenny’s Notes:

  • To make this bread paleo, use baking powder that doesn’t include cornstarch in it.

  • You can make your own flax meal by grinding flax seeds in a food processor or coffee/spice grinder. Quick and easy! I do this every time.

  • Other GF flours can be substituted for part of the flaxmeal. I like to substitute about 25% (so 1/4 cup in this recipe) of the flax meal for buckwheat flour.

  • Really any fat can be used instead of coconut oil, choose your preference!

Flax Bread
Yield 8
Author
Prep time
7 Min
Cook time
20 Min
Inactive time
3 Min
Total time
30 Min

Flax Bread

A versatile flatbread made with ground flax seeds that suits a variety of special dietary needs, including gluten-free, dairy-free, sugar-free, yeast-free, keto, paleo, and candida diet friendly.

Ingredients

Instructions

  1. Preheat oven to 350°F / 177°C. Grease an 8x8in / 20x20cm square pan or 8in / 20cm round cake pan.
  2. In a medium bowl, combine flax meal, baking powder, and xylitol, if using.
  3. In a small bowl, lightly beat eggs. Add eggs to dry mixture along with water and coconut oil; mix until well combined.
  4. Let sit for a few minutes to thicken up slightly, then pour and spread into prepared pan.
  5. Bake for about 20 minutes or until turning golden-brown and bread is springy to the touch.

Notes

  • To make this bread paleo, use baking powder that doesn’t include cornstarch in it.
  • You can make your own flax meal by grinding flax seeds in a food processor or coffee/spice grinder. Quick and easy! I do this every time.
  • Other GF flours can be substituted for part of the flaxmeal. I like to substitute about 25% (so 1/4 cup in this recipe) of the flax meal for buckwheat flour.
  • Really any fat can be used instead of coconut oil, choose your preference!

Nutrition Facts

Calories

228.14

Fat

19.84 g

Sat. Fat

8.84 g

Carbs

8.54 g

Fiber

6.16 g

Net carbs

2.38 g

Sugar

0.40 g

Protein

5.69 g

Sodium

116.69 mg

Cholesterol

46.50 mg

Nutritional info is approximate. Based on 1 serving if recipe is made with 1 Tbsp of xylitol.

gluten free, dairy free, flaxmeal bread, candida diet friendly, sugar free, yeast free, flatbread, flaxbread focaccia, paleo, keto
bread, special diets
American
Did you make this recipe?
Tag @jennyblogsandbakes on instagram and hashtag it #jennyblogs

Paste di Pistacchio Siciliane - Sicilian Pistachio Cookies

Last Updated September 7, 2024

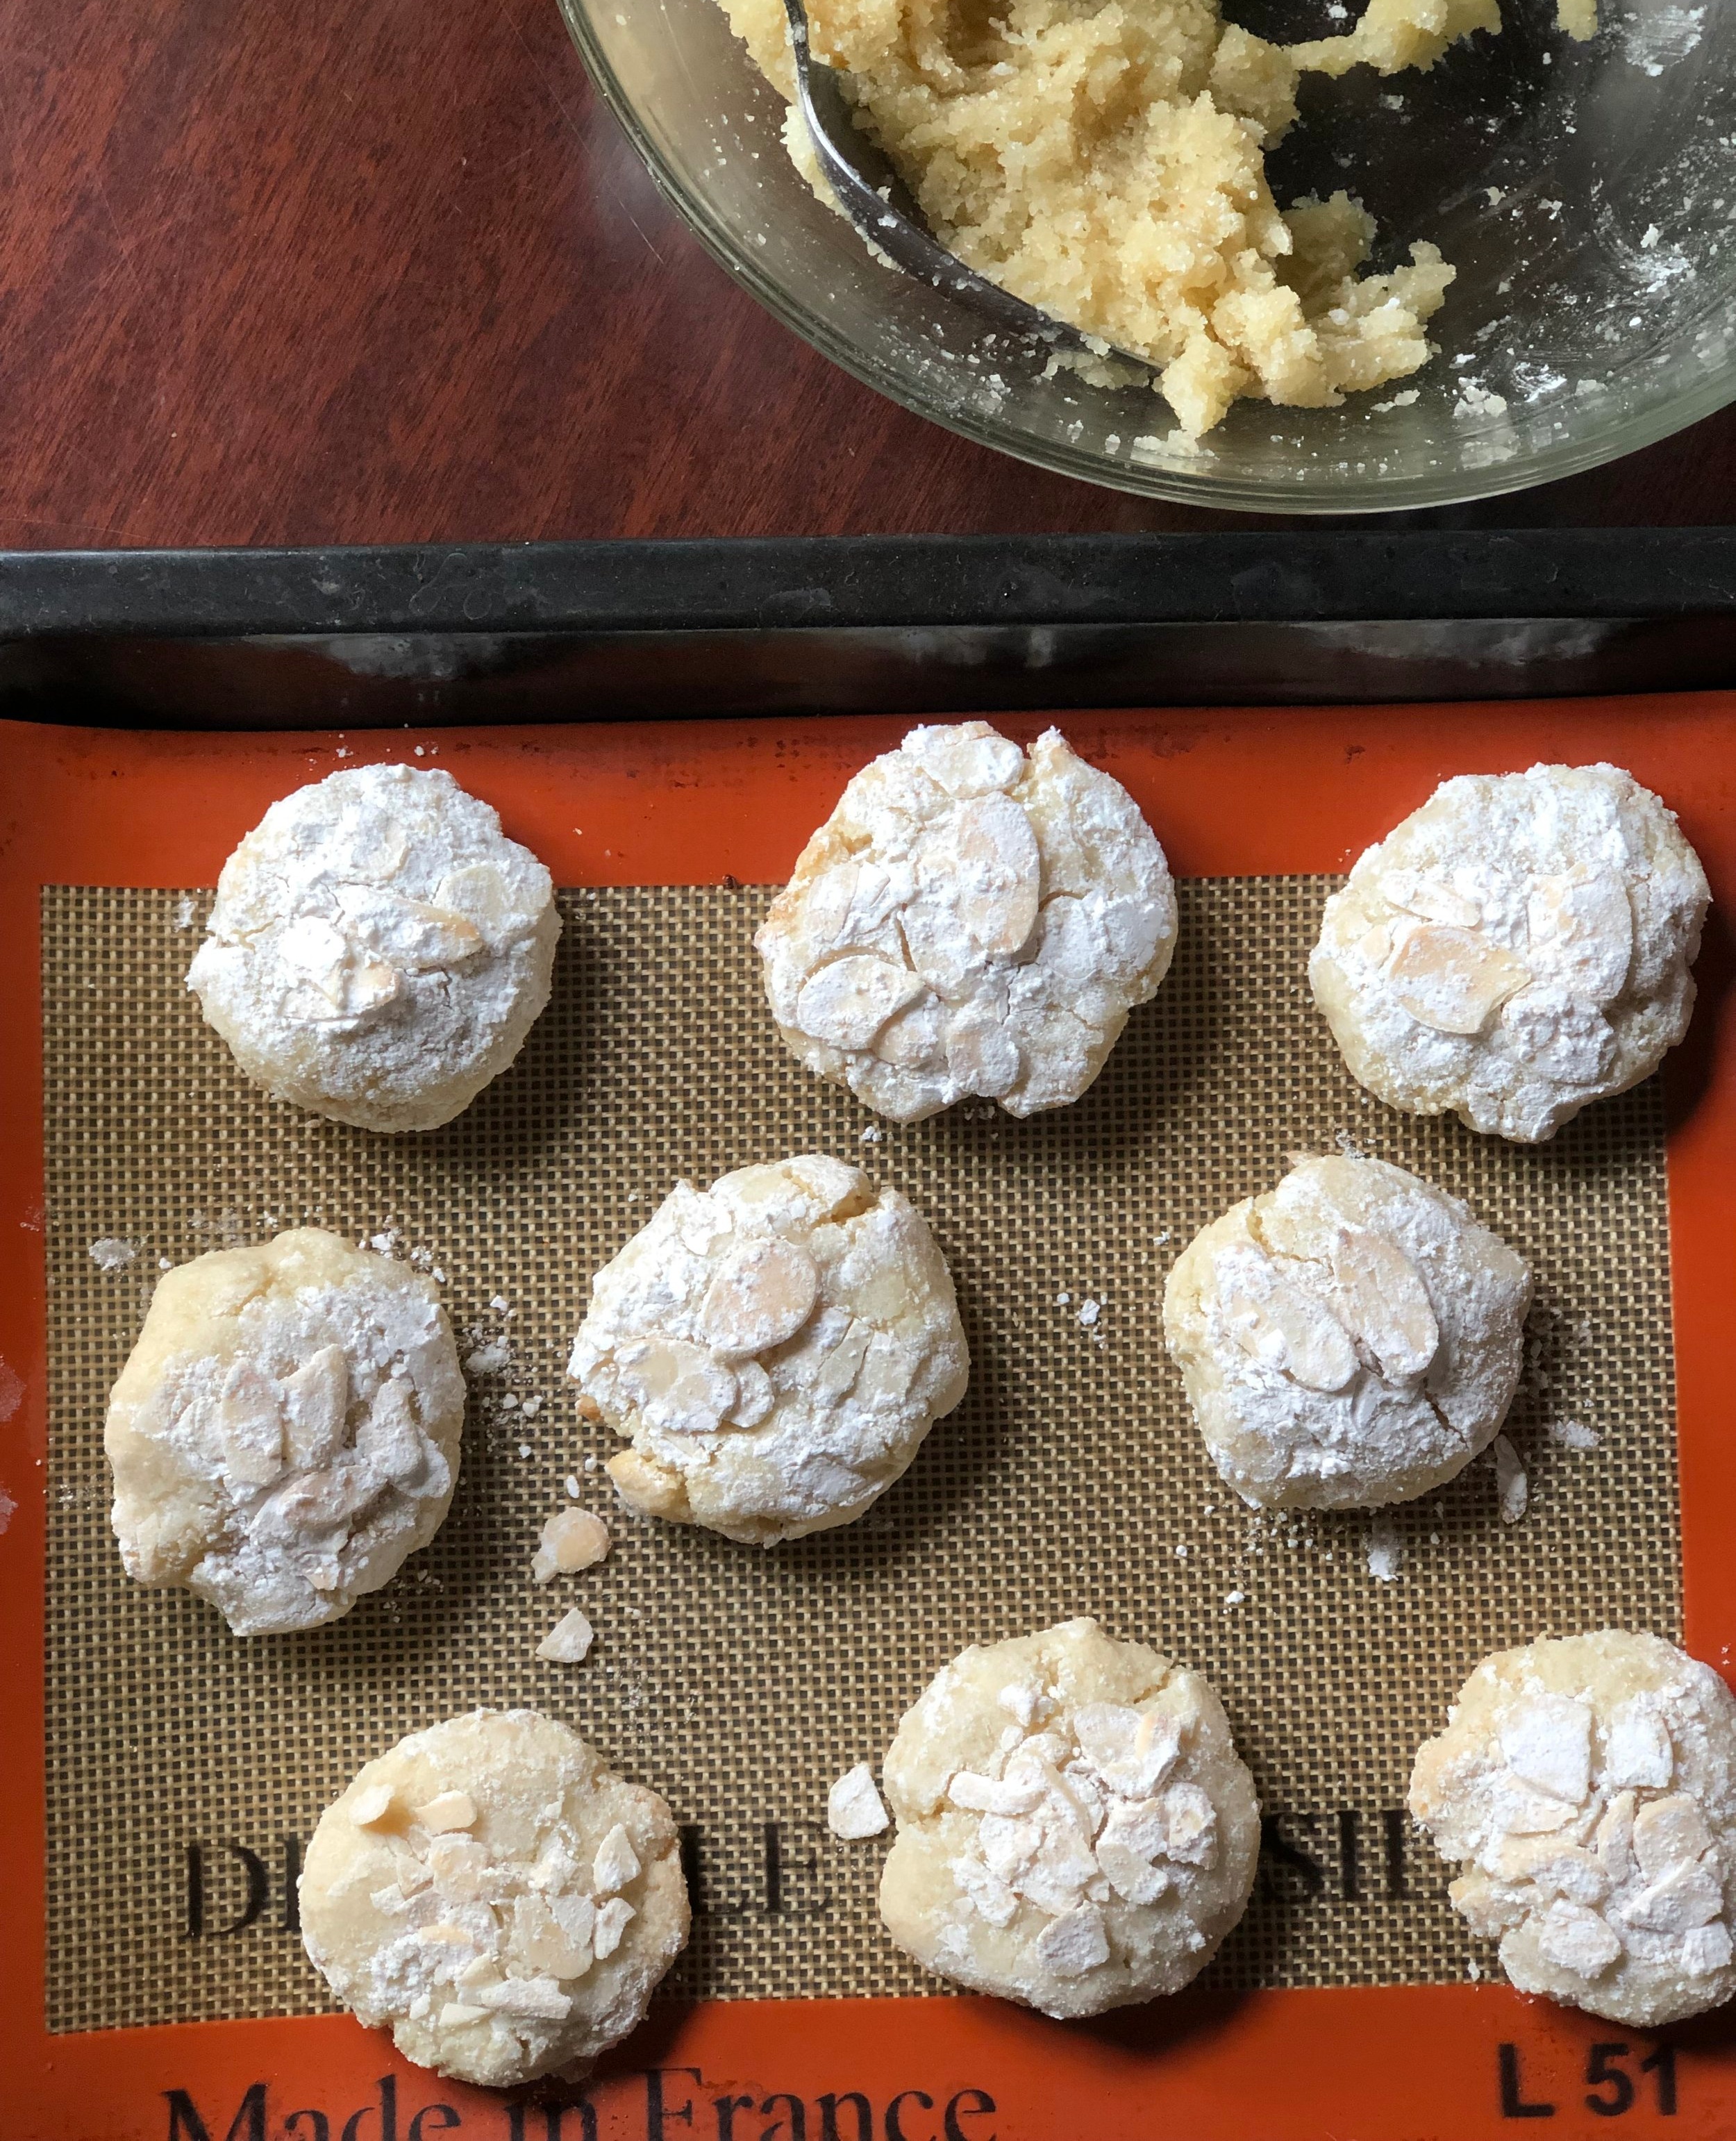
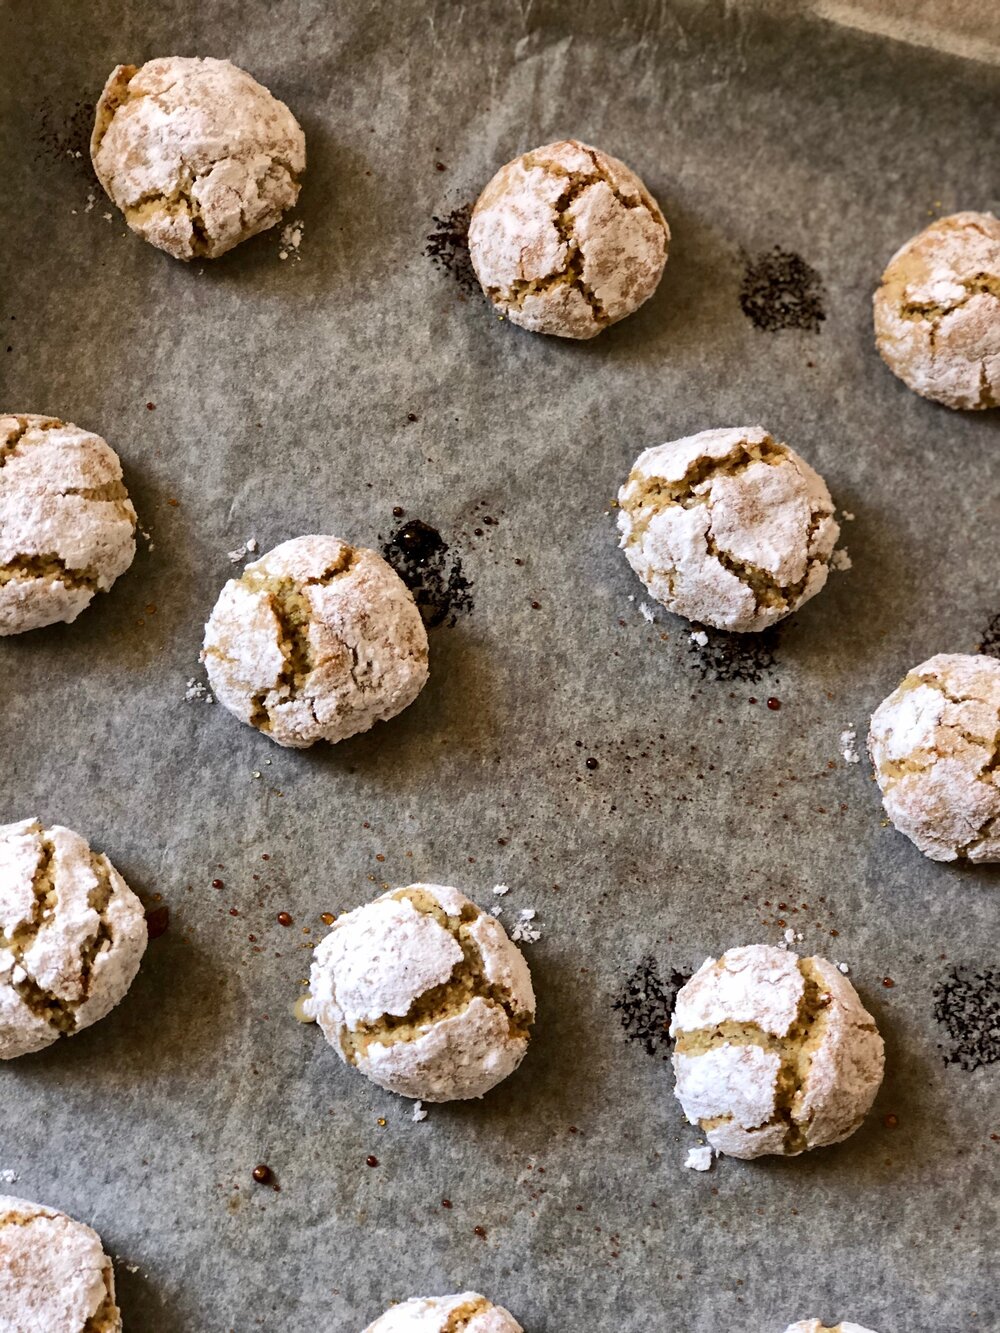
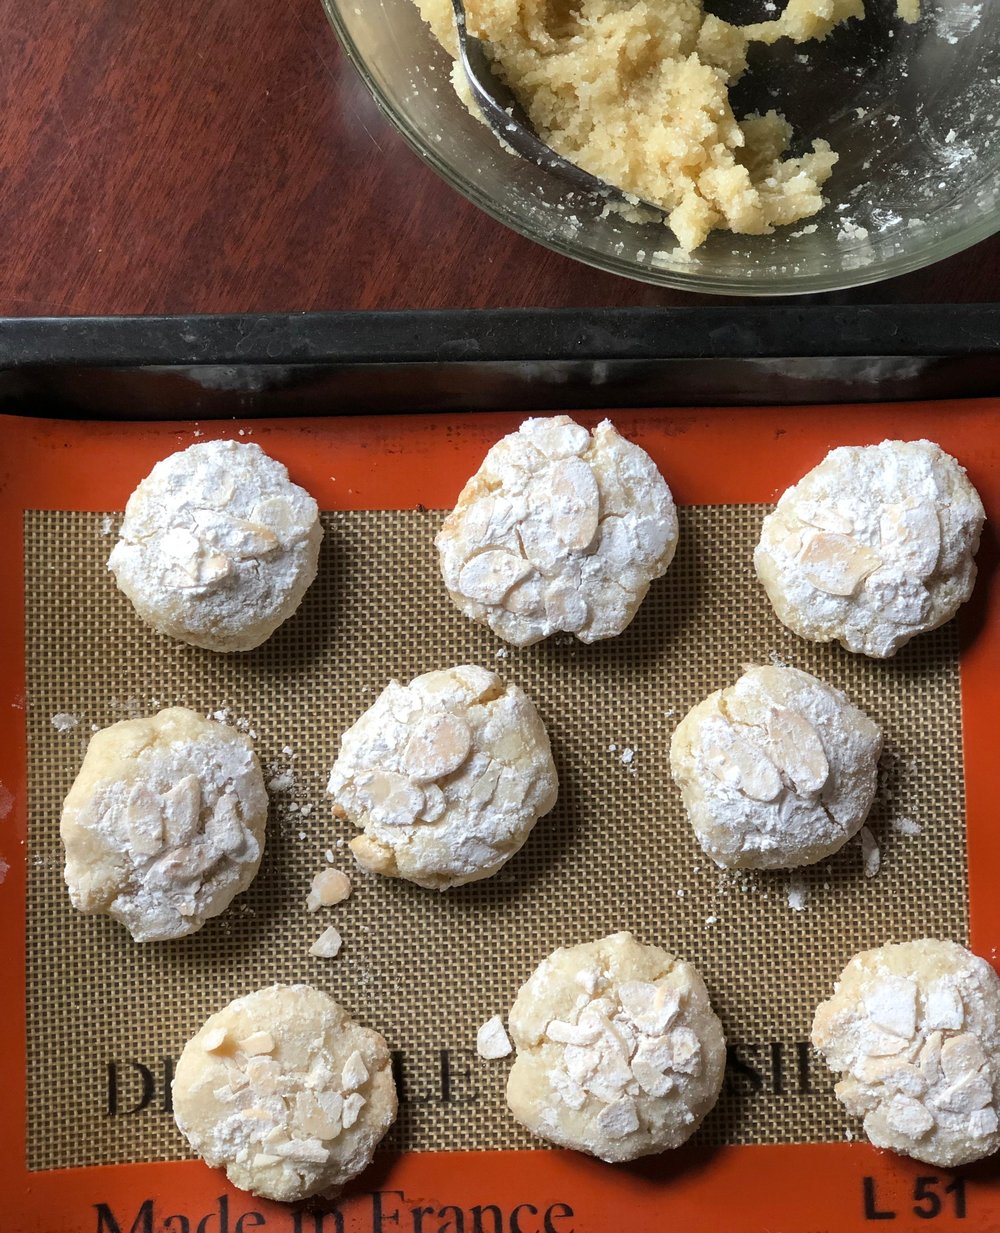
Paste di Pistacchio, or Pistachio cookies, hail from the beautiful island of Sicily. They have a delightfully crisp outer shell and a chewy, soft center.

Two years ago I put up the recipe for Paste di Mandorle, or Sicilian Almond Cookies, and it has become one of the top recipes on this site.

It’s not hard to figure out why…with only 4 ingredients that get mixed together in a bowl with a spoon, rolled in powdered sugar and baked, it really doesn’t get much easier than this. No fancy equipment. Not to mention with the almonds there are more nutritional benefits to these than your average cookie. Or at least, that’s what I tell myself when I’m going for my fifth cookie. They’re also gluten-free and dairy-free friendly.

Sometimes great ideas pop into my head. Sometimes really awful ones, too, but I try to only filter the good ones here onto this blog, k? One day, I saw a half bag of pistachios in my cupboard. The first half had been ground into pistachio flour to make this Pistachio Cake with Honey Vanilla Buttercream for Christmas. Then I had an idea, what if I take the Paste di Mandorle recipe and replace part of the almond flour with pistachio flour?? So I did. And this recipe was born.

After the fact when all the cookies had been gobbled up within a couple hours, I wondered if maybe this recipe wasn’t original to me? It seemed too easy for no one else to have thought of this. Turns out these are definitely already a thing. Sicily is known not just for their almonds but also for their pistachios, especially the area of Bronte. Naturally, these pistachio cookies are a classic right alongside the almond ones.

The original Paste di Pistacchio Siciliane

The original recipe itself has a few variations, as I will list below. You can choose to implement any of the following as per your taste, or just follow the main recipe below, which is my favorite way of making it. Any way you go, you will have a scrumptious cookie that is not only unbelievably easy, but also an authentic Italian sweet!

  • Grind your own flour vs storebought flour. Some will instruct to grind your own almonds and pistachios. This not only gives you fresh nut flour, but it allows you to control how fine you grind it. Some advise against buying almond flour or pistachio flour from the store because it’s too thin. However, if you don’t have a food processor, spice grinder, coffee grinder or any other tool that will get the job done, I have used store bought flour and it turned out fine. No pun intended. ;)

  • Honey. I’d say most of the recipes claiming to be the original I’ve seen call for adding a bit of honey, anywhere from 10-20g. Honestly I don’t, but it would be easy to add if you truly want as close to the original as possible. If adding honey, use a bit less of the cane sugar.

  • Powdered sugar. Some recipes call for using powdered, others granulated. Others call for granulated but have you grind the sugar with the nuts, so you end up with powdered sugar anyway. I generally use granulated sugar and don’t grind, because I grind the nuts in a small electric coffee grinder and there isn’t room for the sugar. Either way you will have great results.

  • Cookie shape. The cookies can be shaped into the classic S shape (Roll dough into logs about the width of a finger, then slice into pieces about the length of half of an index finger, roll in powdered sugar, and use your fingers to shape into the S), ovals, or simply round cookies. I chose the round shape for the recipe below, as it’s the simplest. If you’d like to see the S shape, check out the pictures in this recipe.

  • Dough resting/refrigeration. Some will instruct to let the dough rest after you’ve shaped it so it will be less sticky. As with the almond cookies, if you’ve glanced or made that recipe, the refrigeration or resting is not strictly necessary. It allows the dough to dry out a bit, which means they retain their shapes better when baked. But if you’re going for the round or oval shape, there’s not much need.

This post may contain affiliate links. If you make a purchase using these links, Jennyblogs may receive a small commission, at no extra cost to you. This helps to support Jennyblogs. For further information see the privacy policy. Grazie!

Here is one of the recipes I referenced in Italian and also gives a good visual of the “S” shaped cookie.


Paste di Pistacchio Siciliane - Sicilian Pistachio Cookies

Makes about 2 dozen cookies

Ingredients:

  • 125g whole unsalted almonds or almond flour

  • 125g whole unsalted pistachios or pistachio flour

  • 250g granulated sugar (or 230g granulated sugar and 20g honey)

  • 2 / 60g egg whites

  • pinch of salt

  • powdered sugar, for rolling, optional

Directions:

Preheat oven to 350°F / 180°C.

  1. Using a food processor, spice grinder, or coffee grinder, grind the nuts until coarse. Small chunks are ok.

  2. Mix all ingredients together, and form into balls or desired shape. Roll in powder sugar, if desired.

  3. Place evenly spaced on ungreased cookie sheets. At this point cookies can be covered and refrigerated overnight or baked immediately.

  4. Bake in preheated oven for about 8-12 minutes, or until cookies just start to turn golden.

Jenny’s Notes:

  • If working with a food processor or other tool large enough, you can grind the nuts with the sugar, creating powdered sugar in the process, as some recipes call for.

  • If the dough is too sticky, you can let it sit for an hour or refrigerate for several hours to let it thicken/dry out a bit.

  • This recipe is also delicious using all pistachio flour!

Paste di Pistacchio Siciliane - Sicilian Pistachio Cookies
Yield 24
Author
Prep time
15 Min
Cook time
12 Min
Total time
27 Min

Paste di Pistacchio Siciliane - Sicilian Pistachio Cookies

Traditional Sicilian sweets with a delightfully crunchy outside and chewy inside. Made with just 4-5 ingredients and naturally gluten-free and dairy-free.
Cook modePrevent screen from turning off

Ingredients

Instructions

  1. Preheat oven to 350°F / 180°C.
  2. Using a food processor, spice grinder, or coffee grinder, grind the nuts until coarse. Small chunks are ok.
  3. Mix all ingredients together, and form into balls or desired shape. Roll in powder sugar, if desired.
  4. Place evenly spaced on ungreased cookie sheets. At this point cookies can be covered and refrigerated overnight or baked immediately.
  5. Bake in preheated oven for about 8-12 minutes, or until cookies just start to turn golden.

Notes

  • If working with a food processor or other tool large enough, you can grind the nuts with the sugar, creating powdered sugar in the process, as some Italian versions call for.
  • If the dough is too sticky, you can let it sit for an hour or refrigerate for several hours to let it thicken/dry out a bit.
  • This recipe is also delicious using all pistachio flour!


Nutrition Facts

Calories

108.15

Fat

5.13 g

Sat. Fat

0.51 g

Carbs

14.12 g

Fiber

1.10 g

Net carbs

13.02 g

Sugar

12.21 g

Protein

2.73 g

Cholesterol

0.00 mg

Sodium

36.38 mg

Nutritional information is approximate. Based on 1 cookie rolled in powdered sugar.

Italian dessert, Italian cookie, Sicilian dessert, Sicilian recipe, authentic Italian recipe, original Sicilian dessert recipe, pistachio, almond, gluten free, dairy free
dessert, cookies
Italian
Did you make this recipe?
Tag @jennyblogsandbakes on instagram and hashtag it #jennyblogs

Momsy's Pancakes

7CCA3EAB-FC24-468B-AC50-AD97ADBD242E.jpg

Last Updated September 8, 2024

As the weather cools down, what could possibly be better than flipping some fresh, hot pancakes off the griddle?

Well, let’s be honest, whether the weather is heating up, cooling down, stagnant, or generally doing its weather-pattern-season thingy, are pancakes ever not a good idea?

Thought not.

Breakfast, lunch, dinner. Summer. Winter. Inside. Outside. Buttermilk. Pumpkin. Lemon poppyseed. There is always room for a plate of pancakes at the table!

Growing up I can’t say we had a family tradition of eating pancakes on a specific day of the week. It was more of a, whenever the fancy hits you. My mom would make a up a large batch of homemade dry pancake mix (you can get that recipe here), then tape instructions to the jar of how much wet ingredients to add, to be whipped up at a moment’s notice. My dad makes maple syrup every spring and there are always quarts of the liquid gold in the pantry, so we were always pancake ready.
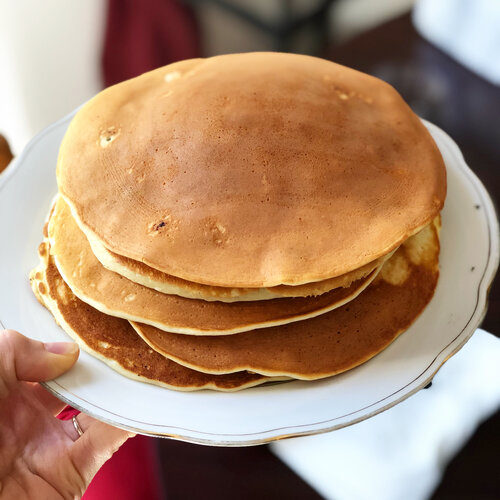
When my nieces and nephews were younger they spent a lot of time at our house, and pancakes were a regular deal. Especially my oldest niece, Gwen, could pack them away! From the time she was a toddler she would eat more than anyone, a stack of 4 or more. It was actually amazing she could fit that many in her tiny body. Realize that we make big pancakes, the size of your face or a large dinner plate. I usually eat 2. The first time I ate pancakes at a friend’s house when I was little the mom seemed surprised I only wanted two. I realized why when two itty bitty pancakes arrived in front of me. Oh. I’ll take 8 more, please. Plus, my friend’s mom made them with chocolate chips and my mom usually didn’t let us, too much sugar. ;)

The pancake recipe below is my mom’s basic recipe, it’s wonderful as-is for a buttermilk pancake, or a base for any add-ins you want, whether that be chocolate chip, raspberry, gingerbread, apple-cinnamon, or whatever your taste-buds can dream up!

This post may contain affiliate links. If you make a purchase using these links, Jennyblogs may receive a small commission, at no extra cost to you. This helps to support Jennyblogs. For further information see the privacy policy. Grazie!

Recipe from my mama


Buttermilk Pancakes

Serves 1-2

Ingredients:

  • 1 cup / 120g flour

  • 2 1/2 tsp baking powder

  • 2 1/2 tsp sugar

  • 1/2 tsp salt

  • 1 cup / 237g buttermilk

  • 1 egg

  • 2 Tbsp / 28g oil

  • up to 1 cup / 250g sourdough discard, optional

Directions:

Preheat a lightly greased griddle or large pan over medium heat (375°F / 290°C if using an electric griddle.)

  1. In a medium bowl whisk together flour, baking powder, sugar, and salt.

  2. In another bowl, combine buttermilk, egg, oil, and sourdough discard, if using. Add to dry ingredients and mix until just moistened. Lumps are ok as long as they’re not too big.

  3. Pour pancake batter to desired size (or shape!) on hot griddle, repeat as you have room, but making sure to leave about an inch / 2cm between pancakes. Flip after a couple minutes or a when the edges look dry and the bubbles towards the middle pop but don’t immediately fill in. Cook for a few minutes on the second side, until golden. Repeat until batter is gone.

  4. Serve hot with butter and maple syrup, or your favorite toppings such as peanut butter, honey, powdered sugar, jams, fruit, Nutella, etc.

Jenny’s Notes:

IMG_3216.jpg
  • Pancakes are easy, quick, and delicious, and also very easy to fit to your dietary needs and choices. With the exception of the baking powder, every ingredient can be substituted or even omitted at times. Even then, some use baking soda instead of baking powder or a combo of the two. Just don’t do more than one, maybe two substitutions at a time without risking the quality of your pancakes. So don’t be frying’ up flour, water and baking powder, okayyyy?

    - Replace flour with a gluten-free flour or flour of your choice. My mom likes grinding oats in a food processor to make oat flour pancakes. I also like substituting part of the flour with buckwheat.
    - Omit sugar if desired. I used to not eat sugar during the week and simply left out the sugar so I could still enjoy pancakes. I recommend leaving it in, though, as it rounds out the flavor of the pancake, especially if you use toppings that aren’t as sweet as maple syrup.
    - If you don’t have buttermilk, you can make it at home by adding 1 Tbsp / 14g vinegar or lemon juice to a 1 cup measure and filling up to the 1 cup mark (223g) with milk. You can also use plain ol’ water in a pinch, or alternative milks as desired!
    - If you don’t have or don’t eat eggs, try using a flax egg, or you can also leave the egg out.
    - For the oil, use whichever oil you prefer. A neutral baking oil is best for a classic pancake taste, but that doesn’t mean you can’t use olive or coconut oil if that’s what you prefer. Or even melted butter. Also, the oil can be left out if need be.

Fluffy Buttermilk Pancakes
Yield 1-2
Author
Prep time
5 Min
Cook time
10 Min
Total time
15 Min

Fluffy Buttermilk Pancakes

Classic, fluffy, buttermilk pancakes hot off the griddle in 15 minutes! Plus substitutions to make delicious pancakes for your dietary needs.
Cook modePrevent screen from turning off

Ingredients

Instructions

  1. Preheat a lightly greased griddle or large pan over medium heat (375°F / 290°C if using an electric griddle.)
  2. In a medium bowl whisk together flour, baking powder, sugar, and salt.
  3. In another bowl, combine buttermilk, egg, and oil. Add to dry ingredients and mix until just moistened. Lumps are ok as long as they’re not too big.
  4. Pour pancake batter to desired size (or shape!) on hot griddle, repeat as you have room, but making sure to leave about an inch / 2cm between pancakes. Flip after a couple minutes or a when the edges look dry and the bubbles towards the middle pop but don’t immediately fill in. Cook for a few minutes on the second side, until golden. Repeat until batter is gone.
  5. Serve hot with butter and maple syrup, or your favorite toppings such as peanut butter, honey, powdered sugar, jams, fruit, Nutella, etc.

Notes

  • Pancakes are easy, quick, and delicious, and also very easy to fit to your dietary needs and choices. With the exception of the baking powder, every ingredient can be substituted or even omitted at times. Even then, some use baking soda instead of baking powder or a combo of the two. Just don’t do more than one, maybe two substitutions at a time without risking the quality of your pancakes. So don’t be frying’ up flour, water and baking powder, okayyyy?

- Replace flour with a gluten-free flour or flour of your choice. My mom likes grinding oats in a food processor to make oat flour pancakes. I also like substituting part of the flour with buckwheat.

- Omit sugar if desired. I used to not eat sugar during the week and simply left out the sugar so I could still enjoy pancakes. I recommend leaving it in, though, as it rounds out the flavor of the pancake, especially if you use toppings that aren’t as sweet as maple syrup.

- If you don’t have buttermilk, you can make it at home by adding 1 Tbsp / 14g vinegar or lemon juice to a 1 cup measure and filling up to the 1 cup mark (223g) with milk. You can also use plain ol’ water in a pinch, or alternative milks as desired!

- If you don’t have or don’t eat eggs, try using a flax egg, or you can also leave the egg out.

- For the oil, use whichever oil you prefer. A neutral baking oil is best for a classic pancake taste, but that doesn’t mean you can’t use olive or coconut oil if that’s what you prefer. Or even melted butter. Also, the oil can be left out if need be.

Nutrition Facts

Calories

448.68

Fat

18.02 g

Sat. Fat

2.44 g

Carbs

58.48 g

Fiber

1.63 g

Net carbs

56.85 g

Sugar

11.17 g

Protein

13.26 g

Cholesterol

97.74 mg

Sodium

1452.78 mg

Nutritional information is approximate, based on 2 servings.

buttermilk pancakes, homemade pancakes recipe, hot cakes, griddle cakes, best
breakfast
American
Did you make this recipe?
Tag @jennyblogsandbakes on instagram and hashtag it #jennyblogs

Homemade Italian Dressing

Last Updated September 6, 2024

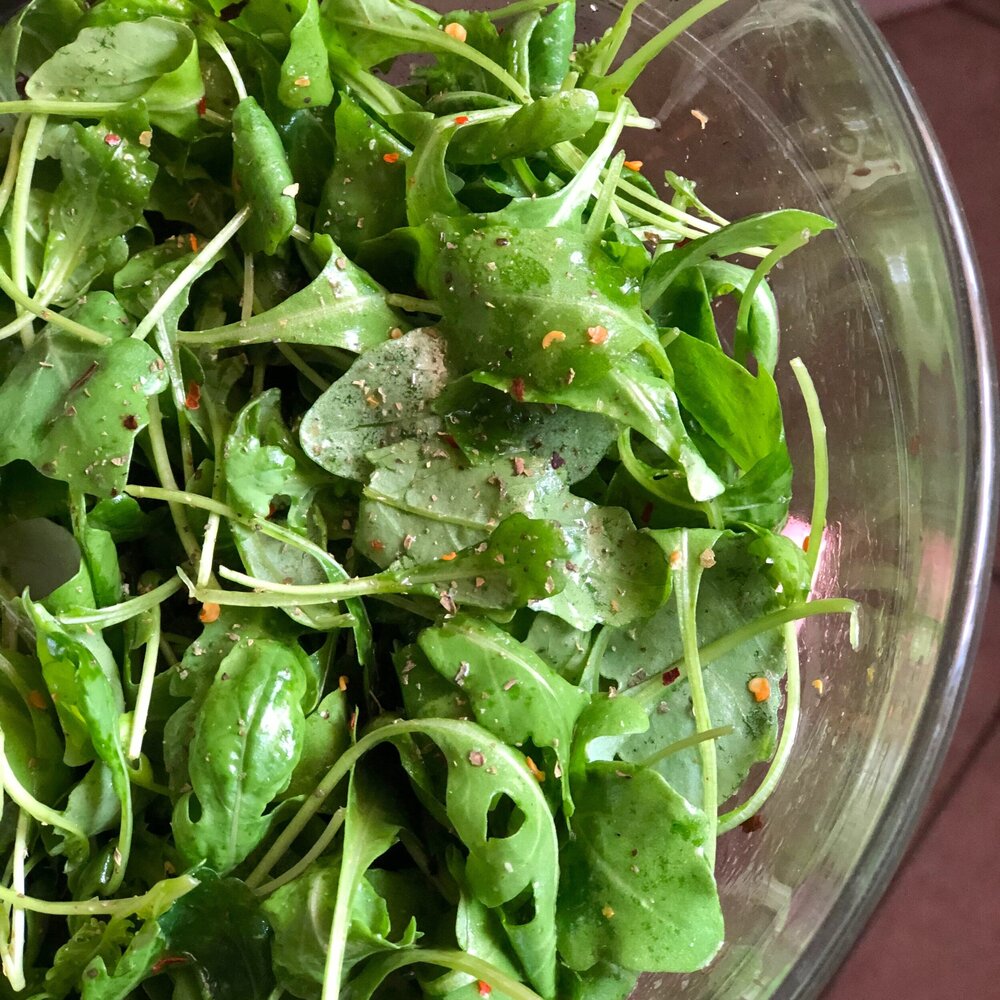
Simple goodness: Arugula tossed with Homemade Italian Dressing

Simple goodness: Arugula tossed with Homemade Italian Dressing

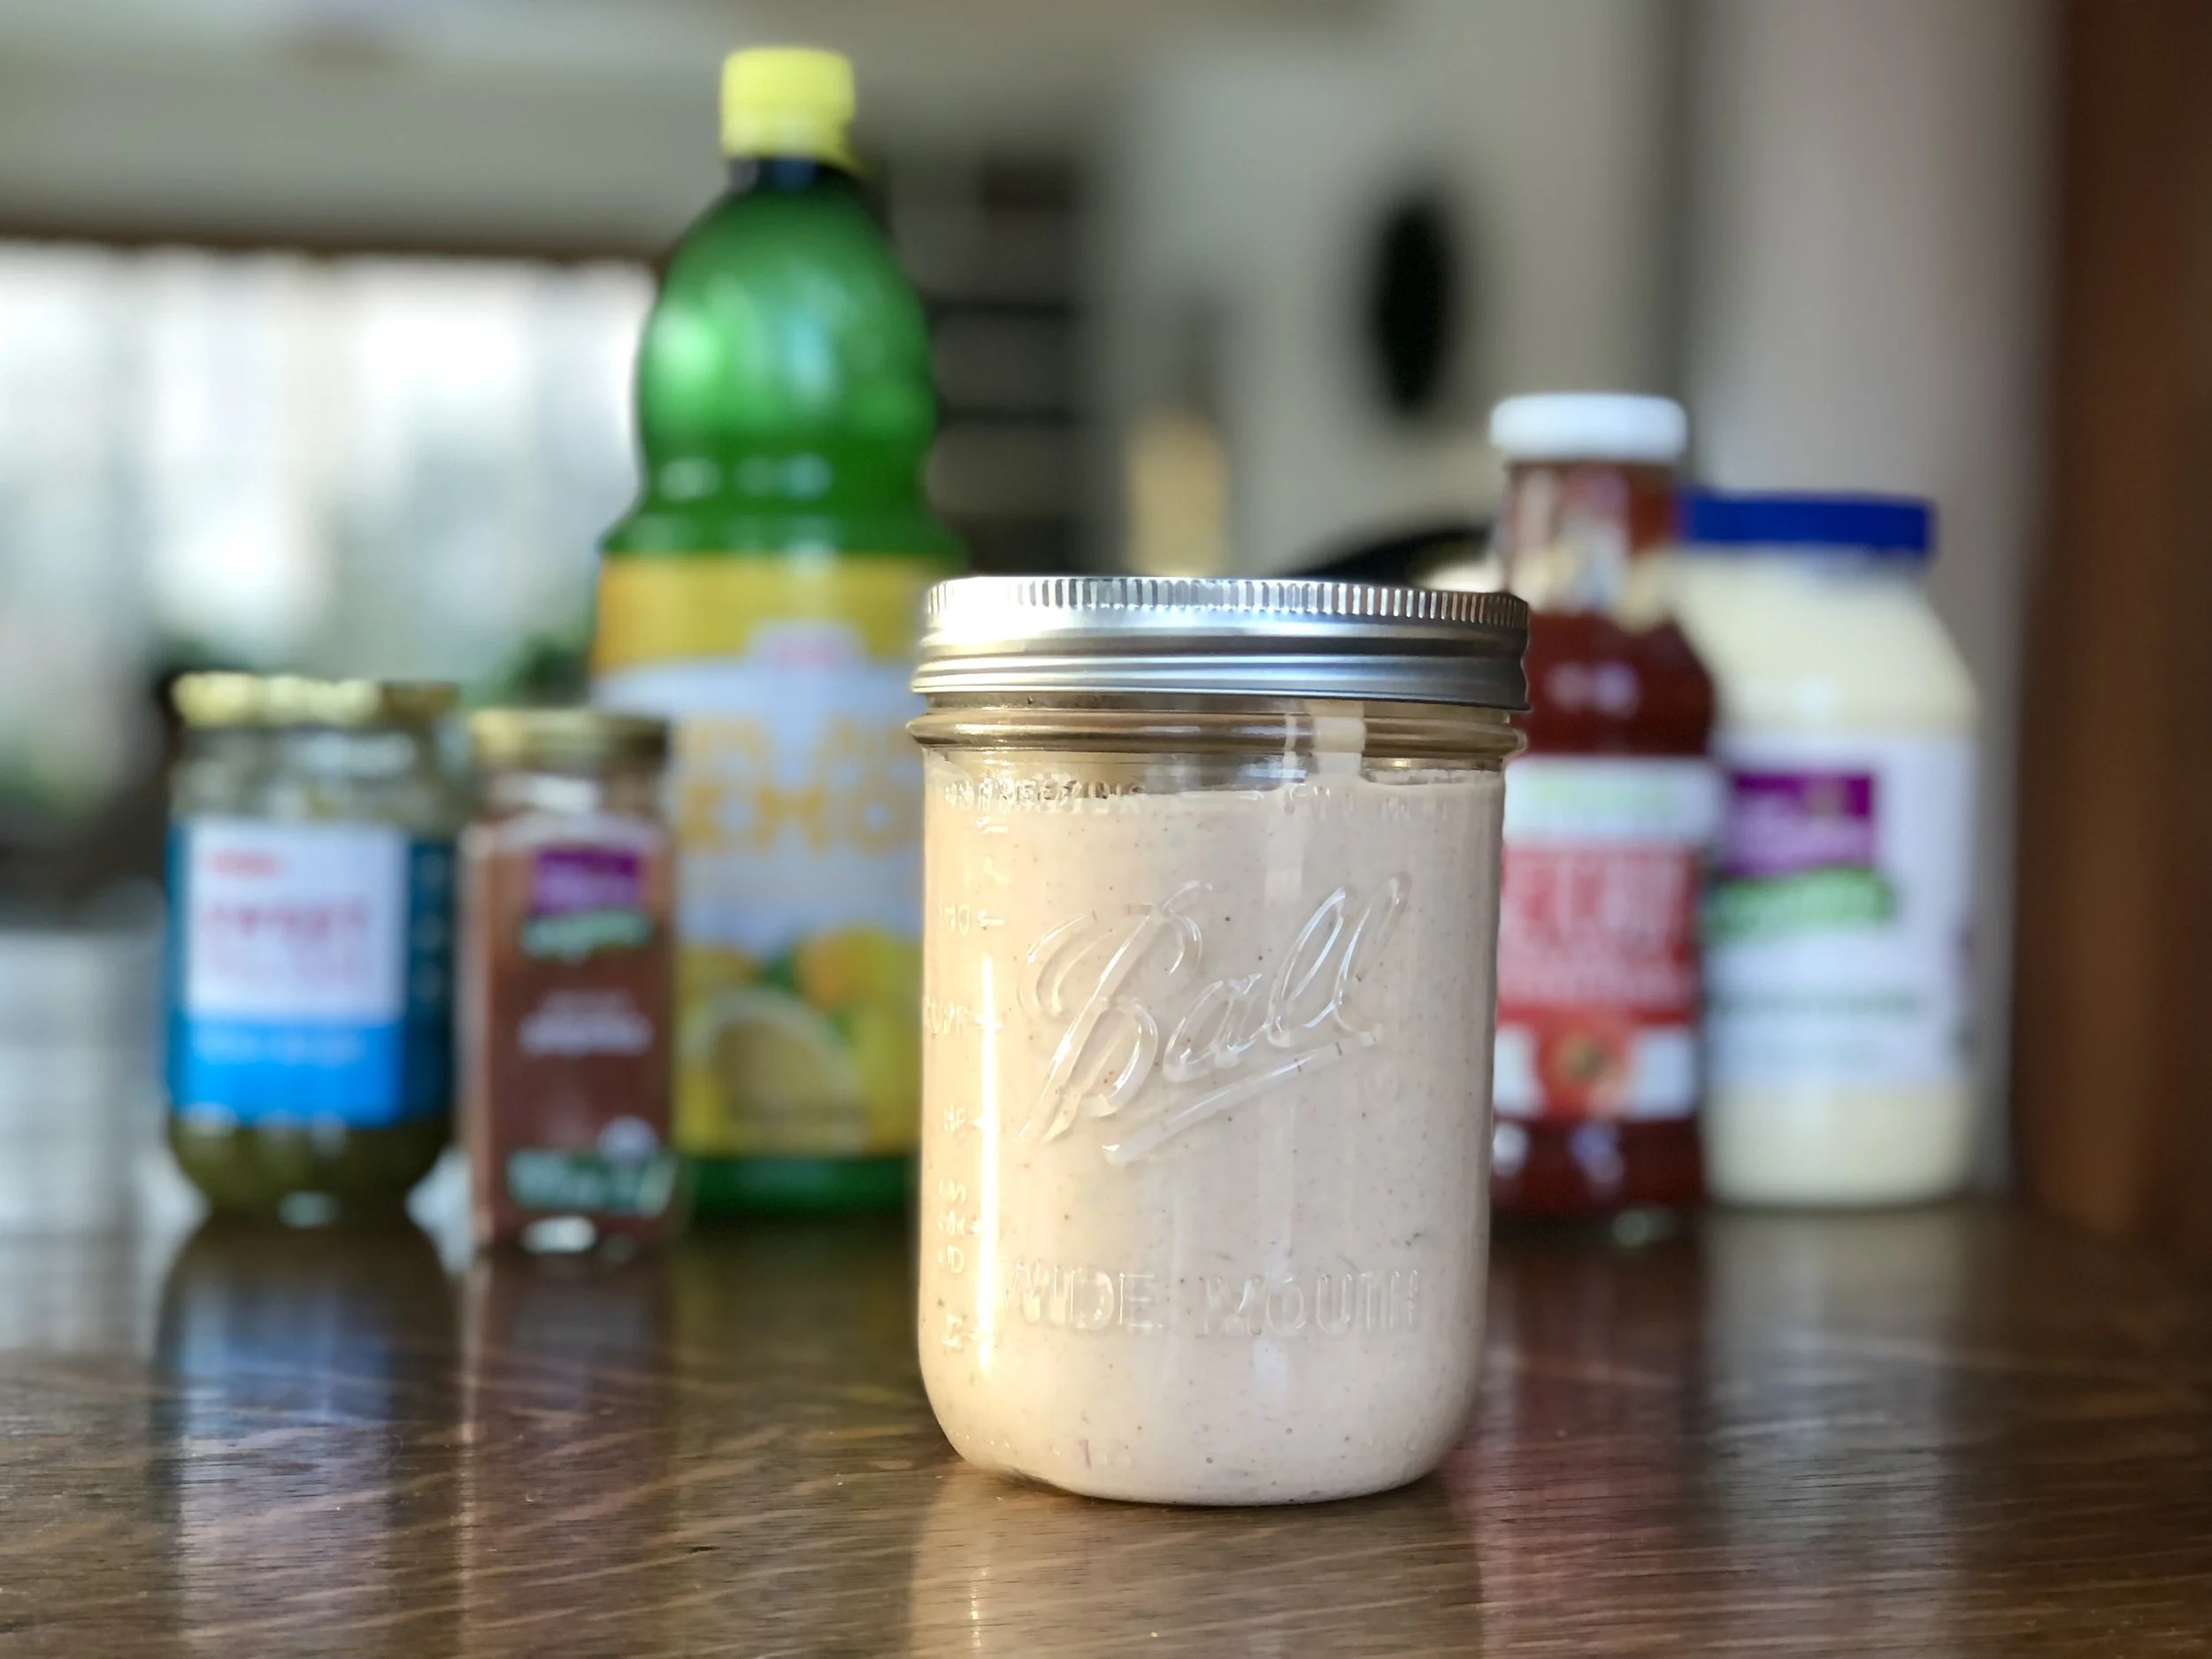
Have you ever thought to make homemade Italian dressing? I certainly hadn’t, until this summer, as it’s usually something I buy. Why bother making it homemade when it’s cheap and I really don’t use it that often? Except for pasta salad, and I’ve been allll about the pasta salads this summer.

First I wanted the classic creamy pasta salad (dressing made with mayo and mustard), then the Italian dressing pasta salad, then I started going off and making up my own, like this Greek Pasta Salad I posted a couple weeks ago. But you know what’s ironic? You can’t find Italian dressing in Italy. Italian dressing is very American. Italians dress their salads with a quality olive oil, salt and pepper, generally speaking. One time I was in Switzerland grocery shopping and saw American dressing. I’m American and had no idea what it was. It was creamy, maybe like Ranch? Haha. I was amused. I wonder if that’s how Italians feel about Italian dressing.

Being in Italy with no Italian dressing ready made at the store, I figured I would see if I could find a homemade recipe. Surreeee there are plenty on the interwebs! And easy enough ingredients, you probably have them all on hand, as I did. Olive oil, vinegar, some spices…I looked at several different recipes, looked up the ingredients for “classic” Kraft Italian dressing, and combined a few of them to create a bit of my own version. It’s tangy and got the job done! Success. Made a delicious pasta salad and had a bit leftover even to dress some regular ol’ salads.

It probably won’t taste exactly like the store bought version, but maybe better if you’re not a die-hard Kraft fan? Some of the ingredients listed on the Kraft Zesty Italian dressing are a bit vague, like “spice,” which can be hard to replicate, but the bright side is that you can control the quality and freshness of ingredients going into your dressing. Better yet, no preservatives at all!

Great for salads, pasta salad, marinades for all types of proteins!

This post may contain affiliate links. If you make a purchase using these links, Jennyblogs may receive a small commission, at no extra cost to you. This helps to support Jennyblogs. For further information see the privacy policy. Grazie!

Recipe adapted from Kraft, Five Heart Home, and the Whole Cook


Homemade Italian Dressing

Makes about 1 cup dressing

I clearly need to figure out how to attractively photograph liquids…and find my whisk. (Recently moved apartments.) But hey, forks work, too!

I clearly need to figure out how to attractively photograph liquids…and find my whisk. (Recently moved apartments.) But hey, forks work, too!

Ingredients:

  • 3/4 cup / 168g extra virgin olive oil

  • 1/4 cup / 60g red or white wine vinegar

  • 1 tsp / 5g lemon juice

  • 1 tsp / 7g honey

  • 3/4 tsp dried basil

  • 1/2 tsp dried oregano

  • 1/2 tsp garlic powder

  • 1/2 tsp salt

  • 1/4 tsp onion powder

  • 1/4 tsp crushed red pepper

  • 1/4 tsp black pepper

  • 1/4 cup / 25g grated parmesan cheese, optional

Directions:

  1. Whisk or shake all ingredients together; taste and adjust seasonings as desired.

  2. Store in fridge, shake well before using.

Jenny’s Notes:

  • This is one of those very versatile and very easily adjustable recipes, no one says you have to follow this one to a T! If you don’t have red or white wine vinegar, use what you have on hand. Even the olive oil can be switched out for what you have. While olive oil will give you the heartiest flavor, technically Kraft uses a bunch of rather junkier oils that don’t add much to the flavor profile (soybean, canola), but oils do tone the vinegar in dressings/vinaigrettes. The spices can be upped if you want a very zesty dressing, or you can add another teaspoon of honey to help tone it down a bit.

  • You could also finely dice red bell pepper to add to this instead of the crushed red pepper, but that seemed like more work than I wanted to put in for this “whip up” type recipe. Plus, I like the touch of added spice, even if not original.

Homemade Italian Dressing
Yield 8
Author
Prep time
10 Min
Total time
10 Min

Homemade Italian Dressing

Homemade zesty Italian dressing is simple, uses pantry ingredients, and doesn't have any preservatives like store-bought versions.
Cook modePrevent screen from turning off

Ingredients

Instructions

  1. Whisk or shake all ingredients together; taste and adjust seasonings as desired.
  2. Store in fridge, shake well before using.

Notes

  • This is one of those very versatile and very easily adjustable recipes, no one says you have to follow this one to a T! If you don’t have red or white wine vinegar, use what you have on hand. Even the olive oil can be switched out for what you have. While olive oil will give you the heartiest flavor, technically Kraft uses a bunch of rather junkier oils that don’t add much to the flavor profile (soybean, canola), but oils do tone the vinegar in dressings/vinaigrettes. The spices can be upped if you want a very zesty dressing, or you can add another teaspoon of honey to help tone it down a bit.
  • You could also finely dice red bell pepper to add to this instead of the crushed red pepper, but that seemed like more work than I wanted to put in for this “whip up” type recipe. Plus, I like the touch of added spice, even if not original.

Nutrition Facts

Calories

204.62

Fat

21.89 g

Sat. Fat

3.39 g

Carbs

1.58 g

Fiber

0.14 g

Net carbs

1.44 g

Sugar

0.75 g

Protein

0.98 g

Sodium

202.78 mg

Cholesterol

2.69 mg

Nutritional information is approximate. Based on 8 servings of 2 Tbsp each and includes parmesan cheese.

Homemade Italian dressing recipe, copycat Zesty Kraft Dressing, Greek dressing
Condiment
American
Did you make this recipe?
Tag @jennyblogsandbakes on instagram and hashtag it #jennyblogs

Chocolate No-Bake Cookies

Last Updated September 6, 2024

IMG_3299.jpg

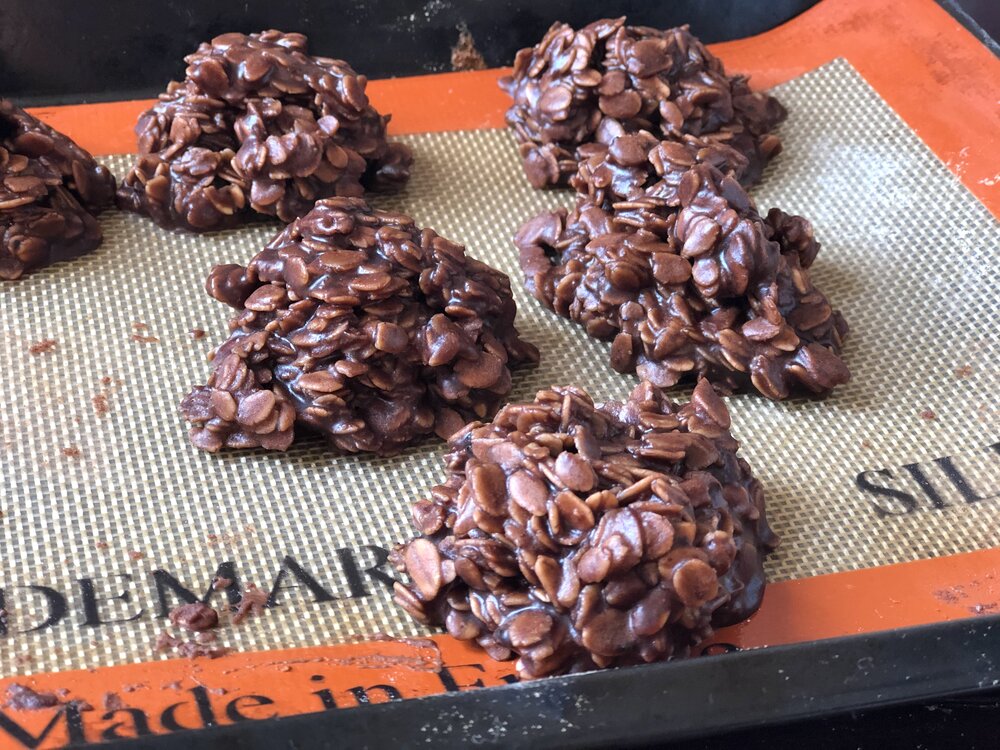
Chocolate no-bake cookies are actually known as Chocolate Sand Dune Cookies around the Morris household, because no-bakes is not as fun, ya know? They’re well enough known that probably doesn’t matter, but as I grew up near the famous Sleeping Bear Sand Dunes, you will understand why, many years ago, my older brother decided to call these mounds of cookies “sand dunes”. Or rather “chocolate sand dunes” because these cookies are not the color of sand. The name stuck, and here we are today.

Chocolate sand dune cookies a.k.a. chocolate no-bake cookies, no matter what you call them, are delicious and just a little too easy to make.

They’re also made without any flour, so if you use certified GF oats, they are easily gluten-free. These cookies made a come back during the quarantine and the flour shortage! They can also be made with a milk-alternative and butter-alternative if you wish to have dairy-free cookies. They’re naturally egg-free!

What follows is the classic recipe I grew up making with my mom. Little did I know until I was a teenager and making no-bake cookies with a friend that the actual “original” recipe includes peanut butter. What?! You don’t put peanut butter into chocolate sand dune cookies! Actually you can, and it’s delicious. Peanut butter and chocolate together, hello. Of course it’s delicious.

However, this is not to disregard my mom’s classic recipe. While she loves chocolate and peanut butter, she doesn’t prefer them together. So she omitted the peanut butter and never looked back from making this pure chocolatey, fudgy version of no-bake cookies. Some of my family members still prefer them without the peanut butter, others prefer with. So if you or someone you know doesn’t like peanut butter with chocolate, or has a nut allergy, know you can omit the peanut butter and have an equally delicious cookie.

This post may contain affiliate links. If you make a purchase using these links, Jennyblogs may receive a small commission, at no extra cost to you. This helps to support Jennyblogs. For further information see the privacy policy. Grazie!

A recipe from my mama


Chocolate Sand Dune Cookies

Makes about 36 cookies

The pan was full at one point…

The pan was full at one point…

Ingredients:

  • 4 cups / 800g sugar

  • 1/2 cup / 50g cocoa powder

  • 1 cup / 237g milk

  • dash of salt

  • 1 cup / 225g butter (2 sticks)

  • 1/4-1 cup / 65g - 260g peanut butter, optional

  • 2 tsp / 10g vanilla extract

  • 5 1/2 cups / 495g quick oats

Directions

  1. In a large pot, stir together sugar, cocoa, milk, and salt; bring to a boil over medium heat. Boil for 2 minutes then remove from heat.

  2. Add butter, peanut butter, and vanilla; stir well.

  3. Add the oats and stir until all oats are coated. Let mixture sit for 8-10 minutes to thicken, stirring occasionally to check consistency.

  4. When mixture has thickened enough, spoon mounds onto wax paper or a clean counter. Allow to set and enjoy!

Jenny’s Notes:

  • Brown sugar can be used instead of white sugar, if you prefer.

  • I grew up baking with salted butter and this recipe reflects that with the dash of salt. Here in Europe and in most bakeries unsalted butter is used, so if that’s what you are using, simply add two dashes of salt if you wish!

  • You may notice the variance in the peanut butter measurement; use up to 1 cup for peanut butter lovers, or as little as 1/4 cup for just a hint.

  • Regular or crunchy peanut butter can be used, and it’s also fine to use natural peanut butter. People often don’t recommend using natural in recipes, but as I prefer not to buy the kinds with added sugars and hydrogenated oils, I usually use it anyway and have hardly met a recipe where you can’t successfully use the natural kind.

  • Quick or instant oats are my preferred kind of oats to use for chocolate sand dunes, but as you will notice from my photos that regular or rolled oats can also be used. Rolled oats give more of a bite to your cookies, and you will probably need to let the mixture sit a bit longer before spooning out the cookies so the oats have time to thicken up the mixture. If after 10-15 minutes your mixture still isn’t thickening up satisfactorily, you may need to add additional oats.

  • The above recipe makes about 36 cookies, great for sharing, large families, and parties. It can also easily be halved to make about 18 cookies, or even quartered to make 9. The photos on this post are from the 2 month lockdown in Italy when I decided that a quarter batch should suffice for 2 people who can’t leave the house.

Chocolate No-Bake Cookies
Yield 36
Author
Prep time
20 Min
Cook time
5 Min
Total time
25 Min

Chocolate No-Bake Cookies

Chocolate No-bakes are decadent mounds of chocolatey oat cookies made without flour, eggs, or an oven, which makes them ideal for summer baking and people with gluten or egg allergies.
Cook modePrevent screen from turning off

Ingredients

Instructions

  1. In a large pot, stir together sugar, cocoa, milk, and salt; bring to a boil over medium heat. Boil for 2 minutes then remove from heat.
  2. Add butter, peanut butter, and vanilla; stir well.
  3. Add the oats and stir until all oats are coated. Let mixture sit for 8-10 minutes to thicken, stirring occasionally to check consistency.
  4. When mixture has thickened enough, spoon mounds onto wax paper or a clean counter. Allow to set and enjoy!

Notes

Brown sugar can be used instead of white sugar, if you prefer.I grew up baking with salted butter and this recipe reflects that with the dash of salt. Here in Europe and in most bakeries unsalted butter is used, so if that’s what you are using, simply add two dashes of salt if you wish! You may notice the variance in the peanut butter measurement; use up to 1 cup for peanut butter lovers, or as little as 1/4 cup for just a hint. Regular or crunchy peanut butter can be used, and it’s also fine to use natural peanut butter. People often don’t recommend using natural in recipes, but as I prefer not to buy the kinds with added sugars and hydrogenated oils, I usually use it anyway and have hardly met a recipe where you can’t successfully use the natural kind. Quick or instant oats are my preferred kind of oats to use for chocolate sand dunes, but as you will notice from my photos that regular or rolled oats can also be used. Rolled oats give more of a bite to your cookies, and you will probably need to let the mixture sit a bit longer before spooning out the cookies so the oats have time to thicken up the mixture. If after 10-15 minutes your mixture still isn’t thickening up satisfactorily, you may need to add additional oats. The above recipe makes about 36 cookies, great for sharing, large families, and parties. It can also easily be halved to make about 18 cookies, or even quartered to make 9. The photos on this post are from the 2 month lockdown in Italy when I decided that a quarter batch should suffice for 2 people who can’t leave the house.

Nutrition Facts

Calories

192.48

Fat

9.10 g

Sat. Fat

4.01 g

Carbs

26.75 g

Fiber

0.92 g

Net carbs

25.83 g

Sugar

22.75 g

Protein

2.47 g

Sodium

89.28 mg

Cholesterol

13.96 mg

Nutritional information is approximate. Based on 1 cookie if using the full cup of peanut butter in the recipe.

no-bake cookies, chocolate, oats, no bake dessert, summer dessert, fudgy chocolate cookies, oat cookies, peanut butter
dessert
American
Did you make this recipe?
Tag @jennyblogsandbakes on instagram and hashtag it #jennyblogs
IMG_3302.jpg

White Bean Potato Soup

Last Updated August 30, 2024

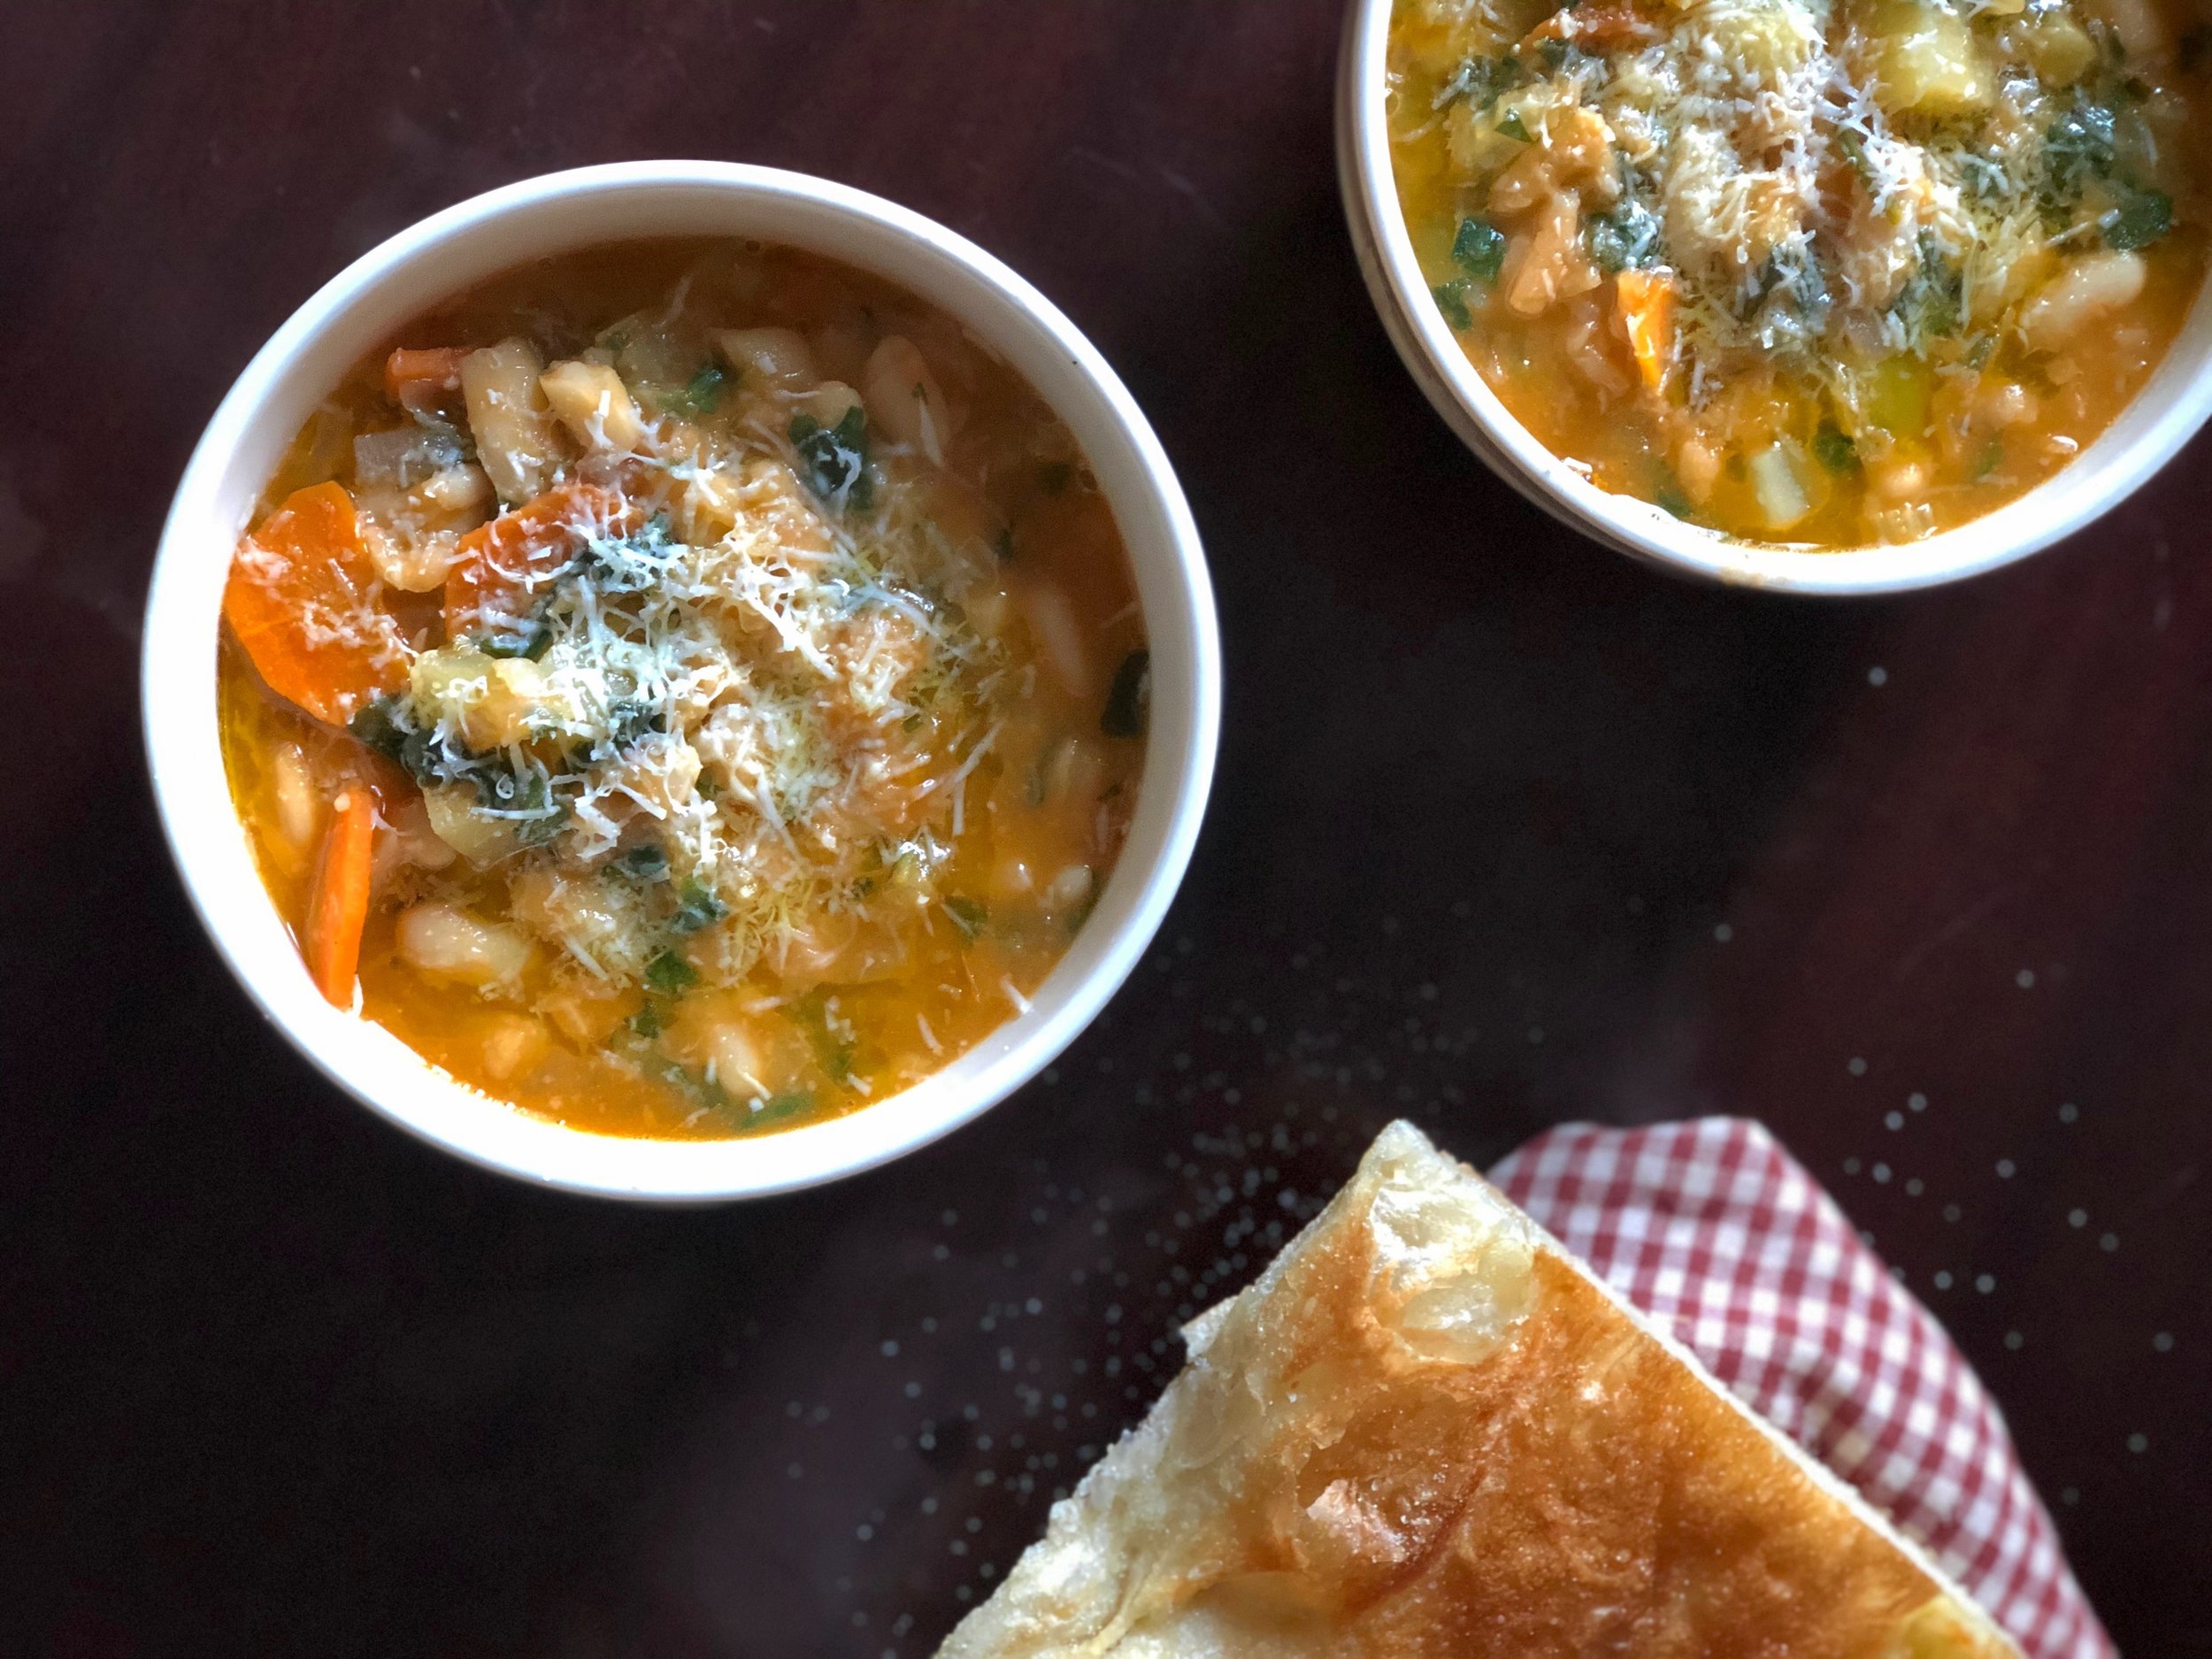
This soup is packed full. Packed full of flavor, packed full of vegetables and good stuff, and therefore packed full of nutrients. Did I mention it’s also vegan? Because it is, at least if you don’t sprinkle any of that wonderful cheese over the soup at the end.

Adjustments.jpeg

While I love beans, and I love potatoes, and just about everything else in this soup, I honestly wasn’t expecting it to be as good as it was. It is so full of flavor and so satisfying, and I didn’t even have any wine on hand to add!

This soup boasts, besides beans and potatoes, onions, carrots, garlic, kale, with a hint of rosemary, spice, and white wine to tie it all together.

While the main soup season might be coming to an end, I decided to finally post this recipe because

1. during these crazy coronavirus times it seems everyone and their brother are baking bread up the wazoo and revving their sourdough starters, at least judging by social media and the shortage of flours and yeast in the stores…and this soup pairs wonderfully with some good homebaked bread!!

2. this soup has many ingredients, but most are pantry staples which makes this ideal to whip up for dinner without having to go to the store. Even if you’re missing one or two things, this soup is so flavorful you can easily swap out vegetables or omit one with a still tasty result.

3. many of these ingredients are also cheap, which means you get a hardy meal for just a few dollars, which is helpful in these uncertain financial times

4. we’ve had an unusually cold few nights and days for April here in Florence, which made me think of this soup..

5. soups are so easy, and recipes like this are rewarding for my friends who may be deciding to expand their cooking skills with all the newfound time on their hands.

This post may contain affiliate links. If you make a purchase using these links, Jennyblogs may receive a small commission, at no extra cost to you. This helps to support Jennyblogs. For further information see the privacy policy. Grazie!

Recipe slightly adapted from Clever Eats


White Bean Potato Soup

Serves 4-6

Ingredients:

  • 1 Tbsp oil

  • 1 medium onion, diced

  • 1 stalk of celery, diced

  • 1 carrot, diced

  • 2 garlic cloves, minced

  • 2 15oz / 400g cans of white beans, drained (any kind, such as cannellini or navy)

  • 2 potatoes, cut into small chunks

  • 1 Tbsp / 16g tomato paste

  • 1/2 tsp dried rosemary or 1 Tbsp chopped fresh

  • 1/2 tsp sweet paprika

  • 1/4 tsp cayenne pepper, optional

  • 1/2 cup / 119g white wine, or more broth or water

  • 7oz / 200g fresh or frozen spinach or kale, lightly chopped

  • 2 cups / 474g vegetable broth

  • salt and pepper, to taste

  • extra virgin olive oil and parmesan or pecorino cheese, for finishing

Directions:

  1. In a large stockpot or dutch oven, heat oil over medium heat. Add onion, celery, and carrot and cook, stirring occasionaly, until onion begins to turn translucent.

  2. Add the garlic, then add the beans, potatoes, tomato paste, rosemary, paprika, and cayenne pepper. Cook for a minute or two, stirring frequently.

  3. Add the wine and stir until it is almost evaporated.

  4. Add kale, broth, and salt and pepper to taste.

  5. Raise heat and bring soup to a boil, then cover and reduce heat to low. Cook for about 15 minutes, or until potatoes are tender.

  6. Ladle soup into serving bowls, top with parmesan or pecorino cheese and drizzle with olive oil. Serve with warm, crusty bread. Buon appetito!

Adjustments.jpeg

Jenny’s Notes:

  • If you prefer to cook dry beans instead of using canned, as I do, a good rule of thumb is to take half the weight of called for canned beans and cook that amount of dry beans. Different dry beans absorb slightly different amounts of water, but generally speaking they double in weight when cooked. So if you need 800g as in this recipe, I would cook 400g of dry beans.

  • You can choose to peel your potatoes before chopping or leave skin on, either way is fine if you ask me! Leaving skin on is easier and more nutritious (more fiber!), just be sure to wash them well before using.

  • If you have a rosemary plant, you can also add a clean sprig straight to the soup, then remove when you are ready to serve the soup.

  • In a pinch, you can always just use water instead of broth, although you will lose some flavor depth. If you have any bouillon cubes, you can also dissolve those into the soup following the bouillon dosing instructions.

White Bean Potato Soup
Yield 4-6
Author
Prep time
15 Min
Cook time
35 Min
Total time
50 Min

White Bean Potato Soup

A hearty and nutritious soup bursting with flavor, featuring white beans, potato, kale, onion, garlic, carrots, and celery with a touch of rosemary and a splash of white wine.
Cook modePrevent screen from turning off

Ingredients

Instructions

  1. In a large stockpot or dutch oven, heat oil over medium heat. Add onion, celery, and carrot and cook, stirring occasionaly, until onion begins to turn translucent.
  2. Add the garlic, then add the beans, potatoes, tomato paste, rosemary, paprika, and cayenne pepper. Cook for a minute or two, stirring frequently.
  3. Add the wine and stir until it is almost evaporated.
  4. Add kale, broth, and salt and pepper to taste.
  5. Raise heat and bring soup to a boil, then cover and reduce heat to low. Cook for about 15 minutes, or until potatoes are tender.
  6. Ladle soup into serving bowls, top with parmesan or pecorino cheese and drizzle with olive oil. Serve with warm, crusty bread. Buon appetito!

Notes

If you prefer to cook dry beans instead of using canned, as I do, a good rule of thumb is to take half the weight of called for canned beans and cook that amount of dry beans. Different dry beans absorb slightly different amounts of water, but generally speaking they double in weight when cooked. So if you need 800g as in this recipe, I would cook 400g of dry beans. You can choose to peel your potatoes before chopping or leave skin on, either way is fine if you ask me! Leaving skin on is easier and more nutritious (more fiber!), just be sure to wash them well before using. If you have a rosemary plant, you can also add a clean sprig straight to the soup, then remove when you are ready to serve the soup.In a pinch, you can always just use water instead of broth, although you will lose some flavor depth. If you have any bouillon cubes, you can also dissolve those into the soup following the bouillon dosing instructions.

Nutrition Facts

Calories

426.89

Fat

8.57 g

Sat. Fat

1.21 g

Carbs

65.80 g

Fiber

14.44 g

Net carbs

51.36 g

Sugar

5.02 g

Protein

20.23 g

Sodium

542.01 mg

Cholesterol

1.07 mg

Nutritional information is approximate. Based on 4 servings and includes using wine and toppings.

white bean soup, potatoes, kale, spinach, vegan, healthy, vegetarian, carrots, white wine, spinach, celery, onion, garlic
Soup, Dinner
American
Did you make this recipe?
Tag @jennyblogsandbakes on instagram and hashtag it #jennyblogs

Caprese Risotto

Last updated August 28, 2024

IMG_0975.jpg

You know risotto, right? That creamy Italian rice dish, usually cooked with a splash of wine? And you also know Caprese salad, the traditional Italian salad consisting of just tomatoes, mozzarella, and basil? (I gave you a nice preface to today’s recipe by sharing the recipe for Insalata Caprese Tradizionale last month on the blog.) Do you know what happens when you combine these two ideas into one dish?

You get a delicious creamy, rice dish with flavors of tomatoes, mozzarella, and basil! Risotto is usually a pretty hearty, comforting dish, better for cooler months, but this one has delicate summer flavors so you can have a risotto for every season. Because It’s mid September, my family back home in Michigan has been wearing jackets and pants for weeks, meanwhile it’s still in the mid 30’sC / 90’sF here in Florence. I’m dreaming of cooler weather, breaking out the sweaters and cozy socks, lighting candles, and making hearty chilis, soups, and everything pumpkin spice and nice. And risotto. So I compromise with a taste of summer, the remnants of summer Italian produce, and a comforting cooler month recipe.

This Caprese Risotto is a bit of a mix between Italian and American cuisines. It’s a risotto and involves all the ingredients from Caprese, but that doesn’t necessarily make it Italian. It’s one of those dishes stuck in the in between, and that’s ok. If it’s anything, it’s American. And I thought I should let you know that, so I don’t give you the false impression that I’m giving you some nonna’s recipe passed down for generations. Nope, this is me being American, taking one thing and combining it with another to create something that doesn’t fall into any category really. That’s one of my pet peeves actually, when I see recipes labeled Italian this or Tuscan that…just because something has oregano, basil, sun-dried tomatoes, or parmesan, does not make it Italian. Especially if it’s a meat, usually chicken is what I see, mixed with pasta. That’s a big no-no in Italy. Pasta is a primo piatto, or first course, and chicken and proteins are always a secondo piatto. You will also never find chicken on pizza. Or pineapple. This doesn’t mean to say you can’t do these things, of course you can, but just keep in mind that it is not Italian. After that, call it as you wish. Oh, and hand me a nice slice of pizza with pineapple, ya? Thanks.

Back to this summery risotto. When I first was making this I wanted to make sure the tomato flavor was closer to a fresh, sun-ripened tomato as it would be for Caprese, and not pungent and salty/sweet like we associate with a lot of canned tomato soups. I love tomato soup, just not the flavor that I was going for here. By using fresh tomatoes and getting saltiness from just the low-sodium broth, this turned out quite nicely. Add the creamy, pull-apart cheesiness from the mozzarella and the sweet, nutty basil, you’ve got a winner summer dinner! If you like, although not traditional to the Italian Caprese salad, add a drizzle of balsamic vinegar at the end. This dish isn’t traditional, so I feel ok about adding it. ;)

Bonus, this dish is also effortlessly gluten-free.

This post may contain affiliate links. If you make a purchase using these links, Jennyblogs may receive a small commission, at no extra cost to you. This helps to support Jennyblogs. For further information see the privacy policy. Grazie!


Caprese Risotto

Serves 4-6

IMG_0980.jpg

Ingredients:

  • 6 cups / 1,422g low-sodium vegetable broth

  • 2 Tbsp / 28g olive oil

  • 1/2 onion, diced

  • 3 cloves garlic, minced

  • 1 1/2 cups / 278g arborio rice, uncooked

  • 1/2 cup / 119g white wine, optional

  • 3 medium tomatoes, chopped

  • 1/2 cup cherry tomatoes, halved or quartered

  • Parmigiano reggiano (parmesan) rind, optional

  • 1 1/2 tsp fresh oregano, or 1/2 tsp dried

  • about 16 fresh basil leaves, sliced into ribbons

  • 1/2 cup / 50g grated parmigiano reggiano

  • 200g fresh mozzarella, sliced into chunks

  • extra virgin olive oil, more cherry tomatoes, basil leaves for garnishing, and balsamic vinegar if desired

Directions:

  1. Heat broth in a pan over low heat.

  2. In a large pot, heat oil over medium heat. Add onions and simmer for a few minutes, until starting to turn translucent.

  3. Add garlic and rice, stirring occasionally, until rice is toasted and just starting to turn translucent on the edges; about 3-4 minutes.

  4. Add the wine slowly, stirring all the while, until mostly absorbed by the rice.

  5. Add all of the tomatoes, stir until heated through. Add parmigiano reggiano rind, if using.

  6. Begin adding heated broth to the rice mixture, 1/2 cup / 119g at a time, stirring and allowing broth to be mostly absorbed before adding the next bit. As you near the end of the broth, start checking the rice every minute or two. When it looks cooked and is al dente when tasted, remove from heat. You may not need all the broth, but make sure it’s not too dry or thick. You’ll want to pull it from the heat when it still looks a bit soupy, as it will continue to cook and absorb liquid. (Thick, moundable risotto is a technically overcooked risotto. It should lazily settle back into the plate if you try and mound it.)

  7. Add oregano, basil, parmigiano, and mozzarella. Stir until parmigiano is melted and mozzarella is stringy. Remove any chunks of parmigiano reggiano rind before serving.

  8. Spoon risotto onto plates, drizzle with olive oil and garnish with cherry tomatoes and basil leaves. Drizzle with a bit of balsamic, if desired. Serve immediately.


Jenny’s Notes:

  • In a pinch you can use a 14.5oz / 411g can of diced tomatoes instead of the 3 medium tomatoes. Fresh tomatoes will always be better but sometimes you gotta do what you gotta do!

  • If using wine, try using a dry white wine, nothing too aged or overpowering, as this is a risotto with more delicate, summery flavors. Think Pinot Blanc, Gewurztraminer, a young Riesling, etc. Whichever wine you use in your cooking should ideally be served with the meal. Because of this, it is mistaken to use the “cheap” wines in cooking and then bring out the nice stuff for the meal. Remember, you’re cooking out (most of) the alcohol, not the flavor.

    In fact, because of the delicate flavors of this risotto I don’t always add wine, but it’s up to you if you do! Wine is traditional in risotto. :)

  • If you have only bouillon cubes or normal-sodium broth on hand, you can substitute part water for the broth to keep the sodium levels down. I recommend using 4 cups / 948g worth of broth/bouillon broth and 2 cups / 474g water.

  • Using heated broth speeds up the cooking time so you’re not waiting for the broth to simmer and be absorbed between each addition. I have, however, made risotto many a time before I learned this trick, and although it takes a bit longer to cook when adding cold or room temp broth, it won’t in any way ruin your risotto.

  • Parmigiano Reggiano (parmesan cheese) is another ingredient typically used in risotto. It’s not used in caprese but it lends a cheesy hand to the mozzarella which is quite mild.

  • Another idea I’m drooling over right now, would be to add a nice portion of burrata on top of the plated risotto right before serving. Burrata is very similar to mozzarella, except it’s softer. It usually comes in round form, and the moment you cut into it the super soft, creamy center oozes out. Oh yes. Oh yes please.

    If you don’t live in Italy chances are burrata and even fresh mozzarella will cost you, so you may opt for one or the other in this recipe. If your budget allows, go for both!! Here in Italy fresh mozzarella can be found easily for 2-3euro a pound.

Caprese Risotto
Yield 4-6 servings
Author
Prep time
45 Min
Total time
45 Min

Caprese Risotto

Creamy risotto playing off the classic Italian summer dish of caprese; tomatoes, fresh mozzarella, fresh basil, parmesan cheese and a hint of oregano.
Cook modePrevent screen from turning off

Ingredients

Instructions

  1. Heat broth in a pan over low heat.
  2. In a large pot, heat oil over medium heat. Add onions and simmer for a few minutes, until starting to turn translucent.
  3. Add garlic and rice, stirring occasionally, until rice is toasted and just starting to turn translucent on the edges; about 3-4 minutes.
  4. Add the wine slowly, stirring all the while, until mostly absorbed by the rice.
  5. Add all of the tomatoes, stir until heated through.
  6. Begin adding heated broth to the rice mixture, 1/2 cup / 119g at a time, stirring and allowing the broth to be mostly absorbed before adding the next bit. Keep an eye on the rice; when it starts to look cooked and is al dente when tasted, remove from the heat. You may or may not need all the broth, but make sure it’s not too dry or thick. You’ll want to pull it from the heat when it still looks a bit soupy, as it will continue to cook and absorb liquid. (A thick, moundable risotto is a technically overcooked risotto. A correctly cooked risotto should lazily settle back into the plate if you try and mound it.)
  7. Add oregano, basil, parmigiano, and mozzarella. Stir until parmigiano is melted and mozzarella is stringy.
  8. Spoon risotto into plates, drizzle with olive oil and garnish with cherry tomatoes and basil leaves. Drizzle with a bit of balsamic, if desired. Serve immediately.

Notes

In a pinch you can use a 14.5oz / 411g can of diced tomatoes instead of the 3 medium tomatoes. Fresh tomatoes will always be better but sometimes you gotta do what you gotta do! If using wine, try using a light white wine, nothing too aged or overpowering, as this is a risotto with more delicate, summery flavors. Think Pinot Blanc, Gewurztraminer, a young Riesling, etc. Whichever wine you use in your cooking should ideally be served with the meal. Because of this, it is mistaken to use the “cheap” wines in cooking and then bring out the nice stuff for the meal. Remember, you’re cooking out (most of) the alcohol, not the flavor. In fact, because of the delicate flavors of this risotto I don’t add wine, but it’s up to you if you do! Wine is traditional in risotto so you may think me odd that I don’t add it. :)If you have only bouillon cubes or normal-sodium broth on hand, you can substitute part water for the broth to keep the sodium levels down. I recommend using 4 cups / 948g worth of broth/bouillon broth and 2 cups / 474g water. Using heated broth speeds up the cooking time so you’re not waiting for the broth to simmer and be absorbed between each addition. I have, however, made risotto many a time before I learned this trick, and although it takes a bit longer to cook when adding cold or room temp broth, it won’t in any way ruin your risotto. Another idea would be to add a nice portion of burrata on top of the plated risotto right before serving. Burrata is very similar to mozzarella, except it’s softer. It usually comes in round form, and the moment you cut into it the super soft, creamy center oozes out.

Nutrition Facts

Calories

423.93

Fat

21.69 g

Sat. Fat

8.54 g

Carbs

36.34 g

Fiber

2.31 g

Net carbs

34.03 g

Sugar

7.25 g

Protein

16.20 g

Sodium

714.71 mg

Cholesterol

42.80 mg

Nutritional information is approximate and based on 4 servings.

gluten-free caprese, risotto, rice, tomatoes, fresh basil, fresh mozzarella, parmesan cheese, parmigiano reggiano, burrata, Italian recipe, oregano, extra virgin olive oil, balsamic vinegar, white wine, which wine to use in risotto
dinner, vegetarian
Italian, American
IMG_0982.jpg

Jeannie's Healthy Breakfast Cookies

Last Updated August 28, 2024

2019-02-17+15.32.23.jpg

What could be better than a cookie? How about a cookie that’s packed with nutrients and can be eaten anytime, especially for breakfast, guilt free?

I love cookies. They are my go-to when I want to whip up something with limited time, or don’t have much energy for other more entailed desserts. I’m sure this has NOTHING to do with the fact that cookies are also one of my favorite things to eat. It ends up turning into a win-win-win situation because I’m having fun, being productive, get to eat some of the ingredients while baking, get to eat some dough while baking, and BONUS if there is enough dough to actually be baked into cookies! So many wins.

I have to bring up the negative, however, to classic cookie baking. They’re kinda calorific and not very good for you. I’m all for eating cookies for breakfast, but that usually goes along with a sugar crash later on. What to do?

Bake healthy cookies! They have to be delicious of course, and not gross. I have just the recipe for you, made up by my mom many years ago when we needed a portable nutritious breakfast for a trip. This recipe has been in my recipe box ever since as “Jean’s breakfast cookies”, made with many adjustments because the add ins are very versatile depending on your tastes. My mom likes to be called Jeannie (not by her kids of course) so I adapted the title accordingly.

One thing this recipe is not is a taste-alike recipe to say, chocolate chip cookies with a surprise twist that it’s healthy. Nope, these cookies have a satisfyingly healthy look and taste and are upfront about it from the get go. They get positive feedback and recipe requests wherever they go!

The recipe that follows is just one version of many, many possibilities. Just keep in mind that major adjustments may need other adjustments. For example, if you don’t have any honey or maple syrup on hand for the sweetener, you could use raw or regular cane sugar. Substituting a liquid for a dry ingredient, however, will mean you may need more liquid from elsewhere. Maybe add another egg, a bit more oil, or even water until you get a cookie dough consistency once again. Other ideas to make the recipe your own:

  • Use any kind of flour you wish instead of wheat flour. Oat flour, almond flour, coconut flour…I often use wheat germ in place of part of the flour or flaxmeal, usually 1/4 cup.

  • If you want these cookies to be gluten-free, ensure that your oats are gluten-free, and use a gluten-free flour.

  • Change up the spices. Sometimes towards fall I also add a bit of ginger, nutmeg, and cloves. Cardamom is also nice.

  • Beyond dried fruit and walnuts, get creative with your add-ins! Just try not to go too far beyond 1 cup, otherwise there might not be enough dough to hold everything together. In the photos on this post I used dried apples, dried cranberries, and walnuts. I’ve also added various combinations of dried cherries, prunes, dried apricots, raisins, dates, dried figs, dried pears, fresh apples, grated coconut, pecans, hazelnuts, dark chocolate, crystallized ginger, and anything else I had on hand!

This post may contain affiliate links. If you make a purchase using these links, Jennyblogs may receive a small commission, at no extra cost to you. This helps to support Jennyblogs. For further information see the privacy policy. Grazie!

Recipe adapted from my mama


Jeannie’s Healthy Breakfast Cookies

Makes about 18-22 cookies

Ingredients:

2019-02-17 14.45.17.jpg
  • 1/2 cup / 112g olive or coconut oil

  • generous 1/3 cup / 120g maple syrup or honey

  • 2 eggs

  • 1 tsp vanilla extract

  • 1 cup / 120g all-purpose or whole wheat flour

  • 1 1/2 cups / 135g rolled oats

  • 1/2 cup / 90g flaxmeal

  • 1/2 tsp baking soda

  • 1/2 tsp salt

  • 1/8 tsp cinnamon

  • 3/4 cup / 105g nuts, roughly chopped

  • 1/2 apple, diced

  • 1/4 cup / 50g dried fruit, chopped if necessary

Directions:

Oven 375°F / 190°C. Baking sheet lined with silpat or parchment paper.

  1. In a large bowl combine wet ingredients: oil, maple syrup, eggs, and vanilla; beat with a spoon until smooth.

  2. In another medium bowl whisk together dry ingredients: flour, oats, flaxmeal, baking soda, salt, and cinnamon.

  3. Add dry ingredients, nuts, apple, and dried fruit to wet ingredients, mix until well combined.

  4. Spoon generous tablespoons of dough onto prepared baking sheet and flatten slightly as they won’t spread much, leaving at least 1 inch between cookies. Bake for 8-10 minutes or until edges turn lightly golden brown and centers are no longer doughy.

Jenny’s Notes:

  • you can make flaxmeal at home by simply processing some flaxseeds in a coffee or spice grinder.

  • olive oil has a rather strong taste so if you prefer to avoid that, try going with the coconut oil option or even a neutral oil like peanut oil.

  • 3 egg whites can be substituted for the 2 eggs for cholesterol-conscience people.

Jeannie's Breakfast Cookies
Yield 12-16 cookies
Author
Prep time
20 Min
Cook time
10 Min
Total time
30 Min

Jeannie's Breakfast Cookies

Healthy cookies packed with nutritious ingredients that make for a great breakfast or anytime snack. Dairy-free, refined sugar-free, and can easily be made gluten-free.
Cook modePrevent screen from turning off

Ingredients

Instructions

  1. Oven 375°F / 190°C. Baking sheet lined with silpat or parchment paper.
  2. In a large bowl combine wet ingredients: oil, maple syrup, eggs, and vanilla; beat with a spoon until smooth.
  3. In another medium bowl whisk together dry ingredients: flour, oats, flaxmeal, baking soda, salt, and cinnamon.
  4. Add dry ingredients, nuts, apple, and dried fruit to wet ingredients, mix until well combined.
  5. Spoon generous tablespoons of dough onto prepared baking sheet and flatten slightly as they won’t spread much, leaving at least 1 inch between cookies. Bake for 8-10 minutes or until edges turn lightly golden brown and centers are no longer doughy.

Notes

you can make flaxmeal at home by simply processing some flaxseeds in a coffee or spice grinder.olive oil has a rather strong taste so if you prefer to avoid that, try going with the coconut oil option or even a neutral oil like peanut oil. 3 egg whites can be substituted for the 2 eggs for cholesterol-conscience people.

Nutrition Facts

Calories

265.40

Fat

15.87 g

Sat. Fat

2.49 g

Carbs

27.23 g

Fiber

3.34 g

Net carbs

23.89 g

Sugar

9.53 g

Protein

5.72 g

Sodium

188.36 mg

Cholesterol

31.00 mg

Nutritional information is approximate and based on 12 servings.

healthy, nutritious, cookies, gluten-free, dairy-free, refined sugar-free, dried fruit, apple, fall spices, oats, nuts, coconut, portable
breakfast, dessert, snack
American
Did you make this recipe?
Tag @jennyblogsandbakes on instagram and hashtag it #jennyblogs
2019-02-17+15.36.02.jpg

Insalata Caprese Tradizionale - Traditional Caprese Salad

Last Updated August 26, 2024

IMG_0994.jpg

Insalata Caprese, often just referred to as Caprese, is by now known the world over and has been adapted into many different dishes and styles. In today’s post we are going to cover the traditional Italian Insalata Caprese, unaltered and in its purest form. How the Italians make it. Leave aside the Caprese grilled cheeses and Caprese pasta for just one second.

Insalata Caprese (EEN-sah-lah-ta cuh-PRAY-zay), or Caprese Salad is an Italian dish consisting of merely 5 ingredients: fresh mozzarella, fresh tomatoes, fresh basil, extra virgin olive oil, and a touch of salt, maybe pepper. Oregano is also added sometimes. That’s it, simple and fresh.

Because there are so few ingredients, no cooking required, and little spice, the quality and freshness of the ingredients are of upmost importance. This is one of the golden rules of the Italian kitchen. In fact, I would say that any caprese salad you’ve eaten in the States is probably a far cry from the shining beacon that it is here in Italy. This is not through any fault of your own, but Italy has certain protected regions and methods for making foods, with rigorous control checks and rules, which holds the product to high standards.

You may be familiar with some of these rules, especially if you seen some Italian wine bottles. You might have noticed special seals that read DOC or DOCG (Denominazione di Origine Controllata or Denominazione di Origine Controllata Garantita), which basically act as a quality seal. One such wine, considered one of the kings of Italian wine, Brunello di Montalcino, will always have the DOCG seal because it can only be grown in the Montalcino region near Siena which has ideal soil and climate for this particular wine. If it doesn’t have the seal, don’t buy it. Hazelnuts, mozzarella, how to make a Neopolitan pizza, and many other food items and processes, sometimes connected to a specific region, are protected by law in Italy.

I just mentioned mozzarella, so you may be understanding how I managed to go on that long spiel and still connect it to today’s subject matter. :) Suffice to say, Italian mozzarella, the good stuff, is in a class of its own.

That’s the beauty of Italian summers, where lunches are made up of ripe tomatoes, a slab of cheese, a drizzle of olive oil. Maybe with a hunk of fresh, salty focaccia. Or maybe just prosciutto and melon.

But maybe you aren’t IN Italy, and you’re wondering how you can make the best Insalata Caprese possible? Let’s dissect the ingredients real quick before getting into the recipe.

Suggestions for selecting ingredients for the Insalata Caprese

  • Tomatoes. You want the freshest, tastiest tomatoes available. The most widely used in Italy would probably be the tomato variety “cuore di bue” or literally, “ox heart,” which originated in America. There are two prinicipal varieties of cuore di bue, Arawak and Albenga. These tomatoes are ideal for salads because they have a thin skin, great flavor, and very few seeds and water inside. They are not usually very round, but fall into the ugly tomato category with lots of ridges. As they say, the uglier the tomato, the more delicious it will be. If you can’t get your hands on a cuore di bue, use your favorite, fresh tomatoes. In the States I often go for an heirloom tomato.

  • Mozzarella. You’ll want the freshest mozzarella possible, which might not be that easy to find unless you know a cheese producer. Traditionally the mozzarella di fiordilatte is used (normal cow’s milk mozzarella), but if you want to up your game, go for the more expensive mozzarella di bufala (buffalo mozzarella) which can also be protected by one of the laws we were talking about above, this time the DOP.

  • Basil. Fresh basil, torn into pieces if desired and ideally added just before serving so it can’t even think about wilting. I mention torn, not sliced, because Italians have this thing against cutting basil with a knife, or it touching metal for that matter.

  • Extra Virgin Olive Oil. I cannot stress enough to you the importance of having a good bottle of olive oil on hand. In Italy there are usually two kinds of olive oil, those used for cooking, and those use for drizzling just before serving. Select your oil carefully, paying attention to where it is produced, when, and when it expires. Olive oil generally has a best if used by date of two years from being bottled. So if you find a bottle that expires in a year or less, you know that bottle has already been sitting on the shelf for too long and is best used for cooking. Also pay attention to wording like “produced in” or “bottled in.” The latter may mean that olives were brought in from elsewhere and merely bottled in Italy so they could write that on the bottle. No really, there are so many shady practices when it comes to olive oil, it can be hard to decipher the great ones, especially when dealing with imported bottles. My mom used to order bottles straight from Italy to get some of the high quality stuff. Basically, you don’t want to pay less than $15 for a bottle in the States. Frantoio Franci and Laudemia are two very high quality brands. If you know your EVOO’s, select a light and fruity oil.

  • Salt and Pepper. Usually just the tomatoes are salted, and pepper is completely optional.

  • Oregano. Oregano is also optional, but a bit of fresh or dried is a nice touch!

This post may contain affiliate links. If you make a purchase using these links, Jennyblogs may receive a small commission, at no extra cost to you. This helps to support Jennyblogs. Where possible, links are prioritized to small businesses and ethically and responsibly made items. For further information see the privacy policy. Grazie!


Insalata Caprese

IMG_1002.jpg

Serves 2

Ingredients:

  • about 1/2lb / 200g fresh mozzarella

  • 2 medium tomatoes

  • a few fresh basil leaves, whole or torn into pieces

  • extra virgin olive oil, for drizzling

  • salt and pepper, to taste

  • fresh or dried oregano, optional

Directions:

  1. Slice the mozzarella and the tomatoes into equally sized slices and place on a plate.

  2. Drizzly lightly with olive oil and sprinkle tomatoes with salt. Sprinkle with a bit of pepper, if desired.

  3. Garnish with basil leaves and oregano; serve.

Jenny’s Notes:

  • It may seem strange, but some recommend to serve the mozzarella at room temperature. If the mozzarella is cut while cold it may lose more water, interacting with and changing the flavor of the tomatoes. If the mozzarella is losing lots of liquid regardless, it may not be as fresh as desired.

  • You can use a paper towel on both the mozzarella and tomatoes to absorb any excess liquid, dabbing or letting them sit on the paper towel if they are very wet.

  • Contrary to American belief, Caprese Salad does not traditionally have balsamic vinegar. Nor mayonnaise, olives, eggs, or other non-Italian inventions.

Traditional Caprese Salad
Yield 2
Author
Prep time
5 Min
Total time
5 Min

Traditional Caprese Salad

This classic Caprese Insalata is bursting with summer flavors. Tomatoes, fresh mozzarella, basil, and extra virgin olive oil, just as the Italians would make it.
Cook modePrevent screen from turning off

Ingredients

Instructions

  1. Slice mozzarella and tomatoes into equally sized slices and place on a plate.
  2. Drizzly lightly with olive oil and sprinkle tomatoes with salt. Sprinkle with a bit of pepper, if desired.
  3. Garnish with basil leaves and oregano; serve.

Notes

  • It may seem strange, but some recommend to serve the mozzarella at room temperature. If the mozzarella is cut while cold it may lose more water, interacting with and changing the flavor of the tomatoes. If the mozzarella is losing lots of liquid regardless, it may not be as fresh as desired.
  • You can use a paper towel on both the mozzarella and tomatoes to absorb any excess liquid, dabbing or letting them sit on the paper towel if they are very wet.
  • Contrary to American belief, Caprese Salad does not traditionally have balsamic vinegar. Nor mayonnaise, olives, eggs, or other non-Italian inventions.

Nutrition Facts

Calories

326.94

Fat

25.15 g

Sat. Fat

11.64 g

Carbs

7.00 g

Fiber

1.73 g

Net carbs

5.27 g

Sugar

4.09 g

Protein

19.14 g

Sodium

663.60 mg

Cholesterol

64.09 mg

Nutritional information is approximate and based on 2 servings.

Gluten-free, tomatoes, fresh mozzarella, mozzarella di bufala, extra virgin olive oil, fresh basil, fresh oregano, Italian recipe, real italian caprese salad, traditional caprese, authentic italian caprese, how to make the best caprese
Side, Lunch
Italian
Did you make this recipe?
Tag @jennyblogsandbakes on instagram and hashtag it #jennyblogs
IMG_0996.jpg

Strawberry Nutella Coconut Milkshake

Last Updated August 24, 2024

This post may contain affiliate links. If you make a purchase using these links, Jennyblogs may receive a small commission, at no extra cost to you. This helps to support Jennyblogs. Where possible, links are prioritized to small businesses and ethically and responsibly made items. For further information see the privacy policy. Grazie!

IMG_0952.jpg

Buon Ferragosto!

Also known as the day where everything is closed and I feel slightly trapped. Hmmm the gelato place is closed so I’ll just run to the store and pick up some…oh wait, all the grocery stores are closed. Ok, well maybe I’ll go browse some shops, oh wait, all closed. I’ll go walk around in the center for a bit…nope, hardly any buses running today to get to the center. Even if I could find a bus, all the places I could buy a ticket are closed. Ok, so I’ll walk to the gym to work out and enjoy some air conditioning. Ah, closed. So, I hunker down and eat whatever food is in the house, try to stay cool. Actually we’ve come to a bit of a cool spell, today only has a high of 90°F. I’ll take it!

I actually planned ahead this year and went grocery shopping last night. I got fruit and veggies for lunch and dinner today, but why didn’t I get better snackies? But then I remembered that I have a good stash of gelato in the freezer, and made me think of this delectable milkshake I made a few weeks ago.

So with all this time on my hands, I shall be milkshaking and sharing this milkshake with you! What’s so great about this milkshake?

It’s a Strawberry Nutella Coconut Milkshake. That’s such a long name, and kinda going against my own rule of not listing every ingredient in the title, but otherwise I didn’t quite know how to get the dream across, ya know?

How about this: Strawnutelloco Milkshake. Stranucoco Milkshake. Conuterry. Strawconutella. Regardless, this milkshake tastes like a chocolate covered strawberry rolled in coconut with a hint of hazelnut.

I have a confession to make. I originally made this milkshake to try and hide this not-awesome gelato I bought. There was a sale on a brand I had never tried before at the grocery store, and they had coconut and I love coconut but it just did not end well. Icy and so much coconut it was chewy. I didn’t want to waste it, but I also didn’t necessarily want to force myself to eat gelato?

Enter the milkshake idea. I had strawberries, Nutella, and milk, and this beautiful combo was born. The copious amounts of coconut from the gelato still rendered my milkshake a bit chewy, but if you have a GOOD brand of coconut ice cream, or even vanilla ice cream with a bit of flaked coconut and maybe a drop of coconut extract or two thrown in, you’ve got yourself the perfect summer day’s treat.

So thank you, gelato brand that shall remain unnamed, for the not delicious gelato that prompted me to create a delicious milkshake.


Strawberry Nutella Coconut Milkshake

Serves 2

IMG_0947.jpg

Ingredients:

  • 2 cups coconut ice cream, slightly softened

  • 1/2 cup milk, any variety

  • 1/2 cup hulled strawberries, fresh or frozen

  • 2 heaping Tbsp Nutella

  • Dash of vanilla extract, optional

  • Whipped cream, optional

Directions:

  1. Add all ingredients except whipped cream to a blender and blend until smooth. Check consistency and add more milk if desired.

  2. Spoon into 2 glasses and top with whipped cream. Serve immediately.

Jenny’s Notes:

  • Don’t have coconut ice cream but still want that coconut taste? Substitute chocolate or vanilla ice cream and add a bit of flaked coconut and a drop or two of coconut extract.

  • For creamier shakes, use whole milk.

  • For thinner shakes you can sip, add more milk. For thicker, spoonable shakes, add less milk. Some blenders don’t blend thicker shakes well, so if yours is having problems, either wait a minute or two for the ice cream to soften a bit more before continuing to blend, or add a touch more milk.

  • To make fresh whipped cream, whip about 1/4 cup / 60g heavy whipping cream with 1 Tbsp / 14g sugar in the bowl of a stand mixer fitted with whisk attachment, or with a handheld mixer. This makes about 1/2 cup fresh whipped cream. Store in fridge, best if used within a few days.

Strawberry Nutella Coconut Milkshake
Yield 2 Servings
Author
Prep time
5 Min
Total time
5 Min

Strawberry Nutella Coconut Milkshake

Thick and creamy milkshake with coconut ice cream, Nutella, strawberries and whipped cream on top.
Cook modePrevent screen from turning off

Ingredients

Instructions

  1. Add all ingredients except whipped cream to a blender and blend until smooth. Check consistency and add more milk if desired.
  2. Spoon into 2 glasses and top with whipped cream. Serve immediately.

Notes

  • Don’t have coconut ice cream but still want that coconut taste? Substitute chocolate or vanilla ice cream and add a bit of flaked coconut and a drop or two of coconut extract.
  • For creamier shakes, use whole milk.
  • For thinner shakes you can sip, add more milk. For thicker, spoonable shakes, add less milk. Some blenders don’t blend thicker shakes well, so if yours is having problems, either wait a minute or two for the ice cream to soften a bit more before continuing to blend, or add a touch more milk.
  • To make fresh whipped cream, whip about 1/4 cup / 60g heavy whipping cream with 1 Tbsp / 14g sugar in the bowl of a stand mixer fitted with whisk attachment, or with a handheld mixer. This makes about 1/2 cup fresh whipped cream. Store in fridge, best if used within a few days.

Nutrition Facts

Calories

440.85

Fat

23.21 g

Sat. Fat

19.31 g

Carbs

54.51 g

Fiber

3.87 g

Net carbs

50.64 g

Sugar

40.58 g

Protein

6.95 g

Sodium

49.23 mg

Cholesterol

9.42 mg

Nutritional information is approximate and based on 2 servings and includes whipped cream.

milkshake, milk, strawberry, Nutella, coconut, ice cream, vanilla, fresh whipped cream, dessert, summer
Dessert, Beverage
American
Did you make this recipe?
Tag @jennyblogsandbakes on instagram and hashtag it #jennyblogs
IMG_0943.jpg

Sicilian Almond Cookies - Paste di Mandorle

Last Updated August 16, 2024

2019-05-13+15.18.28.jpg

Paste di mandorle, or almond cookies, are one of the simplest and most delicious cookie recipes you could ask for, requiring only 4 ingredients and an overnight refrigeration (and even that is optional), so you can make the dough one day and bake the next. And because they only use almond flour, they are gluten-free friendly!

These cookies and many variations of them hail from Sicily, where the land is full of sunshine and Mediterranean breezes, charming towns, and has the perfect climate for some of the most succulent citrus fruits and almonds. Or so I’ve heard, I have yet to actually go there! The first time I found a bag of Sicilian almonds in Italy I snatched them up, hoping for a taste experience like never before. Basically setting myself up for disappointment. They were good, yes, but I think it would be best to eat them fresh, in Sicily. Until that day when I go to Sicily, I will content myself with tastes of their culture, like the occasional good arancini (fried balls of rice stuffed with cheese and veggies or meat) that you can find around Florence, granita (a slushy type drink), brioche stuffed with gelato, and cannoli. And of course, these almond cookies. And they’re so simple to make. Dangerous.

A Note on What You Call These Cookies in Italian

The original name of this post I had named as “Paste alle mandorle” but I believe that is used more to denote almond paste, or marzipan, so I’ve updated it to Paste di Mandorle.

While most translating apps will tell you “cookie/cookies” translates to “biscotto/biscotti”, it’s not a catch-all. For as often as I talk about, bake, and eat cookies, this word has always given me grief. If you want to get technical, and you know I do, “biscotti” can be broken down into two root words: “bis” meaning two or twice, and “cotti” meaning baked or cooked. Thus, biscotti actually refers to cookies that have been baked twice. In America, you probably are familiar with the word biscotti, meaning those long hard cookies often sold at coffee shops. Those are truly biscotti, because they’re twice baked. The whole dough is baked, then they’re sliced and baked again. So if you want to talk about cookies in Italian but you don’t want to talk about the twice-baked ones, what do you call them? There is no catch-all, but you have some options. You could simply call them “dolci” (sweets) or dolcetti (little sweets) which is always safe, or cookies made with butter, similar to what we know as shortbread, you could call “frolli”. Or, you can call them “paste” as I did in this post, which in the most general translation of the word means "doughs” or “pasticcini” which is similar. Just looking up this recipe in Italian, on the first page you will probably find them called paste, pasticcini, and biscotti.

Then don’t get me started on the Italian word for “cake” which is “torta”. That one IS a catch-all, but in a bad way, because then I’m calling desserts “cake” in Italian that are definitely not cake in English. They have no word for pie, so then if someone comes to your Thanksgiving dinner and asks what the pumpkin pie is, you might say “torta di zucca” or, pumpkin cake. Sigh. Pie, like Americans think of pie (apple pie, cherry pie) doesn’t exist in their traditional cuisine so it makes sense. But confusing for an American who wants to talk about it in Italian. Some desserts, like apple, are known enough now in Italy that you can refer to them by their English name, apple pie.

This post may contain affiliate links. If you buy something using these links, Jennyblogs may receive a small commission, at no extra cost to you. This helps to support Jennyblogs. For further information see the privacy policy. Grazie!

Original recipe adapted and translated from GialloZafferano


Sicilian Almond Cookies - Paste di Mandorle

Makes about 2 dozen cookies

2018-12-22 12.26.58.jpg

Ingredients:

  • 2 1/2 cups / 250g almond flour

  • 1 1/4 cups / 250g granulated sugar

  • 2 / 60g egg whites

  • 1/2 tsp almond extract

Garnishes (optional)

  • powdered sugar

  • whole, sliced, or slivered almonds

Directions:

Oven 350F / 180C

  1. In a medium bowl, combine the almond flour and the sugar.

  2. Mix in the egg whites and the almond extract until thoroughly combined. This can be done with a spoon, a hand mixer, stand mixer, or even in a food processor.

  3. Cover dough and place in fridge overnight or for at least 7 hours.

  4. Remove dough from fridge and roll into balls, then roll in powdered sugar. Flatten cookies a bit, as they will not spread much in the oven. Press in a few almond slices on top. Alternately, shape them as you wish, as they hold their shape well after the overnight refrigeration.

  5. Place cookies on a silpat or parchment covered baking sheet, leaving about 1” between cookies.

  6. Bake in preheated oven for 8-12 minutes, until just lightly golden. Be careful no to overbake, cookies should be crunchy on the outside and soft on the inside.

Jenny’s Notes:

  • If you have almonds and a method to grind them, such as a food processor, go ahead and make fresh almond flour! Be careful not to over grind, you don’t want the almonds to heat up and the oil to start to escape, resulting in almond butter.

  • If you prefer other extracts, go ahead and play around with other flavors; vanilla, orange, lemon, coconut, etc.

  • This recipe, if you go by weight instead of imperial measurements, is very easy to modify or double, triple, halve, etc.! You can see that the ratio of almond flour to sugar is 1:1: essentially all you have to do is mix together equal weights of almond flour and sugar, with just enough egg whites to bind them together easily and a touch of extract for flavor. Voila.

  • These cookies have many variants and shapes and are often piped with candied cherries on top. I’m not a huge candied fruit person, and so I found a simple recipe and omitted the piping for one of the simpler almond cookie methods, rolling in powdered sugar and decorating with almonds.

Sicilian Almond Cookies - Paste alle Mandorle
Yield 24
Author
Prep time
30 Min
Cook time
12 Min
Inactive time
7 Hour
Total time
7 H & 42 M

Sicilian Almond Cookies - Paste alle Mandorle

A classic Italian cookie originating in Sicily with a soft center and crunchy exterior. 4 ingredients and gluten-free.
Cook modePrevent screen from turning off

Ingredients

Garnishes (optional)

Instructions

  1. In a medium bowl, combine the almond flour and the sugar.
  2. Mix in the egg whites and the almond extract until thoroughly combined. This can be done with a spoon, a hand mixer, stand mixer, or even in a food processor.
  3. Cover dough and place in fridge overnight or for at least 7 hours.
  4. Remove dough from fridge and roll into balls, then roll in powdered sugar. Flatten cookies a bit, as they will not spread much in the oven. Press in a few almond slices on top. Alternately, shape them as you wish, as they hold their shape well after the overnight refrigeration.
  5. Place cookies on a silpat or parchment covered baking sheet, leaving about 1” between cookies.
  6. Bake in preheated oven for 8-12 minutes, until just lightly golden. Be careful no to overbake, cookies should be crunchy on the outside and soft on the inside.

Notes

If you have almonds and a method to grind them, such as a food processor, you can make fresh almond flour! Be careful not to over-grind, you don’t want the almonds to heat up and the oil to start to escape, resulting in almond butter. If you prefer other extracts, play around with other flavors; vanilla, orange, lemon, coconut, etc. This recipe, if you go by weight instead of imperial measurements, is very easy to modify or double, triple, halve, etc.! You can see that the ratio of almond flour to sugar is 1:1: essentially all you have to do is mix together equal weights of almond flour and sugar, with just enough egg whites to bind them together easily and a touch of extract for flavor. Voila. These cookies have many variants and shapes and are often piped with candied cherries on top. I’m not a huge candied fruit person, and so I found a simple recipe and omitted the piping for one of the simpler almond cookie methods, rolling in powdered sugar and decorating with almonds.

Nutrition Facts

Calories

110.04

Fat

5.24 g

Sat. Fat

0.40 g

Carbs

14.38 g

Fiber

1.31 g

Net carbs

13.07 g

Sugar

12.51 g

Protein

2.76 g

Cholesterol

0.00 mg

Nutritional information is approximate, based on 1 cookie.

gluten-free, Sicilian almond cookies, Paste alle Mandorle
dessert, cookies
Italian
Did you make this recipe?
Tag @jennyblogsandbakes on instagram and hashtag it #jennyblogs
2019-05-13+15.17.27-2.jpg

Chocolate Sauce

Photo Public Domain https://creativecommons.org/licenses/by-sa/3.0/at/deed.en Permission: Sammlung J.P. Adlbrecht

Photo Public Domain https://creativecommons.org/licenses/by-sa/3.0/at/deed.en Permission: Sammlung J.P. Adlbrecht

Last Updated August 15, 2024

This post contains affiliate links. If you buy something using these links, Jennyblogs may receive a small commission, at no extra cost to you. This helps to support Jennyblogs. For further information see the privacy policy. Grazie!

Classic. Quintessential. Chocolatey. Good on everything, from your morning pancakes and coffee to ice cream and that cake you just made. Or ya know, by the spoonful. Just a spoonful of…I’ll let you sing the rest yourself. ;)

What is it? Chocolate Sauce! Or chocolate syrup, as you prefer. No more Hershey’s in a bottle, or going without if you live outside the USofA. It’s so easy you’ll wonder why you never made it before. No high fructose corn syrup involved!

Recipe from my Mama


Chocolate Sauce

Makes about 3/4 cup of sauce

Ingredients:

  • 3/4 cup / 150g sugar

  • 1/3 cup / 33g unsweetened cocoa powder

  • 1 Tbsp / 7.5g cornstarch

  • 1/2 cup / 118g water

  • 1 tsp vanilla

Directions:

  1. Combine sugar, cocoa, and cornstarch in a small saucepan.

  2. Add water and whisk until there are no cornstarch lumps.

  3. Cook over medium heat, stirring constantly, until mixture boils. Reduce heat to low and boil for 5 minutes, continuing to stir.

  4. Remove from heat and add vanilla. Cool.

  5. Store in an airtight container in the refrigerator.

Jenny’s Notes:

  • The better quality your cocoa powder the better your sauce will taste!

  • Keeps well in the fridge.

Chocolate Sauce
Yield 12
Author
Prep time
5 Min
Cook time
10 Min
Total time
15 Min

Chocolate Sauce

A basic chocolate sauce for ice cream topping, drizzling, mixing in coffee, and anything you need chocolate sauce for!
Cook modePrevent screen from turning off

Ingredients

Instructions

  1. Combine sugar, cocoa, and cornstarch in a small saucepan.
  2. Add water and whisk until there are no lumps.
  3. Cook over medium heat, stirring constantly, until mixture boils. Reduce heat to low and boil for 5 minutes, continuing to stir.
  4. Remove from heat and add vanilla. Cool.
  5. Store in an airtight container in the refrigerator.

Notes

The better quality your cocoa powder the better your sauce will taste! Keeps well in the fridge.

Nutrition Facts

Calories

63.04

Fat

0.27 g

Sat. Fat

0.00 g

Carbs

14.76 g

Fiber

0.56 g

Net carbs

14.21 g

Sugar

12.52 g

Protein

0.55 g

Sodium

0.61 mg

Cholesterol

0.00 mg

Nutritional information is approximate.

Hershey's chocolate sauce, ice cream topping, hot fudge sundae sauce, chocolate sauce
dessert, sauce, topping
American
Did you make this recipe?
Tag @jennyblogsandbakes on instagram and hashtag it #jennyblogs

Pumpkin Pudding

IMG_5018.JPG

Last updated August 14, 2024

Pumpkin Pudding is a classic, easy fall recipe in my family. It’s like pumpkin pie, but without all the fuss of the crust. This is great to make in the time leading up to Thanksgiving, because you’re not ruining your appetite for pumpkin pie (you can’t call it pie if it doesn’t have a crust, therefore, totally different) while not wasting time NOT eating pumpkin. Bonus that it’s incredibly easy to whip up.

Fall is coming fall is coming! I love the changing of seasons and the different nostalgias and expectations that come with each season. Living in Italy, the nostalgia is a little bit stronger. Autumn is still autumn, but the changes are a little less distinct, and the comfort of knowing where to pick out the best pumpkins and buy the best apple cider is not something that really exists here. Pumpkins will be few and far between, unless you’re lucky enough to stumble upon some markets that have the mini gourds; apple cider is practically nonexistent; trick-or-treating happens, but most Italians wear scary costumes instead of characters; the leaf change is not the brilliant red, orange, and yellows like in Michigan, but more of a subtle green-to-yellow with the occasional leaves fluttering down. Despite the differences with what I grew up with, there are still oodles of things I love to do to make my home fall-y and to welcome the chilly evenings. Lighting candles, brewing tea, pulling out the fuzzy socks and sweaters (even if I’d be sweating if I actually tried to wear them yet) and baking and eating lots of fall goodies that include pumpkin, cinnamon, spices, breads, soups, and all the hearty autumn recipes.

This post may contain affiliate links. If you buy something using these links, Jennyblogs may receive a small commission, at no extra cost to you. This helps to support Jennyblogs. For further information see the privacy policy. Grazie!

Recipe from my mama


Pumpkin Pudding

IMG_5023.JPG

Serves: 4-6

Ingredients:

  • 15 oz / 425g pumpkin purée

  • 2/3 cup / 132g sugar

  • 1/2 tsp / 2.5g salt

  • 1 tsp / 5g cinnamon

  • 1/2 tsp / 2.5g ginger

  • 1/4 tsp / 1g cloves

  • 1 cup / 237g milk of choice

Directions:

Oven 375°F / 190°C. Lightly grease an 8x8in / 20x20cm baking pan.

  1. Mix all ingredients in a bowl until smooth.

  2. Pour into prepared pan; bake for 20-25 minutes in preheated oven until edges are bubbling.

Jenny’s Notes:

  • To dress this lovely and simple dessert up you can top it with confectioner’s sugar or crumbled cookies such as shortbread or Nilla Wafers, or serve with ice cream and/or whipped cream.

  • This recipe is gluten free, vegan (if you use a milk substitute like coconut or almond), and probably many of the other diet fads that I can’t quite keep track of. Eat up!

Pumpkin Pudding
Yield 4-6
Author
Prep time
10 Min
Cook time
25 Min
Total time
35 Min

Pumpkin Pudding

Like pumpkin pie but without the hassle of the crust. Gluten-free and can easily be made vegan.
Cook modePrevent screen from turning off

Ingredients

Instructions

  1. Oven 375F / 190C. Lightly greased 8x8in / 20x20cm baking pan.
  2. Mix all ingredients in a bowl until smooth.
  3. Pour into prepared pan; bake for 20-25 minutes in preheated oven until edges are bubbling.

Notes

To dress this lovely and simple dessert up you can top it with confectioner’s sugar or crumbled cookies such as shortbread or Nilla Wafers, or serve with ice cream and/or whipped cream.This recipe is gluten free, vegan (if you use a milk substitute like coconut or almond), and probably many of the other diet fads that I can’t quite keep track of. Eat up!

Nutrition Facts

Calories

198.32

Fat

1.49 g

Sat. Fat

0.88 g

Carbs

45.81 g

Fiber

3.85 g

Net carbs

41.97 g

Sugar

36.49 g

Protein

3.31 g

Sodium

279.59 mg

Cholesterol

4.74 mg

Nutritional information is approximate. Based on 4 servings.

crustless pumpkin pie, no crust pumpkin pie, pumpkin pudding, pumpkin pie, Thanksgiving dessert, fall dessert, easy pumpkin dessert, vegan, gluten free
dessert
American
Did you make this recipe?
Tag @jennyblogsandbakes on instagram and hashtag it #jennyblogs
The slowly melting confectioner’s sugar…

The slowly melting confectioner’s sugar…


Chia Persimmon Pudding

Last Updated August 10, 2024

This post contains affiliate links. If you buy something using these links, Jennyblogs may receive a small commission, at no extra cost to you. This helps to support Jennyblogs. For further information see the privacy policy. Grazie!

I had never eaten a persimmon before living in Italy.  I probably couldn't have even picked it out from a line up of fruit.  But if you asked me, of course I would want to try a persimmon!  I had heard good things about them, especially the elusive "persimmon pudding."  

I used to go the market several times a week for my fruit and vegetables, one of my favorite weekly errands.  It was a large market, the ground floor of the Mercato Centrale if you’ve been there, with lots of vendors, but there was this dear old man that always had the best tomatoes and lettuce.  He would say "Ciao, bella," shake my hand, and always round the price down for me.  He also had this habit of sneaking in a fruit or vegetable that I hadn't ordered.  Whether that was a sweet gesture or a marketing strategy, I may never know.  One day, after getting my usual tomatoes, I arrived home to find this strange object that looked curiously like an orange tomato, but was most definitely not.  So....squishy and lacking that earthy, pungent, tomato vine smell.  After a little research, I found I had in my possession a kaki!  Okay, now what is a kaki?  

After a little more research, I found that kaki is what the Italians call persimmons. Sweet, mysterious persimmons.  Now...how to eat it?  I quickly realized they are like jelly on the inside when ripe, and it's only the skin that holds it together.  If that skin breaks, you have a real mess if you weren't prepared with a bowl or your mouth beneath it.  I ate that first one in hurry, before it all dripped from my hands onto the floor. 

From then on I bought them in packs and beautiful things happened, including various versions of persimmon pudding.  Below is a raw and vegan version of the Persimmon Pudding.  Makes for a great dessert, snack, or breakfast!  Kaki on.  

Recipe adapted from Blissful Basil.


Chia Persimmon Pudding

Serves 4

Ingredients:

For the Chia Pudding Layer

  • 2 cups / 474g unsweetened coconut milk or milk of choice

  • generous 1/2 cup / 90g chia seeds

  • 3 Tbsp / 60g maple syrup or honey

  • 2 tsp / 9g vanilla extract

  • 1/2 tsp / 1g cinnamon

  • pinch of cardamom

For the Persimmon Pudding Layer

  • 3 ripe persimmons

  • 1/4 tsp cinnamon

Directions:

*Note: Make the Chia Pudding the day before you want to eat the pudding, as it takes at least 8 hours to set up.  

You’ll need 4 small (about 12 oz), clear glasses or bowls.

Make the Chia Pudding

  1. In a medium bowl whisk together milk, chia seeds, maple syrup, vanilla, cinnamon, and cardamom.  

  2. Cover and refrigerate overnight or at least 8 hours.  

Make the Persimmon Pudding

  1. Remove the stems from the persimmons and place in a food processor or blender.  Add the cinnamon and blend until smooth.  

  2. Spoon about scant 1/4 cup Persimmon Pudding into the bottom of each glass.  Top with a scant 1/4 cup Chia Pudding.  Repeat layers until both puddings are gone.  Should make three layers of each, or 6 layers total in each glass. Top with additional cinnamon, if desired.

Jenny's Notes:

  • You'll want your persimmons to be very ripe and very soft all the way through; they should be bursting when you try to remove the stems.

  • Persimmons are a great source of vitamin A, vitamin C, and high in fiber.  

Chia Persimmon Pudding
Yield 4
Author
Prep time
15 Min
Inactive time
8 Hour
Total time
8 H & 15 M

Chia Persimmon Pudding

Layers of spiced coconut milk chia pudding and juicy persimmons are a simple, vegan, dairy-free, gluten, raw, etc. dessert, breakfast, or snack.
Cook modePrevent screen from turning off

Ingredients

For the Chia Pudding Layer
For the Persimmon Pudding Layer

Instructions

Make the Chia Pudding
  1. *Note: Make the Chia Pudding the day before you want to eat the pudding, as it takes at least 8 hours to set up.
  2. In a medium bowl whisk together milk, chia seeds, maple syrup, vanilla, cinnamon, and cardamom.
  3. Cover and refrigerate overnight or at least 8 hours.
Make the Persimmon Pudding
  1. You’ll need 4 small (about 12 oz), clear glasses or bowls.
  2. Remove the stems from the persimmons and place in a food processor or blender. Add the cinnamon and blend until smooth.
  3. Spoon about scant 1/4 cup Persimmon Pudding into the bottom of each glass. Top with a scant 1/4 cup Chia Pudding. Repeat layers until both puddings are gone. Should make three layers of each, or 6 layers total in each glass. Top with additional cinnamon, if desired.

Notes

You'll want your persimmons to be very ripe and very soft all the way through; they should be bursting when you try to remove the stems.

Nutrition Facts

Calories

266.73

Fat

9.61 g

Sat. Fat

2.90 g

Carbs

43.72 g

Fiber

12.46 g

Net carbs

35.76 g

Sugar

25.11 g

Protein

4.73 g

Sodium

12.43 mg

Cholesterol

0.00 mg

Nutritional information is approximate.

vegan, raw, no bake, chia pudding, persimmon pudding, dairy free, gluten free, refined sugar free
dessert, pudding
American
Did you make this recipe?
Tag @jennyblogsandbakes on instagram and hashtag it #jennyblogs

Enjoy your Kaki Pudding!

Homemade Marzipan

Last Updated: August 10, 2024

Marzipan!  That weird almond dessert that no one seems to really talk about in America, but people rave about in Europe. It really should catch on in the US, because:

  1. It tastes like almonds and is delicious

  2. It's easy to make

  3. It's fun to work with and versatile

 It can be used as filling or toppings of baked goods, and it can also be colored and molded into shapes or rolled out and used to cover cakes in a fondant fashion. Fondant has it's place, but I would rather eat a marzipan covered cake any day over a fondant cake.  

marzipan.jpg

You may have seen almond paste sold in stores, and although almond paste and marzipan are made from the same ingredients, they are not usually equal. This depends on what part of the world you call home.  In many European countries the terms marzipan and almond paste are interchangeable, in other parts, such as the US, they are different products. If they are different, as in the US, marzipan is smoother, sweeter, made with egg whites and sometimes rose water, whereas almond pasted is less sweet and has a coarser texture.  When I first started dabbling in marzipan, I used almond paste as a base to make marzipan, but now I prefer to make it from scratch.

It's so simple, as you can see for yourself!

This post may contains affiliate links. If you buy something using these links, Jennyblogs may receive a small commission, at no extra cost to you. This helps to support Jennyblogs. For further information see the privacy policy. Grazie!

Recipe adapted from La Cuochina Sopraffina


Marzipan

Makes about 280g of marzipan, or about 10 oz. 

Ingredients:

  • 125g / 1 1/3 cup almond flour or almonds

  • 125g / 1 cup powdered sugar

  • 1 egg white (about 30g)

  • 6 drops almond extract

  • 3 drops rose water, optional

Directions:

  1. If using whole almonds, place in a food processor and process until finely ground.   

  2. Process almond flour, powdered sugar, egg white, almond extract, and rose water until a thick dough forms.  If the consistency is too thin, add more powdered sugar.  

  3. Turn marzipan out onto a surface lightly dusted with powdered sugar, knead for a few seconds.  Wrap tightly in plastic wrap and refrigerate until needed, or freeze.  

Jenny's Notes:

  • This recipe is very simple to adjust to the amount you need, especially if you scale/weigh your ingredients.  As you may have noticed, the almond flour to powdered sugar is a 1:1 ratio.  

  • If you are worried about eating or serving raw egg whites, be sure to buy pasteurized egg whites from the store.   

Homemade Marzipan
Yield 10
Author
Prep time
10 Min
Total time
10 Min

Homemade Marzipan

Marzipan is a versatile and tasty European almond sweet, often paired with chocolate, molded into fruit shapes, or used to cover cakes in place of fondant. Gluten and dairy free.
Cook modePrevent screen from turning off

Ingredients

Instructions

  1. If using whole almonds, place in a food processor and process until finely ground.
  2. Process almond flour, powdered sugar, egg white, almond extract, and rose water until a thick dough forms. If the consistency is too thin, add more powdered sugar.
  3. Turn marzipan out onto a surface lightly dusted with powdered sugar, knead for a few seconds. Wrap tightly in plastic wrap and refrigerate until needed, or freeze.

Notes

This recipe is very simple to adjust to the amount you need, especially if you scale/weigh your ingredients. As you may have noticed, the almond flour to powdered sugar is a 1:1 ratio. If you are worried about eating or serving raw egg whites, be sure to buy pasteurized egg whites from the store.

Nutrition Facts

Calories

131.15

Fat

7.44 g

Sat. Fat

0.57 g

Carbs

14.21 g

Fiber

1.86 g

Net carbs

12.35 g

Sugar

11.43 g

Protein

3.51 g

Sodium

6.80 mg

Cholesterol

0.00 mg

Nutritional information is approximate. Based on 10 servings.

marzipan, almond paste, European sweets, marzipan fruit, fondant, gluten-free, dairy-free, raw
dessert
European
Did you make this recipe?
Tag @jennyblogsandbakes on instagram and hashtag it #jennyblogs

Quinoa Coconut Date Rolls

IMG_4728.jpg

Last Updated August 8, 2024

These little morsels are so named because they are rolled, and no, these will not get you a date nor would I suggest bringing them on a first date.  Not because these aren't scrummy (that’s scrumptious and yummy combined), but because "healthy" baking should always be treated warily.  You must already have a well established relationship with that person, preferably have treated them to some normal sugary delicious desserts so that they understand that you understand what a dessert "should" be, and can trust your taste buds when you then try to sell them on your spinach-spirolina-turmeric-kale-ginger-wasabi-moringa bars that are also dairy-free and refined-sugar free.  Whew, I'm out of breath.  But that relationship is important.  So if I've never eaten anything that you've made before, know that I might distrust you at first, in the most genial way possible.  And you should distrust me, until I gain your trust.  

Also understand what your taste preferences are, and if you don't like healthy desserts, well then, may I ask why are you reading this particular recipe? May I kindly redirect you to this decadent Peanut Butter Brownie Trifle?  Or if you don't like dates, we might have a problem.  But if you like healthy desserts, or are exploring in this arena, then you probably know what you're getting yourself into.  The quinoa provides protein and grains, the almonds provide good fats and more protein, while the dates give sweetness and carbs and coconut brings flavor to the party. 

So now, using your own best judgment, allow me to introduce my friends, the Quinoa Coconut Date Rolls.

This post may contain affiliate links. If you buy something using these links, Jennyblogs may receive a small commission, at no extra cost to you. This helps to support Jennyblogs. For further information see the privacy policy. Grazie!

Recipe adapted from Skinny Ms.


Quinoa Coconut Date Rolls

Makes about 10-12 rolls

Ingredients:

  • 1/3 cup / 60g dry quinoa

  • 2/3 cup / 158g water

  • 1 cup / 160g pitted dates

  • 1/2 cup / 70g almonds

  • 1/3 cup / 33g grated unsweetened coconut, plus more for rolling

  • 2-3 tsp / 10-15g water

  • 1/4 cup / 42g chocolate chips, optional

Directions:

  1. Combine quinoa and water in a small saucepan over medium heat.  Bring to a boil and reduce heat.  Cover and simmer for 10-15 minutes, until all the water is absorbed.  Set aside to cool completely.  If you already have quinoa made, you'll need about 1 cup.  

  2. Place dates in a food processor and blend until they stick together in a ball.  Add the almonds, coconut, and quinoa; pulse until well combined.  Add water, if necessary, until the mixture holds together.  Shape into balls or roll.  Place extra coconut on a plate and roll the rolls around until completely covered in coconut.  

  3. *Optional:  Heat chocolate chips over a double boiler or in the microwave for 30 second bursts, until melted.  Drizzle chocolate over rolls.

  4. Store in an airtight container for up to a week, or freeze.  

Jenny's Notes:

  • For a chunkier roll, process for a shorter period of time.  

  • These rolls are also delicious if you add a 1/2 tsp of cinnamon. They could become autumnal if you add cinnamon along with a dash of nutmeg, cloves, and ginger. Yum!  

Quinoa Coconut Date Rolls (Vegan)
Yield 10-12 rolls
Author
Prep time
25 Min
Cook time
15 Min
Total time
40 Min

Quinoa Coconut Date Rolls (Vegan)

Nutritious Lara-bar like rolls made with quinoa, dates, coconut, and almonds with optional chocolate drizzle. Great for breakfast, snacks, on the go, and after workouts!
Cook modePrevent screen from turning off

Ingredients

Instructions

  1. Combine quinoa and water in a small saucepan over medium heat. Bring to a boil and reduce heat. Cover and simmer for 10-15 minutes, until all the water is absorbed. Set aside to cool completely. If you already have quinoa made, you'll need about 1 cup.
  2. Place dates in a food processor and blend until they stick together in a ball. Add the almonds, coconut, and quinoa; pulse until well combined. Add water, if necessary, until the mixture holds together. Shape into balls or roll. Place extra coconut on a plate and roll the rolls around until completely covered in coconut.
  3. *Optional: Heat chocolate chips over a double boiler or in the microwave for 30 second bursts, until melted. Drizzle chocolate over rolls.
  4. Store in an airtight container for up to a week, or freeze.

Notes

For a chunkier roll, process for a shorter period of time. These rolls are also delicious if you add a 1/2 tsp of cinnamon. They could become autumnal if you add cinnamon along with a dash of nutmeg, cloves, and ginger. Yum!

Nutrition Facts

Calories

151.00

Fat

7.49 g

Sat. Fat

2.97 g

Carbs

20.79 g

Fiber

3.25 g

Net carbs

17.54 g

Sugar

13.01 g

Protein

3.11 g

Sodium

37.86 mg

Cholesterol

0.00 mg

Nutritional information is approximate. Based on 10 servings and includes chocolate drizzle.

quinoa, coconut, almonds, gluten-free, vegan, dairy-free, refined sugar-free, vegetarian, healthy, nutritious, clean eating, egg-free
snack, breakfast
American
Did you make this recipe?
Tag @jennyblogsandbakes on instagram and hashtag it #jennyblogs