New York Style Cheesecake

Happy December!

Adjustments.jpeg

Our bellies may still be lamenting the onslaught of food this past weekend, but planning for Christmas will soon be under way, if it’s not already! Actually, for it just being my husband and I (and baby!) eating a 15lb turkey, we demolished it in good time. Read, the only thing left of the turkey is some turkey broth I made from the bones.

What’s on your Christmas menu? Do you have traditional recipes or try new ones every year? A mix of both? One thing that’s not strictly traditional but I love for Christmas…is cheesecake. It just seems so rich and stately, special enough for my favorite holiday, yet not terribly difficult.

If you’re surprised by that last statement, good. This recipe’s point is to make a bakery-worthy cheesecake attainable in your own kitchen. Cheesecake shouldn’t be intimidating to make. Heed a few simple techniques and the rest is as easy as crushing graham crackers and mixing a few ingredients together.

Tips for making great cheesecake

The most difficult part, at least for me, is baking. Under bake, and it won’t set up. Over bake, and it’ll be a bit dry/crumbly, especially near the edges. It just feels wrong to turn off the oven when the cheesecake is still jiggly in the middle! But it’s supposed to be that way because it works. Trust!

My biggest piece of advice for you, don’t rush your cheesecake. While not difficult, it requires time. Shortcuts will jeopardize the final product. Your ingredients need time to come to room temperature, cheesecakes usually bake an hour or upwards, then there is the gradual cooling, and finally, the refrigeration. All essential for the best cheesecake, no cracks. Other things to remember when making cheesecakes:

  • As mentioned above, it’s important for your ingredients to be room temperature before starting. This may mean pulling out your cream cheese, sour cream, and eggs, etc. first thing in the morning. If it’s particularly cold in your home, you may need to put them near a source of heat. If it’s a holiday baking day, I might put them near the oven that’s giving off heat. You can use a microwave to soften cream cheese, but not eggs. I don’t have a microwave so must stay on top of getting my ingredients out in a timely manner. It’s also possible to stick them in a bowl of warm water to speed up the process.

  • Use full fat ingredients where possible. This is coming from a person who often cuts corners to lighten up dishes, using less sugar, milk instead of cream, and so on. But if you’re going to eat cheesecake, you might as well make it super creamy. I have often used the lower fat Neufchâtel instead of cream cheese in cheesecakes, but there IS a difference. Enough of one for once I am recommending you use the full fat. Take my word for it or try it yourself, but now you know!

  • Use a bain-marie. I’ve made many a cheesecake in my shortish life, sometimes with and sometimes without a bain-marie. A bain-marie is simply a water bath that helps the cheesecake bake evenly thus producing a creamier end product and helps prevent cracks. You might be tempted to skip this step, as I have in the past, but I’ve come to the conclusion that it really does help. A water bath alone can’t save a cheesecake that wasn’t made correctly, but it is one of the keys to a perfect cheesecake.

  • Don’t over mix! In fact, because cheesecake batter shouldn’t be beaten, it’s a good one to mix by hand.

Keeping these simple tips in mind you’re already on your merry way to a fantastic cheesecake.

We’ve all heard of it, but what exactly makes a New York Cheesecake, New York?

To simplify cheesecakes in the most general way possible, there are two kinds. Baked and unbaked. You’ll see unbaked cheesecakes pop up more in hot summer months, but I think most Americans will think of “classic” cheesecake as the baked version. Among the baked variety there are many more categories, I’ve heard of New York style, Chicago style, Pennsylvania-Dutch, Philadelphia, Swedish, Vegan, Roman, Japanese, Savory, among others. Some are made with cream cheese, farmer’s cheese, or ricotta, some are baked in springforms or squarepans. Of the baked variety, probably the most familiar by far is the New York style. And according to some, that’s the only kind that should matter.

In fact, as an American I’m so conditioned to think of cheesecake as the cream cheese based dessert, often in the guise of New York style, that when I try some of the other kinds that use different cheeses, such as ricotta or farmer’s cheese, I don’t like it as well. That’s preference, but for me there is nothing like the silky smooth texture of a cream cheese cheesecake. Here in Italy cheesecake is…weird. Often the cheesecake is more of a semi-freddo or uses ricotta and mascarpone and it’s just not the same. Maybe if it wasn’t called cheesecake I could go into it with more of an open mind. If you’re going to use ricotta, make cannoli!!

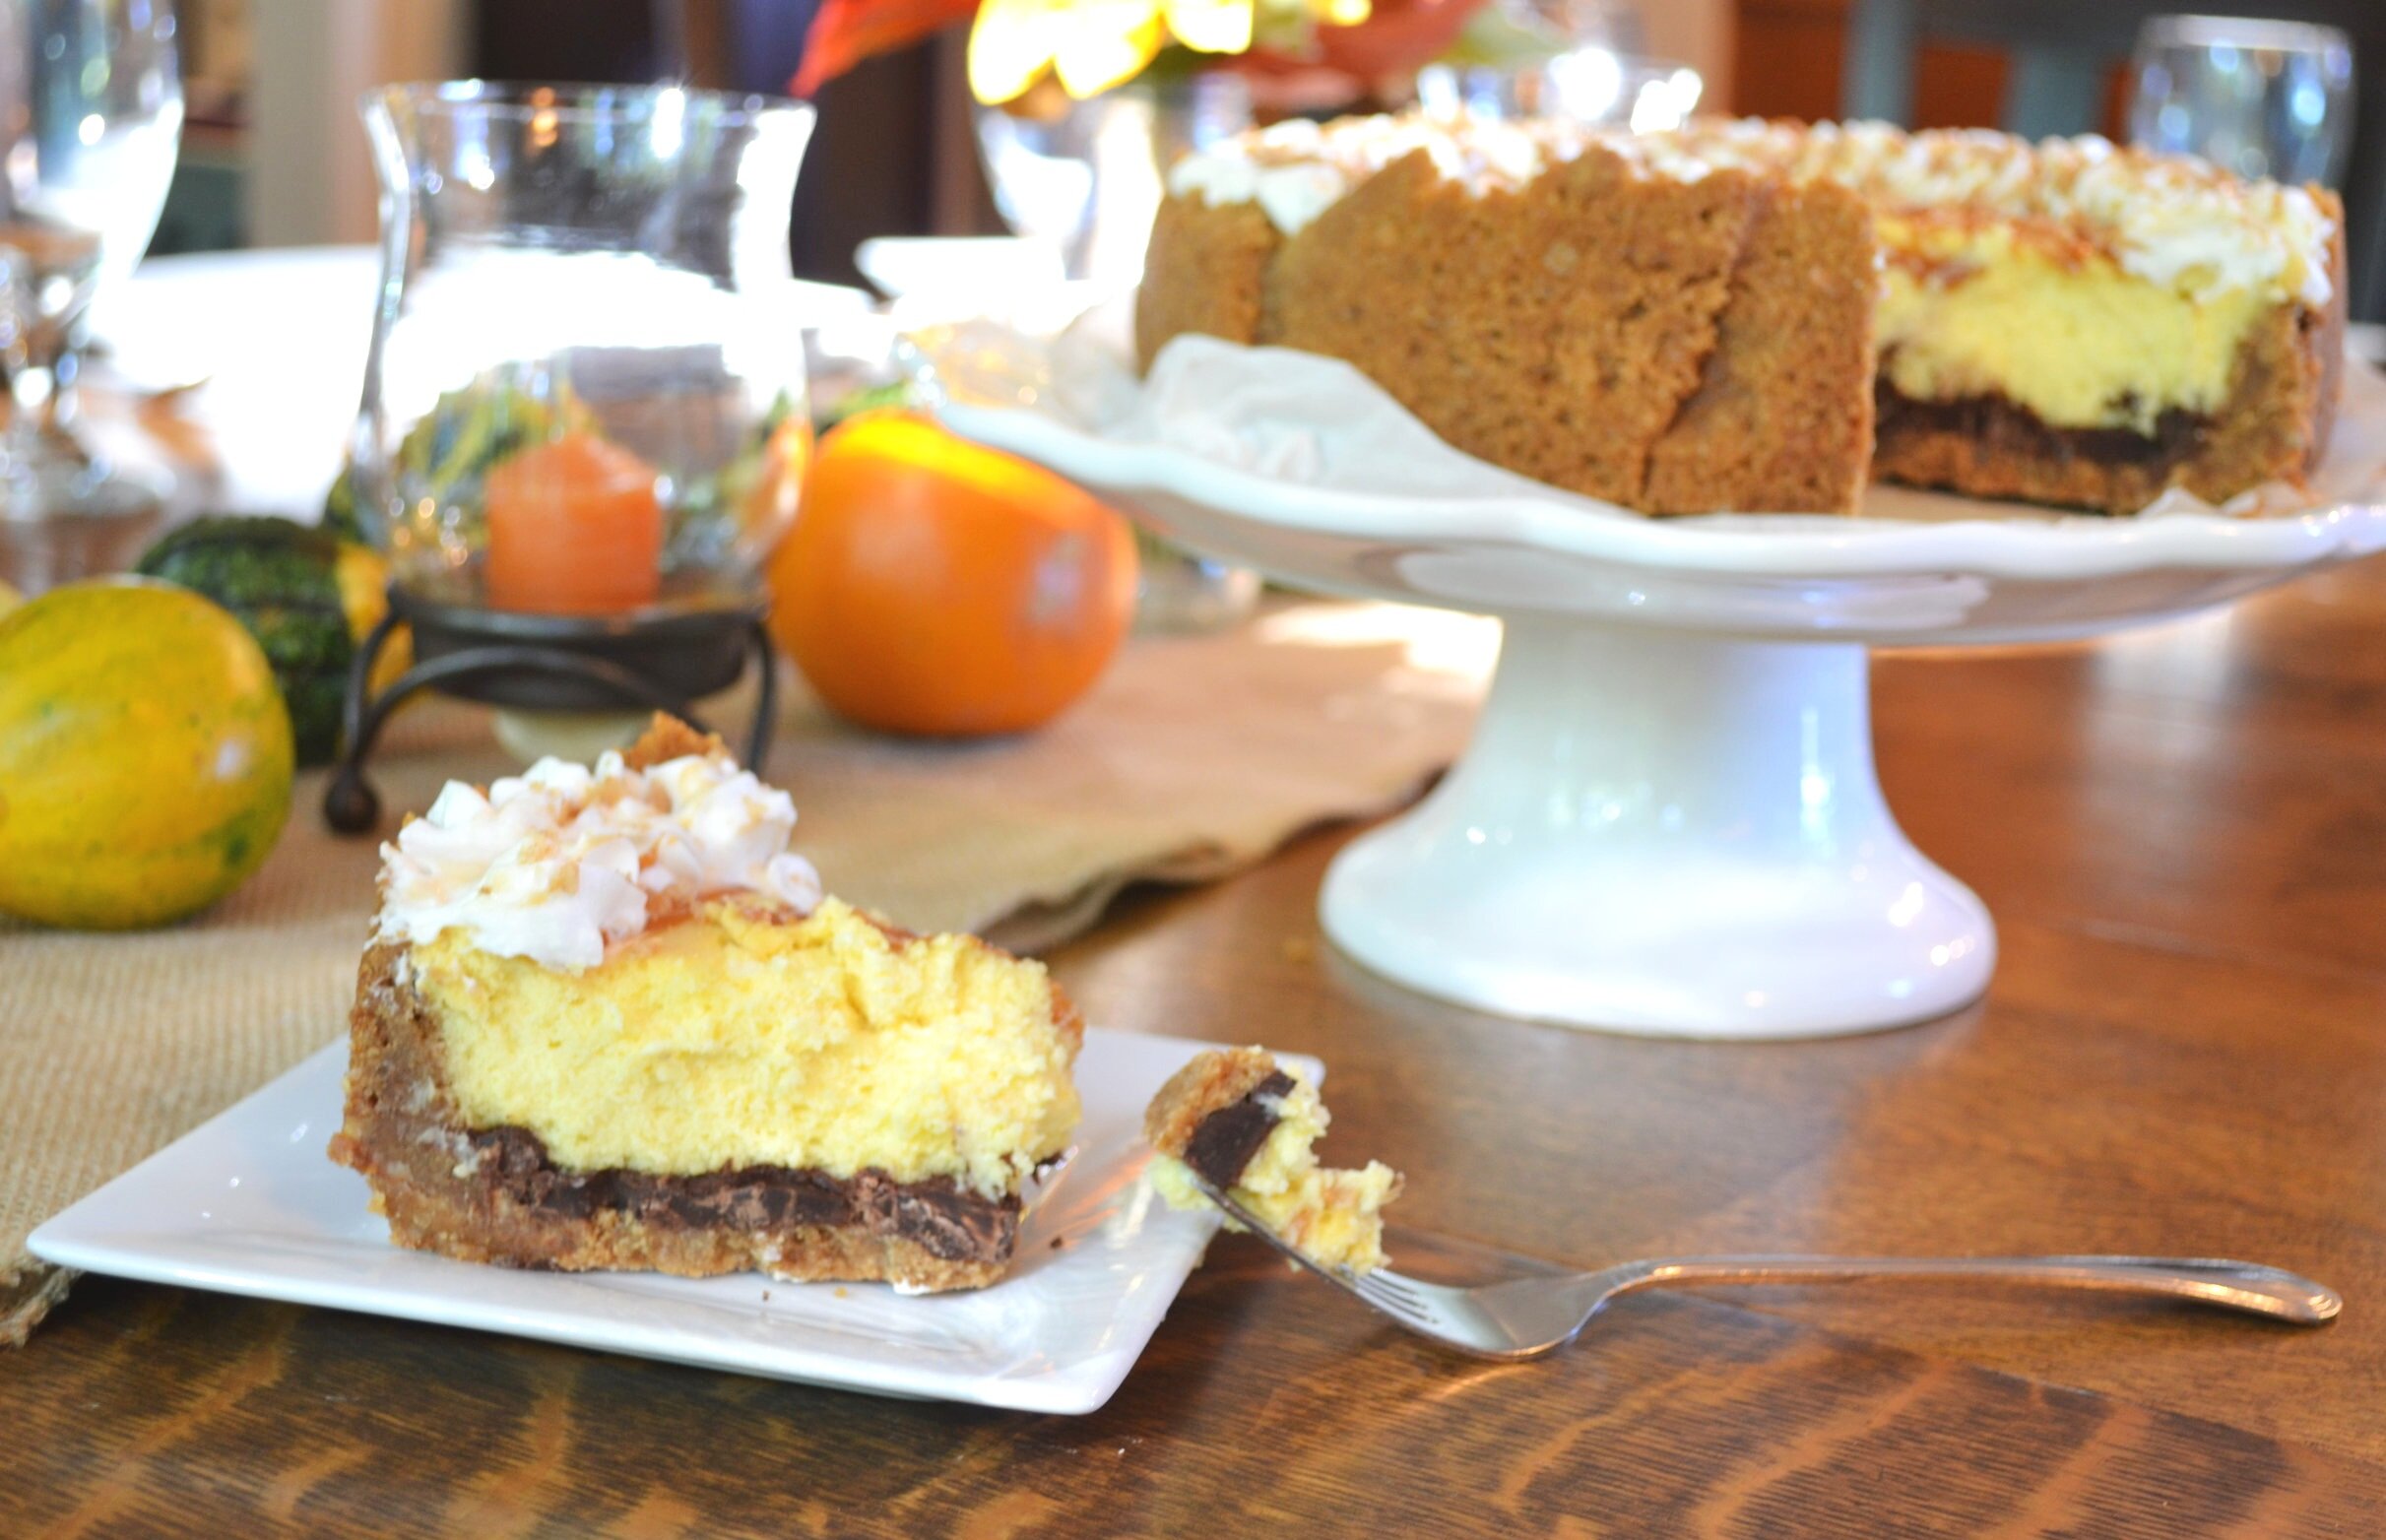
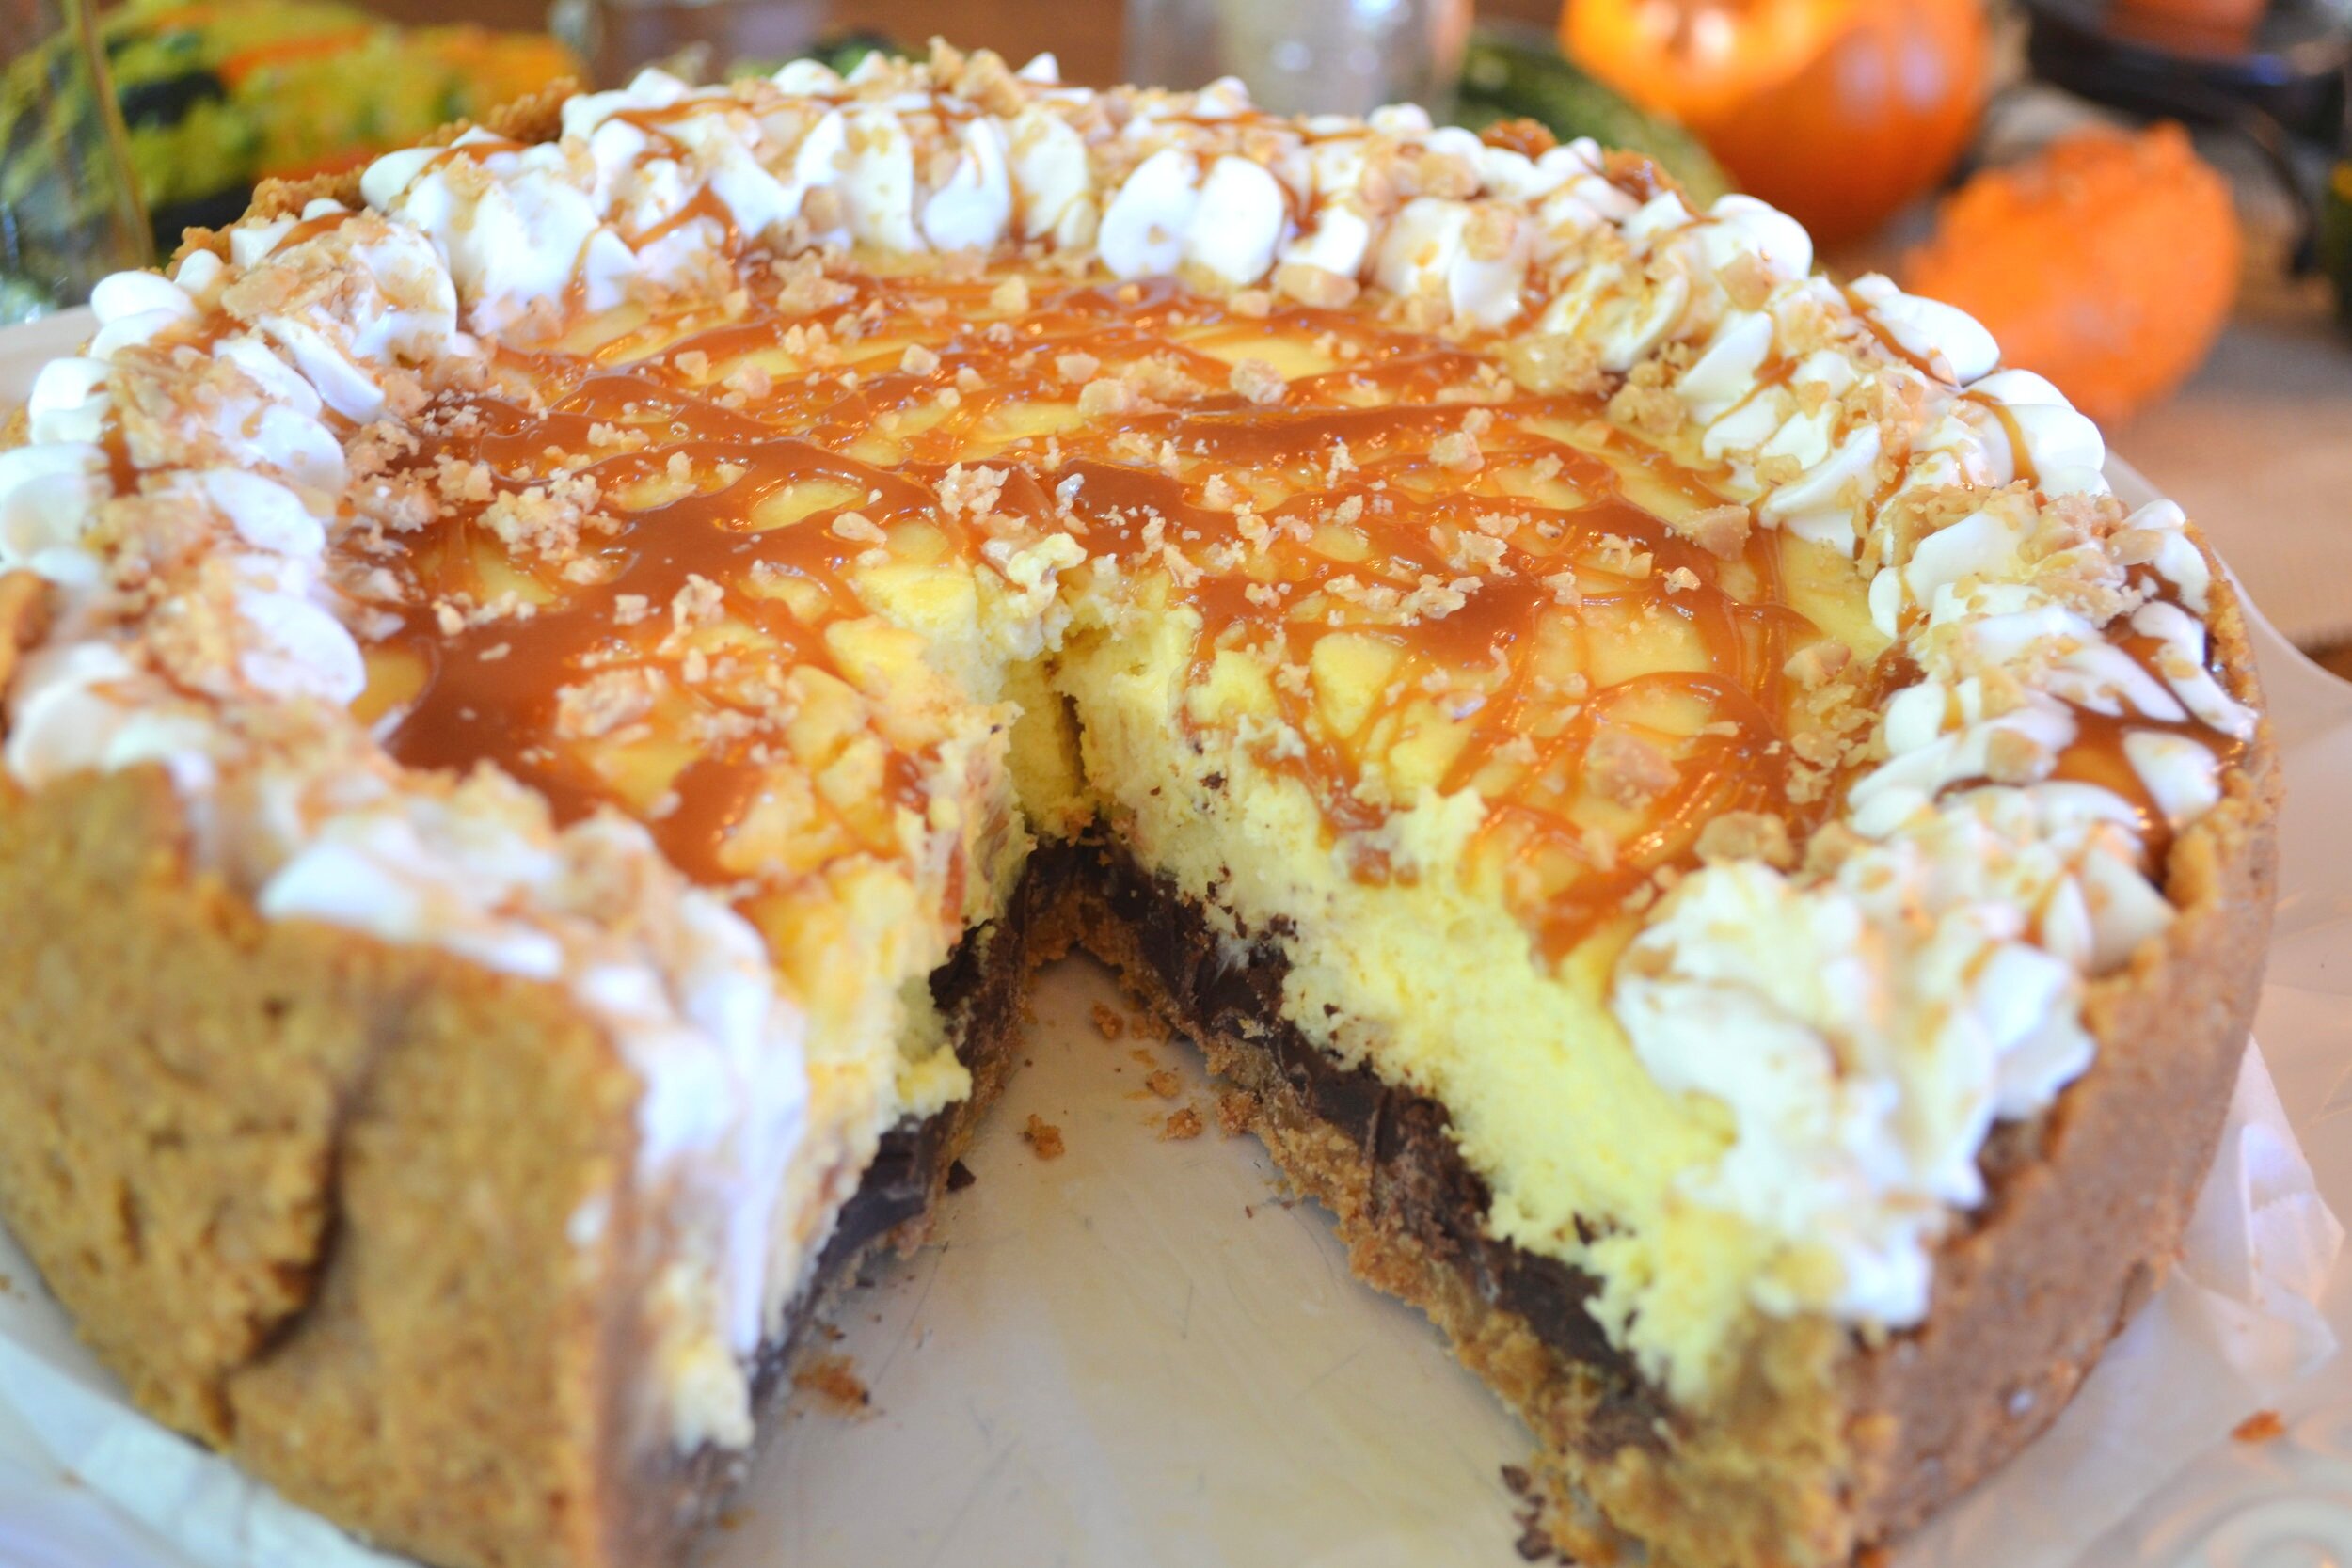
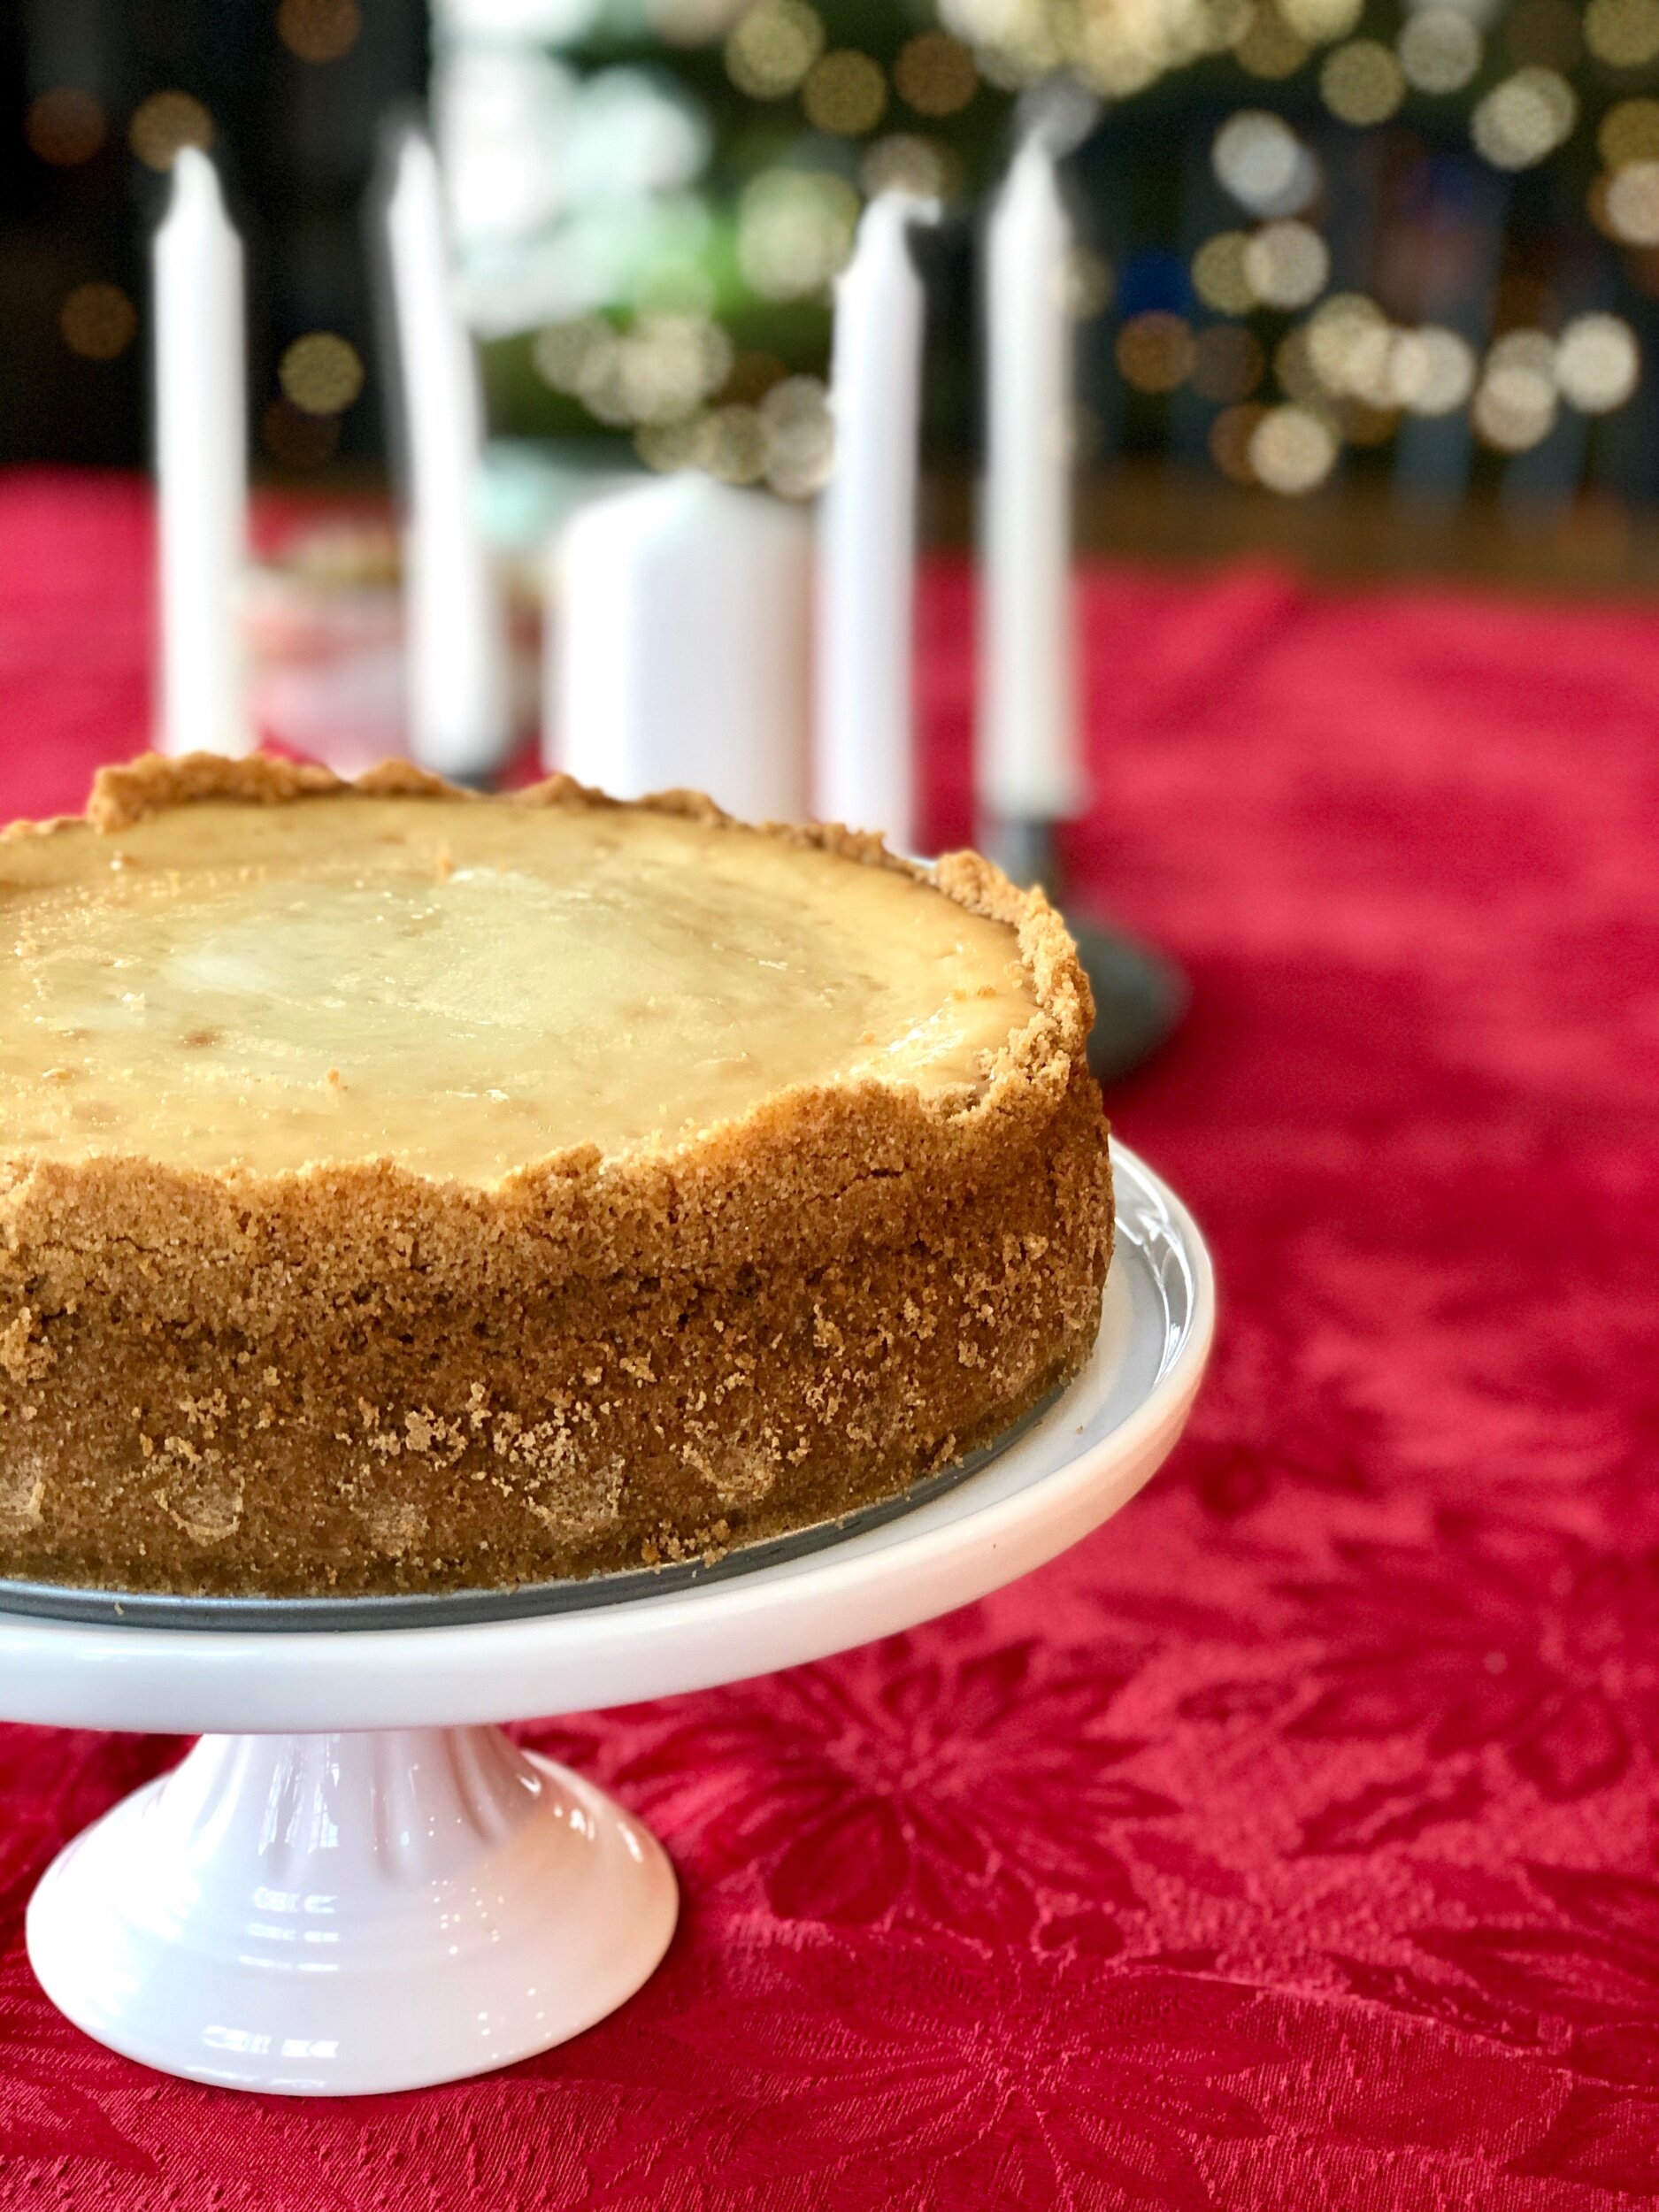
A typical cheesecake usually calls for a moderate amount of cream cheese and is  “lightened” with sour cream or heavy cream, whereas a New York style is heavy on the cream cheese, with less sour cream or heavy cream. NY style will usually call for 2lbs (32oz or four 8oz blocks; that’s roughly 900g) of cream cheese, has a graham cracker crust, and maybe just a touch of lemon juice or vanilla extract for flavor, nothing more. The density and richness of the cheesecake speaks for itself and needs no more extra fluff. The original recipe used at The Cheesecake Factory uses the iconic sour cream topping. The first time I ever made a cheesecake with a sour cream topping I thought that was the weirdest thing, but it’s so good. You can choose to make a sour cream topping, use a fruit topping, dust with powdered sugar, or just leave your cheesecake plain, as you can see I did in these photos. It might have looked more picture perfect with a topping but I honestly love how it looks with its golden and crackless top.

And that’s it. New York style cheesecake is just a richer, denser, no frills cheesecake. And when done well, as I hope you’ll agree with me this recipe does, it needs nothing else.

This post may contain affiliate links. If you make a purchase using these links, Jennyblogs may receive a small commission, at no extra cost to you. This helps to support Jennyblogs. For further information see the privacy policy. Grazie!

Recipe adapted from Butternut Bakery


New York Style Cheesecake

Serves 12-16

Adjustments.jpeg

Ingredients:

For the Graham Cracker Crust

  • 12 sheets / 170g graham crackers

  • 1/3 cup / 66g sugar

  • 1/2 cup / 113g butter, melted

  • 1/2 tsp cinnamon, optional

  • 1/8 tsp salt

For the Filling

  • 32oz / 900g cream cheese, room temperature

  • 1 1/2 cups / 300g sugar

  • 3 Tbsp / 23g cornstarch

  • 4 eggs + 1 egg yolk

  • 2 tsp / 10g vanilla extract

  • 2 tsp / 10g lemon juice

  • 1 cup / 245g sour cream, room temperature

Directions:

Make the Graham Cracker Crust

Oven preheated to 350°F / 177°C. Lightly grease a 9in / 23cm springform pan. Line the sides by cutting two or three strips of parchment paper that are a little bit wider than the springform sides are tall, about 5in / 13cm, and wrap them around the inside of the springform. The parchment paper should rise up a little higher than the sides.

  1. Finely crush graham crackers with a rolling pin or in a food processor. Add sugar, butter, cinnamon, and salt to the graham cracker crumbs in a large bowl or pulse in the processor until graham cracker crumbs are evenly moistened, like wet sand.

  2. Press mixture evenly and firmly into the bottom and up the sides of the springform pan, reaching almost to the top.

  3. Bake in preheated oven for 10 minutes; remove and let cool.

Make the Filling

Reduce oven temperature to 305°F / 152°C. Place one oven rack in the middle and the second below it. Place a large baking dish on the bottom rack. Bring a quart or so of water to boil while you make the cheesecake filling.

  1. In a large bowl combine cream cheese, sugar, and cornstarch with a rubber spatula. The mixture should be smooth.

  2. Add eggs and yolk one at a time, mixing well after each addition.

  3. Add vanilla and lemon juice, mixing until smooth.

  4. Add sour cream, mixing just until combined.

  5. Pour filling over cooled crust, gently tap pan on counter to encourage any air bubbles to come up.

  6. Place cheesecake in oven on the middle rack and pour the boiling water into the baking pan on the rack below. Bake for about 1 hour 40 minutes or until 1-2in / 2.5-5cm of the edges of the cheesecake are set and the center is still jiggly when lightly shaken.

  7. Turn off the oven and crack the oven door, leaving the cheesecake inside for 1 hour.

  8. Remove cheesecake from oven and let cool the rest of the way. Once cool, cover cheesecake and refrigerate for 8 hours or overnight.

  9. Remove sides of springform, top cheesecake if so desired, and serve!

Adjustments.jpg

Jenny’s Notes:

  • When pressing the graham cracker mixture into the springform pay special attention that the corners don’t get too thick.

  • It might seem unusual to mix a cheesecake by hand, but it’s the simplest and safest way to ensure you’re not incorporating excess air into the batter. You can use a stand mixer or hand held mixer, but only use the lowest speed. While it’s important for the cheesecake batter to be well combined and smooth, too much air that inevitably gets incorporated when over beaten can lead to the cheesecake cracking.

  • Most often cheesecake recipes call to place the cheesecake IN the bain-marie, but this recipe has you place the cheesecake on the rack ABOVE the bain-marie, so they’re not touching. Why? It’s easier and it works! If you however wish to place the cheesecake in the water bath (if your oven only has one rack or any other reason) first wrap the outside of your springform in tinfoil to keep the water out.

NY style cheesecake, new york cheesecake, best cheesecake, cheesecake troubleshooting,
dessert, cheesecake
American
Yield: 12-16 Servings
Author: Jennyblogs
Print
New York Style Cheesecake

New York Style Cheesecake

Classic New York Cheesecake is rich, dense, slightly tangy and oh so creamy.
Prep time: 45 MinCook time: 1 H & 40 Minactive time: 9 HourTotal time: 11 H & 25 M

Ingredients

For the Graham Cracker Crust
For the Filling

Instructions

Make the Graham Cracker Crust
  1. Oven preheated to 350°F / 177°C. Lightly grease a 9in / 23cm springform pan. Line the sides by cutting two or three strips of parchment paper that are a little bit wider than the springform sides are tall, about 5in / 13cm, and wrap them around the inside of the springform. The parchment paper should rise up a little higher than the sides.
  2. Finely crush graham crackers with a rolling pin or in a food processor. Add sugar, butter, cinnamon, and salt to the graham cracker crumbs in a large bowl or pulse in the processor until graham cracker crumbs are evenly moistened, like wet sand.
  3. Press mixture evenly and firmly into the bottom and up the sides of the springform pan, reaching almost to the top.
  4. Bake in preheated oven for 10 minutes; remove and let cool.
Make the Filling
  1. Reduce oven temperature to 305°F / 152°C. Place one oven rack in the middle and the second below it. Place a large baking dish on the bottom rack. Bring a quart or so of water to boil while you make the cheesecake filling.
  2. In a large bowl combine cream cheese, sugar, and cornstarch with a rubber spatula. The mixture should be smooth.
  3. Add eggs and yolk one at a time, mixing well after each addition.
  4. Add vanilla and lemon juice, mixing until smooth.
  5. Add sour cream, mixing just until combined.
  6. Pour filling over cooled crust, gently tap pan on counter to encourage any air bubbles to come up.
  7. Place cheesecake in oven on the middle rack and pour the boiling water into the baking pan on the rack below. Bake for about 1 hour 40 minutes or until 1-2in / 2.5-5cm of the edges of the cheesecake are set and the center is still jiggly when lightly shaken.
  8. Turn off the oven and crack the oven door, leaving the cheesecake inside for 1 hour.
  9. Remove cheesecake from oven and let cool the rest of the way. Once cool, cover cheesecake and refrigerate for 8 hours or overnight.
  10. Remove sides of springform, top cheesecake if so desired, and serve!

Notes:

  • Room temperature ingredients are essential for making a cheesecake correctly!
  • While I'm for lightening up recipes to make them healthier, cheesecake is one area I fully endorse using full-fat ingredients!
  • When pressing the graham cracker mixture into the springform pay special attention that the corners don’t get too thick.
  • It might seem unusual to mix a cheesecake by hand, but it’s the simplest and safest way to ensure you’re not incorporating excess air into the batter. You can use a stand mixer or hand held mixer, but only use the lowest speed. While it’s important for the cheesecake batter to be well combined and smooth, too much air that inevitably gets incorporated when over beaten can lead to the cheesecake cracking.
  • Most often cheesecake recipes call to place the cheesecake IN the bain-marie, but this recipe has you place the cheesecake on the rack ABOVE the bain-marie, so they’re not touching. Why? It’s easier and it works! If you however wish to place the cheesecake in the water bath (if your oven only has one rack or any other reason) first wrap the outside of your springform in tinfoil to keep the water out.


Calories

591.48

Fat (grams)

40.97

Sat. Fat (grams)

22.97

Carbs (grams)

49.39

Fiber (grams)

0.59

Net carbs

48.80

Sugar (grams)

37.88

Protein (grams)

8.53

Sodium (milligrams)

396.34

Cholesterol (grams)

185.41
Nutritional information is approximate. Based on 12 servings.
Did you make this recipe?
Tag @jennyblogsandbakes on instagram and hashtag it #jennyblogs
Created using The Recipes Generator

Triple Dark Chocolate Cheesecake

2019-05-26+17.58.07-2.jpg

This post contains affiliate links. If you buy something using these links, Jennyblogs may receive a small commission, at no extra cost to you. This helps to support Jennyblogs. For further information see the privacy policy. Grazie!

After more than two years in Italy, I have finally made a cheesecake.

Proof that you don’t need a springform pan to bake a cheesecake

Proof that you don’t need a springform pan to bake a cheesecake

Cheesecakes are not hard to make, but the baking is important, probably the most important part, and has always been tricky for me. Cheesecakes are usually baked at a slightly lower temperature, usually around 325F, and just until the sides are set but the center is still jiggly. If the center sets, the cheesecake is over done, but if the center is too jiggly, then your cheesecake won’t set up in the fridge and you’ll end up with soup when you cut into it. You don’t want the cheesecake to crack, and some recipes will tell you to add a bain-marie (a hot water bath) to the oven to keep the atmosphere humid or to crack the oven door after you’ve turned it off so your cheesecake won’t cool down too quickly and yes, crack.

So when you live in Italy with strange ovens, you think twice before baking things when you can’t perfectly control the heat in your oven or where the heat is coming from. IF you’re able to tell the temperature of your oven at all. (I’m thinking of you, my oven two apartments ago. I DO NOT miss you!) Or if your oven is small and cooks things a lot quicker. Add on top of that the cream cheese here, “formaggio fresco” or literally translated fresh cheese, is…different. I’m not even sure what it is, it tastes similar to cream cheese in the States, but when you whip it it doesn’t become soupy like the American stuff, it becomes super creamy. Sometimes I think the American stuff is stickier too, maybe? The only brand here I’ve ever seen is Philadelphia, and it has had great success in Italy. But the cheesecakes I’ve eaten in restaurants or pastry shops? Always weird. They taste and look more like semi-freddo or a mousse. I therefore assumed when I made a cheesecake it would be weird like the other ones I’ve eaten here. So I never made one.

Along came Easter and I wanted to make a cheesecake. I didn’t even have a springform pan but found that pie dishes work pretty great as substitutes. And you know what? The cheesecake turned out delicious and not weird. And my husband and colleagues liked it so well I made the same one again and bought a springform pan. And if you know me, you know I rarely bake the same thing twice in a row. I’m always on to the next new recipe or at least something I haven’t made in a while. But this recipe asked to be made again. And so I did. And now you can make it, too, weird cream cheese or normal cream cheese!

Recipe adapted from omgchocolatedesserts


Triple Dark Chocolate Cheesecake

Serves about 12

Ingredients:

For the Oreo Crust

Crushing Oreos the old-fashioned way…

Crushing Oreos the old-fashioned way…

  • 24 Oreos

  • 1/4 cup / 56g butter, melted

For the Filling

  • 7.5 oz / 225g dark chocolate, broken into small chunks

  • 24 oz (3 8 oz packages) / 675g cream cheese, room temperature

  • 1/2 cup + 2 Tbsp / 125g granulated sugar

  • 2 Tbsp / 14 g cocoa powder

  • 3 eggs

For the Ganache Topping

  • 3/4 cup / 175g heavy whipping cream

  • 6 oz / 180g dark chocolate, broken into small chunks

Directions:

Oven 350F / 177C. Grease an 8in - 9in / 20cm - 24cm springform pan.

Make the Oreo Crust

  1. Chop the Oreos finely, either in a food processor, by crushing with a rolling pin on a clean surface or cutting board, or by putting in a resealable plastic bag and crushing with a rolling pin or meat tenderizer.

  2. If using a food processor, pulse in the melted butter until crumbs are evenly moistened. If crushing the Oreos by hand, transfer to a bowl and stir in the butter.

  3. Press mixture evenly into the bottom of the prepared springform pan and bake for 8 minutes.

  4. Remove from oven and let cool while you prepare the filling.

Make the Filling

Spreading cream cheese mixture over baked crust

Spreading cream cheese mixture over baked crust

  1. In a double boiler or pan over low heat, melt the chocolate, stirring constantly. Remove from heat when there are still small chunks of chocolate, and continue to stir until completely melted. In this way the chocolate won’t overheat or burn. Let chocolate cool.

  2. In the bowl of a stand mixer or a large bowl with a handheld mixer, beat cream cheese and sugar on medium speed until smooth. Changing to low speed, carefully beat in cocoa powder so that it doesn’t “poof” everywhere. Every so often stop beating and scrape down the sides of the bowl well.

  3. Beat in the eggs, one at a time, until smooth.

  4. Beat in melted and cooled chocolate.

  5. Pour mixture over the crust, smoothing the top.

  6. Bake for 45 - 60 minutes, or until center is still slightly wiggly and the top looks dry.

  7. Turn the oven off and crack open the door for about 10 minutes. Remove cheesecake from oven and place in fridge until completely cooled, 8 hours or overnight.

Make the Ganache Topping

  1. In a small pan place heavy cream and chocolate over low heat. Stir constantly until the mixture is smooth and melted. Allow to cool slightly.

  2. Remove cheesecake from fridge and pour ganache evenly over the top. Allow to set before running a dull knife around the edge of cheesecake and releasing from springform pan. Alternately, if you don’t need to transport the cheesecake anywhere, you can remove the ring of the springform first and then pour the ganache over, using a spoon to guide the ganache toward the edges and allowing some to dribble down the sides.

Jenny’s Notes:

  • Not a dark chocolate fan? Try it out with milk chocolate or a mixture of milk and dark to create your preferred bitterness!

  • If you don’t own a double boiler, you can make a makeshift one by placing a small pan with an inch or so of water in the bottom and bring to a simmer. Place the chocolate in a bowl big enough that it can sit on top of the pan without touching the water. Stir constantly and proceed as in the recipe. This might take a touch more effort than just melting the chocolate in a pan, but it’s safer if you’re not used to melting chocolate so as not to burn it.

  • Powdered sugar can be substituted for the granulated, use 1 cup / 110g.

  • For cleaner slicing, try running your knife under hot water for a few seconds between slices.

American
Yield: 12
Author:

Triple Dark Chocolate Cheesecake

Oreo crust, creamy dark chocolate cheesecake filling, and a decadent dark chocolate ganache.
prep time: 1 hourcook time: 1 H & 8 Mtotal time: 2 H & 8 M

ingredients:

For the Oreo Crust
  • 24 Oreos
  • 1/4 cup / 56g butter, melted
For the Filling
  • 7.5 oz / 225g dark chocolate, broken into small chunks
  • 24 oz (3 8 oz packages) / 675g cream cheese, room temperature
  • 1/2 cup + 2 Tbsp / 125g granulated sugar
  • 2 Tbsp / 14 g cocoa powder
  • 3 eggs
For the Ganache Topping
  • 3/4 cup / 175g heavy whipping cream
  • 6 oz / 180g dark chocolate, broken into small chunks

instructions:

How to cook Triple Dark Chocolate Cheesecake

Make the Oreo Crust
  1. Preheat oven to 350F / 177C. Grease an 8in - 9in / 20cm - 24cm springform pan.
  2. Chop the Oreos finely, either in a food processor, by crushing with a rolling pin on a clean surface or cutting board, or by putting in a resealable plastic bag and crushing with a rolling pin or meat tenderizer.
  3. If using a food processor, pulse in the melted butter until crumbs are evenly moistened. If crushing the Oreos by hand, transfer to a bowl and stir in the butter.
  4. Press mixture evenly into the bottom of the prepared springform pan and bake for 8 minutes.
  5. Remove from oven and let cool while you prepare the filling.
Make the Filling
  1. In a double boiler or pan over low heat, melt the chocolate, stirring constantly. Remove from heat when there are still small chunks of chocolate, and continue to stir until completely melted. In this way the chocolate won’t overheat or burn. Let chocolate cool.
  2. In the bowl of a stand mixer or a large bowl with a handheld mixer, beat cream cheese and sugar on medium speed until smooth. Changing to low speed, carefully beat in cocoa powder so that it doesn’t “poof” everywhere. Every so often stop beating and scrape down the sides of the bowl well.
  3. Beat in the eggs, one at a time, until smooth.
  4. Beat in melted and cooled chocolate.
  5. Pour mixture over the crust, smoothing the top.
  6. Bake for 45 - 60 minutes, or until center is still slightly wiggly and the top looks dry.
  7. Turn the oven off and crack open the door for about 10 minutes. Remove cheesecake from oven and place in fridge until completely cooled, 8 hours or overnight.
Make the Ganache Topping
  1. In a small pan place heavy cream and chocolate over low heat. Stir constantly until the mixture is smooth and melted. Allow to cool slightly.
  2. Remove cheesecake from fridge and pour ganache evenly over the top. Allow to set before running a dull knife around the edge of cheesecake and releasing from springform pan. Alternately, if you don’t need to transport the cheesecake anywhere, you can remove the ring of the springform first and then pour the ganache over, using a spoon to guide the ganache toward the edges and allowing some to dribble down the sides.

NOTES:

Not a dark chocolate fan? Try it out with milk chocolate or a mixture of milk and dark to create your preferred bitterness! If you don’t own a double boiler, you can make a makeshift one by placing a small pan with an inch or so of water in the bottom and bring to a simmer. Place the chocolate in a bowl big enough that it can sit on top of the pan without touching the water. Stir constantly and proceed as in the recipe. This might take a touch more effort than just melting the chocolate in a pan, but it’s safer if you’re not used to melting chocolate so as not to burn it. Powdered sugar can be substituted for the granulated, use 1 cup / 110g. For cleaner slicing, try running your knife under hot water for a few seconds between slices.

Calories

715.12

Fat (grams)

54.28

Sat. Fat (grams)

31.43

Carbs (grams)

52.73

Fiber (grams)

3.26

Net carbs

49.47

Sugar (grams)

39.29

Protein (grams)

7.29

Sodium (milligrams)

316.65

Cholesterol (grams)

118.98
Nutritional Information is Approximate.
Created using The Recipes Generator
2019-04-24+19.00.29.jpg

Chocolate Thumbprint Cheesecake Cookies

2017-12-19+13.08.33.jpg

This post contains affiliate links. If you buy something using these links, Jennyblogs may receive a small commission, at no extra cost to you. This helps to support Jennyblogs. For further information see the privacy policy. Grazie!

I like cookies.  I like cheesecake.  What happens when you put them together?  These Cheesecake Cookies!  And you know what's great about this recipe?  Besides being delicious, of course, is that it calls for one sleeve of graham crackers.  Perfect for all those times you buy a box of graham crackers to make a crust or similar recipe that usually call for two sleeves of graham crackers and leave you hanging with just one lonely sleeve.  Cheesecake Cookies to the rescue!  They look more time consuming to make than they really are, it's pretty straightforward.  So let's get to it! 

Recipe adapted from Kitchme


Chocolate Cheesecake Cookies

Makes about 24 cookies

Ingredients:

2017-12-19 13.12.33.jpg
  • 1 1/4 cups / 135g (1 sleeve) finely crushed chocolate graham crackers

  • 3/4 cup / 90g all-purpose flour

  • 1 1/2 teaspoons baking powder

  • 1/2 cup / 113g butter, softened

  • 1/2 cup / 100g brown sugar

  • 1 egg, separated

  • 3 ounces / 85g cream cheese, softened

  • 1/4 cup / 50g sugar

  • 1 teaspoon vanilla extract

  • 2 teaspoons lemon zest, optional

Directions:

Oven 350°F / 177°C.  Line 2 cookies sheets with parchment or silicone mats.  

  1. In a large bowl, whisk together graham cracker crumbs, flour, and baking powder.  

  2. In the bowl of a stand mixer beat the butter with the brown sugar.  Beat in the egg white.  Add the mixture to the graham cracker mixture and mix until combined.  

  3. Again, in the clean bowl of a stand mixer, beat the cream cheese until smooth and creamy.  Add the sugar, egg yolk, zest, and vanilla and beat until smooth.  Set aside.

  4. Using a spoon or small ice cream scoop, scoop a very generous tablespoon worth of dough onto the prepared cookie sheet.  (If your graham cracker dough seems too soft to easily hold its shape, add a bit more flour.)  Repeat until all the dough has been scooped onto the cookies sheets, evenly spaced, leaving room for them to spread.  

  5. Press your thumb into the cookies to make a deep well; fill with the cream cheese mixture. 

  6. Bake 8-11 minutes or until the filling is just set.  

Can't do anything around here.

Can't do anything around here.

Jenny's Notes:

  • Use any flavor graham crackers, regular, cinnamon, chocolate! You could also experiment with similar cookies, such as teddy grahams.

  • Regular sugar can be substituted for the brown sugar with a slightly different texture for the cookie. Not bad, just slightly different. Or add a teaspoon or two of molasses to 1/2 cup regular sugar and mix before adding to the recipe.

  • You can fill the cookies right to the top with the cream cheese as the filling shouldn't do more than puff a bit in the oven.

  • Feel free to add different extracts and zests to your cream cheese filling, if you wish, or even cocoa to make it ALL chocolate! I'm thinking cinnamon graham crackers with a touch of orange extract and orange zest for a fall treat!

thumbprint cookies, cheesecake cookies, cheesecake, graham cracker cookies
dessert, cookies
American
Yield: 24
Author: Jennyblogs
Print
Chocolate Cheesecake Cookies

Chocolate Cheesecake Cookies

Chocolate graham cracker thumbprint cookies filled with a cream cheese filling.
Prep time: 50 MCook time: 11 MTotal time: 61 M

Ingredients:

  • 1 1/4 cups / 135g (1 sleeve) finely crushed chocolate graham crackers
  • 3/4 cup / 90g all-purpose flour
  • 1 1/2 teaspoons baking powder
  • 1/2 cup / 113g butter, softened
  • 1/2 cup / 100g brown sugar
  • 1 egg, separated
  • 3 ounces / 85g cream cheese, softened
  • 1/4 cup / 50g sugar
  • 1 teaspoon vanilla extract
  • 2 teaspoons lemon zest, optional

Instructions:

  1. Oven 350°F / 177°C.  Line 2 cookies sheets with parchment or silicone mats.
  2. In a large bowl, whisk together graham cracker crumbs, flour, and baking powder.
  3. In the bowl of a stand mixer beat the butter with the brown sugar. Beat in the egg white. Add the mixture to the graham cracker mixture and mix until combined.
  4. Again, in the clean bowl of a stand mixer, beat the cream cheese until smooth and creamy. Add the sugar, egg yolk, zest, and vanilla and beat until smooth. Set aside.
  5. Using a spoon or small ice cream scoop, scoop a very generous tablespoon worth of dough onto the prepared cookie sheet. (If your graham cracker dough seems too soft to easily hold its shape, add a bit more flour.) Repeat until all the dough has been scooped onto the cookies sheets, evenly spaced, leaving room for them to spread.
  6. Press your thumb into the cookies to make a deep well; fill with the cream cheese mixture.
  7. Bake 8-11 minutes or until the filling is just set.

Notes:

Use any flavor graham crackers, regular, cinnamon, chocolate! You could also experiment with similar cookies, such as teddy grahams. Regular sugar can be substituted for the brown sugar with a slightly different texture for the cookie. Not bad, just slightly different. Or add a teaspoon or two of molasses to 1/2 cup regular sugar and mix before adding to the recipe. You can fill the cookies right to the top with the cream cheese as the filling shouldn't do more than puff a bit in the oven. Feel free to add different extracts and zests to your cream cheese filling, if you wish, or even cocoa to make it ALL chocolate! I'm thinking cinnamon graham crackers with a touch of orange extract and orange zest for a fall treat!

Calories

111.78

Fat (grams)

6.07

Sat. Fat (grams)

3.44

Carbs (grams)

13.46

Fiber (grams)

0.31

Net carbs

13.15

Sugar (grams)

8.41

Protein (grams)

1.29

Sodium (milligrams)

108.74

Cholesterol (grams)

21.56
Nutritional information is approximate.
Created using The Recipes Generator
2017-12-19+13.04.04.jpg

Caramel Toffee Cheesecake

DSC_0185.jpg

Happy Thanksgiving!  I am thankful for so many things.  One of those things is cheesecake. 

Especially a caramel cheesecake with a layer of chocolate between the crust and cheesecake, toffee bits, whipped cream, and more caramel drizzled on top. Yep, especially that.

I love the graham cracker crust because it stays together so well! The secret is to use toffee bits in the crust. Toffee is sticky and while the crust is baking all the little pieces melt a bit, fusing the graham cracker crust together into a beautiful, slightly crunchy mass. No crumbling graham cracker crusts today! I mean, I even pressed the crust all the way up the sides of the pan and it stayed even after taking off the spring form pan. Success.

You know how they say actions speak louder than words?  Well, instead of talking about how much I love cheesecake and how great this crust is, I'm going to share the recipe with you...that's an action, right?  Then in turn you can make it, and then you acted on your thankfulness too.  This is such a great plan, let's go! 

This post may contain affiliate links. If you buy something using these links, Jennyblogs may receive a small commission, at no extra cost to you. This helps to support Jennyblogs. For further information see the privacy policy. Grazie!

Recipe adapted from Yammie’s Noshery


Caramel Toffee Cheesecake

Serves about 16-20

Ingredients:

For the Toffee Crust

  • 3 cups / 255g crushed graham crackers, about 2 packages or 18 sheets

  • 1/2 cup / 85g toffee bits, plain or with chocolate (Heath Bits O Brickle)

  • 1/2 cup / 100g brown sugar

  • 1 cup / 226g butter, melted

  • 6 oz / 170g bitter-sweet chocolate, chopped

For the Filling

  • 3 8oz packages / 675g cream cheese, room temperature

  • 1 cup / 245g sour cream

  • 1 cup / 200g sugar

  • 1 Tbsp / 15g vanilla extract

  • 1/4 cup / 75g caramel sauce (To make homemade caramel, halve this recipe here)

  • 4 eggs, lightly beaten

For the Topping

  • 1 cup / 237g heavy whipping cream

  • 2 Tbsp / 40g maple syrup or sugar

  • 1/4 cup / 75g caramel sauce

  • 1/4 cup / 43g toffee bits

Directions:

Oven 300°F / 149°C.  10in / 26cm spring-form pan lined with parchment paper, bottom and sides.

Make the Toffee Crust

  1. Combine graham crackers, toffee, brown sugar, and butter.  Press firmly into the prepared spring-form pan, pressing all the way up the sides.  Sprinkle chopped chocolate evenly over bottom of crust. 

  2. Bake for 5 minutes or until chocolate is melted.  Remove from oven and spread chocolate evenly with a spatula.  Place crust in freezer while you make the filling.

Make the Filling

  1. In the bowl of a stand mixer, beat cream cheese, sour cream, and sugar on low-medium speed for a few minutes.  Add vanilla and caramel.  Beat in the eggs, one at a time, until just combined. 

  2. Pour over crust and bake for about 1 hour and 20 minutes, or until edges are set and center is still a bit jiggly when lightly shaken. 

  3. Turn off oven and crack open the door, leaving cheesecake to set for another 30 minutes.  Remove from oven and allow to cool for a further 30 minutes.

  4. Refrigerate until completely chilled, about 6 hours or overnight.

Make the Topping

  1. When cheesecake is ready, beat whipping cream in the bowl of a stand mixer until soft peaks form.  Add maple syrup and beat until stiff peaks form. 

  2. Pipe whipped cream onto cheesecake, or if you don't have piping bags or tips, simply spread it with a spatula. 

  3. Warm caramel in a small saucepan and drizzle all over the cheesecake with a spoon or spatula.  Sprinkle with toffee and chill until ready to serve.

Jenny's Notes:

  • Cheesecakes require a decent amount of beating, however, avoid beating on high speeds as you don't want to incorporate too much air into the batter. 

  • You can also use an 8in / 20cm spring-form pan + a 6in / 15cm spring-form pan to make this recipe. Or, instead of the 6 incher just stick any extra crust in the bottom of a square baking dish, top with lefotver filling and you have cheesecake bars! I have done the second option before. :) The bars will bake for less time than a spring-form pan.

caramel, toffee crunch, Heath, Bits O Brickle, cheesecake, homemade caramel, chocolate, graham cracker crust
dessert
American
Yield: 16-20 servings
Author:

Caramel Toffee Cheesecake

Toffee graham gracker crust, a layer of dark chocolate, caramel cheesecake filling, and whipped cream, caramel, and more toffee bits on top.
prep time: 1 hourcook time: 1 H & 55 Mtotal time: 2 H & 55 M

ingredients:

For the Toffee Crust
  • 3 cups / 255g crushed graham crackers, about 2 packages or 18 sheets
  • 1/2 cup / 85g toffee bits, plain or with chocolate
  • 1/2 cup / 100g brown sugar
  • 1 cup / 226g butter, melted
  • 6 oz / 170g bitter-sweet chocolate, chopped
For the Filling
  • 3 8oz packages / 675g cream cheese, room temperature
  • 1 cup / 245g sour cream
  • 1 cup / 200g sugar
  • 1 Tbsp / 15g vanilla extract
  • 1/4 cup / 75g caramel sauce (To make homemade caramel, halve this recipe here)
  • 4 eggs, lightly beaten
For the Topping
  • 1 cup / 237g heavy whipping cream
  • 2 Tbsp / 40g maple syrup or sugar
  • 1/4 cup / 75g caramel sauce
  • 1/4 cup / 43g toffee bits

instructions:

How to cook Caramel Toffee Cheesecake

  1. Oven 300°F / 149°C. 10in / 26cm spring-form pan lined with parchment paper, bottom and sides.
Make the Toffee Crust
  1. Combine graham crackers, toffee, brown sugar, and butter. Press firmly into the prepared spring-form pan, pressing all the way up the sides. Sprinkle chopped chocolate evenly over bottom of crust.
  2. Bake for 5 minutes or until chocolate is melted. Remove from oven and spread chocolate evenly with a spatula. Place crust in freezer while you make the filling.
Make the Filling
  1. In the bowl of a stand mixer, beat cream cheese, sour cream, and sugar on low-medium speed for a few minutes. Add vanilla and caramel. Beat in the eggs, one at a time, until just combined.
  2. Pour over crust and bake for about 1 hour and 20 minutes, or until edges are set and center is still a bit jiggly when lightly shaken.
  3. Turn off oven and crack open the door, leaving cheesecake to set for another 30 minutes. Remove from oven and allow to cool for a further 30 minutes.
  4. Refrigerate until completely chilled, about 6 hours or overnight.
Make the Topping
  1. When cheesecake is ready, beat whipping cream in the bowl of a stand mixer until soft peaks form. Add maple syrup and beat until stiff peaks form.
  2. Pipe whipped cream onto cheesecake, or if you don't have piping bags or tips, simply spread it with a spatula.
  3. Warm caramel in a small saucepan and drizzle all over the cheesecake with a spoon or spatula. Sprinkle with toffee and chill until ready to serve.

NOTES:

Cheesecakes require a decent amount of beating, however, avoid beating on high speeds as you don't want to incorporate too much air into the batter. You can also use an 8in / 20cm spring-form pan + a 6in / 15cm spring-form pan to make this recipe. Or, instead of the 6 incher just stick any extra crust in the bottom of a square baking dish, top with lefotver filling and you have cheesecake bars! I have done the second option before. :) The bars will bake for less time than a spring-form pan.

Calories

619.24

Fat (grams)

42.95

Sat. Fat (grams)

25.01

Carbs (grams)

53.18

Fiber (grams)

0.90

Net carbs

52.27

Sugar (grams)

42.62

Protein (grams)

7.17

Sodium (milligrams)

376.36

Cholesterol (grams)

156.01
Nutritional information is approximate and based on 16 servings.
Created using The Recipes Generator

Peanut Butter Cheesecake Bars

IMG_4192.jpg

Bars. Like cookies, but without all the rolling and fussing. Just…plopping in a pan and baking. I like it.

These bars are extra special because they are cheesecake bars. I really like cheesecake.  I mean creamy, not overpoweringly sweet, with a bit of graham cracker accompanying each bite.  Good morning, sunshine!  I also really like chocolate and peanut butter.  So today let's make some peanut butter cheesecake bars with chocolate chips. 

Fair warning: These particular bars can be very difficult to make.  You have to be able to resist eating all of the dough.  If you can do that, then the actual making of these are quite simple.  Va bene? Va bene.

This post may contain affiliate links. If you make a purchase using these links, Jennyblogs may receive a small commission, at no extra cost to you. This helps to support Jennyblogs. For further information see the privacy policy. Grazie!

Adapted from Pinch of Yum


Peanut Butter Cheesecake Bars

Serves 9-12

Ingredients:

For the Peanut Butter Chocolate Chip Cookie Dough

image.jpg
  • 6 Tbsp / 84g oil

  • 1/2 cup / 100g sugar

  • 1/2 cup / 100g brown sugar

  • 1/2 cup / 130g peanut butter

  • 1 egg

  • 1 cup / 120g all-purpose flour

  • 1 tsp baking soda

  • 1/2 tsp salt

  • 1/2 cup / 40g rolled oats

  • 1 1/2 cups / 255g mini chocolate chips

For the Cream Cheese Filling

  • 8 oz / 225g cream cheese, room temperature

  • 1/4 cup / 50g sugar

  • 1 egg

  • 1 tsp / 5g vanilla

Directions:

Oven preheated to 325°F / 163°C

Make the Peanut Butter Chocolate Chip Cookie Dough

  1. Mix together the oil, sugars, and peanut butter in a large bowl until well combined.  Add the egg and beat well.

  2. In a separate bowl, whisk together flour, baking soda, salt, and oats.

  3. Stir flour mixture into sugar mixture, then add chocolate chips and stir until evenly distributed. Set aside.

Make the Cream Cheese Filling

  1. Beat cream cheese in a stand mixer or with a handheld mixer until smooth, about 30 seconds. Add sugar, egg, and vanilla and beat until thoroughly combined. 

Assembly

  1. Press half of the cookie dough into the bottom of an 8x8in / 20x20cm or 9x9in / 23x23cm pan.  Pour and spread cream cheese filling evenly over dough.  Using your hands, crumble the remaining half of cookie dough over cream cheese until it is thoroughly covered.

  2. Cover with tinfoil and bake for 15 minutes.  Remove foil and continue to bake for another 10-15 minutes, until cream cheese center is almost set and the top is lightly golden brown. 

cheesecake, bars, peanut butter chocolate chip cookie cheesecake bars, peanut butter oatmeal, cream cheese
dessert, bars, cheesecake
American
Yield: 9-12
Author: Jennyblogs
Print
Peanut Butter Cheesecake Bars

Peanut Butter Cheesecake Bars

Layers of peanut butter chocolate chip and oat cookie layers with a cheesecake filling.
Prep time: 25 MinCook time: 30 MinTotal time: 55 Min

Ingredients

For the Peanut Butter Chocolate Chip Cookie Dough
  • 6 Tbsp / 84g oil
  • 1/2 cup / 100g sugar
  • 1/2 cup / 100g brown sugar
  • 1/2 cup / 130g peanut butter
  • 1 egg
  • 1 cup / 120g all-purpose flour
  • 1 tsp baking soda
  • 1/2 tsp salt
  • 1/2 cup / 40g rolled oats
  • 1 1/2 cups / 255g mini chocolate chips
For the Cream Cheese Filling
  • 8 oz / 225g cream cheese, room temperature
  • 1/4 cup / 50g sugar
  • 1 egg
  • 1 tsp / 5g vanilla

Instructions

Make the Peanut Butter Chocolate Chip Cookie Dough
  1. Mix together the oil, sugars, and peanut butter in a large bowl until well combined. Add the egg and beat well.
  2. In a separate bowl, whisk together flour, baking soda, salt, and oats.
  3. Stir flour mixture into sugar mixture, then add chocolate chips and stir until evenly distributed. Set aside.
Make the Cream Cheese Filling
  1. Beat cream cheese in a stand mixer or with a handheld mixer until smooth, about 30 seconds. Add sugar, egg, and vanilla and beat until thoroughly combined.
Assembly
  1. Oven preheated to 325°F / 163°C
  2. Press half of the cookie dough into the bottom of an 8x8in / 20x20cm or 9x9in / 23x23cm pan. Pour and spread cream cheese filling evenly over dough. Using your hands, crumble the remaining half of cookie dough over cream cheese until it is thoroughly covered.
  3. Cover with tinfoil and bake for 15 minutes. Remove foil and continue to bake for another 10-15 minutes, until cream cheese center is almost set and the top is lightly golden brown.

Calories

596.11

Fat (grams)

34.98

Sat. Fat (grams)

12.70

Carbs (grams)

62.57

Fiber (grams)

2.60

Net carbs

59.97

Sugar (grams)

44.08

Protein (grams)

10.24

Sodium (milligrams)

458.31

Cholesterol (grams)

73.10
Nutritional information is approximate. Based on 9 servings.
Did you make this recipe?
Tag @jennyblogsandbakes on instagram and hashtag it #jennyblogs
Created using The Recipes Generator
image.jpg

No-Bake Oreo Cheesecake

What do you do when you have 55 days until you move to another country?  Start thinking about all the food items and ingredients you won't be able to eat or buy while you're there.  Naturally. 

I started to make a list of such things, and some of the items on there are rather tragic.  No real vanilla extract?  No Oreos, Butterfingers, or other terribly wonderful processed American goodies?  Pretzels only to be found of sketchy tough texture? Weird behaving marshmallows and graham crackers? (No S'mores for this girl.)  Italians also don't understand our love for peanut butter.  In all the grocery stores I've been in in Florence, (probably all of them because they're kinda my happy place) I have only seen Skippy, maybe Peter Pan once, and usually priced about 4-5 euros, roughly $6.  There is a specialty Asian market, Vivi Market, that has an "American" section, and they sell the closest thing to real peanut butter I found.  It's called Calve, made in the Netherlands, but it still has the hydrogenated oil and sugar added to it. Pumpkin is also a rarity over there. They make such wonderful pumpkin filled ravioli and pumpkins for carving come out for a couple weeks around Halloween, but to buy a 15 oz can of Libby's pumpkin costs over €4. Pumpkin pie, bread, muffins, cake, pudding, only for special occasions, I guess...

Now don't get me wrong, I'm really not that worried about missing American food.  I did just fine for three months last fall, it's just a matter of understanding how different ingredients and substitutions behave in my favorite recipes.  I mean, this is Italy we're talking about.  Home to some of the best food in the world.  But I'm not partial or anything.  I keep a pretty good cover, though; you can't tell how much I love the food by the way I skip home from the super market with my arms full of pasta and heart bursting, waltz past the shelves of Nutella, guzzle acqua frizzante (sparkling water), double fist the cones of gelato, or giggle as I sweep the tubs of mascarpone that are cheaper than milk off the shelves.  Nope.  Not even around Christmas time when all the different kinds of panettone start filling the shelves and Jenny's shopping cart. 

I'm happy just thinking about all this wonderful food and its potential, but right now I am in the States, and I'm going to bake something I won't be able to for awhile.  Something with Oreos.  Lots of Oreos.  Or not bake, because this is a super easy no-bake cheesecake.

Unfortunately I forgot to take a picture of this cheesecake before my family started devouring it.  And continued eating it as I was trying to take photos.  But at least it was well received, right? 


No-Bake Oreo Cheesecake

Serves about 12

Ingredients:

For the Crust:

  • 16-18 Oreos

  • 4 Tbsp / 56g butter, melted

For the Filling:

  • 1 cup / 237g heavy whipping cream

  • 24 oz / 675g cream cheese, room temperature

  • 1/2 cup / 100g sugar

  • 32 Oreos, coarsely chopped, (or more), divided

Directions:

Make the Crust:

  1. In a food processor, pulse Oreos until finely ground.  Add butter and pulse until combined. 

  2. Press into bottom and a bit up the sides of a 9 in. tart pan, pie tin, or springform pan.  Freeze while you make the filling.

Make the Filling:

  1. In the bowl of a stand mixer or with an electric mixer, whip cream until stiff peaks form. Set aside.

  2. Beat cream cheese in the bowl of a stand mixer or with an electric mixer until light and fluffy. Beat in sugar. 

  3. Fold in 24 (or about 3/4) of the coarsely chopped Oreos, then gently fold in whipped cream. 

  4. Remove crust from the freezer.  Pour in filling and smooth the top. 

  5. Sprinkle with remaining chopped Oreos and place in fridge until completely chilled, about 2 hours. 

Jenny's Notes:

  • This cheesecake can also be frozen. Allow to sit at room temperature for 10 minutes or so before slicing.

  • Technically more than one package of Oreos is needed for this recipe. But you could squeeze by on one if you used half Oreos and half graham crackers for the crust.  You'll need about 1 1/4 cups of crumbs for the crust, then add an extra 2 Tbsp of cocoa powder to make it just as a chocolatey as if you used all Oreos, if you wish.