Biscoff Oreo Layer Bars

Bucca di Beppo, using the proper snaaaack hand.

Bucca di Beppo, using the proper snaaaack hand.

You had me at Biscoff.  Then you had me again at Oreo.  These bars are decadent and disappear quickly.  I had barely pulled them out of the oven when my nieces and nephews appeared at the door looking to see if we had any "snacks." (To be said, "snaaaaaacks," with the Italian hand gesture.)  Normally these bars should be cooled and chilled before slicing, but in this instance we used bowls and spoons to scoop up the warm, melty, ooey-gooey, Biscoff Oreo-ness with a hint of peanut butter atop a shortbread crust.  I practically had to put caution tape around the remaining few bars so I could get a picture of them before they all disappeared.  I don't own caution tape, but I think it would be a very handy thing to have around. 

This post may contain affiliate links. If you make a purchase using these links, Jennyblogs may receive a small commission, at no extra cost to you. This helps to support Jennyblogs. For further information see the privacy policy. Grazie!

Recipe adapted from Call Me PMc


Biscoff Oreo Layer Bars

Ingredients:

For the Crust

  • 1 1/3 cup / 160g all-purpose flour

  • 3/4 cup / 150g brown sugar

  • 6 Tbsp / 85g salted butter, cold, cut into cubes (3/4 of a stick)

For the Layers

  • 1/3 cup / 59g peanut butter chips

  • 12 Oreo cookies, crushed (You could always use more, my Oreo loving friends)

  • 14 oz can / 398g sweetened condensed milk

  • 1/2 cup Biscoff spread

Directions:

Oven preheated to 350° / 177°C

Make the Crust

  1. Lightly grease an 8x8inch / 20x20cm pan. 

  2. In a food processor pulse together flour and sugar.  Add butter, one cube at a time.  Continue to pulse until mixture looks like wet sand and will hold together when pressed between your fingers.  Press evenly into prepared pan.

Make the Layers

  1. Sprinkle peanut butter chips evenly over crust, then the Oreos. 

  2. In a small bowl whisk together sweetened condensed milk and Biscoff until smooth.  Pour over crust and spread to evenly cover Oreos.

  3. Bake for 20-22 minutes or until edges are lightly golden and center is just set.  The filling will go from shiny to matte, forming a sort of skin over the top. 

  4. Place in the fridge until completely cool.  Cut and serve.  Store covered in the fridge.

Jenny's Notes:

  • Don't sweat if you only have unsalted butter.  To interchange unsalted for salted butter, just add 1/4 tsp salt for every 1 stick of unsalted butter.  And vice versa, if you only have salted butter and a recipe calls for 1 stick of unsalted butter and salt, just omit the salt and replace unsalted butter with salted.  I just stared at the word "salt" for too long and now it looks very strange.  Salt.  Huh.

  • ALSO.  You could use the crunchy Biscoff spread in this and I think that would be amaze-za-zing.  I haven't gotten a chance to try it yet but if you do let me know and invite me over.  :)

Biscoff Oreo Layer Bars
Yield 12-16
Author
Prep time
25 Min
Cook time
22 Min
Inactive time
1 Hour
Total time
1 H & 47 M

Biscoff Oreo Layer Bars

Shortbread crust with Oreos, Biscoff caramel, and peanut butter chips
Cook modePrevent screen from turning off

Ingredients

For the Crust
For the Layers

Instructions

Make the Crust
  1. Oven preheated to 350° / 177°C
  2. Lightly grease an 8x8inch / 20x20cm pan.
  3. In a food processor pulse together flour and sugar. Add butter, one cube at a time. Continue to pulse until mixture looks like wet sand and will hold together when pressed between your fingers. Press evenly into prepared pan.
Make the Layers
  1. Sprinkle peanut butter chips evenly over crust, then the Oreos.
  2. In a small bowl whisk together sweetened condensed milk and Biscoff until smooth. Pour over crust and spread to evenly cover Oreos.
  3. Bake for 20-22 minutes or until edges are lightly golden and center is just set. The filling will go from shiny to matte, forming a sort of skin over the top.
  4. Place in the fridge until completely cool. Cut and serve. Store covered in the fridge.

Notes

Don't sweat if you only have unsalted butter.  To interchange unsalted for salted butter, just add 1/4 tsp salt for every 1 stick of unsalted butter.  And vice versa, if you only have salted butter and a recipe calls for 1 stick of unsalted butter and salt, just omit the salt and replace unsalted butter with salted.

ALSO.  You could use the crunchy Biscoff spread in this and I think that would be amaze-za-zing.

Nutrition Facts

Calories

393.06

Fat

16.94 g

Sat. Fat

7.20 g

Carbs

56.29 g

Fiber

1.07 g

Net carbs

55.22 g

Sugar

39.04 g

Protein

5.59 g

Sodium

174.15 mg

Cholesterol

26.55 mg

Nutritional info is approximate. Based on 12 servings.

Biscoff bars, biscoff caramel, shortbread bars, oreo caramel bars
dessert
American
Did you make this recipe?
Tag @jennyblogsandbakes on instagram and hashtag it #jennyblogs

Peanut Butter Truffle Brownies

Last Updated June 27, 2024

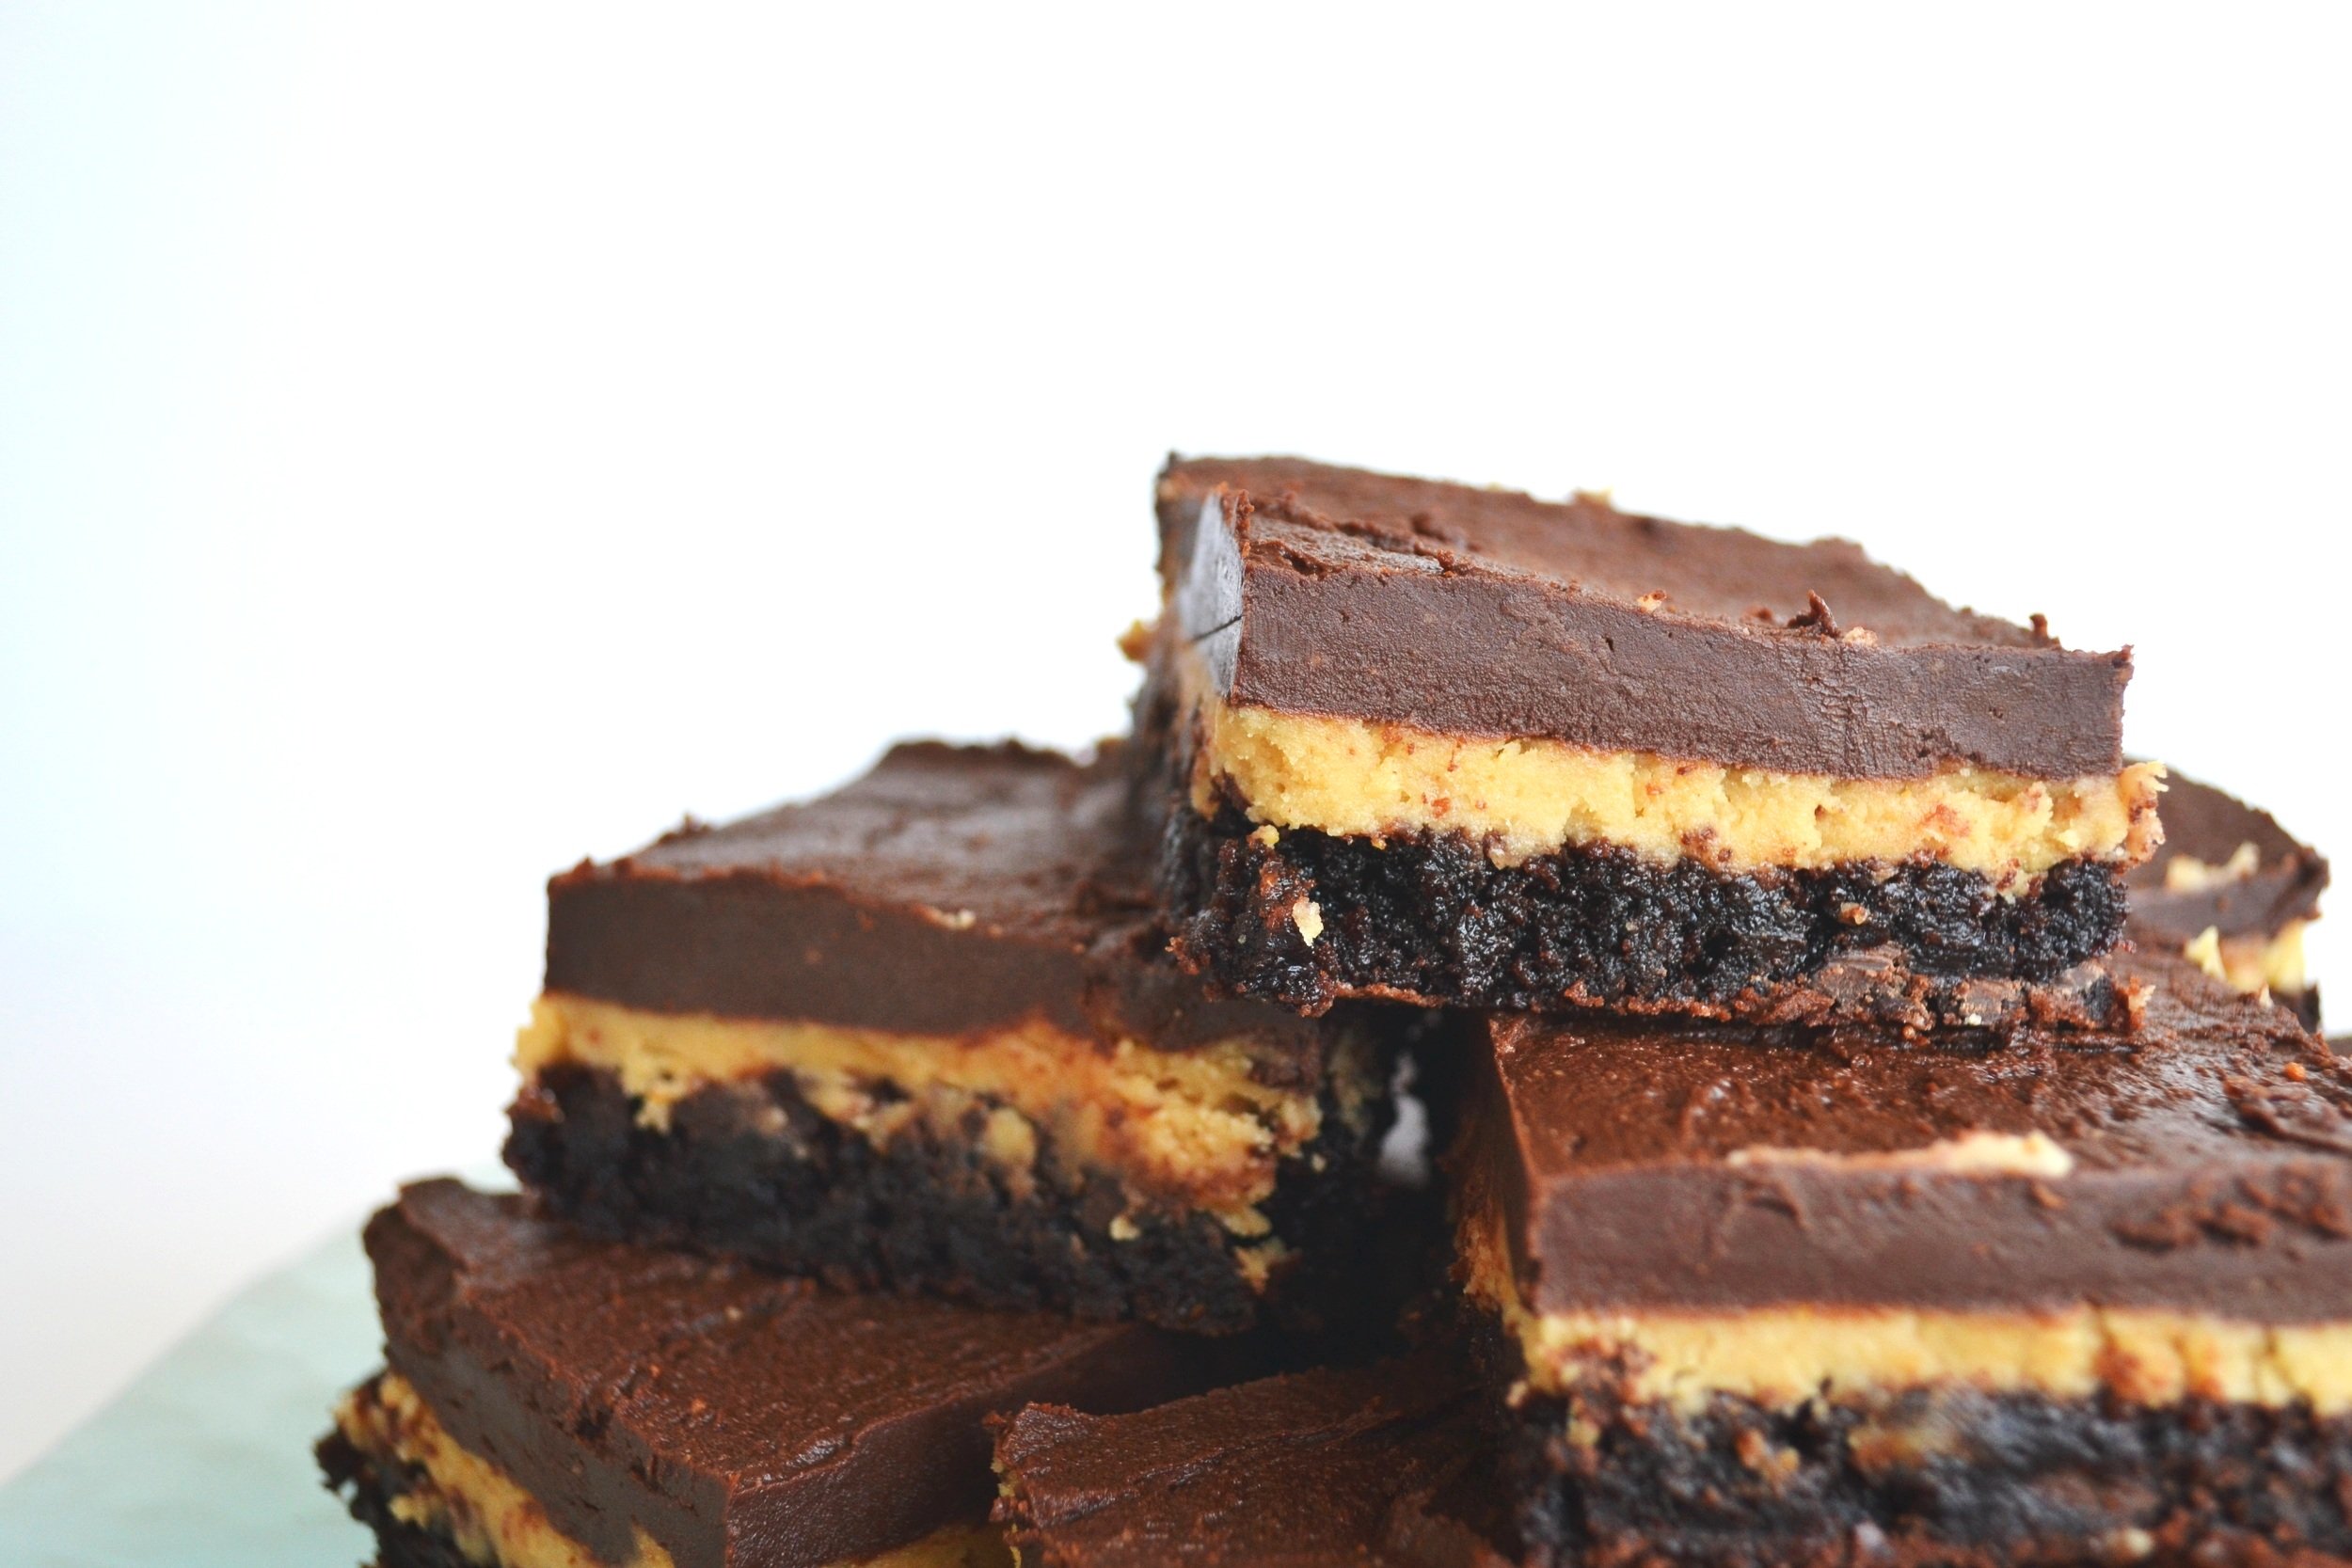
These aren't just any brownies. They are ooey and gooey with a layer of peanut butter truffle, topped with chocolate ganache. Did I mention you can also make the peanut butter truffle layer with Nutella? Well, yes, yes you can. 

Lately I've been experimenting with different takes on brownies. If you've ever compared brownie recipes, you might have noticed that some recipes include a leavening agent, such as baking powder, while others don't, some use melted chocolate in the batter, and others only cocoa powder. 

Which is best? This comes down to personal preference, but if you prefer that fudgy, dense brownie with a rich chocolate taste, I've found the most success without using a leavening agent and plenty of cocoa powder. I couldn't taste a significant enough difference in chocolatey-ness if I included melted chocolate in the batter or not. And for the trouble, I prefer sticking to a quality cocoa powder. Sorry Hershey, you just don't cut it.  (I find their cocoa bland, lacking in that wonderful depth of flavor and buttery-ness that should come from chocolate.)  I love Saco Premium Baking Cocoa, Guittard, and Pernigotti.  I've heard wonderful things about Valrhona, but haven't had a chance to try it yet.  For these brownies, I used Saco.

This post may contain affiliate links. If you make a purchase using these links, Jennyblogs may receive a small commission, at no extra cost to you. This helps to support Jennyblogs. Where possible, links are prioritized to small businesses, and American companies and products made in the USA for American readers. For further information see the privacy policy. Grazie!

Recipe adapted from Some Kitchen Stories


Peanut Butter Truffle Brownies

Makes about 24 servings

Ingredients:

For the Brownies

  • 3/4 cup / 169g oil

  • 2 cups / 400g sugar

  • 3 eggs

  • 3 tsp / 15g vanilla

  • 2/3 cup / 67g cocoa powder

  • 1/2 tsp salt

  • 1 cup / 120g all-purpose flour

For the Peanut Butter Truffle

  • 1/2 cup / 113g butter (1 stick), room temperature

  • 1/2 cup / 130g creamy peanut butter

  • 2 cups / 250g powdered sugar

  • 2-3 tsp / 10-15g milk

For the Ganache

  • 1/4 cup / 65g creamy peanut butter

  • 2 cups / 340g semi-sweet chocolate chips

  • 1/4 cup / 56g butter (1/2 stick)

  • 2 Tbsp / 30g heavy whipping cream

Directions:

Make the Brownies

Oven 350°F / 177°C.  Lightly grease a 9x13in / 23x33cm pan.

  1. In a large mixing bowl, combine oil and sugar.  Beat in eggs and vanilla.  Add cocoa powder and salt.  Mix in flour until just combined. 

  2. Pour into prepared pan and bake for 25-30 minutes, until toothpick inserted off center comes out mostly clean.  Allow to cool.

Make the Peanut Butter Truffle

  1. While the brownies are cooling, combine butter, peanut butter, and powdered sugar in the bowl of a stand mixer and beat until light and fluffy. 

  2. Add in 2 teaspoons of milk and beat.  The mixture should be spreadable.  If not, add another teaspoon of milk.

  3. Spread onto cooled brownies and place in the fridge to set the truffle layer. 

Make the Ganache

  1. While the filling sets, place a small saucepan with a small amount of water on the stove over low heat.  Place peanut butter, chocolate chips, butter, and whipping cream in a small glass or metal bowl and place over simmering water on the stove. The bottom of the bowl shouldn't touch the water.  Stir just until all the chocolate and butter is melted, and remove from heat.

  2. Remove brownies from fridge and spread ganache over the top.  Return to fridge and chill until set.

Nutella Version:

In the Peanut Butter Truffle replace the peanut butter with Nutella and add 1 1/4 cups / powdered sugar with 3/4 cup flour, instead of 2 cups powdered sugar.  Cuts the sweetness since Nutella is sweetened and Peanut Butter usually is not, or minimally so. 

For the Ganache replace the peanut butter with Nutella. 

Proceed as normal.

Jenny's Notes:

  • These are rich and delicious, small portions go a long way.  I often cut the recipe in half and bake in an 8x8inch / 20x20cm pan. 

Peanut Butter Truffle Brownies
Yield 24
Author
Prep time
40 Min
Cook time
30 Min
Inactive time
1 Hour
Total time
2 H & 10 M

Peanut Butter Truffle Brownies

Chocolate brownies with a creamy peanut butter truffle layer topped with rich chocolate ganache
Cook modePrevent screen from turning off

Ingredients

For the Brownies
For the Peanut Butter Truffle
For the Ganache

Instructions

Make the Brownies
  1. Oven 350°F / 177°C. Lightly grease a 9x13in / 23x33cm pan.
  2. In a large mixing bowl, combine oil and sugar. Beat in eggs and vanilla. Add cocoa powder and salt. Mix in flour until just combined.
  3. Pour into prepared pan and bake for 25-30 minutes, until toothpick inserted off center comes out mostly clean. Allow to cool.
Make the Peanut Butter Truffle
  1. While the brownies are cooling, combine butter, peanut butter, and powdered sugar in the bowl of a stand mixer and beat until light and fluffy.
  2. Add in 2 teaspoons of milk and beat. The mixture should be spreadable. If not, add another teaspoon of milk.
  3. Spread onto cooled brownies and place in the fridge to set the truffle layer.
Make the Ganache
  1. While the filling sets, place a small saucepan with a small amount of water on the stove over low heat. Place peanut butter, chocolate chips, butter, and whipping cream in a small glass or metal bowl and place over simmering water on the stove. The bottom of the bowl shouldn't touch the water. Stir just until all the chocolate and butter is melted, and remove from heat.
  2. Remove brownies from fridge and spread ganache over the top. Return to fridge and chill until set.

Notes

  • These are rich and delicious, small portions go a long way.  I often cut the recipe in half and bake in an 8x8inch / 20x20cm pan. 


Nutrition Facts

Calories

386.73

Fat

23.84 g

Sat. Fat

8.86 g

Carbs

35.36 g

Fiber

2.58 g

Net carbs

32.79 g

Sugar

16.18 g

Protein

4.52 g

Sodium

139.31 mg

Cholesterol

38.06 mg

Nutritional information is approximate; based on 24 servings.

brownies, truffle, peanut butter, ganache
dessert
American
Did you make this recipe?
Tag @jennyblogsandbakes on instagram and hashtag it #jennyblogs

Baked Egg Baguettes

Last Updated September 15, 2024

Happiness is, a good piece of bread and a stairway in Paris.

"How can you tell how good bread is without tasting it? Not the smell, not the look, but the sound of the crust. Listen. [bread crackles] Oh, symphony of crackle. Only great bread sound this way."             - Colette, Ratatouille

Disclaimer: This is not a bread recipe, but it involves using your favorite crusty bread...think baguettes, with their wonderful crisp outside, soft and chewy inside...oh yes. I have not been everywhere in the world or tried all the bread, not even close, but of the places I have been, France has the best bread.  And pastries.  And butter.  And lots of other things.  The best part?  You can go to just about any bakery, even the world renowned, and never pay more than 1.50 euro.  That's less than $2 for the world's best bread.  Unfortunately I'm not in France right now, so a package of demi-baguettes will have to do for this recipe. 

This post may contain affiliate links. If you make a purchase using these links, Jennyblogs may receive a small commission, at no extra cost to you. This helps to support Jennyblogs. For further information see the privacy policy. Grazie!

Recipe adapted from Spoon Fork Bacon


Baked Egg Baguettes

Serves 4-8 (depending on if you want to eat a whole mini baguette or cut them in half)

Ingredients:

  • 4 demi-baguettes

  • 5 eggs

  • 1/3 cup / 79g milk

  • 1/4 small white onion, diced

  • 2-3 green onions, chopped

  • 3 oz / 85g smoked Gouda cheese, shredded

  • salt and pepper, to taste

Directions:

Oven preheated to 350°F / 177°C

  1. Cut out the middle of each baguette, making a V shape, like a canoe shape. 

  2. Whisk together eggs and milk, beating lightly.  Add in onion, green onion, and half of the cheese.  Lightly salt and pepper.  Divide evenly among the baguettes.  Top each with the remaining cheese. 

  3. Place on a baking sheet or dish and bake for 20-25 minutes, until golden and the center is set and slightly puffed up.  Allow to cool for a few minutes, then slice and serve. 

Jenny's Notes:

  • This is a very quick and easy recipe to execute!  You can add or adjust the add-ins as you wish.  I also enjoy adding chopped spinach, mushrooms, diced red or green onion, or sun-dried tomatoes. 

  • Substitute the smoked gouda with any of your favorite cheeses!

Baked Egg Baguettes
Yield 4-8
Author
Prep time
20 Min
Cook time
25 Min
Total time
45 Min

Baked Egg Baguettes

Hollowed out baguettes filled and baked with cheesy eggs and onions, easy to make and delicious for breakfast or anytime!
Cook modePrevent screen from turning off

Ingredients

Instructions

  1. Oven preheated to 350°F / 177°C
  2. Cut out the middle of each baguette, making a V shape, like a canoe shape.
  3. Whisk together eggs and milk, beating lightly. Add in onion, green onion, and half of the cheese. Lightly salt and pepper. Divide evenly among the baguettes. Top each with the remaining cheese.
  4. Place on a baking sheet or dish and bake for 20-25 minutes, until golden and the center is set and slightly puffed up. Allow to cool for a few minutes, then slice and serve.

Notes

  • This is a very quick and easy recipe to execute!  You can add or adjust the add-ins as you wish.  I also enjoy adding chopped spinach, mushrooms, diced red or green onion, or sun-dried tomatoes. 
  • Substitute the smoked gouda with any of your favorite cheeses!

Nutrition Facts

Calories

730.69

Fat

18.57 g

Sat. Fat

7.2 g

Carbs

123.02 g

Fiber

5.53 g

Net carbs

117.5 g

Sugar

13.74 g

Protein

36.81 g

Sodium

1854.79 mg

Cholesterol

231.28 mg

Nutritional information is approximate, based on eating 1 whole demi-baguette.

baked egg boats, egg bake, make ahead breakfast
breakfast, brunch
American
Did you make this recipe?
Tag @jennyblogsandbakes on instagram and hashtag it #jennyblogs

Toasted Coconut Toffee Cookies

Last Updated September 15, 2024

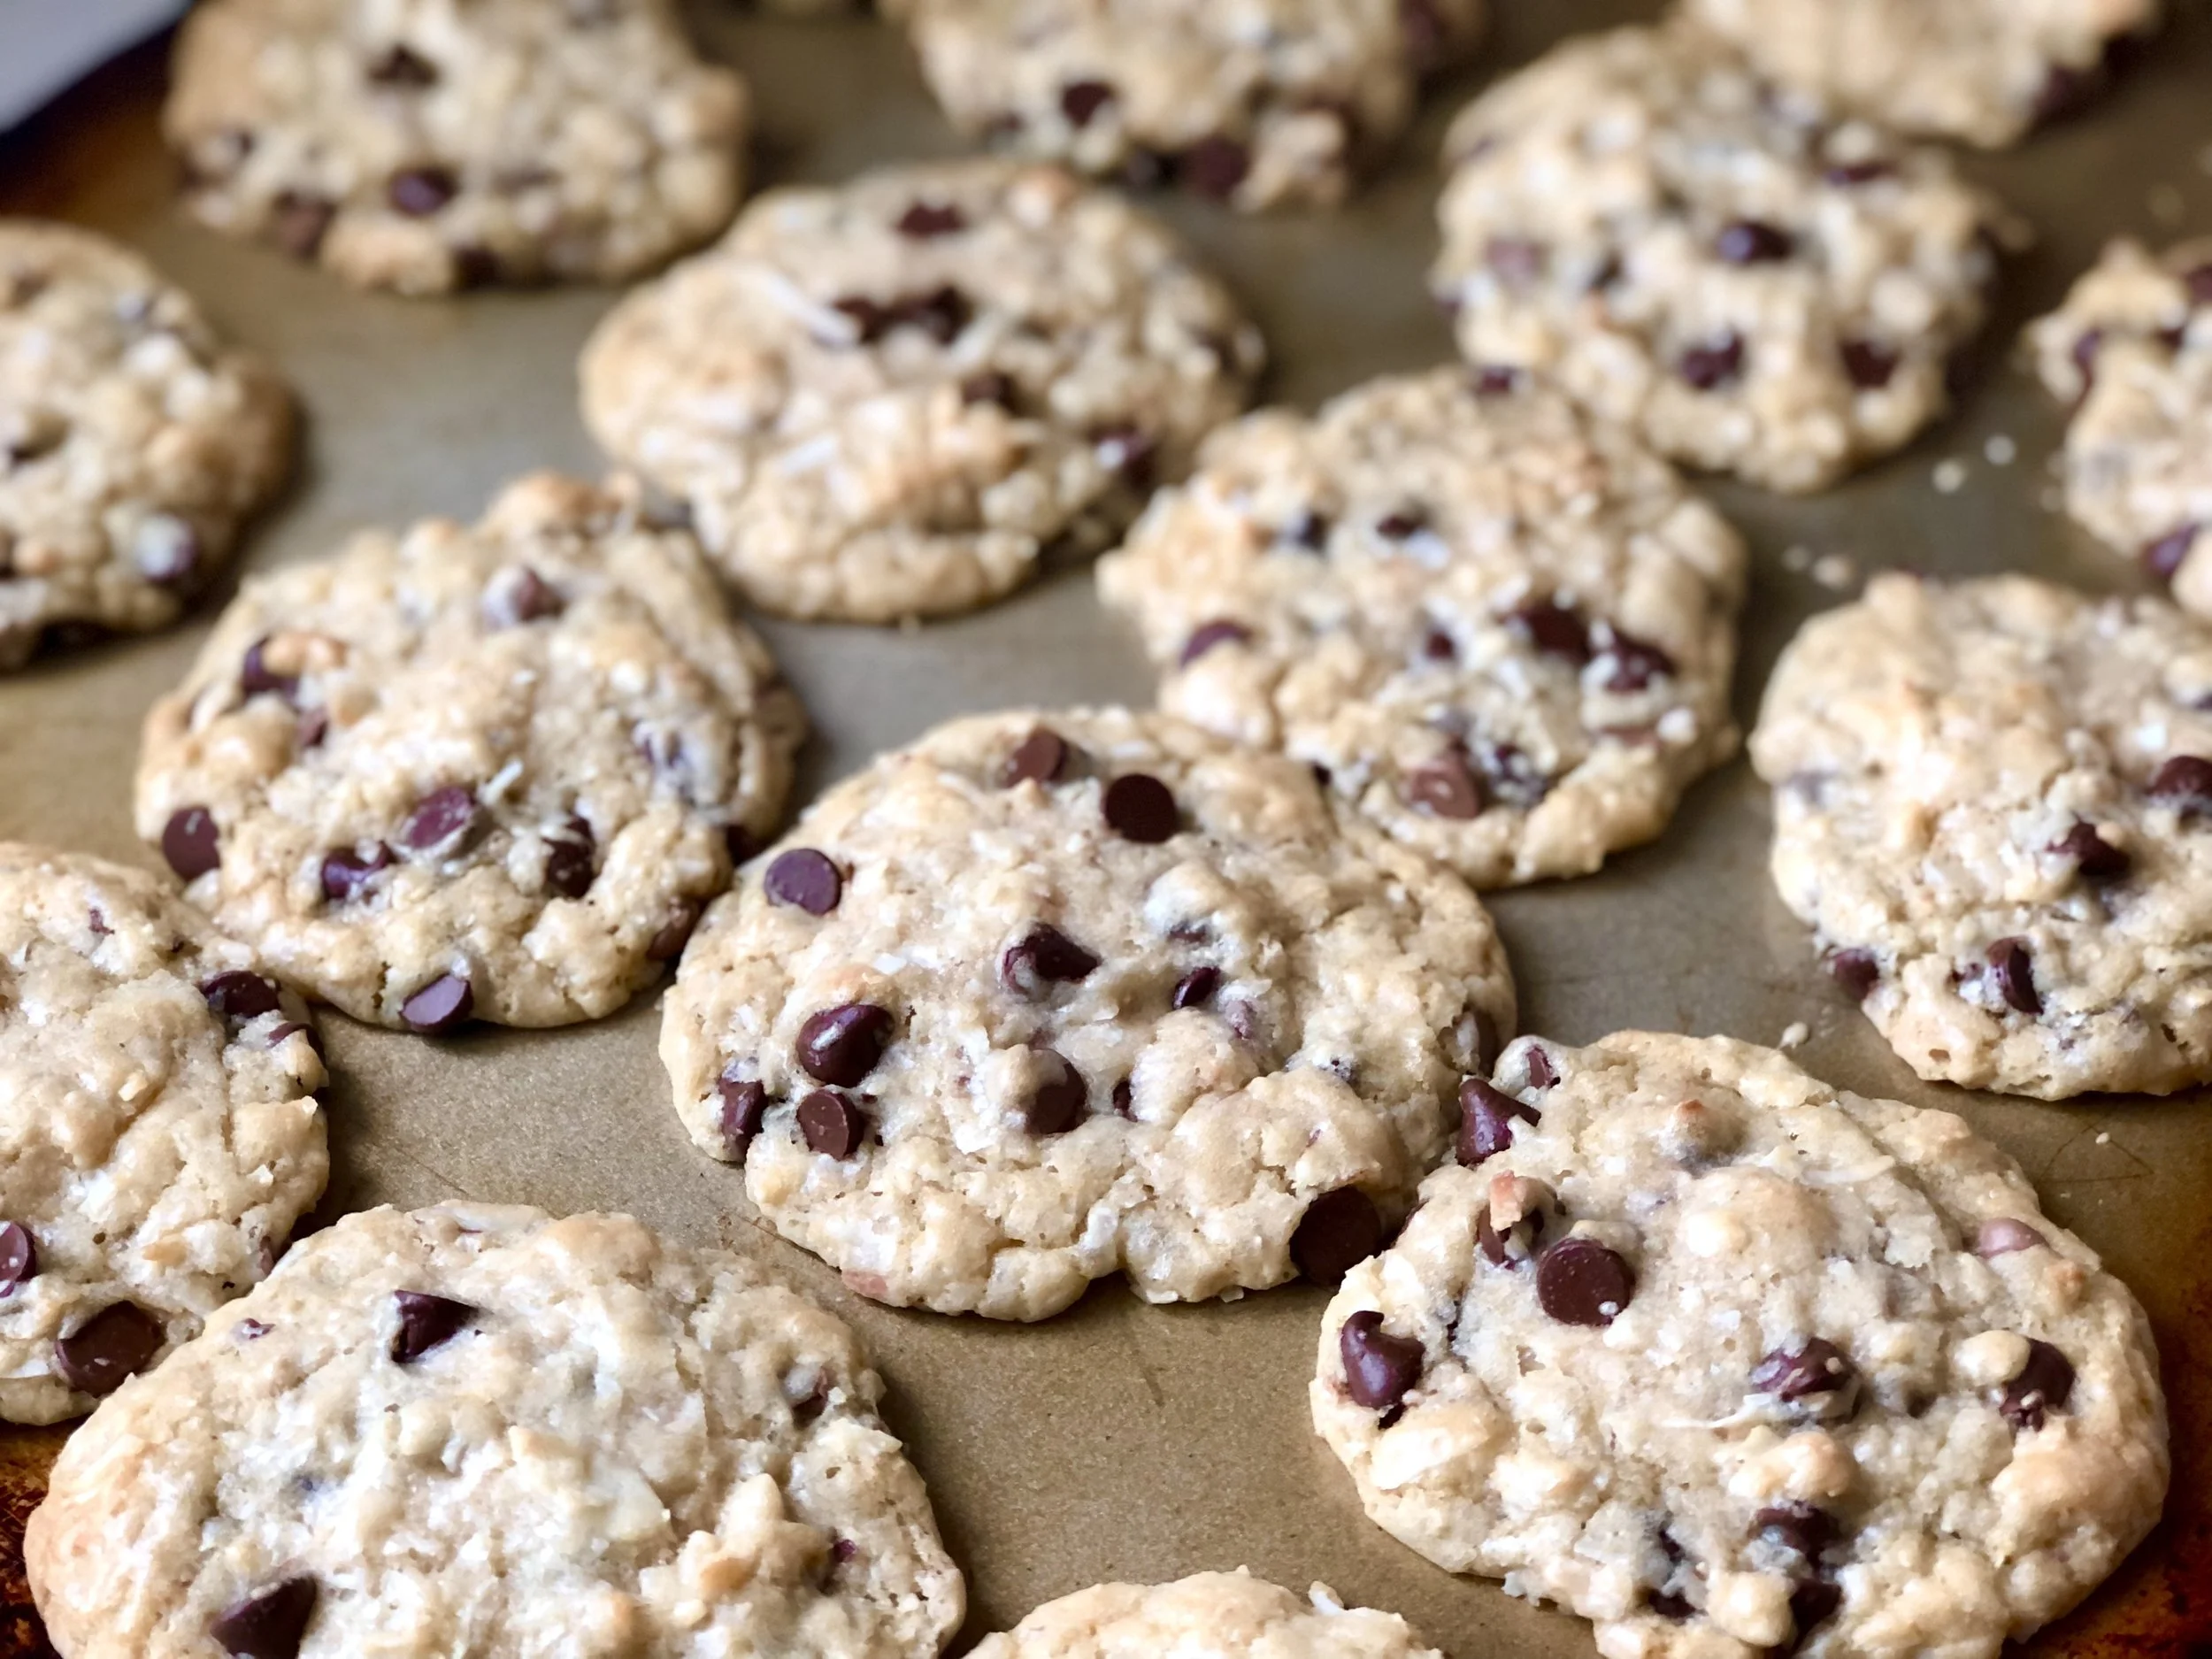
These Toasted Coconut Toffee Cookies are a new favorite of mine. I can’t get enough!

It is similar to a chocolate chip cookie, just add a handful of freshly toasted coconut and toffee bits.  The dough alone is magical.  The first time I ever made these the dough barely made it in the oven because it was in my mouth.  I think I made a note at the bottom of the recipe something to the effect of "KEEP THIS RECIPE FOREVER."  And here it is, yours to hold and keep and eat forever until death do you part.

This post may contain affiliate links. If you make a purchase using these links, Jennyblogs may receive a small commission, at no extra cost to you. This helps to support Jennyblogs. For further information see the privacy policy. Grazie!

Recipe inspired by Let's Dish Recipes


Toasted Coconut Toffee Cookies

Makes 40-50 smallish cookies (or less, depending on how much dough is consumed before baking)

Ingredients:

  • 2 cups / 160g shredded coconut, unsweetened

  • 1 3/4 cups / 210g all-purpose flour

  • 1 tsp baking powder

  • 1/2 tsp baking soda

  • 1/4 tsp salt

  • 1 1/2 cups / 300g brown sugar

  • 1/2 cup / 113g oil

  • 2 tsp / 10g vanilla extract

  • 2 eggs

  • 1 8 oz / 227g bag Heath Bits O Brickle or Toffee bits

  • 1 1/2 cups / 255g semi-sweet chocolate chips

Directions:

Preheat oven to 350°F / 177°C.

  1. Arrange coconut in an even layer on a large baking sheet or pan.  Bake in preheated oven for 5-8 minutes or until fragrant and lightly golden brown, stirring occasionally.

  2. While the coconut is toasting, whisk together flour, baking powder, baking soda, and salt in a medium bowl. 

  3. In another bowl, mix brown sugar and oil together.  Add vanilla and eggs and beat well.  Add dry ingredients and mix. 

  4. By this time your coconut should be done.*  Add coconut, toffee, and chocolate chips to dough and mix until just combined. 

  5. Place by small spoonful onto cookie sheet.  Bake for 6-8 minutes, or until edges are just golden and the center still looks soft and doughy. 

Jenny's Notes:

  • Coconut goes quickly from perfectly golden to burnt, so keep a close eye on it!

  • Feel free to use shredded, flaked, and desiccated coconut interchangeably, but keep in mind certain kinds, like shredded, are almost always sold sweetened.  You may need to adjust your toasting time accordingly: More time for flaked, less for desiccated. 

  • *I like to add the coconut to the dough while it's still warm from the oven, thus melting the chocolate chips a tad and creating a chocolate swirl in the batter.  Just be careful not to over mix.

Toasted Coconut Toffee Cookies
Yield 40-50 cookies
Author
Prep time
20 Min
Cook time
24 Min
Total time
44 Min

Toasted Coconut Toffee Cookies

Cookies loaded with chocolate chips, toasted coconut, and toffee bits.
Cook modePrevent screen from turning off

Ingredients

Instructions

  1. Preheat oven to 350°F / 177°C.
  2. Arrange coconut in an even layer on a large baking sheet or pan. Bake in preheated oven for 5-8 minutes or until fragrant and lightly golden brown, stirring occasionally.
  3. While the coconut is toasting, whisk together flour, baking powder, baking soda, and salt in a medium bowl.
  4. In another bowl, mix brown sugar and oil together. Add vanilla and eggs and beat well. Add dry ingredients and mix.
  5. By this time your coconut should be done.* Add coconut, toffee, and chocolate chips to dough and mix until just combined.
  6. Place by small spoonful onto cookie sheet. Bake for 6-8 minutes, or until edges are just golden and the center still looks soft and doughy.

Notes

  • Coconut goes quickly from perfectly golden to burnt, so keep a close eye on it!
  • Feel free to use shredded, flaked, and desiccated coconut interchangeably, but keep in mind certain kinds, like shredded, are almost always sold sweetened.  You may need to adjust your toasting time accordingly: More time for flaked, less for desiccated. 
  • *I like to add the coconut to the dough while it's still warm from the oven, thus melting the chocolate chips a tad and creating a chocolate swirl in the batter.  Just be careful not to over mix.

Nutrition Facts

Calories

163.73

Fat

8.77 g

Sat. Fat

4.1 g

Carbs

20.06 g

Fiber

1.04 g

Net carbs

19.04 g

Sugar

14.31 g

Protein

1.45 g

Sodium

57.12 mg

Cholesterol

14.47 mg

Nutritional information is approximate, based on 1 cookie.

chocolate chip cookies, toasted coconut, Heath toffee
dessert, cookies
American
Did you make this recipe?
Tag @jennyblogsandbakes on instagram and hashtag it #jennyblogs

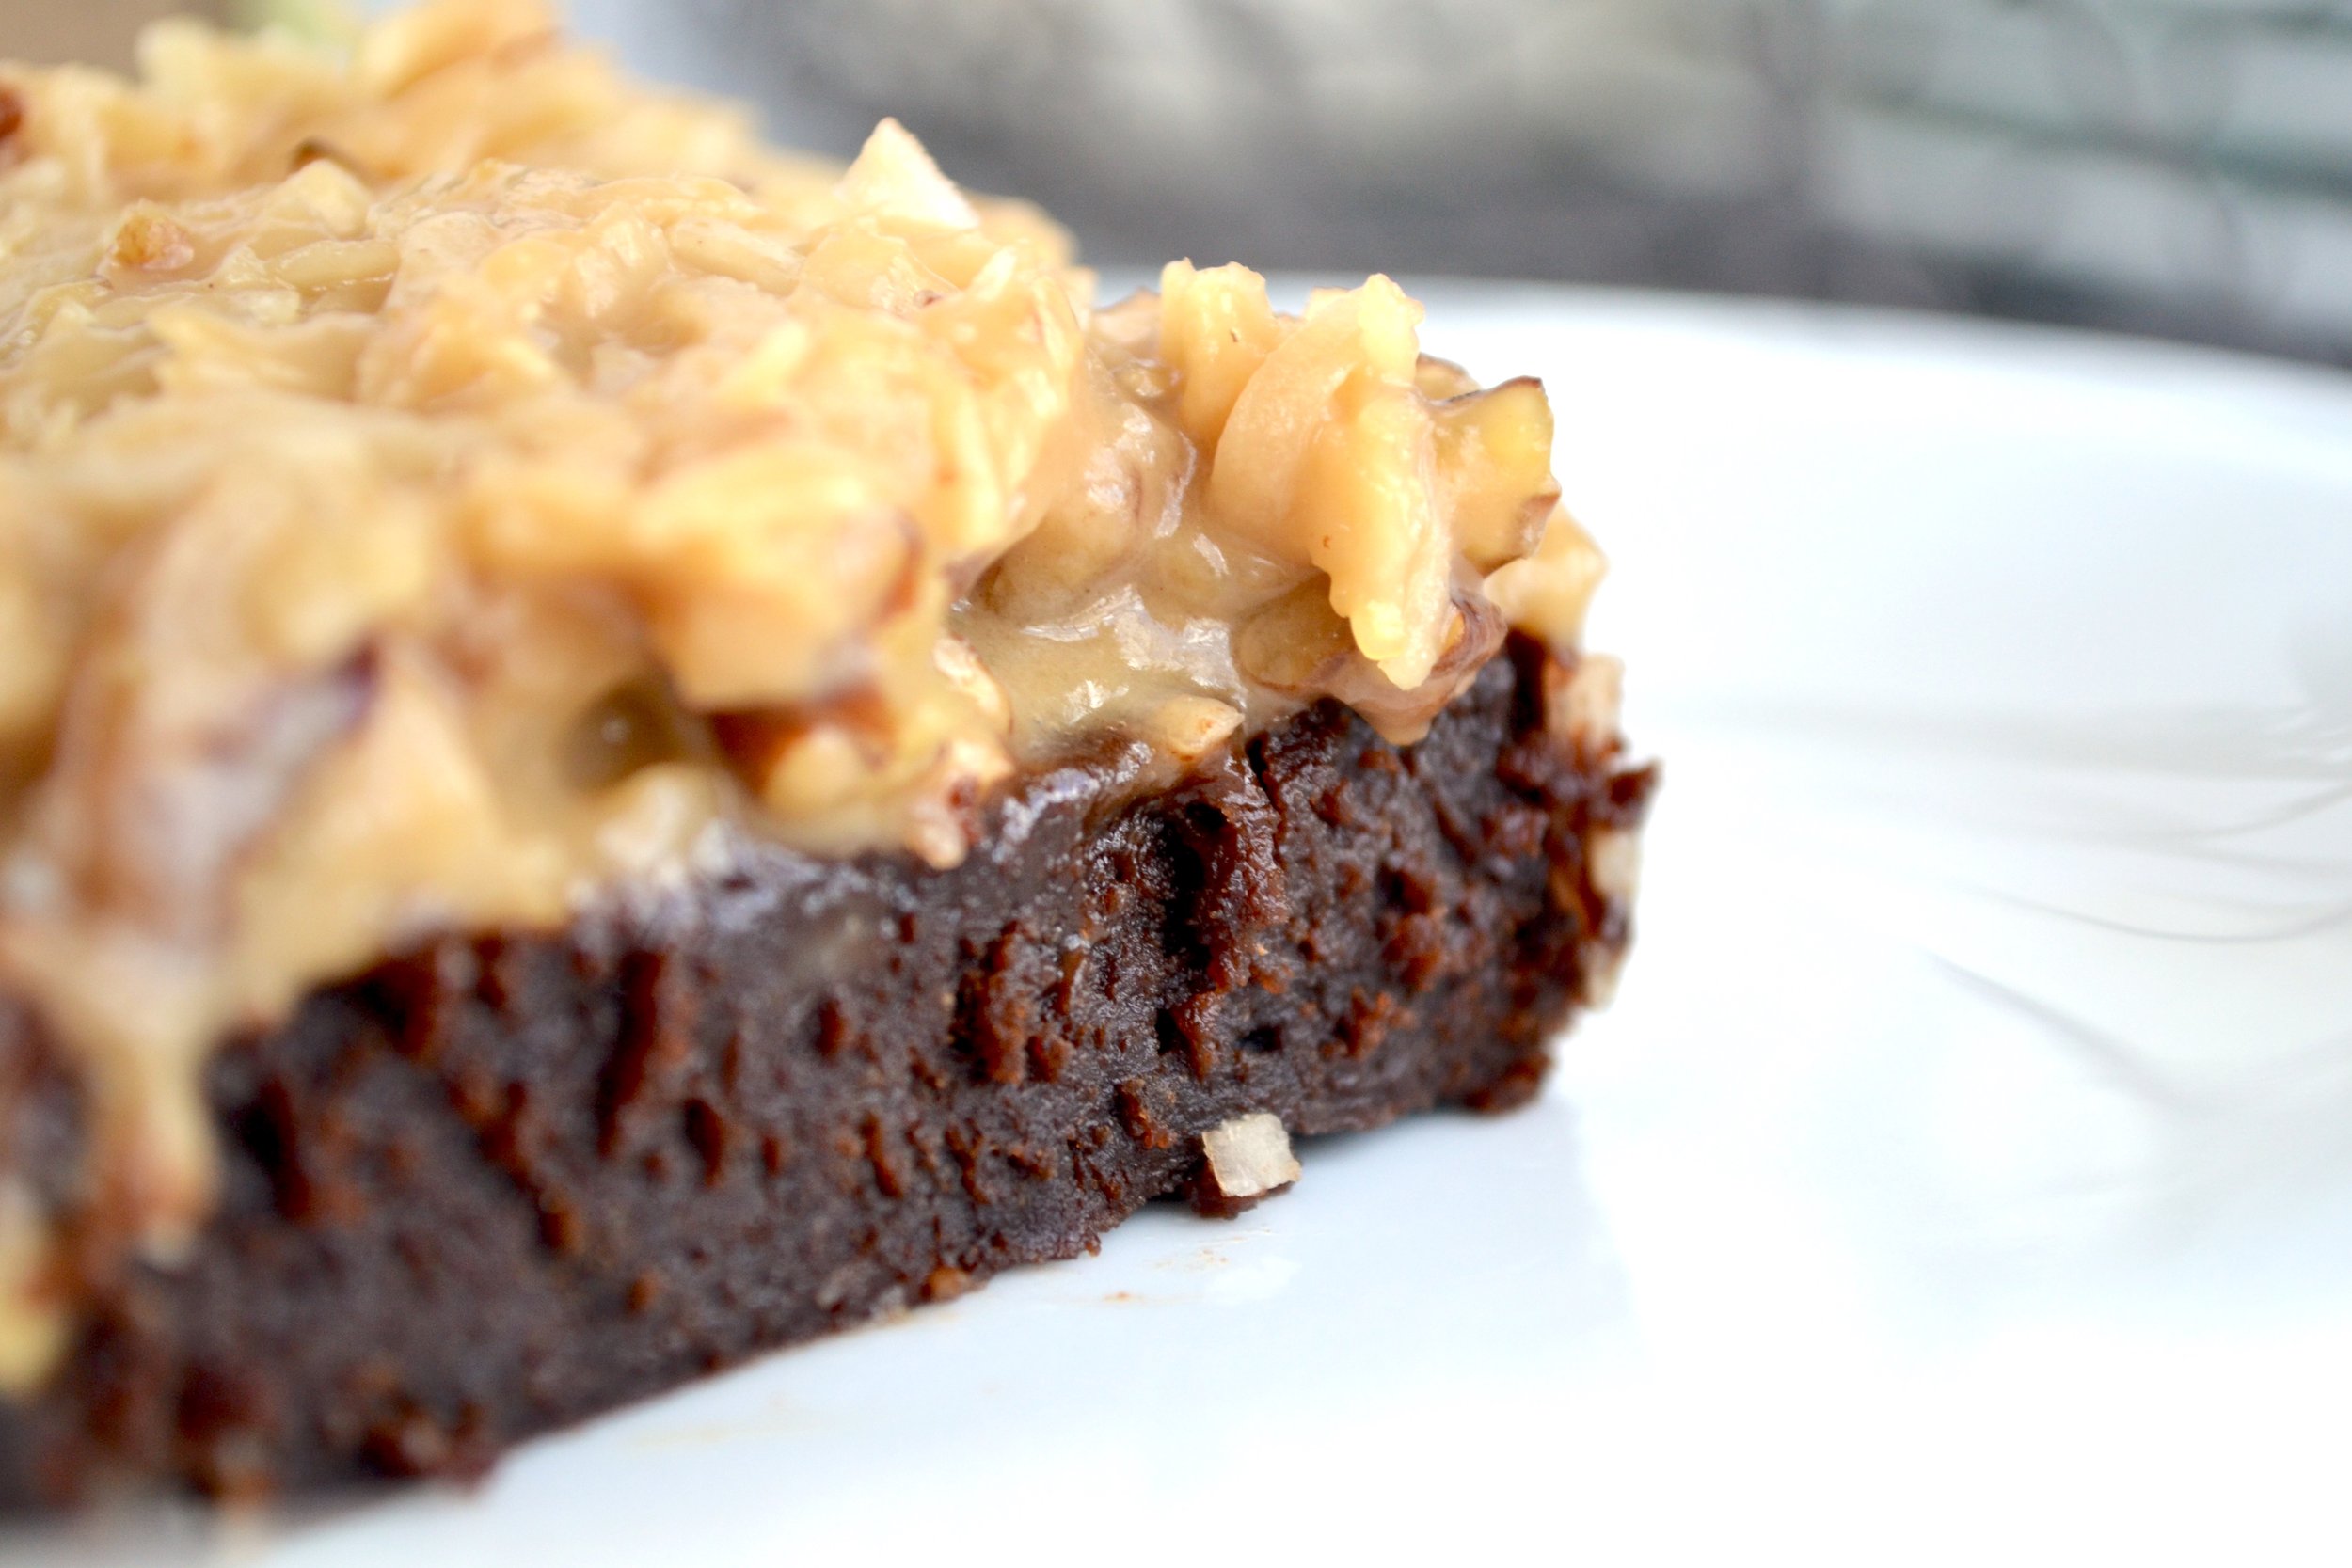
German Chocolate Brownies

If you cross coconut, pecans, and chocolate, what do you get?  I don't know, but if you combine those, you get the dessert affectionately called German Chocolate, originally called German's chocolate cake, after Samuel German. 

This recipe is not a cake, but in fact brownies. German chocolate brownies. One of my favorite things about this recipe is the homemade coconut pecan frosting. I hadn’t made it homemade before, but after realizing just how easy it is and DELICIOUS, it seemed silly to ever buy it again! I hope it wins you over, too.

Now if you’re wondering where German Chocolate came from…

It might not be what you think. The original cake was not invented in Germany nor was Mr. German German.  Ach du lieber.  He was an English-American who worked for Baker's Chocolate Company (their chocolate is still in circulation and used in this recipe!) who developed a dark baking chocolate that was named after him.  Eventually a recipe came out featuring Mr. German's chocolate in a recipe called "Baker's German's Chocolate Cake."  I think you can probably see how the name morphed from there. And apparently June 11 is National German Chocolate Day in America.

This post may contain affiliate links. If you make a purchase using these links, Jennyblogs may receive a small commission, at no extra cost to you. This helps to support Jennyblogs. Where possible, links are prioritized to mall businesses and ethically and responsibly made items. For further information see the privacy policy. Grazie!

Recipe adapted from Creations by Kara


German Chocolate Brownies

Serves about 12

Ingredients:

For the German Chocolate Brownies

  • 3/4 cup / 168g oil

  • 2 cups / 400g sugar

  • 2 tsp / 10g vanilla extract

  • 3 eggs

  • 4 oz / 113g Baker's German Chocolate, melted and cooled

  • 1 cup / 120g flour

  • 2/3 cup / 67g cocoa

  • 1/2 tsp salt

For the Coconut Pecan Frosting

  • 1 cup / 262g evaporated milk, make your own here!

  • 3 egg yolks

  • 1 cup / 200g brown sugar

  • 1/2 cup 113g butter

  • 1 tsp / 5g vanilla

  • 1 1/2 cups / 120g flaked coconut

  • 1 cup / 125g chopped pecans

Directions:

Make the German Chocolate Brownies

Oven 350°F / 177°C Grease a 9x13in / 23x33cm pan

  1. In a large bowl, beat together oil, sugar, vanilla, and eggs. 

  2. Add cooled chocolate.  Stir in flour, cocoa, and salt.  Pour and spread into prepared 9x13 pan. 

  3. Bake 20-25 minutes, or until toothpick inserted off center comes out mostly clean. Brownies like to be slightly under baked. Let cool.

Make the Coconut Pecan Frosting

  1. Whisk together milk, yolks, and sugar in a medium saucepan.  Add butter and place over medium heat, stirring until mixture becomes thick, approximately 10-12 minutes. 

  2. Remove from heat and add vanilla, coconut, and pecans.  Cool until spreadable. 

  3. Spread frosting evenly over brownies. Slice and enjoy. 

Jenny's Notes:

  • I'll let you in on a little secret.  You can make this recipe with regular milk, if you don’t have evaporated milk. I recommend you do, but I have done without!

German Chocolate Brownies
Yield 20
Author
Prep time
30 Min
Cook time
35 Min
Inactive time
10 Min
Total time
1 H & 15 M

German Chocolate Brownies

Dense, fudgy German Chocolate brownies topped with a delectable caramel pecan coconut frosting. Just like the classic cake, but in brownie form.
Cook modePrevent screen from turning off

Ingredients

For the German Chocolate Brownies
For the Coconut Pecan Frosting

Instructions

Make the German Chocolate Brownies
  1. Oven 350°F / 177°C Grease a 9x13in / 23x33cm pan
  2. In a large bowl, beat together oil, sugar, vanilla, and eggs.
  3. Add cooled chocolate. Stir in flour, cocoa, and salt. Pour and spread into prepared 9x13 pan.
  4. Bake 20-25 minutes, or until toothpick inserted off center comes out mostly clean. Brownies like to be slightly under baked. Let cool.
Make the Coconut Pecan Frosting
  1. Whisk together milk, yolks, and sugar in a medium saucepan. Add butter and place over medium heat, stirring until mixture becomes thick, approximately 10-12 minutes.
  2. Remove from heat and add vanilla, coconut, and pecans. Cool until spreadable.
  3. Spread frosting evenly over brownies. Slice and enjoy.

Notes

  • I'll let you in on a little secret.  You can make this recipe with regular milk, if you don’t have evaporated milk. I recommend you do, but I have done without!


Nutrition Facts

Calories

334.87

Fat

25.59 g

Sat. Fat

9.83 g

Carbs

37.1 g

Fiber

2.79 g

Net carbs

34.31 g

Sugar

15.61 g

Protein

4.33 g

Sodium

124.89 mg

Cholesterol

69.56 mg

Nutritional info is approximate, based on 1 serving if sliced into 20 pieces.

German chocolate, evaporated milk, caramel coconut pecan frosting, german chocolate cake, brownies
dessert, bars
American
Did you make this recipe?
Tag @jennyblogsandbakes on instagram and hashtag it #jennyblogs

No-Bake Oreo Cheesecake

Last Updated September 15, 2024

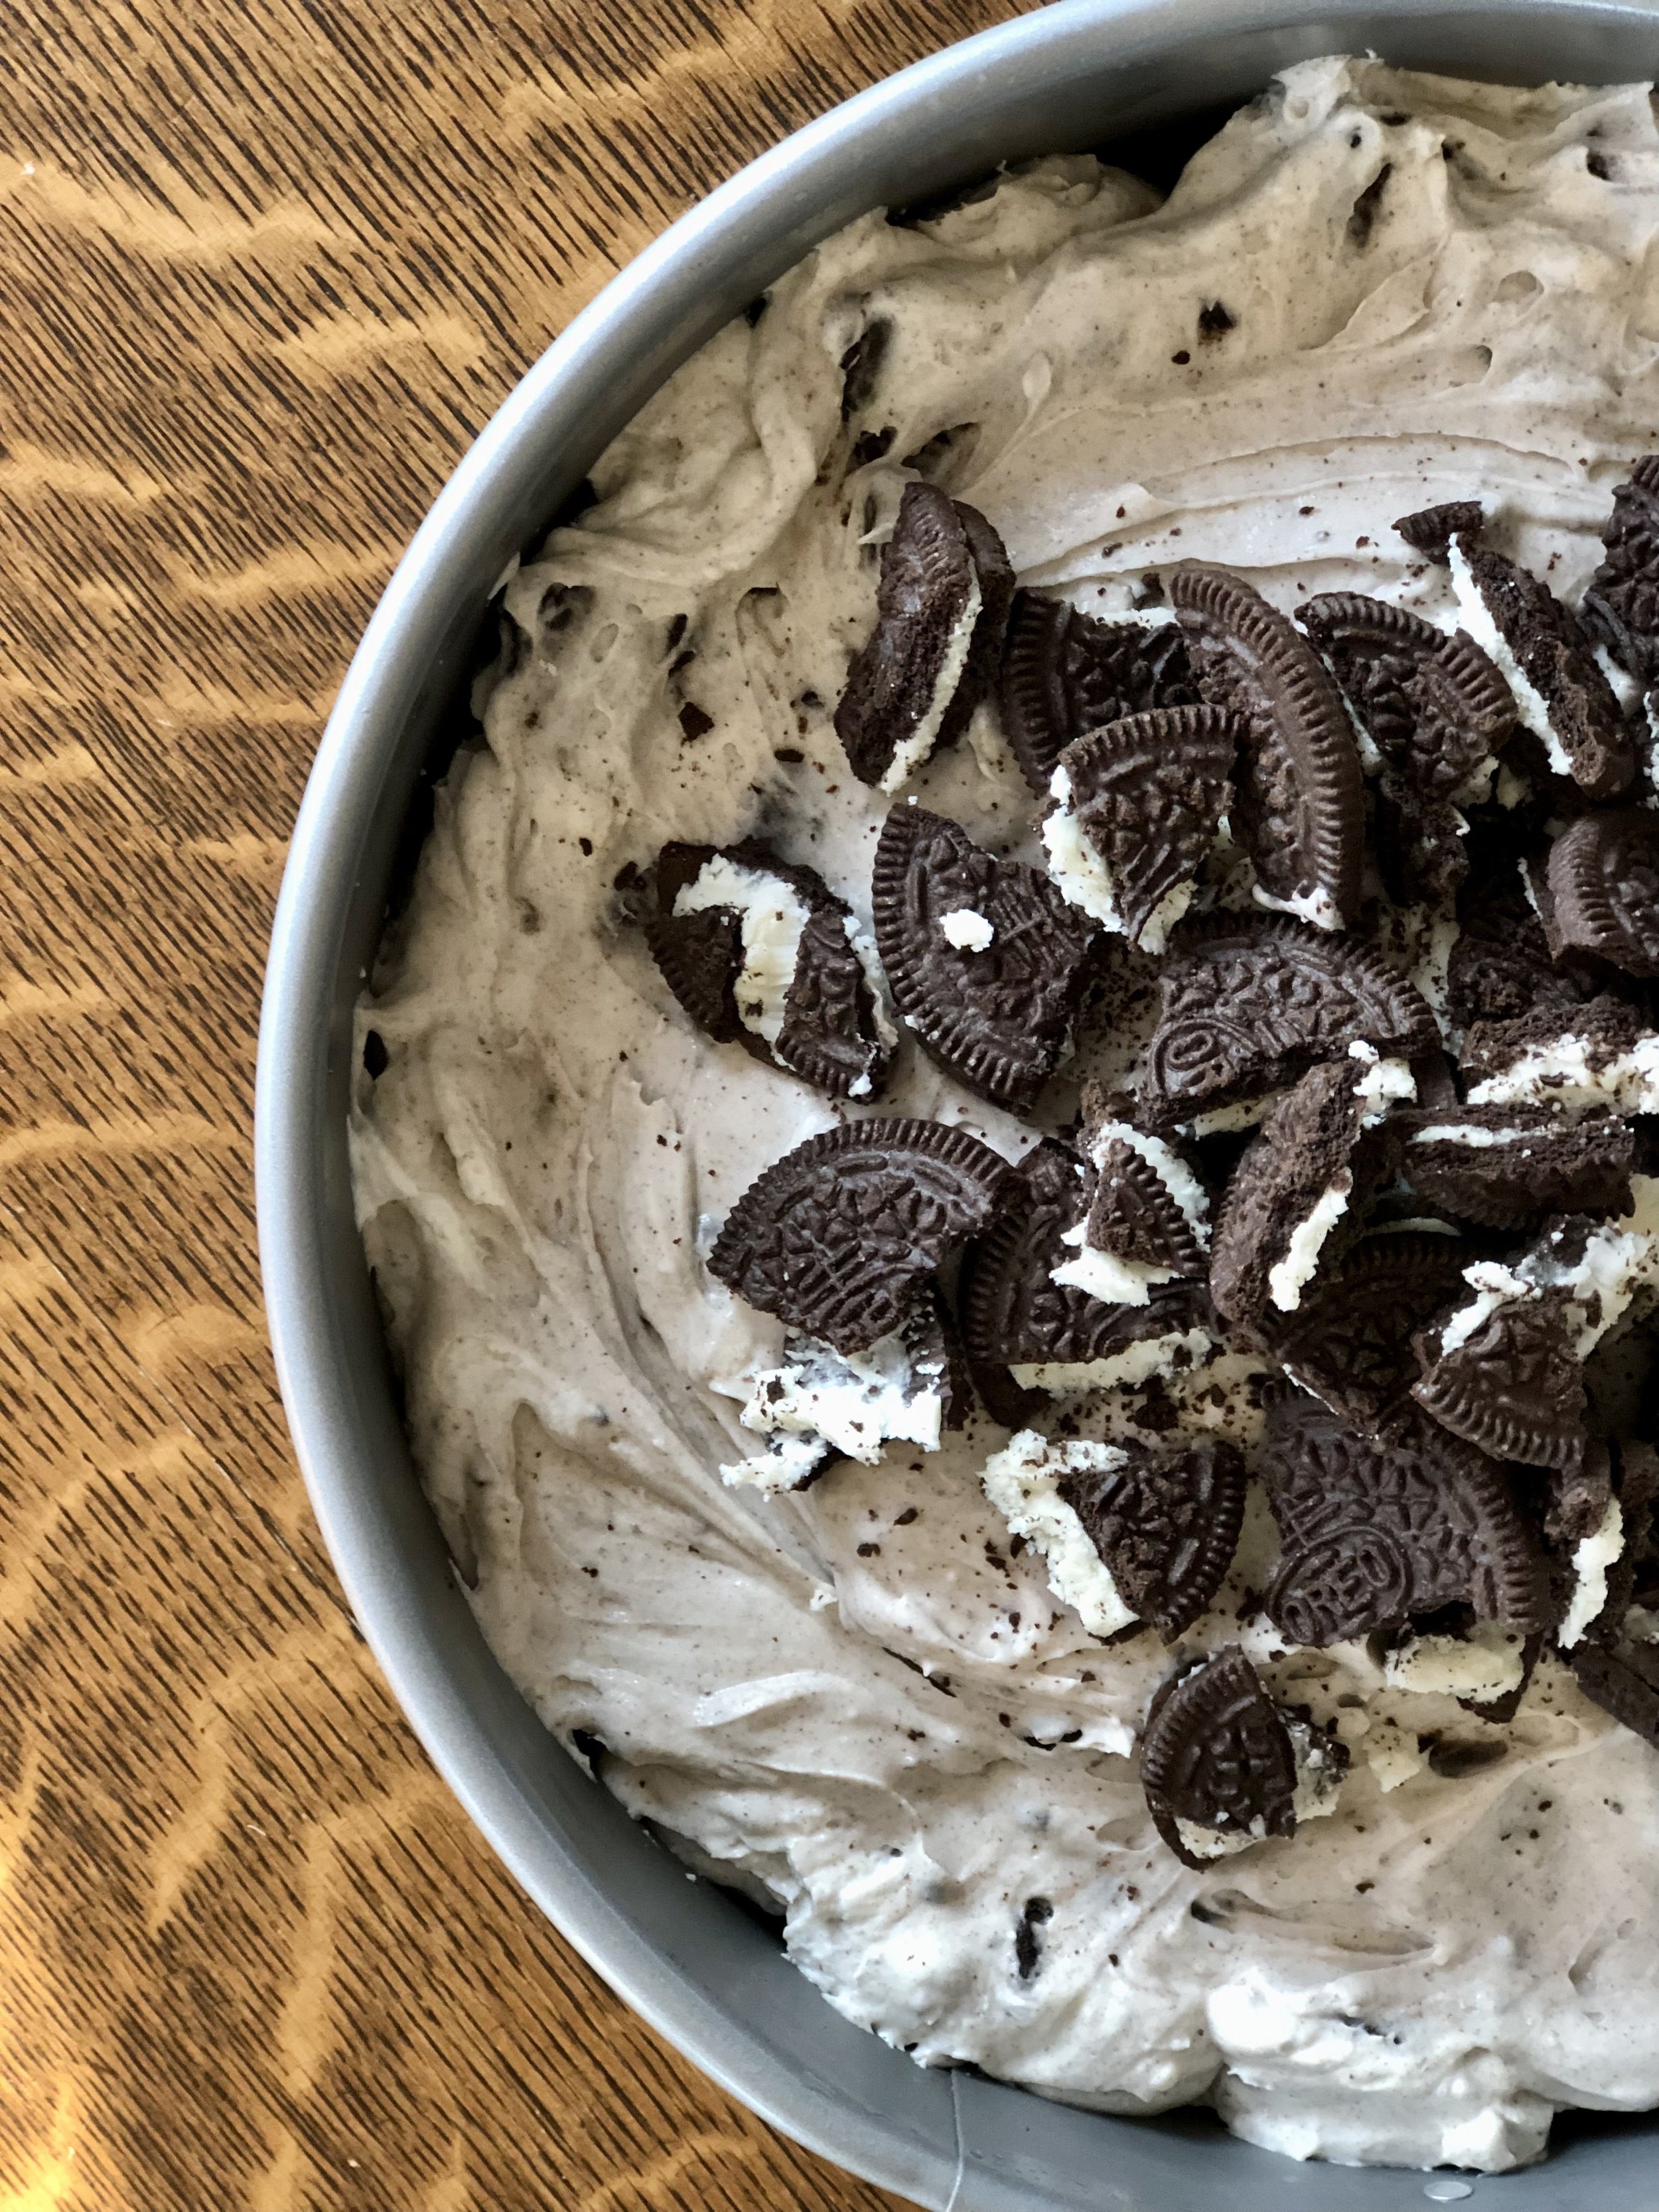
What do you do when you have 55 days until you move to another country?  Start thinking about all the food items and ingredients you won't be able to eat or buy while you're there. Naturally. 

I started to make a list of such things, and some of the items on there are rather tragic. No real vanilla extract? No Oreos (false, Oreos are readily available in Italy), Butterfingers, or other terribly wonderful processed American goodies? Pretzels only to be found of sketchy tough texture? Weird behaving marshmallows and graham crackers? (No S'mores for this girl.) Italians also don't understand our love for peanut butter. In all the grocery stores I've been in in Florence, (probably all of them because they're kinda my happy place) I have only seen Skippy, maybe Peter Pan once, and usually priced about 4-5 euros, roughly $6. There is a specialty Asian market, Vivi Market, that has an "American" section, and they sell the closest thing to real peanut butter I found. It's called Calve, made in the Netherlands, but it still has the hydrogenated oil and sugar added to it. Pumpkin is also a rarity over there. They make such wonderful pumpkin filled ravioli and pumpkins for carving come out for a couple weeks around Halloween, but to buy a 15 oz can of Libby's pumpkin costs over €4. Pumpkin pie, bread, muffins, cake, pudding, only for special occasions, I guess...

Now don't get me wrong, I'm really not that worried about missing American food. I did just fine for three months last fall, it's just a matter of understanding how different ingredients and substitutions behave in my favorite recipes. I mean, this is Italy we're talking about.  Home to some of the best food in the world. But I'm not partial or anything.  I keep a pretty good cover, though; you can't tell how much I love the food by the way I skip home from the super market with my arms full of pasta and heart bursting, waltz past the shelves of Nutella, guzzle acqua frizzante, double fist the cones of gelato, or giggle as I sweep the tubs of mascarpone that are cheaper than milk off the shelves. Nope. Not even around Christmas time when all the different kinds of panettone start filling the shelves and Jenny's shopping cart. 

I'm happy just thinking about all this wonderful food and its potential, but right now I am in the States, and I'm going to bake something I won't be able to for awhile. Something with Oreos.  Lots of Oreos. Or not bake, because this is a super easy no-bake cheesecake. Again, wasting my time, because I didn’t realize at the time of making this before moving to Italy that almost every grocery store carries Oreos.

This post may contain affiliate links. If you make a purchase using these links, Jennyblogs may receive a small commission, at no extra cost to you. This helps to support Jennyblogs. Where possible, links are prioritized to small businesses, and American companies and products made in the USA for American readers. For further information see the privacy policy. Grazie!


No-Bake Oreo Cheesecake

Serves about 12

Ingredients:

For the Crust:

  • 16-18 Oreos

  • 4 Tbsp / 56g butter, melted

For the Filling:

  • 1 cup / 237g heavy whipping cream

  • 24 oz / 675g cream cheese, room temperature

  • 1/2 cup / 100g sugar

  • 32 Oreos, coarsely chopped, divided

Directions:

Make the Crust:

  1. In a food processor, pulse Oreos until finely ground.  Add butter and pulse until combined. 

  2. Press into bottom and a bit up the sides of a 9 in. tart pan, pie pan, or springform pan.  Freeze while you make the filling.

Make the Filling:

  1. In the bowl of a stand mixer or with an electric mixer, whip cream until stiff peaks form. Set aside.

  2. Beat cream cheese in the bowl of a stand mixer or with an electric mixer until light and fluffy. Beat in sugar. 

  3. Fold in 24 (about 3/4) of the coarsely chopped Oreos, then gently fold in whipped cream. 

  4. Remove crust from freezer. Pour in filling and smooth the top. 

  5. Sprinkle with remaining chopped Oreos and place in fridge until completely chilled, about 2 hours. 

Jenny's Notes:

  • This cheesecake can also be frozen. Allow to sit at room temperature for 10 minutes or so before slicing.

No-Bake Oreo Cheesecake
Yield 12
Author
Prep time
30 Min
Inactive time
2 Hour
Total time
2 H & 30 M

No-Bake Oreo Cheesecake

No-Bake Oreo Cheesecake features an easy Oreo crust with an ultra creamy, yet light filling with chunks of Oreos throughout and more Oreos on top.

Ingredients

For the Crust:
For the Filling:

Instructions

Make the Crust:
  1. In a food processor, pulse Oreos until finely ground. Add butter and pulse until combined.
  2. Press into bottom and a bit up the sides of a 9 in. tart pan, pie pan, or springform pan. Freeze while you make the filling.
Make the Filling:
  1. In the bowl of a stand mixer or with an electric mixer, whip cream until stiff peaks form. Set aside.
  2. Beat cream cheese in the bowl of a stand mixer or with an electric mixer until light and fluffy. Beat in sugar.
  3. Fold in 24 (about 3/4) of the coarsely chopped Oreos, then gently fold in whipped cream.
  4. Remove crust from freezer. Pour in filling and smooth the top.
  5. Sprinkle with remaining chopped Oreos and place in fridge until completely chilled, about 2 hours.

Notes

  • This cheesecake can also be frozen. Allow to sit at room temperature for 10 minutes or so before slicing.

Nutrition Facts

Calories

559.39

Fat

39.86 g

Sat. Fat

21.21 g

Carbs

43.69 g

Fiber

1.42 g

Net carbs

42.27 g

Sugar

22.65 g

Protein

6.65 g

Sodium

403.94 mg

Cholesterol

89.86 mg

Nutritional information is approximate, based on 1 serving if recipe serves 12.

no-bake cheesecake, oreo pie, oreo cream cheese pie, summer dessert
dessert
American
Did you make this recipe?
Tag @jennyblogsandbakes on instagram and hashtag it #jennyblogs

Banana Coconut Breakfast Cookies

Last Updated July 23, 2024

Do you like cookies? Would you like to eat cookies for breakfast, or anytime? Then these cookies are for you, because they’re delicious and also healthy!

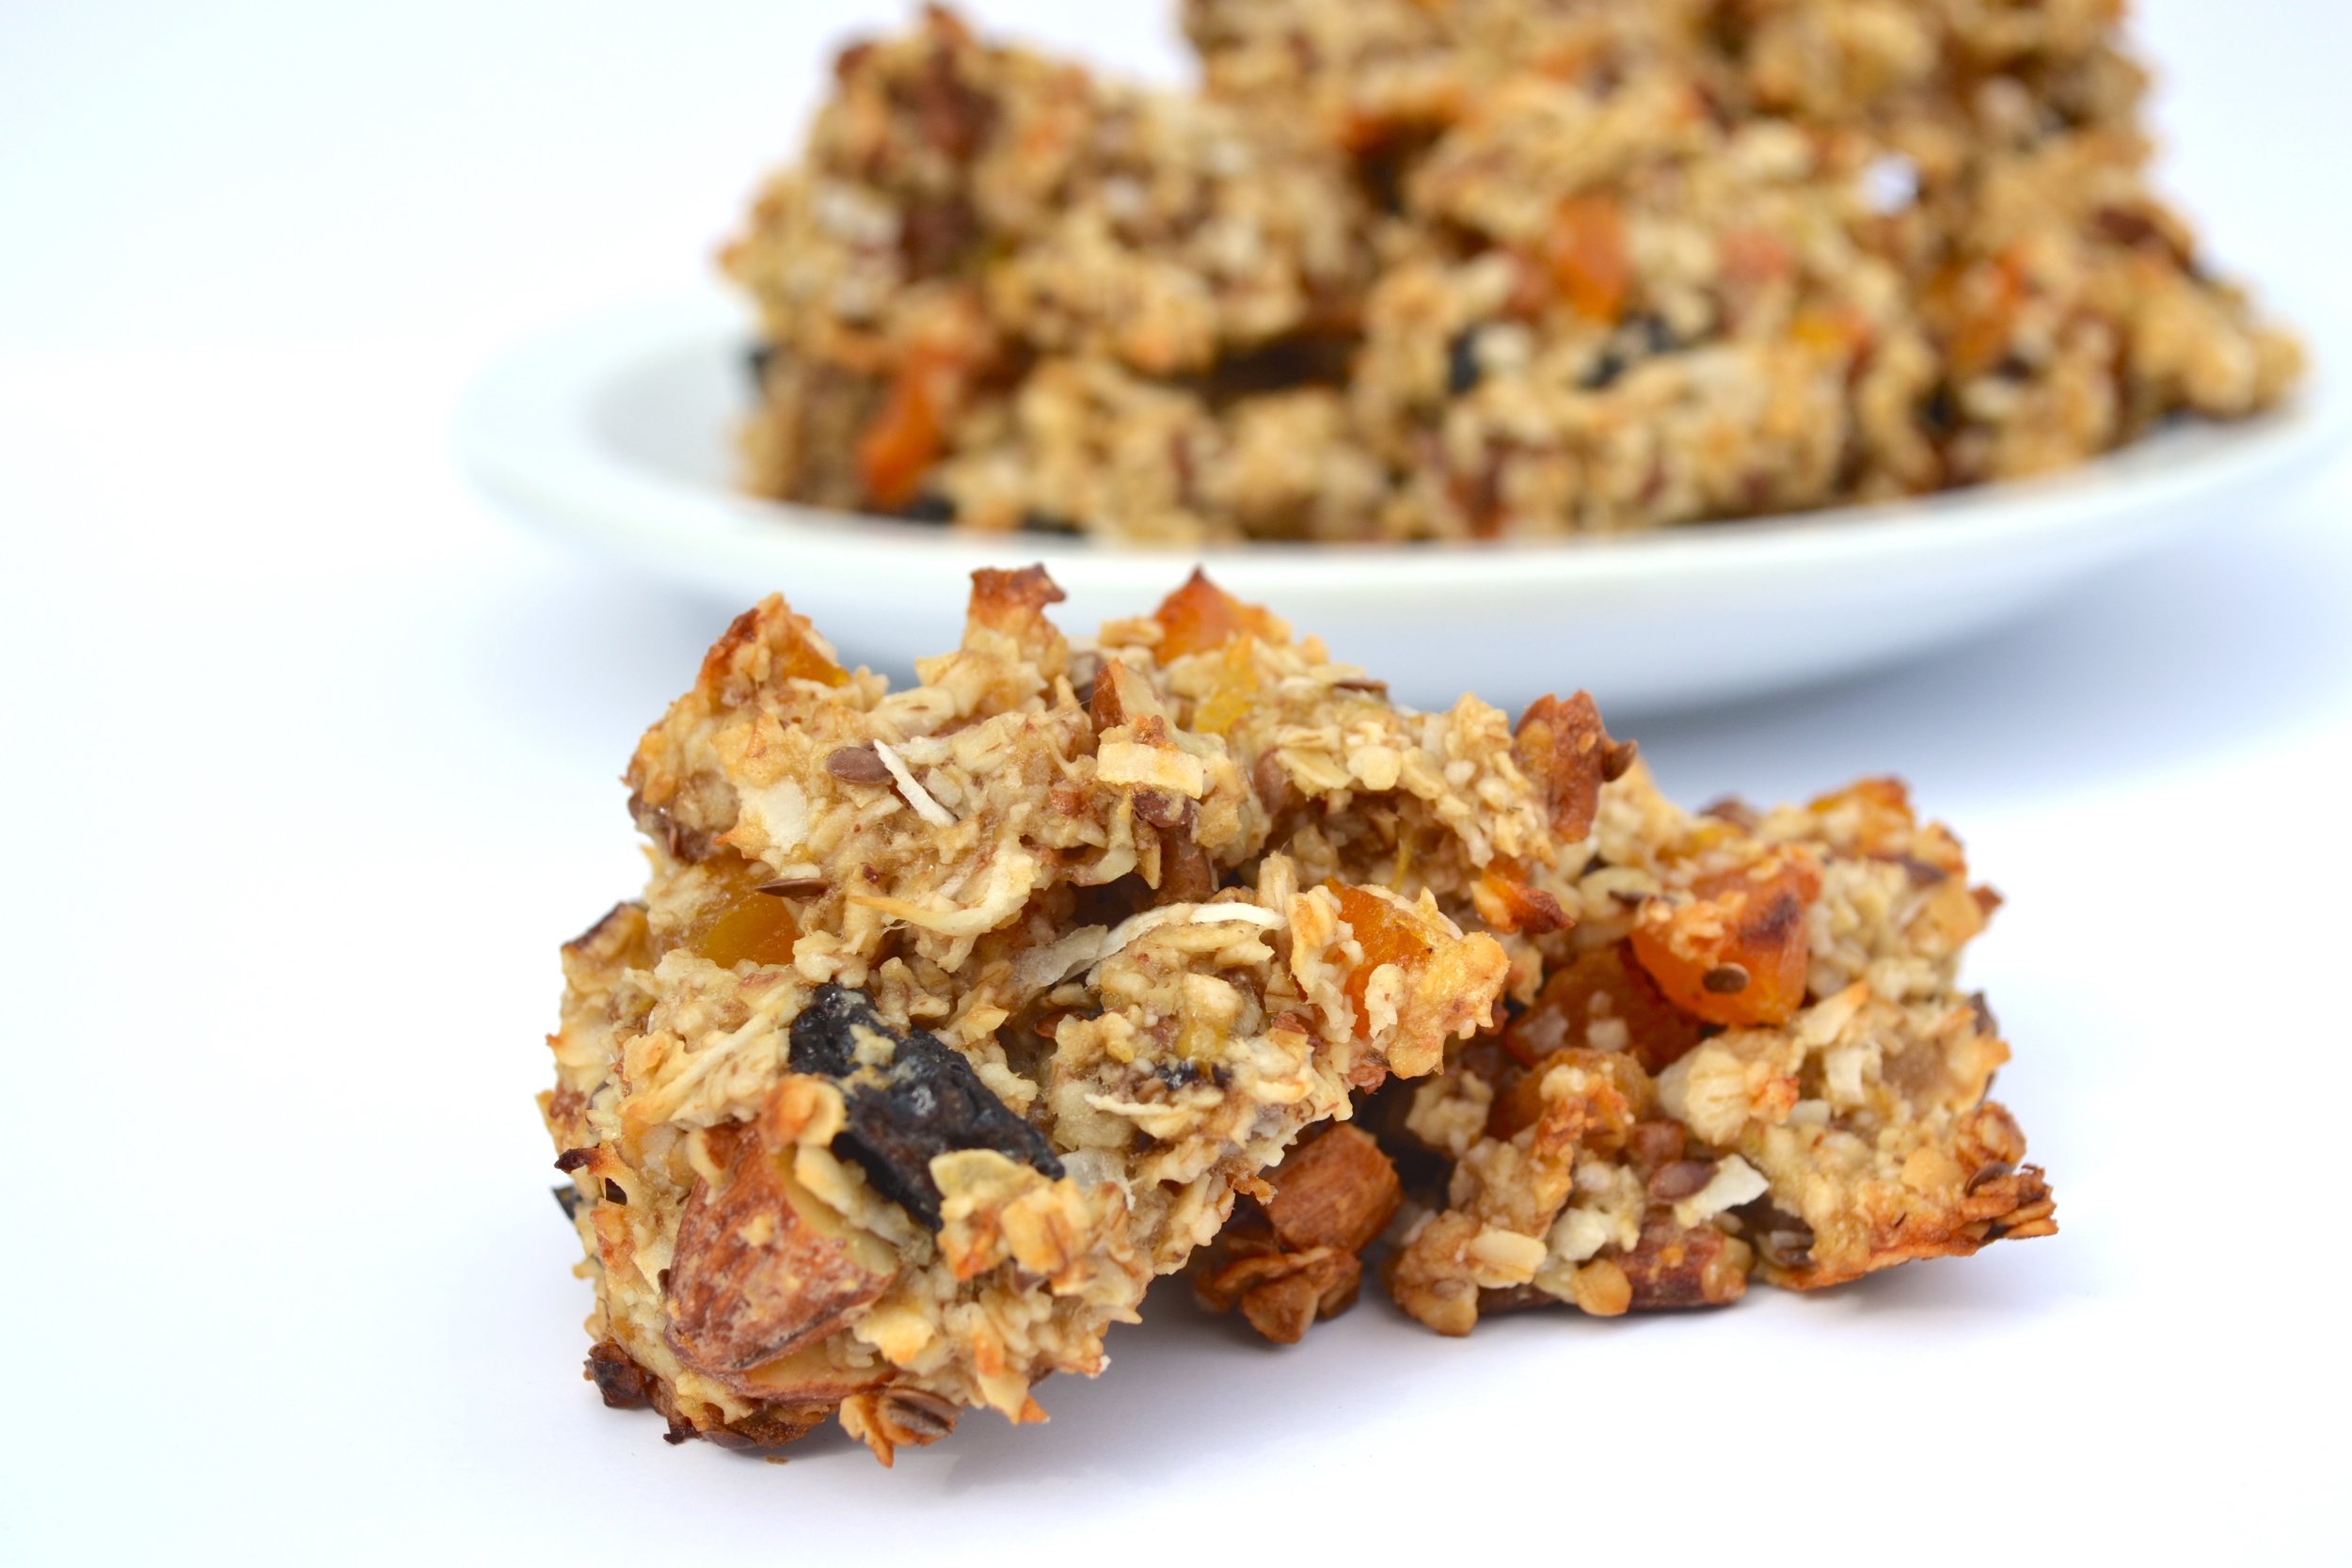
These Coconut Banana Breakfast Cookies have no refined sugar. Think bananas, coconut, pecans, and apricots with a light touch of maple syrup and oats. Of course, I practically just gave you the whole ingredient list so let's just get baking, shall we?? 

This post may contain affiliate links. If you make a purchase using these links, Jennyblogs may receive a small commission, at no extra cost to you. This helps to support Jennyblogs. Where possible, links are prioritized to ethically and responsibly made items, small businesses, and where applicable, American companies and products made in the USA for American readers. For further information see the privacy policy. Grazie!


Banana Coconut Breakfast Cookies

Makes about 15 cookies

Ingredients:

  • 1 1/2 cups / 135g quick oats

  • 1 cup / 80g unsweetened flaked or shredded coconut

  • 2/3 cup / 66g pecan halves, coarsely chopped

  • 1/4 cup / 35g almonds, coarsely chopped

  • 1 Tbsp / 10g flax seeds

  • 1/2 tsp salt

  • 1/2 cup / 65g dried apricots, chopped

  • 3 / 300g very ripe bananas, mashed

  • 1/4 cup / 56g coconut oil, melted

  • 1 Tbsp / 20g maple syrup

  • 1 tsp / 5g vanilla extract

Directions:

Oven 350°F / 177°C

  1. In a medium bowl, stir together oats, coconut, pecans, flax, salt, and apricots. Add bananas, coconut oil, maple syrup, and vanilla until combined. 

  2. Spoon generous mounds onto a baking sheet lined with parchment paper or silpat

  3. Bake 23-25 minutes, until lightly golden. 

Jenny's Notes:

  • Recipes like this are great because they can be so easily adapted to your tastes, or simply to change it up.  Feel free to use any kind of nuts you wish, or a combination of several, change up the dried fruit, or use honey instead of maple syrup.  I recommend also trying dried blueberries and dried cherries!

  • You can use rolled oats for these cookies in place of the quick oats. I've found that in most recipes the different kind of oats can be interchanged without affecting the quality of your product. Just keep in mind that rolled oats are slightly less absorbent than quick oats, so you may need to add slightly more.

Banana Coconut Breakfast Cookies
Yield 15
Author
Prep time
20 Min
Cook time
25 Min
Total time
45 Min

Banana Coconut Breakfast Cookies

Healthy cookies made with bananas, coconut, nuts, seeds, and fruit, and sweetened with maple syrup. Excellent for breakfast, dessert, or anytime snack! Gluten free, dairy free, vegan, and refined sugar free.
Cook modePrevent screen from turning off

Ingredients

Instructions

  1. Oven 350°F / 177°C
  2. In a medium bowl, stir together oats, coconut, pecans, flax, salt, and apricots. Add bananas, coconut oil, maple syrup, and vanilla until combined.
  3. Spoon generous mounds onto a baking sheet lined with parchment paper or silpat.
  4. Bake 23-25 minutes, until lightly golden.

Notes

  • Recipes like this are great because they can be so easily adapted to your tastes, or simply to change it up.  Feel free to use any kind of nuts you wish, or a combination of several, change up the dried fruit, or use honey instead of maple syrup.  I recommend also trying dried blueberries and dried cherries!
  • You can use either quick oats or rolled oats for these cookies. I've found that in most recipes the different kind of oats can be interchanged without affecting the quality of your product. Just keep in mind that rolled oats are slightly less absorbent than quick oats, so if using rolled oats, you may need to add slightly more.

Nutrition Facts

Calories

145.27

Fat

8.24 g

Sat. Fat

3.68 g

Carbs

17.02 g

Fiber

2.36 g

Net carbs

14.68 g

Sugar

6.6 g

Protein

3.19 g

Sodium

79.49 mg

Cholesterol

0 mg

Nutritional information is approximate and based on 1 cookie if recipe makes 15 cookies.

healthy cookies, vegan, gluten free, dairy free, refined sugar free, breakfast cookies
dessert, breakfast
American
Did you make this recipe?
Tag @jennyblogsandbakes on instagram and hashtag it #jennyblogs

Some raisins snuck into these ones


Monkey Bread Muffins

Last Updated August 21, 2024

You might be familiar with Monkey Bread: soft, cinnamon and sugar bread that tears apart and is oh, so good? You might also know it as Monkey Puzzle Bread. Or its more literal name Pull-Apart Cinnamon Sugar Bread. Or individual pieces of heaven. Or as we call it, Plucketts.

While apparently no one can decide on a name, what everyone is unanimous on is how delicious Monkey Bread is. There is no yeast in Monkey Bread, just baking powder, making for a quick and satisfying baking adventure.

What’s special about this recipe is that instead of being baked in a bundt or other larger pan, these are assembled in a muffin pan, making for individual Monkey Bread Muffins!

The dough comes together in a matter of minutes, then shaped into lots of small balls that are rolled in sugar, and placed in a muffin pan. Melted butter and brown sugar gets drizzled all over before baking, seeping into all those cracks and crevices, which helps to make these easy to pull apart when eating. Finally, a simple glaze finishes off these little treats.

What’s in a name?

Honestly, I have no idea why it's sometimes called monkey bread in the first place. There is no banana involved, and as far as I know a monkey didn't invent the recipe. Maybe people act like monkeys when they eat it? Not to mention we haven’t even gotten through all of its possible names yet.

This and similar recipes are also called Bubble bread, African coffee cake, Hungarian coffee cake, sticky bread, Pinch-Me Bread, Pluck-Its, or even Monkey Brains. Because that last one sounds SO appetizing. A quick Google search has brought me to the conclusion that many people are also confused as to why it's called Monkey Bread, but might be so named because the bread resembles monkeys in a barrel (but does it?), monkeys like to pick at things, or it resembles the bark of the monkey puzzle tree. I guess we shall remain shrouded in mystery, and continue to make up even more names for it as we go along. For now, I’ll just stick with Monkey Bread.

On to the recipe!

This post may contain affiliate links. If you make a purchase using these links, Jennyblogs may receive a small commission, at no extra cost to you. This helps to support Jennyblogs. Where possible, links are prioritized to small businesses and ethically and responsibly made items. For further information see the privacy policy. Grazie!

Recipe adapted from Cooking Classy


Monkey Bread Muffins

Makes 12 muffins

Ingredients:

For the Muffins

  • 2 cups + 2 Tbsp / 255g flour

  • 1 Tbsp / 12g sugar

  • 1 Tbsp / 14g baking powder

  • 1/2 tsp / 3g salt

  • 1/2 cup / 120g buttermilk or sour milk*

  • 1/3 cup / 79g milk

  • 5 Tbsp / 70g oil

  • 1/2 cup / 100g sugar

  • 5 Tbsp / 70g butter, melted

  • 2/3 cup / 133g brown sugar

  • 2 tsp cinnamon

For the Glaze (optional)

  • 1/2 cup / 60g powdered sugar

  • 1 Tbsp / 15g milk

Directions:

Make the Muffins

Oven preheated to 350°F / 177°C.

  1. Lightly grease a muffin pan or line with liners (preferably grease-proof.) 

  2. In a large bowl, whisk together flour, 1 Tbsp sugar, baking powder, and salt.  Add both milks and oil to flour mixture.  Stir with a fork until just combined. Over mixing = dense muffins. 

  3. Place 1/2 cup / 100g sugar in a bowl or container with a lid.  Scoop out roughly one tsp of dough, round into a ball shape with your palms, and plop into the sugar,. Repeat until you have an even layer of balls in the sugar. Place on lid and gently shake to coat with sugar. Place sugar-coated balls in muffin pan, about six in each cup. Repeat scooping, rolling, and sugar-coating with remaining dough.

  4. In a small bowl, whisk together melted butter, brown sugar, and cinnamon. Pour evenly over each muffin. Place muffin pan on a baking sheet and bake for 17-19 minutes, or until lightly golden-brown and they no longer look doughy. 

  5. Remove from oven and allow to cool at least 15 minutes before removing from pan so they don't fall apart. Run a knife around the edge of each muffin to loosen.

Make the Glaze

  1. In a small bowl or measuring cup, whisk together powdered sugar and milk.  Using a spoon, lightly drizzle each muffin with glaze. 

Jenny's Notes:

  • *If you don't have buttermilk, sour milk can be substituted. For every 1 cup milk add 1 Tbsp lemon juice or apple cider vinegar. Stir and let sit for a minute before using. This works with regular milk, nut milks, and most other milk alternatives. 

  • When first mixed, the batter may seem wet but it quickly becomes scoop-able. Something about baking powder doughs tend to be this way, they seem too wet when it first comes together, then within a matter of seconds it seems fine.

  • The glaze is optional, mostly depending on if you want that finished look and how sweet you like your monkey muffins. You may notice the actual dough is just lightly sweet, only 1 Tbsp of sugar. The brown sugar butter mixture that gets poured over is what makes these sweet and rich. I personally don’t think they need to be sweeter beyond that, but I do like the glazed/finished look.

Monkey Bread Muffins
Yield 12
Author
Prep time
30 Min
Cook time
19 Min
Total time
49 Min

Monkey Bread Muffins

Individual serving pull-apart cinnamon sugar bread made in muffin tins. Sticky, sweet, and satisfying, it's hard to eat just one!
Cook modePrevent screen from turning off

Ingredients

For the Muffins
For the Glaze (optional)

Instructions

Make the Muffins
  1. Oven preheated to 350°F / 177°C.
  2. Lightly grease a muffin pan or line with liners (preferably grease-proof.)
  3. In a large bowl, whisk together flour, 1 Tbsp sugar, baking powder, and salt. Add both milks and oil to flour mixture. Stir with a fork until just combined. Over mixing = dense muffins.
  4. Place 1/2 cup / 100g sugar in a bowl or container with a lid. Scoop out roughly one tsp of dough, round into a ball shape with your palms, and plop into the sugar,. Repeat until you have an even layer of balls in the sugar. Place on lid and gently shake to coat with sugar. Place sugar-coated balls in muffin pan, about six in each cup. Repeat scooping, rolling, and sugar-coating with remaining dough.
  5. In a small bowl, whisk together melted butter, brown sugar, and cinnamon. Pour evenly over each muffin. Place muffin pan on a baking sheet and bake for 17-19 minutes, or until lightly golden-brown and they no longer look doughy.
  6. Remove from oven and allow to cool at least 15 minutes before removing from pan so they don't fall apart. Run a knife around the edge of each muffin to loosen.
Make the Glaze
  1. In a small bowl or measuring cup, whisk together powdered sugar and milk. Using a spoon, lightly drizzle each muffin with glaze.

Notes

  • *If you don't have buttermilk, sour milk can be substituted. For every 1 cup milk add 1 Tbsp lemon juice or apple cider vinegar. Stir and let sit for a minute before using. This works with regular milk, nut milks, and most other milk alternatives. 
  • When first mixed, the batter may seem wet but it quickly becomes scoop-able. Something about baking powder doughs tend to be this way, they seem too wet when it first comes together, then within a matter of seconds it seems fine.
  • The glaze is optional, mostly depending on if you want that finished look and how sweet you like your monkey muffins.

Nutrition Facts

Calories

289.12

Fat

11.45 g

Sat. Fat

3.84 g

Carbs

41.19 g

Fiber

0.83 g

Net carbs

40.35 g

Sugar

17.7 g

Protein

2.95 g

Sodium

258.48 mg

Cholesterol

14.78 mg

Nutritional information is approximate, based on 1 muffin if recipe makes 12.

monkey bread muffins, individual serving cinnamon sugar pull-apart bread, monkey brain muffins, mini plucketts, cinnamon bubble bread, African coffee cake, Hungarian coffee cake, sticky bread, Pinch-Me Bread, Pluck-Its
dessert
American
Did you make this recipe?
Tag @jennyblogsandbakes on instagram and hashtag it #jennyblogs

White Russian Tart

Last updated on September 15, 2024

This tart is a refreshingly scrumptious, not-as-guilty dessert. It is no-bake, gluten-free, refined-sugar free, and somehow delicious. It’s filled with healthy fats which help keep you satisfied for longer than sugary, carb-heavy desserts.

Crust

The crust is like a chewy Lara bar, made of dates, nuts, coconut and cocoa powder to make it dark and chocolatey.

Dark Chocolate Cream

Next, there is a smooth, dark chocolate layer spiked with vodka and Kahlua. You’d never guess the main ingredient for this “cream” is avocado.

Mascarpone Cream

The top layer is decadent and lightly sweetened mascarpone. Put the three layers together and you have yourself quite the treat!

A healthy dessert? Is it any good?

When I'm experimenting and trying new recipes in the "healthy" department (as defined by trying to limit refined-sugars or flours, using a vegetable or bean or something that doesn't normally go belong in desserts, or generally replacing healthier ingredients for less healthy ones) I look for the 3 different categories of reactions from my tasters:

  1. The category of "This is honest deliciousness."  When people ask for a recipe or have no idea that there are chickpeas or spinach powder hidden in what they're eating. Something a normal or even picky eater would eat. 

  2. The category of "It's good for a healthy dessert!"  So it's palatable and they're not gagging, but most would still take a slice of cheesecake over it. AKA, just not as good as it’s regular counterpart.

  3. The category of "I would rather just eat a salad."  If actual fruits and vegetables are tastier than the “dessert” that is trying to be passed off, then that recipe should probably be scrapped.

This tart is a solid category 1.  Even my mom and brother approved this, and they keep me pretty honest when it comes to healthy desserts. 

I bounce back and forth between decadent desserts and healthier desserts. I have a love and respect for both, and each have their place. Some days it's honey, nuts, and coconut oil; other days it's sugar, heavy whipping cream, and butter. Variety is the spice of life. Today, it's dates, avocado, and mascarpone.

This post may contain affiliate links. If you make a purchase using these links, Jennyblogs may receive a small commission, at no extra cost to you. This helps to support Jennyblogs. Where possible, links are prioritized to small businesses, and American companies and products made in the USA for American readers. For further information see the privacy policy. Grazie!


White Russian Tart

Serves 8-12

Ingredients:

Chocolate Crust

  • 1-1/2 cups / 210g whole almonds

  • 2 Tbsp / 10g unsweetened shredded coconut

  • 4-5 medjool or 8-10 / 100g deglet dates, pitted

  • 1/2 tsp vanilla extract

  • 1 Tbsp / 7g unsweetened cocoa powder

  • 1/4 tsp salt

Chocolate Vodka Cream

  • 1/4 cup / 56g unrefined coconut oil, melted

  • 1 Tbsp finely ground coffee beans

  • 1 large ripe avocado, peeled, pit removed, and sliced

  • 3 Tbsp / 20g unsweetened cocoa powder

  • 1 tsp vodka

  • 1 tsp rum or Kahlua (of course the Kahlua option adds sugar)

  • 2 Tbsp / 40g+ maple syrup, or more to taste

Mascarpone Cream

  • 8 oz / 225g mascarpone cheese

  • 1 Tbsp / 20g maple syrup

  • 1 tsp vanilla extract

Directions:

Make the Chocolate Crust

  1. In a food processor, combine almonds and coconut and pulse until small crumbles. 

  2. Add dates, vanilla, cocoa powder, and salt.  Process until well combined. 

  3. Press into the bottom of a 8 or 9 inch spring-form pan or pie plate.

Make the Chocolate Vodka Cream

  1. Combine melted coconut oil, coffee, avocado, cocoa powder, vodka, Kahlua, and maple syrup in a food processor until smooth. Stop and scrape down sides and bottom occasionally. 

  2. Spread over crust and place in freezer for about 30 minutes.

Make the Mascarpone Cream

  1. Combine mascarpone, maple syrup, and vanilla in a small bowl.  Take the tart out of the freezer and spread mascarpone mixture over it. 

  2. Place in fridge for about 2 hours before serving.   

Jenny's Notes:

  • This tart is not very sweet and really lets the mascarpone shine through.  However, if you or your guests prefer things a little on the sweeter side, feel free to add more maple syrup in either of the creams. 

  • Also, I like to use black cocoa powder in this recipe.  Black cocoa powder is what gives Oreos their signature black color.  (I didn't know the flavor of Oreo was supposed to be chocolate until I was an adult.)  If you can get your hands on it, it's really great. I usually order it from Amazon. 

White Russian Tart
Yield 8-12
Author
Prep time
35 Min
Inactive time
2 Hour
Total time
2 H & 35 M

White Russian Tart

Chewy chocolate almond and date crust, creamy chocolate cream, topped with a lightly sweet mascarpone cream. This dessert is decadent and also gluten-free, refined sugar-free, no-bake, and full of healthy fats.

Ingredients

Chocolate Crust
Chocolate Vodka Cream
Mascarpone Cream

Instructions

Make the Chocolate Crust
  1. In a food processor, combine almonds and coconut and pulse until small crumbles.
  2. Add dates, vanilla, cocoa powder, and salt. Process until well combined.
  3. Press into the bottom of a 8 or 9 inch spring-form pan or pie plate.
Make the Chocolate Vodka Cream
  1. Combine melted coconut oil, coffee, avocado, cocoa powder, vodka, Kahlua, and maple syrup in a food processor until smooth. Stop and scrape down sides and bottom occasionally.
  2. Spread over crust and place in freezer for about 30 minutes.
Make the Mascarpone Cream
  1. Combine mascarpone, maple syrup, and vanilla in a small bowl. Take the tart out of the freezer and spread mascarpone mixture over it.
  2. Place in fridge for about 2 hours before serving.

Notes

  • This tart is not very sweet and really lets the mascarpone shine through.  However, if you or your guests prefer things a little on the sweeter side, feel free to add more maple syrup in either of the creams. 
  • Also, I like to use black cocoa powder in this recipe.  Black cocoa powder is what gives Oreos their signature black color.  (I didn't know the flavor of Oreo was supposed to be chocolate until I was an adult.)  If you can get your hands on it, it's really great. I usually order it from Amazon. 

Nutrition Facts

Calories

358.31

Fat

29.26 g

Sat. Fat

15.72 g

Carbs

22.26 g

Fiber

5.01 g

Net carbs

17.27 g

Sugar

14.6 g

Protein

5.29 g

Sodium

92.3 mg

Cholesterol

28.35 mg

Nutritional information is approximate. Based on 8 servings.

no bake, refined sugar free, gluten free dessert, raw dessert
dessert
American
Did you make this recipe?
Tag @jennyblogsandbakes on instagram and hashtag it #jennyblogs

Snickers Salad

Last Updated August 27, 2024

No spinach, kale, or arugula were harmed in the making of this recipe. 

Don't be deceived, this is not a real salad. If visions of spinach salad with Snickers on top were dancing across your brain, I am so so sorry. I love my greens and Snickers, but not together. No no no. If it makes you feel better, you could call this Green Apple Salad, like my mom does. But it has the word "salad" in it, so I feel fully justified in keeping Snickers in the title. As you wish.

Instead, think crisp Granny Smith apples and bits of Snickers lovingly folded into fluffy whipped cream and vanilla pudding.  So simple, and so delicious.

I usually make this for large family gatherings and double the recipe for 12 or more people.

This post may contain affiliate links. If you make a purchase using these links, Jennyblogs may receive a small commission, at no extra cost to you. This helps to support Jennyblogs. Where possible, links are prioritized to small businesses and ethically and responsibly made items. For further information see the privacy policy. Grazie!

Recipe adapted from Taste of Home


Snickers Salad

Serves about 8

Ingredients:

For the Vanilla Pudding

  • 1/4 cup / 50g sugar

  • 2 Tbsp / 15g cornstarch

  • 1/8 tsp salt

  • 1 1/3 cup / 316g milk, divided

  • 1 egg yolk

  • 1 tsp vanilla

For the Whipped Cream

  • 1 cup / 237g heavy whipping cream

For Assembling

  • about 13 oz / 369g of Snickers, chopped, divided

  • 4 Granny Smith apples, cored and chopped

Directions:

Make the Vanilla Pudding

At least a few hours before assembling recipe, or up to 2 days before, make the vanilla pudding:

  1. Whisk together sugar, cornstarch, and salt in a medium saucepan. Slowly whisk in 1 cup milk. 

  2. In a separate small bowl, measure out remaining 1/3 cup milk and add yolk; whisk to combine. Slowly whisk into mixture in the saucepan. 

  3. Place over medium heat and stir constantly until mixture thickens and whisk leaves a trail. Remove from heat and add vanilla. Place a piece of plastic wrap directly on to the top of pudding to prevent skin from forming.

  4. Place in refrigerator until completely chilled.

Make the Whipped Cream

  1. Whip heavy whipping cream in bowl of a stand mixer with whisk attachment or with an electric mixer until stiff peaks form. 

Assemble

  1. Gently fold about one third of whipped cream into pudding. Continue folding in whipped cream by thirds.  Gently fold in apples and about 3/4 of the Snickers. 

  2. Transfer to serving bowl and top with remaining 1/4 of Snickers. Store in fridge until ready to serve.   

Jenny's Notes:

  • Best if assembled on day of serving. 

  • Using whole milk will get you the creamiest result, but 2% all the way down to skim milk will also work. You can also sub out the milk for other milk substitutes as desired: oat milk, almond milk, etc.

  • This can be made with other candy bars, such as Rolo, Milky Way, Payday, Twix, etc. While Snickers is my favorite, I also really like this with Reese’s. Sometimes I do half and half! 

  • If using a candy that has caramel in it, you can freeze it before hand to make chopping easier. 

  • Add chopped peanuts for an extra crunch!

Snickers Salad
Yield 6-8
Author
Prep time
20 Min
Cook time
10 Min
Inactive time
2 Hour
Total time
2 H & 30 M

Snickers Salad

Crisp, green granny smith apples and sweet and salty Snickers bars tossed in a light vanilla whipped pudding.
Cook modePrevent screen from turning off

Ingredients

For the Vanilla Pudding
For the Whipped Cream
For Assembling

Instructions

Make the Vanilla Pudding
  1. At least a few hours before assembling recipe, or up to 2 days before, make the vanilla pudding:
  2. Whisk together sugar, cornstarch, and salt in a medium saucepan. Slowly whisk in 1 cup milk.
  3. In a separate small bowl, measure out remaining 1/3 cup milk and add yolk; whisk to combine. Slowly whisk into mixture in the saucepan.
  4. Place over medium heat and stir constantly until mixture thickens and whisk leaves a trail. Remove from heat and add vanilla. Place a piece of plastic wrap directly on to the top of pudding to prevent skin from forming.
  5. Place in refrigerator until completely chilled.
Make the Whipped Cream
  1. Whip heavy whipping cream in bowl of a stand mixer with whisk attachment or with an electric mixer until stiff peaks form.
Assemble
  1. Gently fold about one third of whipped cream into pudding. Continue folding in whipped cream by thirds. Gently fold in apples and about 3/4 of the Snickers.
  2. Transfer to serving bowl and top with remaining 1/4 of Snickers. Store in fridge until ready to serve.

Notes

  • Best if assembled on day of serving. 
  • Using whole milk will get you the creamiest result, but 2% all the way down to skim milk will also work. You can also sub out the milk for other milk substitutes as desired: oat milk, almond milk, etc.
  • This can be made with other candy bars, such as Rolo, Milky Way, Payday, Twix, etc. While Snickers is my favorite, I also really like this with Reese’s. Sometimes I do half and half! 
  • If using a candy that has caramel in it, you can freeze it before hand to make chopping easier. 
  • Add chopped peanuts for an extra crunch!

Nutrition Facts

Calories

439.59

Fat

23.76 g

Sat. Fat

12.02 g

Carbs

49.52 g

Fiber

3.26 g

Net carbs

46.26 g

Sugar

35.63 g

Protein

6.25 g

Sodium

172.14 mg

Cholesterol

68.79 mg

Nutritional information is approximate and based on 1 serving if recipe serves 8.

dessert salad, Snickers salad, Granny smith green apple salad, vanilla pudding whipped cream salad
dessert
American
Did you make this recipe?
Tag @jennyblogsandbakes on instagram and hashtag it #jennyblogs

Coffee Pancakes with Mocha Syrup

I got a little chocolate drizzle happy.  Not to mention this was a time sensitive photo, the first whipped cream mound melted and slipped off the back due to the hot and delicious nature of the pancakes.  Pictured here, whipped cream mound…

I got a little chocolate drizzle happy.  Not to mention this was a time sensitive photo, the first whipped cream mound melted and slipped off the back due to the hot and delicious nature of the pancakes.  Pictured here, whipped cream mound take 2. 

Some mornings just call for pancakes, and not just any pancakes: pancakes that involve coffee, chocolate, and whipped cream.

Enter, these pancakes. They’re made with some espresso powder and served with a homemade mocha syrup and freshly whipped cream. They’re delicious and decadent and more like dessert posing as breakfast!

These are the pancakes you turn to when it’s your birthday, when you want to make someone breakfast in bed, or you just want an excuse to have dessert for breakfast. Breakfast and dessert are my favorite meals, so why not combine them??

Americans are big on oatmeal, cereal, or starting your day with a big protein like eggs and sausage or bacon. While I often eat oatmeal for breakfast, I really love the Italian rhythm of waking up to a fresh pastry and a cappuccino, no guilt. As someone who really loves their sweets, I appreciate the excitement of waking up to a breakfast I’m looking forward to. A sweet breakfast also tends to help me eat less sweet things throughout the day.

Are you convinced yet of the beauty of starting your day with something sweet? Alright! Chocolate and coffee in pancakes, let’s go!

Coffee Pancakes with Mocha Syrup

Makes 2-3 servings (6-8 pancakes)

Ingredients:

Mocha Syrup

Make this first so it has time to cool and your pancakes don't get cold!

  • 1/4 cup sugar

  • 2 Tbsp cocoa powder

  • 1 tsp corn starch

  • 2 Tbsp strong brewed coffee

  • 1 tsp vanilla extract

Combine all ingredients except vanilla in small saucepan.  Cook over medium heat, stirring constantly, until boiling.  Reduce heat to low and boil for 5 minutes.

Remove from heat and add vanilla.  Allow to cool while you make the pancakes.  Store leftovers in the fridge for up to 1 month.  Sugar is a wonderful preservative.  I'm going to live so long. 

Whipped Cream

  • 1/2 cup heavy whipping cream

  • 2 Tbsp granulated sugar

  • 1/2 tsp vanilla extract

In the bowl of a stand mixer or with a hand held mixer, beat cream until soft peaks form.  Add sugar and vanilla, beat until stiff peaks appear.

Coffee Pancakes

Make these last so they will be nice and hot when you serve them!

  • 1 1/4 cups all-purpose flour

  • 1 Tbsp baking powder

  • 1 Tbsp sugar

  • 1/2 tsp salt

  • 2 tsp ground espresso, or freshly ground coffee (sometimes I use the contents of a Nespresso capsule)

  • 1 egg

  • 1 cup milk of choice, or water

  • 2 Tbsp oil of choice, or melted butter or coconut oil

  • 1 tsp vanilla extract

Directions:

Preheat lightly greased griddle or pan to 350 Fahrenheit.

In a medium bowl whisk together flour, baking powder, sugar, salt, and ground espresso. 

Make a well in the center of the dry ingredients and add the egg, milk, oil, and vanilla.  Stir until just moistened, some lumps will remain.  If you prefer thinner pancakes, you may add more milk.  Allow to sit for a few minutes.

Pour about 1/4 cup of batter onto hot griddle, allow to cook 1-2 minutes on each side, either until light golden-brown or when the air bubbles pop, but don't fill in immediately.  If the first pancakes seem too thick or too thin, add more milk or flour, respectively, until desired consistency is reached.  Repeat with remaining batter. 

Any leftover batter or pancakes can be stored in the refrigerator for about 1-2 days.  They can be reheated on the griddle or pan, microwave (boo), or my favorite way, the toaster. 

Assembly:

Place pancakes on a plate.  If desired, butter each pancake.  Drizzle generously with mocha syrup and top with copious amounts of whipped cream. And maybe drizzle with more syrup.  Don't forgot a complementary cup of coffee.  Complementary as in it goes with it nicely, not I'm giving you a complimentary cup of coffee.  I would totally give you a free cup of coffee, but, you're reading a blog right now, and this is only 2016.  Maybe by 2038 when Leslie Knope is President, I can send you coffee over the interwebs. 

Adapted from Pastry Affair

And Happy Good Friday.  This morning I kept thinking to myself "Black Friday" but that is quite the opposite of what today is.  No consumerism today.  A day to reflect on Jesus as He took our place on the cross.  The least deserving and only perfect man to walk the earth, bearing the wrath and punishment of separation from God the Father so that we might never have to.  Instead, He cloaks us in His righteousness so that we might receive the love of the Father freely.  Hallelujah, what a Savior. 


Beurre Noisette Chocolate Chip Cookies

All chocolate chip cookies are delicious, but not all are made equal.  This is my favorite recipe for chocolate chip cookies, because of its use of beurre noisette.

Beurre noisette is French for hazelnut butter, or what we in the States call browned butter. Beurre noisette sounds better, doesn't it?  I mean, if you were offered a beurre noisette cookie or a browned butter cookie, which one would you take? Beurre noisette has that foreign, slightly mysterious sound, but without going too wildly out of bounds because after all, it still had the word "cookie" in the question. 

If you already thought butter was delicious and makes everything better, which is true, (Julia Child liked it for good reason) then browned butter is VERY delicious and makes everything WAY better. It tastes very nutty and toasty, which is another reason why I think the French term is more accurate. English “browned butter” is more descriptive in what it looks like; French is more descriptive in what it tastes like.

If you've never made beurre noisette before, don't fret, it’s simple.

This post may contain affiliate links. If you buy something using these links, Jennyblogs may receive a small commission, at no extra cost to you. This helps to support Jennyblogs. For further information see the privacy policy. Grazie!

Making Beurre Noisette:

  1. Take the amount of butter you will need for your recipe of choice and place it in a small saucepan over low heat, no need to stir. 

  2. Allow to simmer until you notice the bottom start to turn golden brown.  These are the milk solids separating from the butterfat; the milk solids sink to the bottom and brown, giving it that wonderful nutty flavor.  If you stopped here and separated the butterfat from the milk solids, you would have ghee, or clarified butter. 

The whole process should take about 5-15 minutes, depending on your stove and how much butter you are browning.  It goes very quickly from perfectly golden brown to burnt, so keep a careful watch over it.  You may be tempted to turn up the heat and quicken the process, but please don't, the lower the heat the more even the browning.   Allow to cool to room temperature.  If needed, you can place in the fridge or freezer.  Stir every so often for even cooling.  Use like regular butter.


Beurre Noisette Chocolate Chip Cookies:

Makes about 52 smallish cookies (about 2 in. in diameter)

Ingredients:

  • 1 cup / 226g unsalted butter (2 sticks), browned and cooled to room temperature

  • 1 1/2 cups / 300g brown sugar (light or dark, your choice)

  • 2 eggs

  • 1 Tbsp / 15g vanilla extract

  • 2 1/2 cups / 300g all-purpose flour

  • 1 tsp baking soda

  • 1 tsp baking powder

  • 1 tsp salt

  • 12 oz / 340g semi-sweet chocolate chips or chunks

Directions:

  1. Preheat oven to 375°F / 190°C.

  2. In the bowl of a stand mixer or with a hand-held mixer, beat butter and brown sugar until light and fluffy, about 2-3 minutes. 

  3. Add eggs, one at a time, beating well after each addition. Beat in vanilla.

  4. In a separate bowl, whisk together flour, baking soda, baking powder, and salt. 

  5. Stir flour mixture into butter mixture until incorporated, then add chocolate chips. 

  6. Place in small mounds on cookie sheet, about 1 inch in diameter, evenly spread out. 

  7. Bake for 6-8 minutes, or until edges are lightly golden brown and centers are still a tad wet looking.

Jenny's Notes:

  • These can easily be made gluten-free by substituting 3 1/4 cups GF oat flour for the 2 1/2 cups all-purpose flour.  You can make your own oat flour by blending GF oats in a food processor until a flour consistency is achieved.

cookies, dessert, chocolate chip cookies, browned butter
dessert
American
Yield: 48-52
Author:
Beurre Noisette Chocolate Chip Cookies

Beurre Noisette Chocolate Chip Cookies

These chocolate chip cookies are next level with beurre noisette (browned butter) and made with all brown sugar, no white sugar, making for a delectably rich and flavorful cookie.
Prep time: 35 MCook time: 8 MTotal time: 43 M

Ingredients:

  • 1 cup / 226g unsalted butter (2 sticks), browned and cooled to room temperature
  • 1 1/2 cups / 300g brown sugar (light or dark, your choice)
  • 2 eggs
  • 1 Tbsp / 15g vanilla extract
  • 2 1/2 cups / 300g all-purpose flour
  • 1 tsp baking soda
  • 1 tsp baking powder
  • 1 tsp salt
  • 12 oz / 340g semi-sweet chocolate chips or chunks

Instructions:

How to cook Beurre Noisette Chocolate Chip Cookies

  1. Preheat oven to 375F / 190C.
  2. In the bowl of a stand mixer or with a hand-held mixer, beat butter and brown sugar until light and fluffy, about 2-3 minutes.
  3. Add eggs, one at a time, beating well after each addition. Beat in vanilla.
  4. In a separate bowl, whisk together flour, baking soda, baking powder, and salt.
  5. Stir flour mixture into butter mixture until incorporated, then add chocolate chips.
  6. Place in small mounds on cookie sheet, about 1 inch in diameter, evenly spread out.
  7. Bake for 6-8 minutes, or until edges are lightly golden brown and centers are still a tad wet looking.

Notes:

These can easily be made gluten-free by substituting 3 1/4 cups GF oat flour for the 2 1/2 cups all-purpose flour. You can make your own oat flour by blending GF oats in a food processor until a flour consistency is achieved.

Calories

118.19

Fat (grams)

6.20

Sat. Fat (grams)

3.71

Carbs (grams)

15.51

Fiber (grams)

0.59

Net carbs

14.92

Sugar (grams)

9.99

Protein (grams)

1.25

Sodium (milligrams)

90.98

Cholesterol (grams)

17.87
Nutritional information is approximate. Based on 1 cookie.
Did you make this recipe?
Tag @jenevamorris on instagram and hashtag it #jennyblogs
Created using The Recipes Generator

CIAO COOKIE

CIAO COOKIE

Blueberry Icebox Pie

Serves 10-12

A day late and a dollar short on pi day, I know.  But hear me out! If 3/14 is pi day, do you know what comes after the .14? That's right.  .1415.  Emphasis on the 15, because that's today.  Pie the food is so great it should get two days of recognition anyway. There, there, pie, I didn't forget about you.  But you didn't come here to listen to me ramble, you're probably here because you love pie, or blueberries, or math, or all of the above.  Moving on, before this post accidentally ends up on 3/16.

This is a simple recipe, fairly quick and delicious to eat!  The only baking required is for the crust.  Great for summer time, especially when blueberries are in season.

Blueberry Icebox Pie

Ingredients:

  • 1 sleeve graham crackers

  • 4 Tbsp butter, melted

  • 2 cups fresh blueberries (or frozen and thawed)

  • 2 Tbsp lemon juice

  • 2 tsp unflavored powdered gelatin, or 1 1/4-oz packet

  • 16 oz. cream cheese (2 blocks), room temperature

  • 14 oz can sweetened condensed milk

Directions:

Preheat oven to 350 F.

In a food processor, process graham crackers until fine.  Alternately, you can always crush them with a rolling pin on a cutting board or in a seal-able plastic bag. Add melted butter and pulse until graham cracker crumbs hold together some.  Press into a 9 in. spring form pan or pie plate.

Bake for 10 minutes.

Purée 1 1/2 cups of the blueberries in a food processor or blender.  Add lemon juice. 

Transfer to a small saucepan and sprinkle gelatin over the surface.  Let sit for 10 minutes.

Place blueberry mixture on the stove over medium-low, heating until gelatin has just dissolved. Remove from heat.

In a bowl with electric beaters or with a stand mixer, beat cream cheese for about a minute.  Add condensed milk.  On low speed, slowly add blueberry mixture.  Increase speed and beat until smooth.

Pour over baked crust, top with remaining blueberries, and chill until set. 

To serve, garnish with fresh mint, if desired.

Jenny's Note:  This can also be frozen, perfect for the hottest of summer days.  Just let set at room temperature for about 10 minutes before slicing.

Disclaimer on the ahem, er, photography.  It can only get better from here, right?

Disclaimer on the ahem, er, photography.  It can only get better from here, right?

And do you know what number comes after 3.1415? Yep. 926.  And guess what? I was writing this post at 9:26.  Oh yes, I went there.  Enjoy your pi. I mean, pie.

And here is a pie chart to go with your pie on the day after pi.  Sincerely, Jenny Leslie Knope Morris.

Recipes Currently Waiting to be Made

Recipe adapted from Self